3Com HomeConnect ADSL Modem Ethernet Installation Guide Version 1.1 http://www.3com.com Part No. 1.024.2356-00 Published Sept.
3Com Corporation ■ 3800 Golf Road ■ Rolling Meadows, Illinois ■ 60008 Copyright © 1999, 3Com Corporation. All rights reserved. No part of this documentation may be reproduced in any form or by any means or used to make any derivative work (such as translation, transformation, or adaptation) without written permission from 3Com Corporation.
INTRODUCTION TO THE HOMECONNECT ADSL MODEM ETHERNET 1 Introduction ■ ■ ■ ■ ■ ■ ■ ■ ■ Welcome to the 3Com HomeConnect ADSL Modem Ethernet What’s Included in the Package Installation Operation Pin Assignments Important Safety Instructions Technical Support FCC Information Warranty Information Welcome to the 3Com HomeConnect ADSL Modem Ethernet The 3Com HomeConnect ADSL Modem Ethernet is your passport to full internetworking and high-speed multimedia communications from your home or office to a corporate n
1-4 CHAPTER 1: INTRODUCTION TO THE HOMECONNECT ADSL MODEM ETHERNET What’s Included in the Package? First, check your package to be sure it’s complete.
Installation of the 3Com HomeConnect ADSL Modem Ethernet 1-5 where air can flow freely through the air holes in the unit’s sides and top. 2 Connect one end of the ADSL cable (RJ-11) to the connector on the rear of the HomeConnect ADSL Modem Ethernet marked ADSL and connect the other end to your ADSL wall jack (or Network Interface Device (NID)). CAUTION: The DSL line outlet uses the same type connector as a normal voice telephone line.
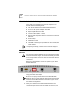
1-6 CHAPTER 1: INTRODUCTION TO THE HOMECONNECT ADSL MODEM ETHERNET 6 Determine if you want the MDI/X switch “out” or “in”. The MDI/X Switch swaps the transmit (Tx) and receive (Rx) signal pairs on the Ethernet port. The MDI/X button must be pressed “in” to use the port for connection to a workstation. When the MDI/X button is “out”, you can connect to a non-cascade port on another hub.
Installation of the 3Com HomeConnect ADSL Modem Ethernet 1-7 or a ‘delete configuration’ command has been executed from the CLI). Changing Boot Options/Resetting Your Modem You may choose a different boot option after you have already selected one previously and set up your unit. To reset your unit and select a different boot option: 1 Set the appropriate DIP switch to match the configuration information provided by your service provider.
1-8 CHAPTER 1: INTRODUCTION TO THE HOMECONNECT ADSL MODEM ETHERNET Enable the port using the command: enable port Save the configuration using the command: save all For example, if your service provider instructed you to use VPI 0 and VCI 44, you would enter the following CLI commands: set port 2 vpi 0 vci 44 enable port 2 save all The CLI provides extensive configuration and monitoring capabilities.
Operation 1-9 Alert Indicator The Alert Indicator is used to indicate the configuration and software download status of the modem. Immediately after power-up, the indicator will light orange for one second. Then, if the Configuration Reset button has been pressed while powering-on the unit, the indicator will flash green five times a second for four seconds.
1-10 CHAPTER 1: INTRODUCTION TO THE HOMECONNECT ADSL MODEM ETHERNET When data traffic is passing through the Ethernet port, the LED will rapidly flash green. ADSL Status Indicator After power-up and software downloading, the ADSL Status Indicator will light red until the modem begins to synchronize with the central office equipment. If the indicator remains red for an extended period, you should check to ensure that the ADSL line is properly plugged into the rear panel jack.
Important Safety Instructions 1-11 Console Interface (DB-9) (Default configured as DCE) Pin 1 — DCD LL <= PC Pin 2 — Transmit Data LL => PC Pin 3 — Receive Data LL <= PC Pin 4 — DTR LL <= PC Pin 5 — Ground Pin 6 — DSR LL => PC Pin 7 — RTS LL <= PC Pin 8 — CTS LL => PC Pin 9 — RI LL <= PC Important Safety Instructions When using your telephone equipment, basic safety precautions should always be followed to reduce the risk of fire, electric shock, and injury to persons, including the following: ■ ■ ■ D
1-12 CHAPTER 1: INTRODUCTION TO THE HOMECONNECT ADSL MODEM ETHERNET ■ Your 3Com HomeConnect ADSL Modem Ethernet and the AC adapter. Check that the AC adapter is plugged into a live AC socket. If all of the connections are correct, and you are still having difficulties, contact your Network Service Provider for assistance. Power Requirements ■ AC Voltage: External DC adapter, 100 to 250 VAC, 50-60 Hz ■ Power: 10 watts maximum Operating Environment ■ Temperature: 0° to 40° C.
TECHNICAL SUPPORT 3Com provides easy access to technical support information through a variety of services. This section describes those services. Technical Support Hotline Technical questions about the 3Com HomeConnect ADSL Modem products can be answered by technical support representatives. This hotline is a toll call. 847-262-3700 8:00am - 6:00pm CST; Monday through Friday Canadian customers can speak to a technical support representative by contacting Keating Technologies.
MANUFACTURER’S DECLARATION OF CONFORMITY 3Com Corporation 3800 Golf Road Rolling Meadows, IL 60008 U.S.A. declares that this product conforms to the FCC’s specifications: Part 15: Operation is subject to the following two conditions: (1) this device may not cause harmful electromagnetic interference, and (2) this device must accept any interference received including interference that may cause undesired operations. This equipment uses the following USOC jacks: RJ-11C.
Service can be obtained at: 3Com Corporation,1800 W. Central Avenue., Mount Prospect, IL 60056 If the device is causing harm to the telephone network, the telephone company may request that you disconnect the equipment until the problem is resolved. This registered device is capable of providing users access to interstate providers of operator services through the use of equal access codes.
Caution to the User The user is cautioned that any changes or modifications not expressly approved by the party responsible for compliance could void the user’s authority to operate the equipment. UL-Certified/CUL-Certified This information technology equipment is UL-Certified and CUL-Certified for the uses described in the users guide.
For Canadian Modem Users Industry Canada (IC) This digital apparatus does not exceed the Class B limits for radio noise emissions from digital apparatus set out in the interference-causing equipment standard entitled Digital Apparatus, ICES-003 of Industry Canada. Cet appareil numérique respecte les limites de bruits radioélectriques applicables aux appareils numériques de Classe B préscrites dans la norme sur le matériel brouilleur: Appareils Numériques , NMB- 003 édictée par l'Industrie Canada.
Les réparations de matériel homologué doivent être coordonnées par un représentant désigné par le fournisseur. L'entreprise de télécommunications peut demander à l'utilisateur de débrancher un appareil à la suite de réparations ou de modifications effectuées par l'utilisateur ou à cause de mauvais fonctionnement.
price paid by Customer for any defective software product, or to replace any defective media with software which substantially conforms to applicable 3Com published specifications. Customer assumes responsibility for the selection of the appropriate applications program and associated reference materials.
replaced item will be shipped to Customer, at 3Com’s expense, not later than thirty (30) days after 3Com receives the defective product. 3Com shall not be responsible for any software, firmware, information, or memory data of Customer contained in, stored on, or integrated with any products returned to 3Com for repair, whether under warranty or not. Dead- or Defective-on-Arrival.
REPLACEMENT, OR REFUND OF THE PURCHASE PRICE paid, AT 3COM’S OPTION. THIS DISCLAIMER OF LIABILITY FOR DAMAGES WILL NOT BE AFFECTED IF ANY REMEDY PROVIDED HEREIN SHALL FAIL OF ITS ESSENTIAL PURPOSE.