1 Mbps Wireless LAN PC Card User Guide Full featured wireless local area networking made simple. Version 2.0 http://www.3com.com/ http://support.3com.com/warrantyregistration/register.pl Published March 2001 Version 2.0.
3Com Corporation ■ 5400 Bayfront Plaza ■ Santa Clara, California ■ 95052-8145 Copyright © 2001, 3Com Corporation. All rights reserved. No part of this documentation may be reproduced in any form or by any means or used to make any derivative work (such as translation, transformation, or adaptation) without written permission from 3Com Corporation.
CONTENTS 1 INTRODUCTION How Does a Wireless LAN Work? Network Association 5 Roaming 5 Security 5 Ad Hoc Networks 5 Setting Up a 3Com Wireless LAN All Wireless Networks 6 Wired/Wireless Networks 6 Product Registration and Support 2 5 6 7 INSTALLING THE WIRELESS CLIENT Requirements 9 Disk Factory 9 Inserting the PC Card 10 Installing the Software 11 Windows Wizard Installation 11 Install Files 11 Set Up the PC Card 12 Install Utilities 12 Windows NT Installation with Networking Installed 12 Install Fil
SETTING THE WIRELESS CLIENT CONFIGURATION Changing Network and Security Settings 23 Network Settings 23 Security Settings 24 40-bit Shared Key (Wi-Fi) Encryption Settings 128-bit Dynamic Security Link Settings 25 Setting up Auto Network Connect 25 Setting up an Ad Hoc Network 26 Starting an Ad Hoc Network Session 26 Joining an Ad Hoc Network Session 27 Ending an Ad Hoc Network Session 27 Changing Power, Traffic, and Address Settings 27 Changing Your Password 28 Running Diagnostics 29 Viewing Configuratio
INTRODUCTION 1 3Com wireless technology brings the benefits of a local area network (LAN) to your office without the restraints and expense of network wiring. If your office already has an Ethernet LAN, the 3Com 11 Mbps Wireless LAN can extend the network without adding more wires. How Does a Wireless LAN Work? Network Association In a traditional LAN, computers communicate through wires. Instead of wires, a wireless LAN uses radio signals to communicate.
CHAPTER 1: INTRODUCTION Setting Up a 3Com Wireless LAN All Wireless Networks The type of network you decide to set up depends on the size of your office and whether or not you require connection to a wired LAN. You can also set up security for each of the different types of networks. Your set up will probably resemble one or more of the following examples. The simplest 3Com wireless LAN consists of several clients associating in an ad hoc network without an access point.
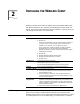
Product Registration and Support ETH WIR ELE SS ETH ERN WIR ELE SS PO WE R ET PO WE R ERN ET Product Registration and Support To register your product with 3Com, go to the following Web page: http://support.3com.com/warrantyregistration/frontpg.pl For support information, see “Technical Support” on page 39 and go to the following Web page: http://support.3com.
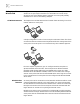
2 INSTALLING THE WIRELESS CLIENT Installing a wireless client consists of inserting the 3Com Wireless LAN PC Card with XJACK® Antenna in your computer and installing the software driver and utilities. If you have 3Com Administrator Utilities installed on a wireless client, you can manage access points or run a site survey.
CHAPTER 2: INSTALLING THE WIRELESS CLIENT with a CD-ROM drive and a floppy drive and eight or more diskettes. Make sure you have enough diskettes on hand. 1 For the driver software, prepare a diskette labeled Drivers. For the rest of the software, label diskettes numerically (Disk 1, Disk 2, Disk 3...). 2 Put the 3Com CD in the CD-ROM drive. The setup program should start automatically. If it does not start, you can run it manually by selecting Run from the Start menu and specifying the srsetup.
Installing the Software Installing the Software 11 Depending on how your computer is set up, the installation program may ask for the operating system installation media (usually a CD supplied with your computer) or for a path to the operating system files. If you have other networking software installed on your computer, the installation program may ask for the networking software installation media.
CHAPTER 2: INSTALLING THE WIRELESS CLIENT Set Up the PC Card After the computer restarts, the 3Com 11 Mbps Wireless LAN Client Setup window opens, in which you specify the PC Card configuration. 1 In the 3Com 11 Mbps Wireless LAN Client Setup window, select Typical and click Next.
Windows NT Installation with Networking Installed 13 The CardWizard utility, which helps Windows NT to load and manage software, must be installed. If the installation program does not detect the CardWizard utility on your computer, it will ask whether you want to install it. If you already have a similar utility installed, you must first uninstall that utility to prevent conflicts with CardWizard. Internet Explorer version 4 is required to view help files.
CHAPTER 2: INSTALLING THE WIRELESS CLIENT 4 Read the CardWizard Software License Agreement and click Yes. 5 When prompted to remove the PC Card, eject the card and click Yes. 6 In the Select Type of Platform window, select your computer type and click Next. If your computer type is not listed, select Other Notebook and click Next. 7 Respond to the prompts to install CardWizard. 8 When the CardWizard installation finishes, click the radio button to restart the computer and click Finish.
Confirming the Installation 15 7 In the next window, if the option to restart the computer appears, select it and click Finish. If you had a service pack installed before setting up the PC Card, reinstall it and restart the computer. This completes the basic installation. To confirm the installation, see “Confirming the Installation”.
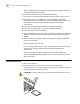
CHAPTER 2: INSTALLING THE WIRELESS CLIENT To get the best reception: Custom Installation Options ■ Clear the area around the antenna of items that could block radio transmission, such as metal objects, electronic devices, and cordless telephones. ■ Even a slight change in antenna orientation can affect the network association. If necessary, move your computer a few inches to find a better signal.
Installing the Documentation 17 To enter hexadecimal keys: 1 In the Security settings window, select 40-bit Shared Key (Wi-Fi) and click Next. 2 In the Encryptions Settings window, select Hexadecimal Keys. 3 Type the encryption key sequences in the spaces provided. You must enter key sequences for all four keys. 4 Click one of the radio buttons to select a key to use for encrypting data from your computer. 5 Click Next when finished.
3 USING THE WIRELESS LAN The 3Com WLAN Launcher shows the status of your network association and allows you to perform some network association and configuration tasks. The functions of the 3Com WLAN Launcher buttons are: Access Point Refreshes the association with the access point when you are associated with an access point. When you are associated with an ad hoc network, this button ends the ad hoc session and associates you to an access point.
CHAPTER 3: USING THE WIRELESS LAN About the 3Com Icon When the 3Com WLAN Launcher is running, the 3Com icon in the Windows system tool tray displays the status of the network association: Associated Green radio waves indicate a good association with an access point. Not Associated Red circle with a white X indicates no association with an access point. Card Removed Yellow circle with a black X indicates that no PC Card is detected by the computer.
Using the 3Com WLAN Configuration Utility 21 Good Status A green dotted line with a padlock between the two icons indicates a good association with security. If you are using a 3Com 11 Mbps Wireless LAN Access Point and it is properly connected to an Ethernet network, a network icon is shown. If the access point is from another manufacturer, no network icon is shown. Problem Status If you see an X or a red line, refer to “Troubleshooting” on page 31.
CHAPTER 3: USING THE WIRELESS LAN To display the 3Com WLAN Configuration Utility window: 1 In the Windows system tray, click the 3Com icon to display the 3Com WLAN Launcher. If the 3Com WLAN Launcher is not already running, you can start it from the Windows Start menu. Select Start/Programs/3Com 11 Mbps Wireless LAN/3Com WLAN Launcher. 2 In the 3Com WLAN Launcher, click the Padlock or the Hammer icon to display the 3Com WLAN Configuration Utility window.
4 Changing Network and Security Settings SETTING THE WIRELESS CLIENT CONFIGURATION You can change security and network settings for the wireless client in the Network/Security tab. 1 In the Windows system tray, click the 3Com icon to display the 3Com WLAN Launcher. If the 3Com WLAN Launcher is not already running, you can start it from the Windows Start menu. Select Start/Programs/3Com 11 Mbps Wireless LAN/3Com WLAN Launcher. 2 In WLAN Launcher, click the Padlock icon.
CHAPTER 4: SETTING THE WIRELESS CLIENT CONFIGURATION 3 In the Security/Network window, WLAN Service Area displays the name of the wireless network with which the wireless PC client can associate. You can change this setting as follows: Attach to any WLAN Service Area automatically Check this box to associate the client automatically to the WLAN service area with the best signal strength. This is recommended.
Setting up Auto Network Connect ■ 25 Hexadecimal keys are sequences of hexadecimal digits arranged into four keys. A hexadecimal digit may be a letter from A to F or a number from 0 to 9. This type of encryption is compatible with Wi-Fi certified equipment from other manufacturers. To enter an encryption string: 1 In the Security/Network window, select 40-bit Shared Key (Wi-Fi) from the Security setting list. 2 Click Encryption Key Settings. 3 In the next window, select Specify Encryption String.
CHAPTER 4: SETTING THE WIRELESS CLIENT CONFIGURATION Follow these steps to set up Auto Network Connect: 1 In the Windows system tray, click the 3Com icon to display the 3Com WLAN Launcher. If the 3Com WLAN Launcher is not already running, you can start it from the Windows Start menu. Select Start/Programs/3Com 11 Mbps Wireless LAN/3Com WLAN Launcher. 2 In WLAN Launcher, click the Padlock icon. 3 In the Security/Network window, check the Attach to any WLAN Service Area automatically box.
Changing Power, Traffic, and Address Settings Joining an Ad Hoc Network Session 27 The TCP/IP or NetBEUI protocol settings of clients participating in an ad hoc network session must match. For example, TCP/IP must be configured on the same subnet and NetBEUI must be configured with the same workgroup. After a client has started an ad hoc network session, other clients may join it as follows: 1 In the Windows system tray, click the 3Com icon to display the 3Com WLAN Launcher.
CHAPTER 4: SETTING THE WIRELESS CLIENT CONFIGURATION Manually set the power management When this radio button is selected, you can select the power mode manually. You may want to select this mode, for example, if your computer cannot detect its power source or if you want to improve performance by forcing continuous access even though you are using battery power. Windows NT users must select the power mode because the operating system cannot detect its power source.
Running Diagnostics Running Diagnostics 29 The Diagnostics tool checks adapter presence, network connection, signal strength, and link quality. 1 In the Windows system tray, click the 3Com icon to display the 3Com WLAN Launcher. If the 3Com WLAN Launcher is not already running, you can start it from the Windows Start menu. Select Start/Programs/3Com 11 Mbps Wireless LAN/3Com WLAN Launcher. 2 In WLAN Launcher, click the Hammer icon. 3 In the Tools tab, double-click the Diagnostics icon.
CHAPTER 4: SETTING THE WIRELESS CLIENT CONFIGURATION Item Description Network Name If the network type is Ad hoc, shows the name of the ad hoc network. For information on ad hoc networks, see “Setting up an Ad Hoc Network” on page 26. If the network type is Access Point, this item does not appear in the list. Access Point MAC Address Unique hardware name for the associated access point. If the network type is Ad hoc, this field shows N/A. Power Management Power mode.
5 Diagnosing Problems TROUBLESHOOTING The 3Com WLAN Launcher window can help you can diagnose problems. To display the 3Com WLAN Launcher, double click the 3Com icon in the Windows system tray. If you have difficulty using the PC Card, try the solutions in the following table. If you continue to experience difficulty, see “Upgrading PC Card Firmware” on page 34 or “Uninstalling the Card” on page 33. Symptom Solutions PC Card LED is off. Make sure the card is properly inserted in the slot.
CHAPTER 5: TROUBLESHOOTING Symptom Solutions Computer operating system does not recognize the card. Make sure the card is properly inserted in the slot. Make sure that PCMCIA support is installed. In the WLAN Launcher window, Check whether a card is already in use. you see a yellow X on the client icon. Windows 95, Windows 98, Windows Millennium Edition (Windows Me), and Windows 2000: Check whether the The diagnostic adapter presence computer has a Plug and Play BIOS. test fails.
Uninstalling the Card Uninstalling the Card ■ “Running Diagnostics” on page 29 ■ “Upgrading PC Card Firmware” on page 34 33 Previous installations or interrupted installation attempts sometimes leave problems that affect card operation. Possible problems include: ■ PC Card fails to function. ■ Operating system does not detect the PC Card. ■ System issues a warning tone at startup.
CHAPTER 5: TROUBLESHOOTING Uninstalling Software Utilities If you want to uninstall the 3Com 11 Mbps Wireless LAN software utilities, you can either use the standard operating system procedure for removing programs or use the following shortcut procedure: 1 From the Windows Start menu, select Programs, then 3Com 11Mbps Wireless LAN, then Uninstall 3Com 11Mbps Wireless LAN. 2 When prompted to confirm, click OK.
A WINDOWS NT INSTALLATION WITHOUT NETWORKING INSTALLED Use the following procedure to install the PC Card software while you are installing Windows NT Networking. For details on installing networking, see your Windows NT documentation. The CardWizard utility, which helps Windows NT to load and manage software, must be installed. If the installation program does not detect the CardWizard utility on your computer, it will ask whether you want to install it.
CHAPTER A: WINDOWS NT INSTALLATION WITHOUT NETWORKING INSTALLED 14 Click Next. The Windows NT Setup windows asks for the location of the Windows NT installation files. 15 Remove the 3Com CD from the CD-ROM drive, put the Windows NT CD in the drive and wait for it to spin up to speed. Make sure that the correct path to your CD-ROM drive appears in the entry box (for example, d:) and click Continue.
Set Up the PC Card 37 9 When the CardWizard installation finishes, click the Restart the computer radio button and click Finish. 10 Insert the PC Card. Set Up the PC Card After the computer restarts, the 3Com 11 Mbps Wireless LAN Client Setup window opens. In this window, you can specify the PC Card configuration. 1 In the 3Com 11 Mbps Wireless LAN Client Setup window, select Typical and click Next.
TECHNICAL SUPPORT B 3Com provides easy access to technical support information through a variety of services. This appendix describes these services. Information contained in this appendix is correct at time of publication. For the most recent information, 3Com recommends that you access the 3Com Corporation World Wide Web site.
APPENDIX B: TECHNICAL SUPPORT Support from Your Network Supplier If you require additional assistance, contact your network supplier. Many suppliers are authorized 3Com service partners who are qualified to provide a variety of services, including network planning, installation, hardware maintenance, application training, and support services.
Support from 3Com Country Telephone Number Europe, Middle East and Africa From anywhere in these regions, call: +44 (0)1442 435529 phone +44 (0)1442 436722 fax Europe and South Africa From the following countries, you may use the toll-free numbers: Austria Belgium Denmark Finland France Germany Hungary Ireland Israel Italy Luxembourg Netherlands Norway Poland Portugal South Africa Spain Sweden Switzerland U.K.
APPENDIX B: TECHNICAL SUPPORT Returning Products for Repair Before you send a product directly to 3Com for repair, you must first obtain an authorization number. Products sent to 3Com without authorization numbers will be returned to the sender unopened, at the sender’s expense.
INDEX Numbers 128-bit Dynamic Security Link 24, 25 3Com Administrator Utilities CD 9 3Com CDs 9 3Com End User Utilities CD 9 3Com icon, in Windows system tray 20 3Com Knowledgebase Web Services 39 3Com URL 39 3Com WLAN Configuration Utility 21 3Com WLAN Launcher 19 buttons 19 starting 15, 22, 23, 26, 27, 28, 29 40-bit Shared Key (Wi-Fi) security 24 A access point 5 ad hoc network 5, 6, 26 antenna, adjusting 15 association 5, 20 B base station 5 buttons, 3Com WLAN Launcher 19 C changing user passwords 28
Tools tab 22 troubleshooting firmware PC Card 34 typical installation 12, 14, 37 U upgrading PC Card firmware 34 URL 39 W warranty, registration 7 Web browser requirements 9 Windows system tray, 3Com icon 20 wireless association (connection) 5, 20 clients, defined 5 wireless LAN defined 5 ways to set up 6 wireless LAN service area 6, 23 WLAN Configuration Utility 21 WLAN launcher 19 buttons 19 starting 15, 22, 23, 26, 27, 28, 29 WLAN service area defined 6 setting up 23 World Wide Web (WWW) 39
REGULATORY COMPLIANCE INFORMATION FCC RADIO-FREQUENCY EXPOSURE NOTICE This device generates and radiates radio-frequency energy. In order to comply with FCC radio-frequency radiation exposure guidelines for an uncontrolled environment, this equipment has to be installed and operated while maintaining a minimum body to antenna distance of 2.5 cm. This product does not contain any user serviceable components.
or exceeds the following technical standards: SAFETY COMPLIANCE NOTICE ■ ETS 300 328 - Electromagnetic compatibility and Radio spectrum Matters (ERM); Wideband Transmission systems; data transmission equipment operating in the 2,4 GHz ISM band and using spread spectrum modulation techniques ■ ETS 300 826 - Electromagnetic compatibility and Radio spectrum Matters (ERM); ElectroMagnetic Compatibility (EMC) standard for 2,4 GHz wideband transmission systems and HIgh PErformance Radio Local Area Network (H
with any term or condition of this Agreement. Upon such termination you agree to destroy the Software and Documentation, together with all copies and merged portions in any form. LIMITED WARRANTIES AND LIMITATION OF LIABILITY: All warranties and limitations of liability applicable to the Software are as stated on the Limited Warranty Card or in the product manual, whether in paper or electronic form, accompanying the Software.