
User Manual

9
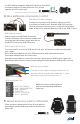
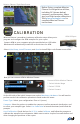
Mission Planner: Flight Data Screen
Before flying, complete Mission
Planner’s configuration utilities,
including RC (shown below),
compass, accelerometer, frame
type, and flight mode calibrations.
Visit planner.ardupilot.com for
complete Mission Planner
instructions.
CALIBRATION
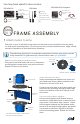
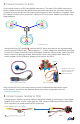
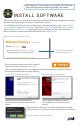
Connect APM to your computer using the provided micro-USB cable.
Windows will automatically install the correct drivers for APM.
APM USB port
Connect APM to Mission Planner:
1 Select Arduino Mega.
2 Select 115200.
3 Select Connect.
1
2
3
Mission Planner’s mandatory hardware calibration steps allow you to
program and configure the APM autopilot for your copter.
Now you can connect APM to Mission Planner.
Select Initial Setup, Install Firmware, and Quad to install flight code firmware onto APM.
On the left side of the Initial Setup screen, select Mandatory Hardware. You will need to
perform each of the calibration procedures listed under this menu.
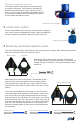
Frame Type: Select your configuration: Plus or X (cross).
Compass: Select the options to enable the compass, to allow automatic declination, and
to select your autopilot type. Select Live Calibration to launch the wizard, and follow the
prompts.
Accel Calibration: Check the box for AC 3.0+, select Calibrate, and follow the prompts to
calibrate the autopilot’s accelerometer. Make sure to wait a couple of seconds before and
after changing the positions of the copter.