
Instructions / Assembly


Polka Dots
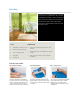
Looking for an inexpensive way to decorate
your nursery? Try polka dots. All you need
is ScotchBlue™ Painter's Tape, a little bit of
paint, and a few supplies you may already
have at home. With a few simple steps,
you'll have a playful pattern that your kids
will grow to love.
TOOLS
ScotchBlue™ Painter's Tape
Paints, brush, roller & tray
5-in-1 tool/putty knife
Wax paper
Utility knife
PREPARATION
Remove any wall hangings (pictures, nails,
fixtures)
Fill nail holes, then use sandpaper to smooth
the wall
Make sure wall is clean, dust-free and dry
completely
Step By Step Guide:
Step 1: Mask & Paint Base
Mask trim, baseboards and non-
textured ceilings with ScotchBlue™
Painter's Tape. Hint: use the chart on
page 2 to find the right tape for your
project. Paint the wall your lighter
base color, and let it dry for 24 hours.
Step 2: Draw Template
Overlap strips of tape on a piece of
wax paper. Seal the edges with long
strips of tape. Then trace a circle onto
the tape using a coffee can lid or plate
as a guide.
Step 3: Cut Out Circles
Cut out the circle with a utility knife.
You now have one polka dot template
and one polka dot center. Repeat
steps 2 and 3 to create enough
templates for each polka dot in your
wall pattern.