CheetahAccessTM Wireless Gateway AC-IG2004W User Guide
User Guide CheetahAccessTM Wireless Gateway 10/100 Mbps Wireless Gateway with 3 10/100 Mbps (RJ-45) Ethernet LAN ports, and 1 10Mbps (RJ-45) WAN Port
Copyright © 2001 by Accton Technology Corporation. All rights reserved. No part of this document may be copied or reproduced in any form or by any means without the prior written consent of Accton Technology Corporation. Accton makes no warranties with respect to this documentation and disclaims any implied warranties of merchantability, quality, or fitness for any particular purpose. The information in this document is subject to change without notice.
Limited Warranty Accton Technology Corporation Limited Warranty: Accton warrants all is products to be free of manufacturing defects in workmanship and materials, under normal use and service, for the applicable warranty term. All Accton products carry a standard 90-day limited warranty from the date of purchase from ACCTON or its Authorized Reseller.
Limited Warranty WARRANTIES EXCLUSIVE: IF AN ACCTON PRODUCT DOES NOT OPERATE AS WARRANTED ABOVE, CUSTOMER'S SOLE REMEDY SHALL BE REPAIR OR REPLACEMENT OF THE PRODUCT IN QUESTION, AT ACCTON’S OPTION. THE FOREGOING WARRANTIES AND REMEDIES ARE EXCLUSIVE AND ARE IN LIEU OF ALL OTHER.WARRANTIES OR CONDITIONS, EXPRESS OR IMPLIED, EITHER IN FACT OR BY OPERATION OF LAW, STATUTORY OR OTHERWISE, INCLUDING WARRANTIES OR CONDITIONS OF MERCHANTABILITY AND FITNESS FOR A PARTICULAR PURPOSE.
Contents Contents Chapter 1: Introduction About the CheetahAccess™ Wireless Gateway Features and Benefits Applications 1-1 1-1 1-1 1-2 Chapter 2: Installation Package Contents Description of Hardware System Requirements Connect the System Basic Installation Procedure Attach to Your Network Using Ethernet Cabling Attach to Your Network Using Radio Signals Attach the CheetahAccess™ Wireless Gateway to the Internet Connect the CheetahAccess™ Wireless Gateway to a Printer Connecting the Power Adapter Verify
Contents Virtual Server Enabling Special Applications Client Filtering MAC Filtering Miscellaneous Settings Viewing Network and Device Status Using System Tools 4-13 4-14 4-15 4-16 4-18 4-19 4-20 Chapter 5: Configuring Client TCP/IP Installing TCP/IP Protocol in Your PC Setting TCP/IP to Work with the CheetahAccess™ Wireless Gateway Dynamic IP Allocation via a DHCP Server Manual IP Configuration Verifying Your TCP/IP Connection 5-1 5-1 5-2 5-3 5-4 5-5 Chapter 6: Configuring Printer Services Install the
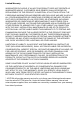
Chapter 1: Introduction Congratulations on your purchase of the CheetahAccess™ Wireless Gateway. Accton is proud to provide you with a powerful yet simple communication device for connecting your local area network (wired or wireless LAN) to the Internet. For those who want to surf the Internet at the lowest possible cost, this wireless gateway provides a convenient and powerful solution.
Introduction • Supports PPP dial-in connection using standard dial-up program • Easy setup through a Web browser on any operating system that supports TCP/IP • Compatible with all popular Internet applications Applications Many advanced applications are provided by the CheetahAccess Wireless Gateway, such as: • Flexible LAN Access The CheetahAccess Wireless Gateway provides connectivity to 10/100 Mbps wired devices as well as 11 Mbps wireless mobile users.
Applications • Security The CheetahAccess Wireless Gateway supports security features that can deny Internet access to specified users, or filter all requests for specific services the administrator does not want to serve. The CheetahAccess Wireless Gateway’s firewall can also block common hacker attacks, including IP Spoofing, Land Attack, Ping of Death, IP with zero length, Smurf Attack, UDP port loopback, Snork Attack, TCP null scan, and TCP SYN flooding.
Introduction 1-4
Chapter 2: Installation Before installing the CheetahAccess™ Wireless Gateway, verify that you have all the items listed under “Package Contents.” If any of the items are missing or damaged, contact your local Accton distributor. Also be sure that you have all the necessary cabling before installing the Wireless Gateway. After installing the Wireless Gateway, refer to the Web-based configuration program in Chapter 4 for information on configuring the router.
Installation Although access speed to the Internet is determined by the modem type connected to your CheetahAccess Wireless Gateway, data passing between devices connected to your local area network can run up to 100 Mbps over the Fast Ethernet ports. The CheetahAccess Wireless Gateway includes an LED display on the front panel for system power and port indications that simplifies installation and network troubleshooting.
Description of Hardware Item Description WAN Port WAN port (RJ-45). Connect your Cable modem, xDSL modem, or an Ethernet router to this port. LAN Ports Fast Ethernet ports (RJ-45). Connect devices (such as a PC, hub or switch) on your local area network to these ports. Power Inlet Connect the included power adapter to this inlet. Warning: The included power adapter is 5 V / 2 A DC. Using the wrong type of power adapter may cause damage.
Installation System Requirements You must have an Internet Service Provider (ISP) that meets the following minimum requirements: • Internet access from your local telephone company or ISP using an xDSL modem, Cable modem, ISDN TA, or PSTN analog modem. You may also have access over the telephone system to an analog modem at another site. • A PC using a fixed IP address or dynamic IP address assignment via DHCP, as well as a Gateway server address and DNS server address from your service provider.
Connect the System Prepare a serial cable for connecting the CheetahAccess Wireless Gateway to an ISDN TA or PSTN modem. 3. Connect your printer: Use standard parallel printer cable to connect your printer to the printer port on the CheetahAccess Wireless Gateway. 4. Power on: Connect the power adapter to the CheetahAccess Wireless Gateway. Internet Internet Access Device TM CheetahAccess Wireless Gateway Notebook with Wireless PC Card SOHO Office or Residence Figure 2-2.
Installation Warning: Do not plug a phone jack connector into any RJ-45 port. This may damage the CheetahAccess Wireless Gateway. Instead, use only twisted-pair cables with RJ-45 connectors that conform with FCC standards. Notes: 1. Use 100-ohm shielded or unshielded twisted-pair cable with RJ-45 connectors for all connections. Use Category 3, 4 or 5 for connections that operate at 10 Mbps, and Category 5 for connections that operate at 100 Mbps. 2.
Connect the System CheetahAccess Wireless Gateway. A wireless infrastructure can be used for access to a central database, or for connection between mobile workers, as shown in the following figure: Wired to Wireless Network Extension Internet Internet Access Device Notebook with Wireless PC Card Adapter CheetahAccess Wireless Gateway Wired LAN PC with Wireless PCI Adapter Figure 2-4.
Installation Note: When connecting to the WAN port, use 100-ohm Category 3, 4 or 5 shielded or unshielded twisted-pair cable with RJ-45 connectors at both ends for all connections. Connect the CheetahAccess™ Wireless Gateway to a Printer If you connect a printer to the CheetahAccess Wireless Gateway, all the computer users connected to your LAN can have access to the printer.
Chapter 3: Configuring Client PCs TCP/IP Configuration To access the Internet through the CheetahAccess™ Wireless Gateway, you must configure the network settings of the computers on your LAN to use the same IP subnet as the CheetahAccess Wireless Gateway. The default network settings for the CheetahAccess Wireless Gateway are: IP Address: 192.168.2.1 Subnet Mask: 255.255.255.
Configuring Client PCs 3-2
Chapter 4: Configuring the CheetahAccess™ Wireless Gateway After you have configured TCP/IP on a client computer, you can use a Web browser to configure the CheetahAccess™ Wireless Gateway. The CheetahAccess Wireless Gateway can be configured by any Java-supported browser including Internet Explorer 4.0 or above, or Netscape Navigator 4.0 or above. Using the Web management interface, you can configure the CheetahAccess Wireless Gateway and view statistics to monitor network activity.
Configuring the CheetahAccess™ Wireless Gateway Setting a Password If this is your first time to access the CheetahAccess Wireless Gateway, you should define a new Administrator password, record it and put it in a safe place. From the Main Menu, select “Setup,” then “Change Password” and follow the instructions on the screen (see page 4-4). Note that passwords can consist of 3 to 12 alphanumeric characters and are case-sensitive.
Main Menu Menu Description Status Menu Displays connection status, key interface settings, as well as the firmware and hardware version numbers. INTERNET Displays WAN connection type and status. GATEWAY Displays system IP settings, the status for DHCP, and Firewall services, as well as the wireless interface settings. INFORMATION Displays the number of attached clients, the firmware versions, the physical MAC address for each media interface, as well as the hardware version and serial number.
Configuring the CheetahAccess™ Wireless Gateway Networking and Client Services Use the Setup menu to configure the LAN interface (including TCP/IP parameters for the CheetahAccess Wireless Gateway’s gateway address and DHCP address pool for dynamic client address allocation), the WAN connection options, DNS domain name mapping, the wireless interface, and other advanced services.
Networking and Client Services Use this menu to restrict management access based on a specific password. You must enter a password to access the configuration options provided by the menus. By default, there is no password. So, please assign a password to the Administrator as soon as possible, and store it in a safe place. Passwords can contain from 3–12 alphanumeric characters, and are case-sensitive.
Configuring the CheetahAccess™ Wireless Gateway Valid IP addresses consist of four numbers separated by periods. The first three fields are the network portion, and can be from 0–255, while the last field is the host portion and can be from 1–254. However, remember not to include the gateway address of the CheetahAccess Wireless Gateway in the client address pool. The Domain Name is optional, but this information may be specified so that it can be passed to the client PCs.
Networking and Client Services Dynamic IP Address – DHCP The Host Name is optional, but may be required by some ISPs. The default MAC address is set to the WAN’s physical interface on the CheetahAccess Wireless Gateway. Use this address when registering for Internet service, and do not change it unless required by your ISP. You can use the “Clone MAC Address” button to copy the MAC address of the Ethernet Card installed by your ISP (in your PC) and replace the WAN MAC address with this MAC address.
Configuring the CheetahAccess™ Wireless Gateway PPP over Ethernet – PPPoE Enter the PPPoE user name and password assigned by your ISP. The Service Name is normally optional, but may be required by some providers. Dial-up on Demand – Modem If you are accessing the Internet via an ISDN TA or PSTN modem attached to the serial port on the CheetahAccess Wireless Gateway, then you must specify your account information on this screen as described below.
Networking and Client Services Check if you only use a dial-up modem to connect to the Internet. – If the serial port is used for primary Internet access, then mark this item. - Auto Backup – Click on “Enabled” for automatically dialing up when the primary WAN link fails. Note: If not marked, then this connection will only be used for backup access if the primary WAN link fails. Dial-Up Service Phone Number – Enter the phone number your service provider has given to you for Internet access.
Configuring the CheetahAccess™ Wireless Gateway Wireless Configuration To configure the CheetahAccess Wireless Gateway as a wireless access point for wireless clients (either stationary or roaming), all you need to do is define the radio channel, the domain identifier, and encryption options.
Networking and Client Services However, please be aware that the extra processing time required for encryption may affect the throughput for wireless communications. You can automatically generate encryption keys or you can manually enter the keys. For automatic 64-bit security, you enter a passphrase that is used to create four keys (as shown below). The automatic 128-bit security generates a single key by entering a passphrase.
Configuring the CheetahAccess™ Wireless Gateway Configuring Client Services The CheetahAccess Wireless Gateway includes a broad range of client services, including firewall protection, network address translation, virtual server, connection support for special applications, and restricted Internet access for specified clients.
Networking and Client Services Virtual Server If you configure the CheetahAccess Wireless Gateway as a virtual server, remote users accessing services such as Web or FTP at your local site via public IP addresses can be automatically redirected to local servers configured with private IP addresses.
Configuring the CheetahAccess™ Wireless Gateway Enabling Special Applications Some applications (such as Internet gaming, videoconferencing, Internet telephony and others) require multiple connections. These applications cannot work with Network Address Translation (NAT) enabled. If you need to run applications that require multiple connections, use the following screen to specify the additional public ports to be opened for each application.
Networking and Client Services Client Filtering You can filter Internet access for local clients based on IP address, application type (i.e., HTTP port), and time of day. For example, this screen shows that clients in the address range 192.168.2.50-99 are permanently restricted from using FTP (Port 21), while clients in the address range 192.168.2.110-119 are blocked from browsing the Internet from Monday through Friday.
Configuring the CheetahAccess™ Wireless Gateway MAC Filtering You can filter Internet access for local wired and wireless clients based on MAC address. MAC Address Control: Every client that connects to the network has a unique MAC (Media Access Control) address on his or her Ethernet adapter. An administrator can have more control—and more security—over the network by specifying which MAC addresses are allowed to access the CheetahAccess Wireless Gateway.
Networking and Client Services Association Control: The Association process is the exchange of information between wireless clients and a wireless access point to establish a link between them. A wireless client is capable of transmitting and receiving data to an access point only after the association process is sucessfully completed. Association control allows an administrator to allow or deny wireless clients from linking to the CheetahAccess Wireless Gateway.
Configuring the CheetahAccess™ Wireless Gateway Miscellaneous Settings The CheetahAccess Wireless Gateway also allows you set a timeout for administrator access, prevent external PINGs from causing security problems, set up remote management, and configure a Virtual DMZ Host. Administrator Time-out – Enter a time-out setting in minutes for administrator access protection.
Viewing Network and Device Status Viewing Network and Device Status You can use the following screen to display the connection status for the WAN/ WLAN/LAN interfaces, firmware and hardware version numbers, any illegal attempts to access your network, as well as information on all DHCP clients connected to your network. The following items are included in this screen: Field Description INTERNET Displays WAN connection type and status. Release Click on this button to release the WAN IP address.
Configuring the CheetahAccess™ Wireless Gateway Using System Tools You can use the “Tools” menu to reboot the CheetahAccess Wireless Gateway, restore factory settings, or update firmware. Note: If you use the “Reset” button on the front panel, the CheetahAccess Wireless Gateway performs a power reset and restores the factory settings. The “Backup Settings” button allows you to save your CheetahAccess Wireless Gateway’s current configuration to a file named “config.bin” on your PC.
Chapter 5: Configuring Client TCP/IP If you have not previously installed the TCP/IP protocol on your client PCs, refer to the following section. If you need information on how to configure a TCP/IP address on a PC, refer to “Setting TCP/IP to Work with the CheetahAccess™ Wireless Gateway” on page 5-2. Installing TCP/IP Protocol in Your PC 1. Click the “Start” button and choose “Settings,” then click “Control Panel.” 2.
Configuring Client TCP/IP 5. Select the “Microsoft” item in the manufacturers list. And choose “TCP/IP” in the Network Protocols. Click the “OK” button to return to the Network window. 6. The TCP/IP protocol will be listed in the Network window. Click “OK” to complete the install procedure and restart your PC to enable the TCP/IP protocol. Setting TCP/IP to Work with the CheetahAccess™ Wireless Gateway 1. Click the “Start” button and choose “Settings,” then click “Control Panel.” 2.
Setting TCP/IP to Work with the CheetahAccess™ Wireless Gateway 4. You can dynamically assign TCP/IP address settings to a client, or you can manually configure a client with address settings to meet your specific network requirements. (Note that the default IP address of the CheetahAccess Wireless Gateway is 192.168.2.1.) Dynamic IP Allocation via a DHCP Server Select “Obtain an IP address automatically” in the IP Address tab.
Configuring Client TCP/IP Manual IP Configuration 1. Select “Specify an IP address” in the “IP Address” tab. Select an IP address based on the default network 192.168.2.X (where X is between 1 and 254), and use 255.255.255.0 for the subnet mask. 2. In the “Gateway” tab, add the IP address of the CheetahAccess Wireless Gateway (default: 192.168.2.1) in the “New gateway” field and click “Add.” 3. In the “DNS Configuration” tab, add the IP address for the CheetahAccess Wireless Gateway and click “Add.
Setting TCP/IP to Work with the CheetahAccess™ Wireless Gateway Verifying Your TCP/IP Connection After installing the TCP/IP communication protocol and configuring an IP address in the same network with the CheetahAccess Wireless Gateway, you can use the “Ping” command to check if your computer is successfully connected to the CheetahAccess Wireless Gateway. The following example shows how the Ping procedure can be executed in an MS-DOS window. First, execute the “Ping” command: ping 192.168.2.
Configuring Client TCP/IP 5-6
Chapter 6: Configuring Printer Services If you want to use the print server built into the CheetahAccess™ Wireless Gateway, then you must first install the Port Monitor program as described in the following section for Windows 95/98/ME/NT/2000. To configure the CheetahAccess Wireless Gateway Print Server for Windows 95/98/ ME/NT/2000 or Unix, see “Configure the Print Server” on page 6-4. Install the Printer Port Monitor Skip this section if you are using Unix.
Configuring Printer Services 2. Select the destination folder and click on the “Next” button. The setup program will then begin to install the programs into the destination folder. 3. Select the Program Folder that will contain the program icon for uninstalling the port monitor, and then click “Next.
Install the Printer Port Monitor 4. Enter the printer port name that will be used to identify the port monitor in your system, and press “Next.” 5. When the setup program finishes installing the port monitor, select the item to restart your computer and then click “OK.” 6. After rebooting your computer, add the CheetahAccess Wireless Gateway print server to your system as described in the following section.
Configuring Printer Services Configure the Print Server The CheetahAccess Wireless Gateway’s print server supports Microsoft Windows 95/98/ME/NT/2000 and Unix. If you are using Windows 95/98/ME/NT/2000, first install the port monitor as described in the previous section before adding the CheetahAccess Wireless Gateway’s print server to your operating system. Configure the Network Printer in Windows 95/98/ME/2000 1.
Configure the Print Server 3. Specify the printer type attached to the CheetahAccess Wireless Gateway, and press “Next.” 4. From the list of manufacturers and printers in the next window, select the printer you have attached to the CheetahAccess Wireless Gateway.
Configuring Printer Services 5. Continue following the prompts to finish installing the CheetahAccess Wireless Gateway print server. The printer type you specified will now be added to your “Printers” menu. 6. From the “Start” menu, click “Settings,” and then select “Printers.” 7. Choose the installed printer, click on the right-mouse button, and then select “Properties.
Configure the Print Server 8. Select the “Ports” tab in the Properties window. 9. Select the monitored port (the default port name is “AC-IG2004W”) and then click the “Configure Port” button. 10. Enter the IP address of the CheetahAccess Wireless Gateway and click “OK,” and then click “Next” in the Add Printer Wizard dialog box. 11. Continue following the prompts to finish configuring the CheetahAccess Wireless Gateway print server.
Configuring Printer Services Configure the Network Printer in Windows NT 1. On a Windows NT platform, open the Printers window in the My Computer menu, and double-click the Add Printer icon. 2. Follow the prompts to add a local printer to your system. 3. Select the monitored port. The default port name is “AC-IG2004W.” Then click the “Configure Port” button.
Configure the Print Server 4. Enter the IP address of the CheetahAccess Wireless Gateway and click “OK,” and then click “Next” in the Add Printer Wizard dialog box. 5. Specify the printer type attached to the CheetahAccess Wireless Gateway. 6. Continue following the prompts to finish installing the CheetahAccess Wireless Gateway print server. The printer type you specified will now be added to your “Printers” menu.
Configuring Printer Services 6-10
Appendix A: Troubleshooting This appendix describes common problems you may encounter and possible solutions. The CheetahAccess™ Wireless Gateway can be easily monitored through panel indicators to identify problems. If you cannot resolve any connection problems after checking the indicators, then refer to the other sections in the following table. Troubleshooting Chart Symptom Action LED Indicators Power LED is Off • External power supply has failed or is disconnected.
Troubleshooting Troubleshooting Chart Symptom Action Network Connection Problems Cannot ping the CheetahAccess Wireless Gateway from the attached LAN, or the CheetahAccess Wireless Gateway cannot ping any device on the attached LAN • Verify that IP addresses are properly configured. For most applications, you should use the CheetahAccess Wireless Gateway’s DHCP function to dynamically assign IP addresses to any host on the attached LAN.
Appendix B: Cables Ethernet Cable Specifications Cable Types and Specifications Cable Type Max. Length Connector 10BASE-T Cat. 3, 4, 5 100-ohm UTP 100 m (328 ft) RJ-45 100BASE-TX Cat. 5 100-ohm UTP 100 m (328 ft) RJ-45 Twisted-pair Cable Caution: DO-NOT plug a phone jack connector into any RJ-45 port. Use only twisted-pair cables with RJ-45 connectors that conform with FCC standards. For 10BASE-T/100BASE-TX connections, a twisted-pair cable must have two pairs of wires.
Cables Straight-through Cable Straight-Through RJ-45 Pin Assignments End 1 End 2 1 (TD+) 1 (TD+) 2 (TD-) 2 (TD-) 3 (RD+) 3 (RD+) 6 (RD-) 6 (RD-) Pins 4, 5, 7 and 8 are not connected. Crossover Cable Crossover RJ-45 Pin Assignments End 1 End 2 1 (TD+) 3 (RD+) 2 (TD-) 6 (RD-) 3 (RD+) 1 (TD+) 6 (RD-) 2 (TD-) Pins 4, 5, 7 and 8 are not connected. RJ-45 Port Pin Assignments All LAN ports on the CheetahAccess Wireless Gateway support automatic MDI/ MDI-X configuration.
Serial Port Pin Assignments Serial Port Pin Assignments The DB-9 serial port on the rear panel is used to connect the CheetahAccess Wireless Gateway to an ISDN TA or PSTN modem. The pin assignments used to connect to this port are provided in the following tables. Figure B-2. DB-9 Serial Port Pin Numbers DB-9 Port Pin Assignments EIA Circuit CF BB BA CD AB CC CA CB CE CCITT Signal 109 104 103 108.
Cables Serial Port to 9-Pin COM Port on PC Gateway’s 9-Pin Serial Port 1 DCD 2 RXD 3 TXD 4 DTR 5 SGND 6 DSR 7 RTS 8 CTS 9 RI ----------<----------------------------------------------------------<------------------- CCITT Signal DCD -----------TXD -----------RXD ----------> DSR ----------> SGND ---------DTR -----------CTS -----------> RTS ------------RI --------------- PC’s 9-Pin COM Port 1 3 2 6 5 4 8 7 9 Serial Port to 25-Pin DCE Port on Modem Gateway’s 9-Pin Serial Port 1 2 3 4 5 6 7 8 9 CCITT Signal
Printer Port Pin Assignments Printer Port Pin Assignments The DB-25 parallel port on the CheetahAccess Wireless Gateway’s rear panel is used to connect the CheetahAccess Wireless Gateway to a printer. When a printer is attached to this port, any PCs attached to the CheetahAccess Wireless Gateway’s LAN ports can pass files to the printer. The pin assignments used to connect to the printer port are provided in the following table. 25 Figure B-3.
Cables B-6
Appendix C: Specifications WAN Interface 10BASE-T, 1 RJ-45 port Serial, 1 RS-232 DB-9 connector LAN Interface 10BASE-T/100BASE-TX 3 RJ-45 ports WLAN Interface Standard: IEEE 802.11b, Direct Sequence Spread Spectrum (DSSS) Transmission Rate: 11 Mbps, automatic fallback to 5.5, 2 or 1 Mbps Maximum Channels: US/Canada: 11, Europe (ETSI): 13 Range: Up to 1000 ft (304.8 m) Frequency: (US/Canada/Europe) 2.400-2.4835 GHz Sensitivity: 1, 2, 5.
Specifications Management Web management Advanced Features Dynamic IP Address Configuration – DHCP, DNS Firewall – Client privileges, hacker prevention and logging, NAT Virtual Private Network – PPTP, L2TP, IPSec pass-through Backup Internet Connection – Dial-on-demand via secondary WAN port Print server Internet Standards ARP (RFC 826), IP (RFC 791), ICMP (RFC 792), UDP (RFC 768), TCP (RFC 793), Telnet (RFC 854-859), MD5 (RFC 1321), BOOTP Extension (RFC 1497), PPP LCP Extension (RFC 1570), PPPoE (RFC 2516)
C-Tick - AS/NZS 3548 (1995) Class B ETS 300 328 MPT RCR STD-33 EN 61000-3-2/3 Immunity EN 61000-4-2/3/4/5/6/8/11 Safety UL 1950 EN60950 (TÜV) CSA 22.2 No.
Specifications C-4
Appendix D: Ordering Information CheetahAccess™ Internet Gateway Products AC-IG1004 4-port Internet Gateway - WAN/LAN/Print Server AC-IG1008 8-port Internet Gateway - WAN/LAN/Print Server AC-IG2004W 4-port Wireless Gateway - WAN/LAN/WLAN/Print Server D-1
Ordering Information D-2
AC-IG2004W E102001-R01 Part Number: 650.