
Specifications
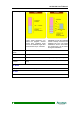

Chapter 5 – Configuring the LCD Menu
33
Chapter 5
Configuring the LCD Menu
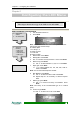
This chapter details the usage of the LCD on the ACS-61100.
RAID PARAMETER CONFIGURATION
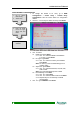
1. Turn the RAID chassis on.
2. Press Enter.
Note: The GGGxxxxxx at the bottom of the panel it indicates
that an array has not been setup.
G=>Globe spare
1~4=>Array 1~4
X=>Disk not exist
L=>Lock disk
R=>Remove disk
3. RAID Param. Press Enter.
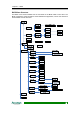
4. RAID Editor. Press Enter.
5. Use to Select an Array between 1 and 4. Press Enter.
6. RAID Level. Press Enter.
6.1 Use to select between 0,1,5,6, 0+1. Press Enter.
7. Stripe Size. Press Enter.
7.1 to select between 8k, 16k, 32k, 64k, 128k or
256k. Press Enter.
Note: The recommended stripe size is 256k.
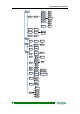
8. Disk Member. Press Enter.
8.1 Use to select the disk to add. Press Enter.
8.2 Repeat step 8.1 as necessary to add all required
disks.
9. RAID Type. Press Enter.
9.1 Use to select On-The-Fly or Evaluation. Press
Enter.
Note: On-The-Fly is the recommended type as it contains
parity.
10. Confirm. Press Enter.
10.1 Use to select Yes or No. Press Enter.
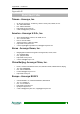
3. Select the
following:
y RAID Level
y Stripe Size
y Disk Members
y RAID Type
4. Confirm creation.
1. Turn on the
chassis.
2. Go RAID Editor.