
10.0
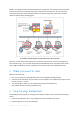
Table Of Contents
8 Copyright © Acronis, Inc., 2000-2010
The user name and password of an administrator of the machine where the management
server is installed
Details. The setup program will automatically register the machine on the management server so
you can manage the machine centrally, such as by using backup policies. The registration will
take place even if the management server is being installed along with the agent on the same
machine. Or, alternatively, you can add the machine to the management server later using the
machine's name or IP address.
12. Choose whether the machine will participate in the Acronis Customer Experience Program (CEP).
13. When prompted about the members of the Acronis Remote Users group, leave the default
setting. With this setting, all members of the Administrators group will be able to manage this
machine remotely.
14. Proceed with installation.
6.2 Starting Acronis Backup & Recovery 10
Right after installation, the management console starts automatically. To start the management
console in other situations, select from the start menu: Acronis > Acronis Backup & Recovery 10
Management Console > Acronis Backup & Recovery 10.
When in the management console, to connect to the management server:
1. Click Connect to a management server.
2. Enter the server name or IP address.
3. If prompted for credentials, specify the user name and password. The user has to be a member
of the Acronis Remote Users and the Acronis Centralized Admins groups on the server.
6.3 Backing up an individual machine
In this step, you will back up a folder on an individual machine. This is a simple operation to start
with. Using a similar procedure, you can back up a machine's volumes or an entire machine.
1. Connect the management console to the management server.
2. On the Welcome screen, click Back up.
3. In the Machine to Back Up Selection window, select the machine you want to back up and click
OK.
Details. You are taken to the Create backup plan view. The screen heading displays the name of
the machine so you remember where you are operating.
4. Under What to back up, in Source type, select Files.
5. In Items to back up, click Change. Select the folder to back up, for example, Program files.
6. Under Where to back up, click Change. In Path, type the path to the network shared folder
where to save the archives. Or you can select this folder from the folder tree. Provide access
credentials for the specified folder.
7. Click OK to create the backup plan. The backup starts immediately.
Details. You are taken to the All physical machines view with the machine you are backing up
pre-selected. The Information pane displays the plan's execution state: Running. To view the
backup task progress, expand the backup plan in the Information pane.