PP2-5600 and PP2I-5600 User’s Manual User’s Manual for: PP2-5600 (Serial Modem) PP2I-5600 (Infrared &Serial Modem) Revision Issue Date Engineer/Comments 1.0 April 11, 2002 YLYang/Pre-release 1.1 July 5, 2002 WWJ/Proofread Copyright by 3JTech. Co., Ltd. All rights reserved. 2003/11 From 3JTech Revision 1.
PP2-5600 and PP2I-5600 User’s Manual TABLE TABLE............................................................................................ 2 I. INTRODUCTION ......................................................................... 3 II. 56K ACCESS INFORMATION ................................................... 4 III. HARDWARE INSTALLATION................................................... 5 BEFORE YOU START ..................................................................................................
PP2-5600 and PP2I-5600 User’s Manual I. INTRODUCTION Thank you for purchasing 3JTech’s Pegasus III series high-speed modem with Infrared wireless communication. The users could connect the infrared modem to PDAs, with IrDA port and different OS like Win CE, Palm, PSION, Linux, DOS and Penbex, etc. It extends the features of the PDA. Connecting the modem to a phone line and turn it into a great travel-mate for Internet connection, file transferring or accessing your own proprietary servers.
PP2-5600 and PP2I-5600 User’s Manual II. 56K ACCESS INFORMATION The International Telecommunications Union (ITU) determines the technical protocols communications devices must use to interoperate with each other. Modems that comply with ITU standards can “talk” to other standards-compliant modems and fax machines worldwide. * In accordance with the ITU-T standard for 56K transmissions, this modem is capable of 56 Kbps downloads.
Infrared Modem User’s Manual III. HARDWARE INSTALLATION Before You Start Please check if the follows are include in your Pegasus III packaging Box: z Infrared Modem z Travel Charger z Telephone Cord z CD with User's Manual PDF file and driver z RS-232 cable for direct connect (One side is MiniDIN 9Pin connector, and one side is mini din 9-pin female connector.) 2003/11 From 3JTech Revision 1.
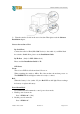
Infrared Modem User’s Manual System Requirements PDA or any hardware devices with IrDA or RS232 serial interface and any of the following Operating System: Windows 95 and above, DOS, Linux, WinCE, Palm OS, PSION, Penbex and others… Front View 1. Speaker produces the sound to show the connection to the ISP or host device. 2. IR Module output the Infrared signal to search and connect to another Infrared device. 3. LED shows the status of on-line, infrared connection and power of the battery. Rear View 1.
Infrared Modem User’s Manual take care of the batteries charging . Also, the main power source will be from the travel charger. In order to save power, the modem will: 1) Get into sleeping mode when no data is transmitting over the phone line for over 4 seconds, (The transition between sleeping and normal operation modes is transparent to users) 2) Automatically shut down when there is no data transmitting over the phone line for over 1Min.
Infrared Modem User’s Manual 3) Turn the switch to Serial on the rear of modem. Then please read the Software Installation chapter. Connect the modem to PDA By Serial Port Connect the cable for PDA (PP2-5600 Version) to the cradle of your PDA. Push the switch to Serial. Next, please see the Installation Guide. By IR Port (Only for PP2I-5600 models.) Please read the Installation Guide for IR. LED Status Green: The colour of LED is tells the modem is Power on.
Infrared Modem User’s Manual IV. SOFTWARE INSTALLATION GUIDE For Palm Organiser (1) Hardware needed: 1. 3JTech. Pegasus III series modem 2. Pilot 1000*. Pilot 5000*, Palm Pilot Personal*, Palm Pilot Professional*, Palm III and above (IIIe Not include), IBM Workpad series and TRGPro 3. Cable for Palm III or Cable for Palm V (The Serial Cable synchronizes the Palm organizer and the Pegasus modem.
Infrared Modem User’s Manual 8. Tap on Details on the bottom right 9. Next to SPEED tap on the down arrow then select “57,600bps” 10. Go to "Volume" and Tap on the down arrow. Then choose a volume of your choice. Note: To turn speaker off enter the Init String M0 11. Go to "Flow Ctrl" and Tap on the down arrow and then select "NONE". 12. Go to "String" and type "ATZ". 13. Tap on OK and then tap on OK again. 14. (4) Network Set-up: 1.
Infrared Modem User’s Manual 3. Type in "user’s name", "user’s password", and "phone number" using the onscreen keyboard. 4. Next to CONNECTION choose IR Modem. Turn on the IR modem by switching the switch to IR (located at the rear of the modem). If your battery is not charged you may have to connect the AC power adapter. Point your Palm’s IR port to the Modem IR port and tap on "connect". Note: you can connect up to 1.5 meters away at a 15-degree angle. NOTE: 1.
Infrared Modem User’s Manual For Windows CE/Pocket PC (1) Hardware needed 1. Pegasus III (PP2I-5600) IrDA modem 2. Windows CE or Pocket PC devices 3. Phone line 4. Battery or Adaptor (2) POCKET PC Modem setting 1. Turn on your POCKET PC. Make sure your Pocket PC organizer is not on the cradle. 2. 3. Tap on the Start menu and select Settings. Tap on the "Connections" menu. 4. 5. 6. Tap on "Modem" on the bottom left corner of your screen. Under modem connections tap New Connection.
Infrared Modem User’s Manual 11. Choose OK to setting mode. 12. Tap on Next to enter country code, area code and Phone number. 13. Tap on Next, don’t type anything in “Extra dial-string modem commands” if don’t know it. And then choose Finish to exit setting menu. 14. Choose Dialing menu then add a local setting. 15. Enter location name and set to “Tone dialing”. 16. Tap on Dialing Patterns menu and set functions as you want. (If you don’t dial country code or area code, set functions as “g”). 17.
Infrared Modem User’s Manual (4) Internet Explorer settings 1. Tap on the Start menu and select Internet Explorer. 2. Enter the WWW address and tap on OK (5) Mail settings 1. Tap on the Start menu and select Inbox. 2. 3. 4. 5. 6. 7. 8. 9. 10. Tap on Services below windows. Choose New Service. Enter your Service type (POP3 Mail) and choose Next. Choose Connection to the modem that you just setting. Enter your POP3 mail server under Server block. Enter your mail User ID and Password. Then tap on Next.
Infrared Modem User’s Manual For Connecting PSION using Serial Cable This section uses PSION 5 as an example. (1) Hardware needed 1. Pegasus III series modem 2. Psion 5 3. Null modem cable (The Serial Cable synchronizes the PSION 5 and the Pegasus modem. One end of the cable is a 9-pin RS-232 male connector that connects to the female RS232 9-pin serial cable provided by PSION series 5. The other end is the PCMCIA male connector that connects to Pegasus modem.
Infrared Modem User’s Manual 3. Make sure the name is "Hayes compatible modem" Speed is "57,600" baud. Connect via is "Serial" and Fax class is "Auto". Tap on "Initialization" Enter "ATZ" under Init. (Reset) string. Enter "AT&F" under Data init. string. And enter "AT&D2" under Fax init. string. Tap "Handshaking" Set flow control to "None" under Flow control. Terminal detect (DSR/DTR) and Carrier detect (DCD) should be unchecked. Tap "OK"; tap "OK" again to close "Modem settings".
Infrared Modem User’s Manual Enter your Fax number, name and preferred resolution, then check the "Show connection dialog" and tap "OK". Setup is now complete. Fax Screen: (7) To Email or browse the web on Internet: Tap "Extras" on the lower right side of screen, and tap "Web" (for Web Browsing), or Tap "Email" for sending E-mails. Web Screen: 2003/11 From 3JTech Revision 1.
Infrared Modem User’s Manual For Connecting PSION using IrDA Port This section uses PSION 618C as an example. This installation guide is intended to help PSION users install the PP2I modem. After following the procedures in this manual, the installation of the PP2I modem should be complete and functional. 1. 2. 3. Connect the power and telephone line to your PP2I modem. Turn on your PP2I modem. On your PSION, go to System Æ Control Panel Æ Modem and setup your modem.
Infrared Modem User’s Manual 6. 7. Go to System Æ Control Panel Æ Internet and setup your Internet settings. The screen below should show: Click New to setup your Internet. Then, the screen below should show: Under Service, enter Your service name (ISP name), select Dial up for your connection type, select Use “smart” dialing, and enter the Standard dial-up 2003/11 From 3JTech Revision 1.
Infrared Modem User’s Manual number which is the number you wish to dial (contact your ISP if you don’t have this number.) 8. Under Account, enter your username, password, and confirm 0password. The screen should be like as shown below: 9. Under Addresses, also enter your username, password, and confirm password. 10. Click Done and your PP2I modem and should be installed and functional. 2003/11 From 3JTech Revision 1.
Infrared Modem User’s Manual For PENBEX 1. Tip home icon to back to the “Main Page”. And choose “Console” icon. 2. Chose “Connection” at title bar. 3. Change “COMM Port” to “IrDA”. And change “IrDA Receive” to “On”. 4. Chose “Mail” at title bar. 2003/11 From 3JTech Revision 1.
Infrared Modem User’s Manual 5. Setting the mail information. 6. Chose “Network” at title bar. 7. Setting the dial information. 8. Tip home icon to back to the “Main Page”. And choose “Email” icon. 9. Add a new mail. 2003/11 From 3JTech Revision 1.
Infrared Modem User’s Manual 10. Type the mail information. And then sent the mail to “Outbox”. 11. Tip “Email” at title bar. 12. Tip “Record” and chose “Send/Receive” to send mail and receive mail. 13. PDA is Setting finish, modem is dialing. 2003/11 From 3JTech Revision 1.
Infrared Modem User’s Manual For SHARP 1. On the Internet Setting Wizard screen, tap “New”. 2. Tap the “Dial-up (Telephone line)” radio button for “Select the connection type”. Then Press “Next”. 3. Setting The Modem type at “IR”. 2003/11 From 3JTech Revision 1.
Infrared Modem User’s Manual 4. Tap the “Advanced Setting”. Set the AT-command at “ATDT”, speed at ”57600”, Hardware flow control “not select”. And tap OK. Then tap “Next”. 5. The second screen appears telling you to set the connection ID and connection password. Then tap ”Next”. 6. Setting your Proxy, or “No Proxies”. Then tap ”Next”. 7. The next screen appears telling you to set up the e-mail settings.Then tap ”Next”. 8. Check your setting on this page. Tap “Register” to finish Modem Setting. 9.
Infrared Modem User’s Manual connection appears. Select dial-up name that you just setting. 10. After the dial tone, you are connecting to your ISP now. 11. On the Index screen, tap the “Options” menu and then tap “New Account”. 12. Tap the “Outgoing” tab to set the sending options. 13. Tap the “Incoming” tab to set the receiving options. 14. Tap “OK” to finish the settings. 15. On the Index screen, tap an e-mail message. 2003/11 From 3JTech Revision 1.
Infrared Modem User’s Manual 16 On the Index screen, tap . . for a new mail. Tap “OK” after finish the mail. 17. Tap “Send mail” to send the mail. 2003/11 From 3JTech Revision 1.
Infrared Modem User’s Manual For Windows98/Me/2000/XP The modem comes with a modem driver for Windows 95/98/Me. Please follow the steps below to install the modem. Make sure you have install IrDA device on PC IrDA enable Icon You can reference the Appendix A_Windows98 IR setup(R220L/210L/200L). 1. Turn on your computer and get in the Windows 98 main operation screen. Double click My Computer, then Control Panel. 1.Choose Modem in Control Panel to set-up the parameters of the modem. 2.
Infrared Modem User’s Manual 3.Check the square “Do not check my Modem, I will choose in the list”. Click “Next”. 5. Choose” Hard Disk” and Choose “mdm3jir.inf”。 Then choose “ZyDAS ZD51_RS2 MROM” and Click “Next”. (If you haven’t drive, you can choose “standard modem” ) 5.Choose “Com Port” for RS232 Modem, Choose “Virtual Infrared COM Port” for IR Modem, Click “ Next”. 6.The System is installing the modem. 2003/11 From 3JTech Revision 1.
Infrared Modem User’s Manual 7.Modem installed OK. Click OK. 8. Then set-up the baud rate. Click Properties to set-up the baud rate in Modem of Control Panel. 9. Choose “Com Port” for RS232 Modem, and “Virtual Infrared COM Port” for IR Modem, Choose Baud Rate (57,600) under ZyDAS ZD51_RS2 MROM. Click OK to finish set-up. 2003/11 From 3JTech Revision 1.
Infrared Modem User’s Manual 10.After Installing the Palm Desktop Organizer Software, restart the computer. HotSync Manager should now be running 11.Press the HotSync button from the cradle and the data will transfer between your Palm and PC. 2003/11 From 3JTech Revision 1.
Infrared Modem User’s Manual V. TECHNICAL SUPPORT If you are experiencing a problem with your modem, try resolving it with the troubleshooting suggestions preceding this section. If necessary you can contact your local dealer’s Customer Service. Before returning any product, please call for a return authorization number. Remember the following before contacting: • Use a phone located near the computer to which your modem is attached. • Have the product serial number available.
Infrared Modem User’s Manual VI. SPECIFICATION Dimensions: 2.5"(65mm) x3.75"(95mm) x0.83"(21mm) Weight: 7.35 oz Battery: rechargeable battery 100V-240V travel charger Dual operating modes: Infrared or serial RS-232 Works with Palm Pilot, Macs, Digital Cameras, PCs, Notebooks. Compliant to the IrDA 1.0 standard for serial infrared (SIR) data communication Link Distance 1 cm to 1.0 m Angle = +/- 15 deg.
Infrared Modem User’s Manual 3JTech. Co., Ltd. LIMITED WARRANTY z Hardware 3JTech warrants its hardware products to be free from defects in workmanship and materials.
Infrared Modem User’s Manual non-compatibility is caused by a “bug” or defect in the third party’s product. z Standard Warranty Service Standard warranty service for hardware products may be obtained by delivering the defective product, accompanied by a copy of the dated proof of purchase, to 3JTech. Co., Ltd. or to an authorized dealer. Customer service is available during the applicable warranty period.
Infrared Modem User’s Manual Some countries, states, or provinces do not allow the exclusion or limitation of implied warranties or the limitation of incidental or consequential damages for certain products supplied to consumers or the limitation of liability for personal injury, so the above limitations and exclusions may be limited in their application to you.
Infrared Modem User’s Manual Appendix A_Windows98 IR setup(R220L/210L/200L) This section describes how to use 3JTech’s PP2I infrared modem with ACTiSYS’s IrDA dungo, which includes ACT-IR220L/210L/200L are IrDA dungos for converting RS232C to an infrared port. Caution: To install this SIR driver in Windows98, please be sure no FIR driver was installed first. If the FIR driver was already installed, even you remove this FIR driver and then install SIR driver, it may not work properly.
Infrared Modem User’s Manual “(Infrared COM port or dongle)”, and then in “Infrared Devices” Select “(Generic Infrared Serial Port or dongle)”. Click on “OK”. 6. At “Infrared Transceiver”, Select “ACTiSYS IR-220L or ACTiSYS IR-200L”. For ACT-IR-210L, Select “Generic Infrared Port” instead. Then click on “Next”. 7. Select the COM port to which the Infrared device is physically connected. In most cases, choose COM2. Click on “Next”. 8. Follow the screen prompts until it asks you what default ports to use.
Infrared Modem User’s Manual successfully. 10. Please reboot your computer. 11. Please refer to ACT-IR 200L/220L User’s to continue installation. 2003/11 From 3JTech Revision 1.
Infrared Modem User’s Manual Appendix B_Country code setting For example US(255): ATS38=2#G255 Type commands as follow: ATS38=2#g< Decimal Country code > ( AT#H could see the country code setting) COUNTRY TLD Decimal United States US 255 South Africa ZA Netherlands TLD Decimal Russia SU 230 254 Hungary HU 229 NL 253 Slovak SK 228 Denmark DK 252 Thailand TH 227 Switzerland CH 225 Israel IL 226 Sweden SE 250 Switzerland CH 225 United Kingdom UK 249 UAE AE 224 B
Infrared Modem User’s Manual Appendix C_Advanced AT Commands (For Debug) Command ATREEP ATREEP10000,256 AT&T8 AT&T1 +++ AT#E1 AT#E0 ATS63.1 ATI1 AT&W ATZ 2003/11 From 3JTech Function & Description Display EEPROM Clear all EEPROM value to FF Modem send ASCII codes to PC continuous Hardware noise testing Power down mode (0 enable) Show versions number. Save current settings in EEPROM Revision 1.