96901K-MN Ceramic glass hob Table de cuisson vitrocéramique Glaskeramische kookplaat Installation and Operating Instructions Instructions de montage et mode d’emploi Montage- en gebruiksaanwijzing
Dear Customer, Please read these user instructions carefully and keep them to refer to later. Please pass the user instructions on to any future owner of the appliance. 1 3 2 2 The following symbols are used in the text: Safety instructions Warning! Information that affects your personal safety. Important! Information that prevents damage to the appliance.
Contents Operating Instructions . . . . . . . . . . . . . . . . . . . . . . . . . . . . . . . . . . . . . 4 Safety instructions. . . . . . . . . . . . . . . . . . . . . . . . . . . . . . . . . . . . . . . . . . . . . . 4 Description of the Appliance . . . . . . . . . . . . . . . . . . . . . . . . . . . . . . . . . . . . . Cooking surface layout . . . . . . . . . . . . . . . . . . . . . . . . . . . . . . . . . . . . . . . . . . . Control panel layout . . . . . . . . . . . . . . . . . . . . . . . . . . .
Operating Instructions 1 Safety instructions 3 5 Please comply with these instructions. If you do not, any damage resulting is not covered by the warranty. This appliance conforms with the following EU Directives: – 73/23/EEC dated 19.02.1973 Low Voltage Directive – 89/336/EEC dated 03.05.1989 EMC Directive inclusive of Amending Directive 92/31/EEC – 93/68/EEC dated 22.07.1993 CE Marking Directive Correct use • This appliance should be used only for normal domestic cooking and frying of food.
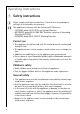
Safety during use • Remove stickers and film from the glass ceramic. • There is the risk of burns from the appliance if used carelessly. • Cables from electrical appliances must not touch the hot surface of the appliance or hot cookware. • Overheated fats and oils can ignite quickly. When cooking with fat or oil (e.g. chips) do not leave the appliance unattended. • Switch the cooking zones off after each use. Safety when cleaning • For cleaning, the appliance must be switched off and cooled down.
Description of the Appliance Cooking surface layout Singlecooking zone 1200W Triple ring cooking zone 1050/1950/2700W Multi-purpose zone 1400/2200W Single cooking zone 1800W Single cooking zone 1800W Control panel Control panel layout .................
Touch Control sensor fields The appliance is operated using Touch Control sensor fields. Functions are controlled by touching sensor fields and confirmed by displays and acoustic signals. Touch the sensor fields from above, without covering other sensor fields.
Displays Display ¾ u Description Cooking zone is switched off Keep warm setting Keep warm setting/STOP+GO function is set ¿ - Ç Heat settings Heat setting is set 2 - 6 Heating setting plus Intermediate heat setting is set decimal point a Automatic warm up function Automatic warm-up function is activated e Fault Malfunction has occurred h Residual heat Cooking zone is still hot l Child safety device Lock/child safety device is engaged _ Safety cut-out Safety cut-out has been activated
Operating the appliance Switching the appliance on and off Control panel 3 Display Switch on Touch for 2 seconds ¾ / h Switch off Touch for 1 second h / none Pilot light lights up goes out After switching on, within approx. 10 seconds a heat setting or a function must be set, otherwise the appliance automatically switches itself off.
Switching the outside ring on and off 3 By switching the outside rings on or off, the effective heating surface can be matched to the size of the cookware. Before an outside ring can be switched on, the inside ring must be switched on. Triple cooking zone Sensor panel Power indicator To switch on middle ring Touch for 1-2 seconds. One power indicator is lit. To switch on outside ring Touch for 1-2 seconds. Two power indicators are lit. To switch off outside ring Touch for 1-2 seconds.
Using the automatic warm-up function All cooking zones are equpped with an automatic warm up function When setting a heat setting using , when starting from ¾, the cooking zone switches to full power for a certain amount of time and then automatically switches back to the heat setting set.
Locking/unlocking the control panel The control panel, with the exception of the “On/Off” sensor field, can be locked at any time in order to prevent the settings being changed e.g. by wiping over the panel with a cloth. 3 Control panel Display Switch on Touch l (for 5 seconds) Switch off Touch previously set heat setting When you switch the appliance off, the locking function is automatically switched off.
Overriding the child safety device The child safety device can be released in this way for a single cooking session; it remains activated afterwards. Step 1. 2. Control panel Switch on the appliance Touch and Display/Signal l at the same time ¾ / acoustic signal Until the appliance is next switched off, it can used as normal. Using the timer All cooking zones can use each use one of the two timer functions at the same time.
Selecting a cooking zone Step 3 3 Control panel Indicator 1. Touch TIMER 1x Pilot light for the first cooking zone flashes 2. Touch TIMER 1x Pilot light for the second cooking zone flashes 3. Touch TIMER 1x Pilot light for the third cooking zone flashes 4. Touch TIMER 1x Pilot light for the fourth cooking zone flashes 5. Touch TIMER 1x Pilot light for the fifth cooking zone flashes If the pilot light is flashing more slowly, the heat setting can be set or modified.
Switching off the timer function Step Control panel field Display 1. TIMER Select cooking zone Pilot light of the cooking zone selected flashes faster The time remaining is displayed 2. Touch for the The time remaining counts down to cooking zone select- 00. ed The pilot light goes out. The timer function for the selected cooking zone is switched off. Changing the time Step Control panel field Display 1.
Switching off the acoustic signal Step Control panel field Acoustic signal 1. Touch TIMER Acoustic signal to acknowledge. Acoustic signal stops. Safety cut-out Cooking surface • If after switching on the cooking surface, a heat setting is not set for a cooking zone within approx. 10 seconds, the cooking surface automatically switches itself off. • If one or more sensor fields are covered for longer than approx. 10 seconds, e.g.
Power-Management The three cooking zones front left, front right and back right together have a maximum possible power available to them. If it looks like the maximum power of all three cooking zones is going to be exceeded, for example by turning on an additional cooking zone or by turning up a heat setting, the Power Management automatically reduces the power of another cooking zone. The power of the cooking zone that has been switched on for the longest time is reduced.
Tips on Cooking and Frying 3 Information on acrylamides According to the latest scientific knowledge, intensive browning of food, especially in products containing starch, can constitute a health risk due to acrylamides. Therefore we recommend cooking at the lowest possible temperatures and not browning foods too much. Cookware • You can recognise good cookware from the bottoms of the pans. The bottom should be as thick and flat as possible.
Examples of cooking applications The information given in the following table is for guidance only. Heat setting Cookingprocess 0 V suitable for Cooking time Tips/Hints Off position Keeping food warm Keeping cooked foods warm as required Cover Melting Hollandaise sauce, melting butter, chocolate, gelatine 5-25 mins. Stir occasionally Solidifying Fluffy omelettes, baked eggs 10-40 mins.
Cleaning and Care 1 1 1 Take care! Risk of burns from residual heat. Let the appliance cool down. Warning! Sharp objects and abrasive cleaning materials will damage the appliance. Clean with water and washing up liquid. Warning! Residues from cleaning agents will damage the appliance. Remove residues with water and washing up liquid. Cleaning the appliance after each use 1. Wipe the appliance with a damp cloth and a little washing up liquid. 2. Rub the appliance dry using a clean cloth.
What to do if … Problem The cooking zones will not switch on or are not functioning Possible cause Remedy More than 10 seconds have Switch the appliance on passed since the appliance again. was switched on The child safety device is switched on l Deactivate the child safety device (See the section “Child safety device”) Several sensor fields were touched at the same time Only touch one sensor field The sensor fields are partly Remove the cloth or the covered by a damp cloth or liquid.
Problem _ is lit 3 Remedy Overheating protection for Switch off the cooking the cooking zone has been zone.
Installation Instructions Safety instructions 1 1 The laws, ordinances, directives and standards in force in the country of use are to be followed (safety regulations, proper recycling in accordance with the regulations, etc.) Installation may only be carried out by a qualified electrician. The minimum distances to other appliances are to be observed. Drawers may only be installed with a with protective board directly under the appliance.
A device must be provided in the electrical installation which allows the appliance to be disconnected from the mains at all poles with a contact opening width of at least 3 mm. Suitable isolation devices include line protecting cut-outs, fuses (screw type fuses are to be removed from the holder), earth leakage trips and contactors. Guarantee/Customer Service Weitere Kundendienststellen im Ausland In diesen Ländern gelten die Garantiebedingungen der örtlichen Partner. Diese können dort eingesehen werden.
U.A.E. Abu Dhabi Universal Trading Company P.O. Box 43 99 Tel.: 6335331 Service Center 6733974 Jordan Jordan Household Supply Co. Ltd. P.O. Box 3/68 Amman/Tel.: 69 70 50 Malta ITC International Trading Company White House Building Mountbatte Street Blata L-Bajda/Tel.: 220644 Egypt Middle East Commercial Center 4 Salah El Dein St. - 2nd floor Heliopolis, Kairo Egypt Tel.: 2024181719 Canada EURO-LINE Appliances 2150 Winston PARK Drive 20 Oakville, Ontario L6H 5V1 Tel.
Israel Evis Ltd. Tadiran-Ampa Service 10 Gibonay Israel Street New Industrial Zone Netanya, 42504 Israel Malaysia Arzbergh Engineering No. 49A/B, Jalan Petaling Utama 7 4600 Petaling Jaya Tel.: 3 795 1084 Fax: 3 795 1082 Saudi Arabia Alia Trading Corporation P.O. Box 4101 Meccak Street Riyadh Tel.: 4645977 Al Nahas Est. Al Sitteeng Street P.O. Box 1 15 29 Jeddah Tel.: 6611675 Service center 6646583 Japan Electrolux Japan Ltd.
Service In the event of technical faults, please first check whether you can remedy the problem yourself with the help of the operating instructions (section “What to do if…”). If you were not able to remedy the problem yourself, please contact the Customer Care Department or one of our service partners. In order to be able to assist you quickly, we require the following information: – Model description – Product number (PNC) – Serial number (S No.
1 1 1 1 1 1 1 1 28 Lors de sa fabrication, cet appareil a été construit selon des normes, directives et/ou décrets pour une utilisation sur le territoire français. Pour la sécurité des biens et des personnes ainsi que pour le respect de l'environnement, vous devez d'abord lire impérativement les préconisations suivantes avant toute utilisation de votre appareil.
Chère cliente, cher client, Veuillez lire attentivement la notice d’utilisation dans son intégralité et la conserver pour pouvoir la consulter ultérieurement. Veuillez la transmettre à l’éventuel propriétaire ultérieur de l’appareil. 1 3 2 Les symboles suivants sont utilisés dans ce document : Consignes de sécurité Avertissement : conseils pour votre sécurité personnelle.
Sommaire Sécurité . . . . . . . . . . . . . . . . . . . . . . . . . . . . . . . . . . . . . . . . . . . . . . . . . . . . . . . 31 Description de l'appareil. . . . . . . . . . . . . . . . . . . . . . . . . . . . . . . . . . . . . . . . . Equipement du plan de cuisson . . . . . . . . . . . . . . . . . . . . . . . . . . . . . . . . . . . . Bandeau de commande. . . . . . . . . . . . . . . . . . . . . . . . . . . . . . . . . . . . . . . . . . . Touche sensitive “Touch Control” . . . . . . . . . . . . . . . . .
Notice d'utilisation 1 Sécurité 3 Pour ne pas perdre le bénéfice de la garantie en cas de panne, veuillez 5 observer ces recommandations. Cet appareil est conforme aux directives CE suivantes : – directive 73/23/CEE du 19.02.1973 basse tension – directive 89/336/CEE du 03.05.1989 relative à la compatibilité électromagnétique (CEM) y compris la directive de révision 92/31/CEE – directive 93/68/CEE du 22.07.
Précautions d’utilisation. • Retirer les étiquettes et les films protecteurs de la vitrocéramique. • Attention aux risques de brûlures lors de l’utilisation de l’appareil. • S’assurer que les câbles d’appareils électriques n’entrent pas en contact avec les surfaces brûlantes de l’appareil ou les récipients brûlants. • Les graisses et les huiles surchauffées peuvent rapidement s’enflammer. Surveiller constamment les mets cuits avec de la graisse ou de l’huile (par ex. des frites).
Description de l'appareil Equipement du plan de cuisson Zone de cuisson 1200W Zone de rôtissage 1400/2200W Foyer à triple circuit 1050/1950/2700W Zone de cuisson un circuit 1800W Bandeau de commande Zone de cuisson un circuit 1800W Bandeau de commande .................
Touche sensitive “Touch Control” Les touches sensitives Touch Control permettent de commander l’appareil. Une pression sur les touches sensitives permet d’activer les fonctions et le fonctionnement de ces dernières est confirmé par des voyants ou par des signaux sonores. Appuyez sur les touches sensitives par un mouvement de haut en bas, en évitant de recouvrir les autres touches.
Voyants Voyant ¾ u Description La zone de cuisson est désactivée Position de maintien au La fonction de maintien au chaud chaud/STOP+GO est activée ¿ - Ç Niveaux de cuisson Le niveau de cuisson est sélectionné 2 - 6 Niveaux de cuisson avec Le niveau intermédiaire est activé point décimal a Commande de démarra- La commande de démarrage autoge automatique de la matique de la cuisson est activée cuisson e Erreur Apparition d’une anomalie de fonctionnement h Chaleur résiduelle La zone de cuisson e
Utilisation de l’appareil Mettre l’appareil sous/hors tension 3 Bandeau de commande Affichage Voyant de contrôle Activer Appuyez sur pendant 2 secondes ¾/h s’allume Désactiver Appuyez sur pendant 1 seconde h / aucun s’éteint Après la mise sous tension, il est nécessaire d’activer un niveau de cuisson ou une fonction dans les 10 secondes environ qui suivent dans le cas contraire l’appareil se déconnecte automatiquement.
Zone de cuisson à triple zone Touche sensitive Voyant de contrôle Activation de la zone de cuisson intermédiaire Si vous effleurez pendant 1-2 secondes un voyant de contrôle s’allume Désactivation de la zone de cuisson extérieure Si vous effleurez pendant 1-2 secondes 2 voyants de contrôle s’allument Eteindre la zone de cuisson extérieure Si vous effleurez pendant 1-2 secondes le deuxième voyant de contrôle s’éteint Eteindre la zone de cuisson intermédiaire Si vous effleurez pendant 1-2 seconde
Utilisation de la commande de démarrage automatique de la cuisson Toutes les zones de cuisson sont dotées d’une commande automatique de démarrage de la cuisson. Lors de la sélection d’un niveau de cuisson avec à partir de ¾ , la zone de cuisson se met en marche à pleine puissance pendant un certain temps puis s’enclenche automatiquement sur le niveau de cuisson sélectionné. Bandeau de commande 3 3 niveaux de Affichage cuisson utilisables Activer Appuyez (seulement à partir de sur .
Niveau de Durée du démarrage Niveau cuisson automatique de la intermécuisson [min : sec] diaire 6 2:00 7 3:30 8 4:30 9 --- Durée du démarrage automatique de la cuisson [min : sec] 6. 2:30 Verrouiller/déverrouiller le bandeau de commande Il est possible à tout moment de verrouiller le bandeau de commande à l’exception de la touche sensitive „Marche/Arrêt“, ce qui permet d’éviter de modifier une sélection, par ex. en le nettoyant avec un chiffon.
Désactiver la sécurité enfants Etape 1. Bandeau de commande Voyant/Signal Mettre l’appareil sous tension l 2. Appuyez sur jusqu’à ce que le Signal sonore signal retentisse 3. Appuyez sur . L’appareil se déconnecte. La sécurité enfants est désactivée. Brider la sécurité enfants Cette touche permet de désactiver la sécurité enfants le temps d’une cuisson seulement, elle reste active ensuite. Etape 1. 2.
3 3 La désactivation d’une zone de cuisson entraîne la désactivation de la fonction Minuteur. Lorsqu’un niveau de cuisson est sélectionné en plus du minuteur pour cette même zone de cuisson, cette dernière se désactive après écoulement de la durée programmée. Sélectionner une zone de cuisson Etape 3 3 Bandeau de commande Voyant 1. Appuyez sur TIMER 1x Le voyant de contrôle de la première zone de cuisson arrière clignote 2.
Réglage de la durée Etape Bandeau de commande Affichage 1. TIMER sélection d’une zone de cuisson Le voyant de contrôle de la zone de cuisson sélectionnée clignote 2. Appuyez sur ou 00 jusqu’à 99 minutes de la zone de cuisson sélectionnée Après quelques secondes, le clignotement du voyant de contrôle ralentit La durée est sélectionnée. Le décompte commence. Désactiver la fonction Minuteur Etape Bandeau de commande Affichage 1.
Modification de la durée Etape Bandeau de commande Affichage 1. TIMER sélection d’une zone de cuisson Le voyant de contrôle de la zone de cuisson sélectionnée clignote plus rapidement Le temps restant s’affiche 2. Appuyez sur ou 01 jusqu’à 99 minutes de la zone de cuisson sélectionnée Après quelques secondes, le clignotement du voyant de contrôle ralentit La durée est sélectionnée. Le décompte commence. Affichage du temps restant d’une zone de cuisson Etape Bandeau de commande Affichage 1.
Désactivation de sécurité Table de cuisson • Si, après activation de la table de cuisson, une zone de cuisson ou un niveau de cuisson n’est pas sélectionné dans les 10 secondes environ qui suivent, la table de cuisson se désactive automatiquement. • Si l’une ou plusieurs des touches sensitives est recouverte pendant plus de 10 secondes environ, par ex. par une casserole, un signal sonore retentit et la table de cuisson se désactive automatiquement.
Gestion de la fonction Puissance Les trois zones de cuisson avant gauche, avant droite et arrière droite peuvent offrir une puissance maximale si elles sont combinées. Si la puissance maximale des trois zones de cuisson est dépassée, par le fonctionnement d’une zone de cuisson ou par un niveau de cuisson plus élevé, la gestion du niveau de puissance réduit automatiquement la puissance d’une autre zone de cuisson. La puissance de la zone de cuisson, qui est restée le plus longtemps allumée, sera réduite.
Economie d’énergie 2 2 2 2 Il est impératif de placer les plats de cuisson avant d’activer la zone de cuisson. Si possible, recouvrez toujours les récipients avec leur couvercle. Eteignez la zone de cuisson avant la fin de la cuisson afin de bénéficier de la chaleur résiduelle. Veillez à ce que le fond du plat de cuisson corresponde à la dimension de la zone de cuisson. Exemples d’utilisation pour la cuisson Les valeurs indiquées dans le tableau suivant sont indicatives.
Niveau de cuisson Type de cuisson adapté à Durée Faire cuire des pommes de 20-60 min terre à l’étuvée 4-5 6-7 7-8 9 Cuire à l’eau Faire cuire à feu doux Remarques/conseils Utilisez juste un peu d’eau, par ex. max.
Nettoyage et entretien 1 Attention ! Risque de brûlure dû à la chaleur résiduelle. 1 1 Laissez refroidir l’appareil. Attention ! Les produits de nettoyage agressifs ou abrasifs endommagent l’appareil. Nettoyez l’appareil avec de l’eau et de la lessive. Attention ! Les restes de produits de nettoyage endommagent l’appareil. Nettoyez les restes avec de l’eau et un produit de nettoyage. Nettoyez l’appareil après chaque utilisation 1.
3 3 Nettoyez les salissures tenaces à l’aide d’un produit de nettoyage pour vitrocéramique ou acier inoxydable. Même s’il n’est plus possible de faire disparaître les égratignures ou les taches sombres sur la vitrocéramique, cela n’a aucune influence sur le fonctionnement de l’appareil.
Symptôme Cause possible La commande de démarra- La zone de cuisson est enge automatique de la cuis- core chaude h son ne s’enclenche pas Le niveau de cuisson mamimum est activé Ç Solution Laissez refroidir la zone de cuisson Le niveau de cuisson maximum présente une puissance équivalente à celle de la commande de démarrage automatique de la cuisson. Le niveau de cuisson a été 1. Désactivez la zone de activé à l’aide de la touche cuisson sensitive 1.
Protection de l’environnement 2 2 Elimination du matériel d’emballage Les matériaux d’emballage sont écologiques et recyclables. Les matières plastiques portent un signe distinctif, par ex. >PE<, >PS<, etc. Eliminez les matériaux d’emballage en fonction de leur signe distinctif dans les containeurs prévus à cet effet sur le site de collecte de votre commune. Appareils usagés W sur le produit ou son emballage indique que ce produit Le symbole ne peut être traité comme déchet ménager.
1 1 52 Avertissement! Danger de blessure due au courant électrique. • La borne de raccordement est sous tension. • Isolez la borne de raccordement au secteur. • Respectez le schéma de raccordement. • Respectez les régles de sécurité électrotechniques. • Assurez vous lors de l’installation qu’il n’y ait pas de possibilité de contact. • Le raccordement électrique relève de la compétence d’un électricien. ATTENTION! Le courant électrique peut provoquer des dommages.
Garantie France Conformément à la Législation en vigueur, votre Vendeur est tenu, lors de l'acte d'achat de votre appareil, de vous communiquer par écrit les conditions de garantie et sa mise en œuvre appliquées sur celui-ci. Sous son entière initiative et responsabilité, votre Vendeur répondra à toutes vos questions concernant l'achat de votre appareil et les garanties qui y sont attachées. N'hésitez pas à le contacter. Electrolux Home Products France S.A.S.
Si vous devez nous contacter France AEG Pour tenir nos engagements, nous écoutons les Consommateurs Info Conso Electrolux est le lien privilégié entre la marque et ses Consommateurs. Il assure en permanence une double mission : satisfaire au mieux vos exigences et tirer parti de cette proximité pour améliorer sans cesse les produits que nous vous proposons.
Service après-vente En cas d’anomalie de fonctionnemet vérifiez d’abord si vous ne pouvez pas remédier vous-même au dysfonctionnement à l’aide de la notice d’utilisation (chapitre “Que faire, si...“). Si vous ne parvenez pas à remédier au dysfonctionnement, veuillez contacter votre vendeur ou à défaut le Centre Contact Consommateurs qui vous communiquera l’adresse service après-vente.
Geachte klant, Lees deze gebruiksaanwijzing zorgvuldig door en bewaar de gebruiksaanwijzing zodat deze later kan worden geraadpleegd. Geef deze gebruiksaanwijzing door aan een eventuele volgende eigenaar van het apparaat. 1 3 2 56 De volgende symbolen worden in de tekst gebruikt: Veiligheidsvoorschriften Waarschuwing! Aanwijzingen ten behoeve van uw persoonlijke veiligheid. Let op! Aanwijzingen om beschadiging van het apparaat te voorkomen.
Inhoud Gebruiksaanwijzing . . . . . . . . . . . . . . . . . . . . . . . . . . . . . . . . . . . . . . . . 58 Veiligheidsvoorschriften . . . . . . . . . . . . . . . . . . . . . . . . . . . . . . . . . . . . . . . . . 58 Beschrijving van het apparaat. . . . . . . . . . . . . . . . . . . . . . . . . . . . . . . . . . . . Uitrusting kookplaat . . . . . . . . . . . . . . . . . . . . . . . . . . . . . . . . . . . . . . . . . . . . . Uitrusting bedieningsveld . . . . . . . . . . . . . . . . . . . . . . . . . . .
Gebruiksaanwijzing 1 Veiligheidsvoorschriften 3 5 Neem deze aanwijzingen in acht, omdat anders bij eventuele schade het recht op garantie vervalt. Dit apparaat is in overeenstemming met de volgende EG-richtlijnen: – 73/23/EEG van 19.02.1973 Laagspanningsrichtlijn – 89/336/EEG van 03.05.1989 EMC-richtlijn inclusief aangepaste richtlijn 92/31/EEG – 93/68/EEG van 22.07.
Veiligheid tijdens het gebruik • Verwijder stickers en folies van het glaskeramiek. • Wanneer u onoplettend bent tijdens het werken met het apparaat, bestaat er risico op verbranding. • De snoeren van elektrische apparaten mogen niet tegen het hete apparaatoppervlak resp. hete pannen aankomen. • Oververhit vet en olie is licht ontvlambaar. Laat het apparaat niet zonder toezicht achter wanneer u kookt met vet of olie (bijv. patat bakken). • De kookzones moeten na ieder gebruik worden uitgeschakeld.
Beschrijving van het apparaat Uitrusting kookplaat Eénkringskookzone 1200W Braadzone 1400/2200W Driekrings-kookzone 1050/1950/2700W Eénkringskookzone 1800W Bedieningsveld Eénkringskookzone 1800W Uitrusting bedieningsveld .................
Touch-control-sensorvelden Het apparaat wordt bediend door middel van touch-control-sensorvelden. Functies worden door het aanraken van de sensorvelden gestuurd en door indicaties en akoestische signalen bevestigd. De sensorvelden moeten van bovenaf worden aangeraakt, zonder andere sensorvelden te bedekken.
Indicatie Beschrijving l Kinderbeveiliging _ Veiligheidsuitschakeling Veiligheidsuitschakeling is actief Vergrendeling/kinderbeveiliging is ingeschakeld Restwarmte-indicatie 1 3 Waarschuwing! Verbrandingsgevaar door restwarmte. Na het uitschakelen duurt het nog enige tijd voordat de kookzones zijn afgekoeld. Let op de h restwarmte-indicatie. Restwarmte kan worden gebruikt voor het smelten en warmhouden van gerechten.
Buitenste verwarmingskringen in- en uitschakelen 3 Door de buitenste verwarmingskringen in of uit te schakelen kunnen de verwarmingsvlakken worden aangepast aan de grootte van de pannen. Voordat een van de buitenste verwarmingskringen kan worden ingeschakeld, moet altijd eerst de binnenste verwarmingskring zijn ingeschakeld.
STOP+GO-functie in- en uitschakelen De STOP+GO-functie schakelt alle ingeschakelde kookzones tegelijk in de warmhoudstand in en weer in de eerder ingestelde kookstand. Deze functie is geschikt voor een kortstondige onderbreking en voortgang van het kookproces, bijv. om een telefoongesprek te voeren. Bedieningsveld 3 3 Indicatie Inschakelen aanraken u Uitschakelen aanraken eerder ingestelde kookstand (niet automatisch kooksysteem) Timerfuncties worden door STOP+GO niet aangehouden.
Kookstand Duur van de kookactivering [min:sec] Tussenstand Duur van de kookactivering [min:sec] v 0:30 1 1:00 2 1:40 2. 2:40 3 4:50 3. 5:30 4 6:30 4. 8:10 5 10:10 5. 12:20 6 2:00 6. 2:30 7 3:30 8 4:30 9 --- Bedieningsveld vergrendelen / ontgrendelen Het bedieningsveld kan met uitzondering van het sensorveld ”Aan/Uit“ op ieder gewenst moment worden vergrendeld, bijv. om het wijzigen van de instellingen als gevolg van het met een lap afnemen, te voorkomen.
Kinderbeveiliging gebruiken De kinderbeveiliging voorkomt ongewenst gebruik van het apparaat. Kinderbeveiliging inschakelen Stap Bedieningsveld Indicatie/signaal 1. apparaat inschakelen (geen kookstand instellen) ¾ 2. aanraken tot het signaal klinkt akoestisch signaal 3. aanraken l Apparaat wordt uitgeschakeld. Kinderbeveiliging is ingeschakeld. Kinderbeveiliging uitschakelen Stap 1. Bedieningsveld apparaat inschakelen 2. aanraken tot het signaal klinkt 3.
Timer gebruiken Alle kookzones kunnen tegelijk een van de beide Timerfuncties gebruiken. 3 3 Functie Vereisten Resultaat na verloop van de tijd Automatische uitschakeling bij een ingestelde kookstand akoestisch signaal 00 knippert kookzone wordt uitgeschakeld Kookwekker bij niet gebruikte kookzones akoestisch signaal 00 knippert Als een kookzone wordt uitgeschakeld, dan wordt tevens de ingestelde Timerfunctie uitgeschakeld.
Kookzone kiezen Stap 3 3 68 Bedieningsveld Indicatie 1. TIMER 1xaanraken Controlelampje van de eerste kookzone knippert 2. TIMER 1xaanraken Controlelampje van de tweede kookzone knippert 3. TIMER 1xaanraken Controlelampje van de derde kookzone knippert 4. TIMER 1xaanraken Controlelampje van de vierde kookzone knippert 5. TIMER 1xaanraken Controlelampje van de vijfde kookzone knippert Knippert het controlelampje langzamer dan kan de kookstand ingesteld of gewijzigd worden.
Tijd instellen Stap Bedieningsveld Indicatie 1. TIMER kookzone se- Controlelampje van de geselecteerde lecteren kookzone knippert 2. of van de geselecteerde kookzone aanraken 00 tot 99 minuten Na een aantal seconden knippert het controlelampje langzamer. De tijd is ingeschakeld. De tijd geeft de resterende tijd aan (loopt terug). Timerfunctie uitschakelen Stap Bedieningsveld Indicatie 1.
Tijd wijzigen Stap Bedieningsveld Indicatie 1. TIMER kookzone se- Controlelampje van de geselecteerde lecteren kookzone knippert sneller Resterende tijd wordt aangegeven 2. of van de geselecteerde kookzone aanraken 01 tot 99 minuten Na een aantal seconden knippert het controlelampje langzamer. De tijd is ingeschakeld. De tijd geeft de resterende tijd aan (loopt terug). Resterende tijd van een kookzone aangeven Stap Bedieningsveld Indicatie 1.
Veiligheidsuitschakeling Kookplaat • Als na het inschakelen van de kookplaat niet binnen ca. 10 seconden bij een kookzone een kookstand wordt ingesteld, schakelt de kookplaat automatisch uit. • Als een of meerdere sensorvelden langer dan ca. 10 seconden worden afgedekt, bijv. door een daarop geplaatste pan, klinkt een signaal en schakelt de kookplaat automatisch uit. • Wanneer alle kookzones worden uitgeschakeld, schakelt de kookplaat na ca. 10 seconden automatisch uit. 3 Bedieningsveld Vochtigheid (bijv.
Power-Management De drie kookzones links voor, rechts voor en rechts achter beschikken tezamen over een maximaal vermogen. Als het maximale vermogen van alle drie de kookzones overschreden dreigt te worden, bijv. door het extra inschakelen van een kookstand of het hoger instellen van een kookstand, reduceert het PowerManagement automatisch het vermogen van een andere kookzone. Het vermogen van de kookzone die het langst is ingeschakeld, wordt gereduceerd.
Tips voor koken en braden 3 Aanwijzing met betrekking tot acrylamide Volgens de laatste wetenschappelijke inzichten kan een intensieve bruining van levensmiddelen, met name bij zetmeelhoudende producten, een gevaar voor de gezondheid door acrylamide veroorzaken. Om die reden adviseren wij levensmiddelen zoveel mogelijk bij lage temperaturen te bereiden en de gerechten niet te veel te bruinen. Pannen • Goede pannen herkent u aan de panbodem. Die moet zo dik en vlak mogelijk zijn.
Toepassingsvoorbeelden voor het koken De gegevens in de volgende tabel dienen slechts als richtlijn. Kookstand Kookproces 0 Duur Aanwijzingen/tips uit-stand Warm houden Warm houden van gare gerechten Naar behoefte Afdekken Smelten Hollandaisesaus, smelten van boter, chocolade, gelatine 5-25 min. Tussendoor omroeren Stollen Schuimomelet, bouillon met ei 10-40 min.
Reiniging en onderhoud 1 1 1 Voorzichtig! Verbrandingsgevaar door restwarmte. Laat het apparaat afkoelen. Let op! Bijtende en schurende schoonmaakmiddelen beschadigen het apparaat. Schoonmaken met water en handafwasmiddel. Let op! Resten van schoonmaakmiddelen beschadigen het apparaat. Verwijder resten met water en handafwasmiddel. Reinig het apparaat na ieder gebruik 1. Maak het apparaat schoon met een vochtige doek en een klein beetje handafwasmiddel. 2. Wrijf het apparaat droog met een schone doek.
Wat is er aan de hand als … Storing De kookzones kunnen niet ingeschakeld worden of functioneren niet Mogelijke oorzaak Oplossing Na het inschakelen van het Apparaat nogmaals inschaapparaat zijn meer dan 10 kelen seconden verstreken De kinderbeveiliging is ingeschakeld l Kinderbeveiliging deactiveren (zie het hoofdstuk ”Kinderbeveiliging“) Er zijn meerdere sensorvel- Raak slechts één sensorveld den tegelijk aangeraakt tegelijk aan De restwarmte-indicatie geeft niets aan De sensorvelden zijn gedeeltel
Storing Mogelijke oorzaak e en nummer wordt aan- Fout in de elektronica gegeven 1 3 Oplossing Apparaat een aantal minuten van de voeding scheiden (zekering uit de huisinstallatie nemen) Als na het inschakelen de fout e nogmaals wordt aangegeven, contact opnemen met de servicedienst Wanneer u de storing niet kunt verhelpen met de hierboven gegeven aanwijzingen, neem dan contact op met uw vakhandel of met onze service-afdeling.
Afvalverwerking 2 2 Verpakkingsmateriaal De verpakkingsmaterialen zijn niet schadelijk voor het milieu en herbruikbaar. De kunststoffen hebben de volgende aanduidingen, bijv. >PE<, >PS<, enz. Verwijder de verpakkingsmaterialen in overeenstemming met de aanduiding bij de gemeentelijke inzamelplaatsen in de daarvoor bestemde containers. Oud apparaat verwijderen W op het product of op de verpakking wijst erop dat dit Het symbool product niet als huishoudafval mag worden behandeld.
Montageaanwijzing Veiligheidsvoorschriften 1 1 De in het land van gebruik geldende wetten, verordeningen, richtlijnen en normen moeten in acht worden genomen (veiligheidsvoorschriften, vakkundige recycling volgens de voorschriften, enzovoort). De montage mag alleen worden uitgevoerd door een vakman. De minimale afstanden tot andere apparaten moeten worden aangehouden. Laden mogen alleen met een beschermende bodem direct onder het apparaat worden gemonteerd.
In de elektrische installatie moet een inrichting worden aangebracht, die het mogelijk maakt het apparaat met een contactopeningswijdte van min. 3 mm met alle polen van het net te scheiden. Geschikte scheidingsinrichtingen zijn bijv. automatische zekeringen (schroefzekeringen moeten uit de fitting geschroefd worden), aardlekschakelaar en veiligheidsschakelaars.
Assembly/Montage/Montage 81
Rating Plate Plaque signalétique Typeplaatje 83
From the Electrolux Group. The world´s No.1 choice. The Electrolux Group is the world´s largest producer of powered appliances for kitchen, cleaning and outdoor use. More than 55 million Electrolux Group products (such as refrigerators, cookers, washing machines, vacuum cleaners, chain saws and lawn mowers) are sold each year to a value of approx. USD 14 billion in more than 150 countries around the world. AEG Hausgeräte GmbH Postfach 1036 D-90327 Nürnberg http://www.aeg.hausgeraete.