www.aeg.com CONTENTS 4 7 8 10 12 13 14 16 19 20 21 SAFETY INFORMATION PRODUCT DESCRIPTION CONTROL PANEL DAILY USE HELPFUL HINTS AND TIPS CARE AND CLEANING TROUBLESHOOTING INSTALLATION TECHNICAL DATA NOISES TECHNICAL DATA ENVIRONMENT CONCERNS Recycle the materials with the symbol . Put the packaging in applicable containers to recycle it. Help protect the environment and human health and to recycle waste of electrical and electronic appliances.
(1*/,6+ 3 FOR PERFECT RESULTS Thank you for choosing this AEG product. We have created it to give you impeccable performance for many years, with innovative technologies that help make life simpler – features you might not find on ordinary appliances. Please spend a few minutes reading to get the very best from it. ACCESSORIES AND CONSUMABLES In the AEG webshop, you’ll find everything you need to keep all your AEG appliances looking spotless and working perfectly.
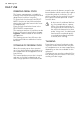
www.aeg.com SAFETY INFORMATION In the interest of your safety and to ensure the correct use, before installing and first using the appliance, read this user manual carefully, including its hints and warnings. To avoid unnecessary mistakes and accidents, it is important to ensure that all people using the appliance are thoroughly familiar with its operation and safety features.
(1*/,6+ Make sure that the power plug is not squashed or damaged by the back of the appliance. A squashed or damaged power plug may overheat and cause a fire. 3. Make sure that you can come to the mains plug of the appliance. 4. Do not pull the mains cable. 5. If the power plug socket is loose, do not insert the power plug. There is a risk of electric shock or fire. 6. You must not operate the appliance without the lamp cover (if foreseen) of interior lighting. This appliance is heavy.
www.aeg.com carried out by a qualified electrician or competent person. • This product must be serviced by an authorized Service Centre, and only genuine spare parts must be used. ENVIRONMENT PROTECTION This appliance does not contain gasses which could damage the ozone layer, in either its refrigerant circuit or insulation materials. The appliance shall not be discarded together with the urban refuse and rubbish.
(1*/,6+ PRODUCT DESCRIPTION 1 2 5 3 4 1 Control panel 2 Cold module 3 Freezer drawers 4 Rating plate 5 Flap compartment 7
www.aeg.com CONTROL PANEL 1 6 5 3 2 4. 1 Display 2 Temperature warmer button 3 Temperature colder button 4 OK button 5 Mode button 6 ON/OFF button It is possible to change predefined sound of buttons to a loudly one by pressing together Mode button and Temperature colder button for some seconds. Change is reversible. 2 3 4 5 If "dEMo" appears on the display, the appliance is in demonstration mode. Refer to "What to do if..." paragraph. 5.
(1*/,6+ The FROSTMATIC indicator flashes. Press the OK button to confirm. The FROSTMATIC indicator is shown. This function stops automatically after 52 hours. To switch off the function before its automatic end: 1. Press the Mode button until the FROSTMATIC indicator flashes. 2. Press the OK button to confirm. 3. The FROSTMATIC indicator goes off. 2. The function switches off by selecting a different freezer set temperature.
www.aeg.com DAILY USE FREEZING FRESH FOOD The freezer compartment is suitable for freezing fresh food and storing frozen and deep-frozen food for a long time. To freeze fresh food activate the FROSTMATIC function at least 24 hours before placing the food to be frozen in the freezer compartment. Place the fresh food to be frozen in the FROSTMATIC compartment. The maximum amount of food that can be frozen in 24 hours is specified on the rating plate, a label located on the inside of the appliance.
(1*/,6+ 11 REMOVAL OF FREEZING BASKETS AND GLASS SHELVES FROM THE FREEZER 2 1 The appliance is equipped with shelf stops to secure the shelves. The shelves must be lifted up (1) on each side and than pulled outwards (2). The glass shelves equipped with expander rollers are secured with locking pins. 1 1 2 To remove them proceed as follow: 1. Use a screwdriver to loosen the locking pin on each side on the expander roller. 2. Then pull out both locking pin (1). 3.
www.aeg.com HELPFUL HINTS AND TIPS NORMAL OPERATING SOUNDS • You may hear a faint gurgling and a bubbling sound when the refrigerant is pumped through the coils or tubing. This is correct. • When the compressor is on, the refrigerant is being pumped around and you will hear a whirring sound and a pulsating noise from the compressor. This is correct. • The thermic dilatation might cause a sudden cracking noise. It is natural, not dangerous physical phenomenon. This is correct.
(1*/,6+ 13 CARE AND CLEANING CLEANING THE INTERIOR Before using the appliance for the first time, wash the interior and all internal accessories with lukewarm water and some neutral soap so as to remove the typical smell of a brand-new product, then dry thoroughly. Do not use detergents or abrasive powders, as these will damage the finish. CAUTION! Unplug the appliance before carrying out any maintenance operation.
www.aeg.com TROUBLESHOOTING During operation of the appliance some smaller but annoying trouble can often occur, which does not require calling a technician out. In the following chart information is given about them to avoid unnecessary charges on service. The operation of the appliance goes with certain sounds (compressor and circulating sound). This not means a trouble, but a normal operation. The appliance operates discontinuously, so the stopping of compressor does not mean being no current.
(1*/,6+ Problem Possible cause There is too much frost and ice. The door is not closed cor- Refer to "Closing the rectly. door". 15 Solution The door gasket is deformed or dirty. Refer to "Closing the door". The temperature in the appliance is too cold. The Temperature regulator may be set incorrectly. Set a warmer temperature. The temperature in the appliance is too warm. The Temperature regulator may be set incorrectly. Set a colder temperature.
www.aeg.com INSTALLATION WARNING! Read the "Safety Information" carefully for your safety and correct operation of the appliance before installing the appliance.
(1*/,6+ 17 ELECTRICAL CONNECTION A B CAUTION! Any electrical work required to install this appliance should be carried out by a qualified electrician or competent person. WARNING! This appliance must be earthed. The manufacturer declines any liability should these safety measures not be observed.
www.aeg.com REAR SPACERS 2 1 4 3 You can find the two spacers in the bag with documentation. Do these steps to install the spacers: 1. Release the screw. 2. Engage the spacer below the screw. 3. Turn the spacer to the right position. 4. Tighten again the screws. LEVELLING When placing the appliance ensure that it stands level. This can be achieved by two adjustable feet at the bottom in front.
(1*/,6+ 19 • Unscrew the upper pin and screw it on the opposite side. • Refit the door. • Make sure the edge of the door is parallel with the edge of the top. 2 1 A B • Unscrew the pin (A) and screw it on the opposite side. • Remove the cap (B) and position it on the opposite side. • Screw the lower hinges. • Refit the plinth. • Stand the appliance upright. • Fit the handle on the opposite side and put the plastic caps (contained in the instructions bag) in the free holes.
www.aeg.com NOISES There are some sounds during normal running (compressor, refrigerant circulation).
(1*/,6+ HISSS! HISSS! SSSRRR! SSSRRR! CRACK! CRACK! TECHNICAL DATA Dimension Height 1540 mm Width 595 mm Depth 658 668 mm Rising Time 30 h Voltage 230-240 V Frequency 50 Hz The technical information are situated in the rating plate on the internal left side of the appliance and in the energy label.
www.aeg.
(1*/,6+ 23
A- www.aeg.