AGN2451 AGN2901 EN FREEZER USER MANUAL
FOR PERFECT RESULTS Thank you for choosing this AEG product. We have created it to give you impeccable performance for many years, with innovative technologies that help make life simpler – features you might not find on ordinary appliances. Please spend a few minutes reading to get the very best from it. ACCESSORIES AND CONSUMABLES In the AEG webshop, you’ll find everything you need to keep all your AEG appliances looking spotless and working perfectly.
Contents 3 CONTENTS 4 6 9 10 11 12 13 15 15 19 21 Safety information Control panel First use Daily use Helpful hints and tips Care and cleaning What to do if… Technical data Installation Noises Environmental concerns The following symbols are used in this user manual: Important information concerning your personal safety and information on how to avoid damaging the appliance.
Safety information SAFETY INFORMATION In the interest of your safety and to ensure the correct use, before installing and first using the appliance, read this user manual carefully, including its hints and warnings. To avoid unnecessary mistakes and accidents, it is important to ensure that all people using the appliance are thoroughly familiar with its operation and safety features.
Safety information 5 – thoroughly ventilate the room in which the appliance is situated • It is dangerous to alter the specifications or modify this product in any way. Any damage to the cord may cause a short-circuit, fire and/or electric shock. WARNING! Any electrical component (power cord, plug, compressor) must be replaced by a certified service agent or qualified service personnel to avoid hazard. 1. 2. • • • • Power cord must not be lengthened.
Control panel • Never use a hair drier or other heating appliances to speed up defrosting. Excessive heat may damage the plastic interior, and humidity could enter the electric system making it live. Installation For electrical connection carefully follow the instructions given in specific paragraphs. • Unpack the appliance and check if there are damages on it. Do not connect the appliance if it is damaged. Report possible damages immediately to the place you bought it. In that case retain packing.
Control panel 7 2 Temperature warmer button 3 Temperature colder button 4 OK button 5 Mode button 6 ON/OFF button It is possible to change predefined sound of buttons to a loudly one by pressing together Mode button and Temperature colder button for some seconds. Change is reversible.
Control panel • -18°C for the freezer The temperature indicator shows the set temperature. The set temperature will be reached within 24 hours. After a power failure the set temperature remains stored. FROSTMATIC function To switch on the function: 1. Press the Mode button until the corresponding icon appears. The FROSTMATIC indicator flashes. 2. Press the OK button to confirm. The FROSTMATIC indicator is shown. This function stops automatically after 52 hours.
First use 9 It is possible to change the time during the countdown and at the end by pressing the Temperature colder button and the Temperature warmer button. Child Lock function To lock the buttons from unintentional operation select the Child Lock function. To switch on the function: 1. Press the Mode button until the corresponding icon appears. 2. The Child Lock indicator flashes. 3. Press the OK button to confirm. The Child Lock indicator is shown. To switch off the function: 1.
Daily use Check that the drain hose at the rear of the cabinet discharges into the drip tray. DAILY USE Freezing fresh food The freezer compartment is suitable for freezing fresh food and storing frozen and deepfrozen food for a long time. To freeze small amount of fresh foods it is not necessary to change the present setting. To freeze fresh food activate the FROSTMATIC function at least 24 hours before placing the food to be frozen in the freezer compartment.
Helpful hints and tips 11 Removal of freezing baskets from the freezer The freezing baskets have a limit stop to prevent their accidental removal or falling out. At the time of its removal from the freezer, pull the basket towards yourself and, upon reaching the end point, remove the basket by tilting its front upwards. At the time of putting it back, slightly lift the front of the basket to insert it into the freezer. Once you are over the end points, push the baskets back in their position.
Care and cleaning • make sure that the commercially frozen foodstuffs were adequately stored by the retailer; • be sure that frozen foodstuffs are transferred from the foodstore to the freezer in the shortest possible time; • not open the door frequently or leave it open longer than absolutely necessary. • Once defrosted, food deteriorates rapidly and cannot be refrozen. • Do not exceed the storage period indicated by the food manufacturer.
What to do if… 13 Make sure the door is open and then: 1. Loosen the upper edge of the grille by pulling outward/downward. 2. Pull the grille straight out to completely remove it. 3. Vacuum clean under the cabinet. Defrosting of the freezer The freezer compartment of this model, on the other hand, is a "no frost" type. This means that there is no buildup of frost when it is in operation, neither on the internal walls nor on the foods.
What to do if… Problem Possible cause Solution The door is not closed correctly. Refer to "Door open alarm". upper or lower square is shown in the temperature display. An error has occurred in measuring the temperature. Call your service representative (the cooling system will continue to keep food products cold, but temperature adjustment will not be possible). “dEMo” appears on the display. The appliance is in demonstration mode.
Technical data Problem The lamp does not work. 15 Possible cause Solution The appliance has no power. There is no voltage in the mains socket. Connect another electrical appliance to the mains socket. Check fuse. Contact a qualified electrician. The lamp is defective. Refer to "Replacing the lamp". The door has been open to long. Close the door. Door interferes with venti- The appliance is not levelled. lation grill. Refer to "Levelling". Misaligned door. Refer to "Levelling".
Installation Positioning Install this appliance at a location where the ambient temperature corresponds to the climate class indicated on the rating plate of the appliance: Climate class Ambient temperature SN +10°C to + 32°C N +16°C to + 32°C ST +16°C to + 38°C T +16°C to + 43°C Location To ensure best performance, if the appliance is positioned below an overhanging wall unit, the minimum distance between the top of the cabinet and the wall unit must be at least 40 mm .
Installation 1. 2. 3. 17 Open the door. Remove the transport support from the door sides. Remove the transport support from the lower hinge (some models). Some models are fitted with a silencing pad under the cabinet. Do not remove this pad. 3 2 Spacers Install the spacers provided within the accessory bag as shown in the figures. When two appliances are placed beside each other, attach the adhesive spacers between the appliances. Install the spacers on the back side of the panel.
Installation Levelling When placing the appliance ensure that it stands level. If necessary adjust the feet using the adjustment spanner supplied. Door alignment is dependent on proper levelling. Door reversibility To change the opening direction of the door, do these steps: 1. Remove the plug from the power. 2. Remove the ventilation grille. Remove the filling an install it on the opposite side of the grille. 3. Lay down the appliance back side down on a wooden support. 4.
Noises 8. 9. Unscrew the handle. On the opposite side remove the hole covers by driving a 3-4 mm drift or drill into them. Install the handle. Fit the handle on to the opposite side by turning it on half circle. Install the hole covers provided within the accessory bag. Put the cabinet in position. 180° WARNING! Reposition, level the appliance, wait for at least four hours and then connect it to the power socket. Do a final check to make sure that: • All screws are tightened.
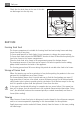
Noises CLICK! BRRR! BLUBB! HISSS! CLICK! BRRR! BLUBB! HISSS!
Environmental concerns SSSRRR! CRACK! 21 SSSRRR! CRACK! ENVIRONMENTAL CONCERNS The symbol on the product or on its packaging indicates that this product may not be treated as household waste. Instead it should be taken to the appropriate collection point for the recycling of electrical and electronic equipment.
www.aeg.