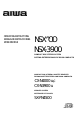
OPERATING INSTRUCTIONS MANUAL DE INSTRUCCIONES MODE D’EMPLOI NSX^OO NSX-3900 COMPACT DISC STEREO SYSTEM SISTEMA ESTEREOFONICO DE DISCO COMPACTO COMPACT DISC STEREO CASSETTE RECEIVER RADIOCASSETTE ESTEREO CON DISCO COMPACTO CX-N4000 u,c CX-N3900 u SPEAKER SYSTEM SISTEMA DE ALTAVOCES SX-FN4500 n COMPACT (ílüSE DIGITAL AUDIO
NOTE (U model only) CAUTION RISK OF ELECTRIC SHOCK DO NOT OPEN “CAUTIONiTO REDUCE THE RISK OF ELECTRIC SHOCK, DO NOT REMOVE COVER (OR BACK). NO USER-SERVICEABLE PARTS INSIDE. REFER SERVICING TO QUALIFIED SERVICE PERSONNEL.
COPYRIGHT Please check the laws on copyright relating to recordings from discs, radio or external tape for the country in which the machine is being used. DERECHO DE AUTOR Sírvase observar las leyes de derecho de autor relacionadas a las grabaciones de los discos, radio o cinta externa para el país donde se utiliza el aparato.
FOREWORD Welcome to the Aiwa NSX-4000/NSX-3900 Congratulations on your purchase of an Aiwa Stereo System. To optimize the performance of this system, please take the time to read through these Operating Instructions and become familiar with the operating procedures. About the layout of this manual This manual contains instructions in three languages (g) @ © and illustrations @-r H .When following the steps for each operation, refer to the illustration indicated by the capital letters (□ ).
PREFACIO PREFACE Bienvenido a Aiwa NSX-4000/NSX-3900 Aiwa vous souhaite la bienvenue. Muchas gracias porsu acertada compra del Sistema Estereofónico de Aiwa. Para obtener el óptimo funcionamiento de su sistema, sírvase leer detenidamente este manual instrucciones y familiarícese con los procedimientos de operación. Félicitations pour votre achat d’une chaîne stéréo Aiwa. La lecture de ce mode d’emploi vous permettra de maîtriser l’utilisation et d’optimiser les performances de cette chaîne.
TABLE OF CONTENTS FOREWORD........................................................................... 4 FEATURES........................................................................... 8 PRECAUTIONS.....................................................................10 CONNECTIONS.......................................................... 12 CONNECTING THE SUPPLIED SPEAKERS................. 12 CONNECTING THE AC CORD....................................... 12 ANTENNA CONNECTIONS............................
INDICE TABLE DES MATIERES PREFACIO.............................................................................. 5 CARACTERISTICAS.............................................................. 9 PRECAUCIONES................................................................. 11 PREFACE............................................................................... 5 CARACTERISTIQUES............................................................9 PRECAUTIONS.......................................................
FEATURES Three CD changer system Three compact discs can be placed in the disc compartment at the same time and played continuously. You can select any track on any of the discs, either directly or in programmed play. You can change two of the discs while the third is playing. DSP (Digital Signal Processor) system DSP circuits can recreate the effect of sounds reflected from walls or ceilings, to obtain the sound presence of real environments without the need to connect surround speakers.
CARACTERISTICAS CARACTERISTIQUES Sistema de cambiadiscos de tres discos compactos Système changeur à trois disques compacts Pueden colocarse al mismo tiempo tres discos compactos sobre el compartimiento de discos y reproducirse continuamente. Usted puede seleccionar cualquier canción de cualquier disco, directamente o en la reproducción programada. Además, puede cambiar los dos primeros discos durante la reproducción del tercer disco.
PRECAUTIONS Follow the advice below for safe and correct operation. On AC voltage Before use, check that the rated voltage of your system matches your local voltage. On placement • Do not use the system in places which are extremely hot, cold, dusty or humid. • Place the system on a flat, even surface. • Be careful not to obstruct the ventilation holes on the exterior of the unit, as increased internal temperature may affect the electric parts. In particular, do not place the system in an airtight rack.
PRECAUCIONES PRECAUTIONS Para obtener una operación segura y correcta, siga ios consejos descritos a continuación. Prière de respecter les consignes suivantes pour une utilisation sûre et correcte. Voltaje de CA Tension du secteur Antes dei uso, compruebe si ei voitaje nominai de su sistema coincide con ei voitaje de su iocalidad. Avant l’utilisation, vérifier que la tension nominale de la chaîne correspond à celle du secteur.
CONNECTIONS IMPORTANT Connect equipment, antennas, and other optional equipment be fore connecting the AC cord. CONNECTING THE SUPPLIED SPEAKERS You can obtain a front surround effect. Connect the speakers to the SPEAKER terminals and the SUR ROUND SPEAKERS jacks of the main unit. 1 Connect to the SPEAKERS terminals. Connect the right speaker © to the R terminal, and the left speaker (D to the L terminal with the cords attached to the speakers.
CONEXIONES CONNEXIONS IMPORTANTE IMPORTANT Conecte el aparato, las antenas y otros equipos opcionales antes Connecter la chaîne, les antennes et tout autre appareil optionnel de conectar el cordón de alimentación CA. avant de connecter le cordon secteur. CONEXION DE LOS ALTAVOCES SUMINISTRADOS CONNEXION DES ENCEINTES FOURNIES Usted puede obtener un efecto difuso delantero. Conecte los altavoces a los terminales SPEAKER y a las tomas SURROUND SPEAKERS del aparato principal.
CONNECTIONS ANTENNA CONNECTIONS CONNECTING THE SUPPLIED ANTENNAS Connections differ according to the suffix of the model number on the rear of your unit. Preparation • Untie the suppiied FM feeder antenna. • Stand the supplied AM ioop antenna on a surface by fixing the ciaw to the slot. -> □ Connection -► ID IE Push the lever of each terminal, and insert the conductor. Then, release the lever to lock. FM: Connect the conductor of the FM feeder antenna © to the FM 75Q terminals.
CONEXIONES connexions CONEXION DE LAS ANTENAS CONNEXION DES ANTENNES CONEXION DE LAS ANTENAS SUMINISTRADAS CONNEXION DES ANTENNES FOURNIES Las conexiones difieren según ei sufijo dei número dei modeio indicado a ia espaida dei aparato. Les connexions diffèrent selon le suffixe du numéro de modèle indiqué au dos de l’appareii. Préparation Preparación • Desate ia antena de iínea FM suministrada. • Ponga de pie ia antena de cuadro AM suministrada sobre una superficie, fijando ia garra a ia ranura.
CONNECTIONS REMOTE CONTROL Inserting batteries Detach the battery cover on the rear of the remote control and insert two R6 (size AA) batteries. -+ Q When to replace the batteries The maximum operational distance of the remote control should be approximately 5 meters (16 feet). When this distance decreases, replace the batteries with new ones. NOTE • Do not mix different types of batteries, or old batteries with new ones.
CONNEXIONS CONEXIONES CONTROL REMOTO TELECOMMANDE Inserción de las pilas Mise en place des piles Abra la tapa del compartimiento de pilas situada en la trasera del control remoto e inserte dos pilas R6 (tamaño AA). El Enlever le couvercle des piles du dos de la télécommande et mettre deux piles R6 (taille AA) en place. -+ El Reemplazo de las pilas Quand remplacer des piles La distancia máxima de operación entre el control remoto y el aparato debe ser de 5 metros.
PREPARATIONS BEFORE OPERATION To turn on the unit -* □ ■CD Press the POWER button. You can also turn the unit on by pressing one of the direct play buttons. (See page 20.) The disc compartment may open and cióse for resetting the unit. After use Press the POWER button to turn off the power. The display changes to clock or DEMO mode. After turning on the unit The flash window above the disc compartment lights up. For 4 seconds, the most recentiy used function button fiashes in green.
PREPARATIVOS ANTES DE LA OPERACION PREPARATIONS AVANT L’UTILISATION Para encender el aparato -+ □ Pour mettre l’appareil sous tension -* □ Presione el botón POWER. Usted puede encender también el aparato, presionando uno de los botones de reproducción directa. (Véase la página 21.) El compartimiento del disco quizá se abra y se cierre para reponer la unidad. Appuyer sur la touche POWER. On peut aussi mettre l’appareil sous tension en appuyant sur une des touches de lecture directe. (Voir page 21.
PREPARATIONS BEFORE OPERATION CASSETTE TAPES Usable tapes For playback, use normal (type I), CrOz (type II), and metal (type IV) tapes. The proper bias and equalization to suit the type of tape are selected automatically. For recording, use a normal (type I) tape. Tape slack Take up any slack in the tape with a pencil or similar tool before use. Slack tape may break or jam in the mechanism. Q 120-minute or longer tapes These are extremely thin and easily deformed or damaged. They are not recommended.
PREPARATIVOS PREPARATIONS ANTES DE LA OPERACION CASSETTES DE CINTAS Cintas utilízables Para la reproducción, utilice las cintas normales (tipo I), Cr02 (tipo II) y cinta metálica (tipo IV). Se seleccionan automáticamente la polarización y la ecualización adecuadas al tipo de la cinta. Para la grabación, utilice una cinta normal (tipo I). Cinta fioja Tense cualquier cinta floja con un lápiz u otro objeto similar. La cinta floja puede romperse o agarrotarse en el mecanismo de la cinta.
PREPARATIONS SETTING THE CLOCK When you first connect the AC cord, the II SET button flashes to inform you that the current time needs to be set. Set the time as foiiows, whiie the power is stiii off. = — 2,4 1 Press the II SET button. The hour fiashes. 2 Press the ◄◄ DOWN or designate the hour. UP button to 3 Press the II SET button to set the hour. The hour stops flashing and the minute starts fiashing. 1 4 Press the DOWN or UP button to desig nate the minute.
PREPARATIVOS PREPARATIONS AJUSTE DEL RELOJ REGLAGE DE L’HORLOGE Al conectar el cordón CA, parpadea el botón 11 SET para informarle que la Indicación horaria debe ajustarse. Ajuste la indicación horaria mientras que la alimentación esté desconectada. Quand on branche le cordon secteur, la touche II SET clignote pour signaler que l’heure courante doit être réglée. L’alimentation étant coupée, régler l’heure comme décrit cl-dessous. 1 Presione el botón II SET. 1 Appuyer sur la touche II SET.
ADJUSTING THE SOUND VOLUME □ To adjust the volume with the VOLUME control on the main unit To increase the volume, turn the VOLUME control clockwise. To decrease the volume, turn the VOLUME control counterclockwise. To adjust the volume with the VOLUME buttons on the remote control To increase the volume, press the /\ button. To decrease the volume, press the V button. BBE system (NSX-3900 only) — For clear and vivid high-definition sound -» Q] The BBE system enhances the clarity of high-frequency sounds.
SONIDO AJUSTE DEL SONIDO REGLAGE DU SON VOLUMEN -» □ VOLUME □ Para ajustar el volumen con el control VOLUME del aparato principal Pour régler le volume avec la commande VOLUME de l’unité principale Para aumentar el volumen, gire el control VOLUME a la derecha. Para disminuir el volumen, gire el control VOLUME a la izquierda. Pour monter le volume, tourner la commande VOLUME vers la droite. Pour baisser le volume, tourner la commande VOLUME vers la gauche.
ADJUSTING THE SOUND DSP (DIGITAL SIGNAL PROCESSOR) 0 The sound of a concert hall Is produced by sounds reflected from the walls and celling, reinforcing the sounds coming directly from the orchestra. You can use this unit’s DSP circuits to recreate reflected sounds digitally, to obtain the sound presence of a disco, live music performance or concert hall. In addition, the supplied speaker system has a surround speaker which faces upward and outside, for a surround sound effect.
SONIDO AJUSTE DEL SONIDO DSP (PROCESADOR DIGITALES) Il DE SEÑALES Con esta función, se produce un sonido parecido al de una sala de conciertos donde los sonidos se repercuten de las paredes y techo para reforzar los sonidos que vienen directamente de la orquesta. Usted puede usar los circuitos de DSP para crear digitalmente los sonidos a fin de lograr una sensación de estar en una discoteca, un escenario de representación musical o en una sala de conciertos.
CD PLAYING BASIC OPERATIONS 2,4 -DISC DIRECT PLAY 1 Press the CD button. The power is turned on and the button lights in red. If a disc is inserted You can turn the unit on and begin play by pressing the CD button (direct play function). 2 Press the ^ OPEN/CLOSE button to open the disc compartment. 3 Load disc(s) with the iabei side up. ® To play one or two discs Place the discs on trays 1 and 2. ® To play three discs CD 1 After placing two discs, press the DISC CHANGE button to rotate the trays.
REPRODUCCION DE DISCOS COMPACTOS LECTURE DE DISQUES COMPACTS OPERACIONES BASICAS OPERATIONS DE BASE 1 Presione el botón CD. 1 Appuyer sur la touche CD. Se conecta la alimentación y enciende en rojo el botón CD. L’appareil est mis sous tension et la touche s’allume en rouge. Si está insertado un disco Si un disque est en place Usted podrá encender el aparato e iniciar la reproducción presionando el botón CD (función de reproducción directa).
CD PLAYING BASIC OPERATIONS EDIT/ REMAIN i 'IP I j .:ic. LC30< i i □QD ^ DISC SKIP o 0 o c;; .J I To check the remaining time Press the CD EDIT/REMAIN button during playback. The amount of time remaining until all tracks finish playing is displayed. To restore the play time display, press it again. When using the remote control, press the EDIT/REMAIN button. To skip discs A J Press the DISC SKIP button on the remote control to skip a disc and press the button to play the next disc.
REPRODUCCION DE DISCOS COMPACTOS LECTURE DE DISQUES COMPACTS OPERACIONES BASICAS OPERATIONS DE BASE Para verificar el tiempo restante Pour vérifier le temps restant Presione el botón CD EDIT/REMAIN durante la reproducción. Se visualiza el tiempo que queda hasta que termine la reproducción de todas las canciones. Para restablecer a la indicación del tiempo de reproducción, presione otra vez el mismo botón. Cuando utilice el control remoto, presione el botón EDIT/REMAIN.
CD PLAYING BASIC OPERATIONS r I .r-' - DISC SKIP -0-9.+10 SEARCHING FOR A PARTICULAR POINT IN ATRACK You can locate a particular point in a track during play by monitoring fast forward sound or observing CD playing time in the display. -► Q To search back Keep the DOWN button pressed and release it at the desired point. To search forward Keep the ►► UP button pressed and release it at the desired point. SKIPPING TO THE BEGINNING OF A TRACK You can locate the beginning of any track on a disc.
REPRODUCCION DE DISCOS COMPACTOS LECTURE DE DISQUES COMPACTS OPERACIONES BASICAS OPERATIONS DE BASE BUSQUEDA DE UN DETERMINADO PUNTO DE LA CANCION RECHERCHE D’UN SUR UNE PLAGE Es posible ubicar un determinado punto de la canción durante la reproducción mediante el monitoreo de sonido a alta velocidad u observando el tiempo de reproducción del disco compacto en el visualizador.
CD PLAYINC RANDOM PLAY RANDOM- All the tracks on the selected disc or on all discs In the compartment can be played randomly. Press the RANDOM button on the remote control to display RANDOM, before or during play. -> Q ■REPEAT DISC DIRECTPLAY Mi To cancel random play Press the RANDOM button so that RANDOM In the display goes out. NOTE • Even if the button is pressed, the previously played track cannot be skipped. • You cannot select tracks directly with the numeric buttons in random play mode.
REPRODUCCION DE DISCOS COMPACTOS LECTURE DE DISQUES COMPACTS REPRODUCCION ALEATORIA LECTURE ALEATOIRE Todas las canciones del disco seleccionado o de todos los discos contenidos en el compartimiento de discos pueden reproducirse aleatoriamente. Presione el botón RANDOM del control remoto para visualizar “RANDOM”, antes o durante la reproducción. -► O Toutes les plages du disque sélectionné ou de tous les disques du compartiment peuvent être lues dans un ordre aléatoire.
CD PLAYING PROGRAMMED PLAY The CD player has a built-in memory function that ailows play of up to 30 tracks over three discs in any order. 1 Press the PRGM button in stop mode. The PRGM indicator flashes in the dispiay. 2 Press one of the DISC DIRECT PLAY buttons to select a disc. The selected disc is indicated in red in the dispiay. Go to the next step when the tray stops rotating. 3 Press the numeric buttons and the -t-10 button to program a track.
REPRODUCCION DE DISCOS COMPACTOS LECTURE DE DISQUES COMPACTS REPRODUCCION PROGRAMADA LECTURE PROGRAMMEE El reproductor de discos compactos tiene una función de memoria que le permite reproducir hasta 30 canciones de tres discos en cualquier orden. Le lecteur de disques compacts possède une fonction de mémorisation qui permet la lecture d’un maximum de 30 plages de trois disques dans n’importe quel ordre. 1 Presione el botón PRGM en el modo de parada. 1 Appuyer sur la touche PRGM dans le mode arrêt.
TAPE PLAYBACK BASIC OPERATIONS 1 Press the TAPE button. The power is turned on and the button lights in red. If a tape is inserted You can turn the unit on and begin playback by pressing the TAPE button (direct play function). 2 Open the cassette holder by pressing the ^ EJECT mark and insert a tape exposed side down. Push the cassette holder to close it. 3 Set DOLBY NR to match the playback tape. For tapes recorded with DOLBY NR, press the DOLBY NR button to turn on □□ NR.
REPRODUCCION DE LA CINTA LECTURE DE CASSETTES OPERACIONES BASICAS OPERATIONS DE BASE 1 Presione el botón TAPE. 1 Appuyer sur la touche TAPE. Se conecta la alimentación y el botón se enciende en rojo. L’appareil est mis sous tension et la touche s’allume en rouge. Si está insertada una cinta S’il y a une cassette en place Usted puede encender el aparato e iniciar la reproducción presionando el botón TAPE (función de reproducción directa).
TAPE PLAYBACK BASIC OPERATIONS Information in the display - * : HPh ES @ Playback side of the tape When > is displayed, the side facing you (the front side) is played. When <1 is displayed, the other side (the side away from you) is played. (D Tape counter The tape counter indicates the tape running length. To change the playback side During play or in pause mode, press the DIFVPRESET button. Each time the button is pressed, the playback side changes.
REPRODUCCION DE LA CINTA LECTURE DE CASSETTES OPERACIONES BASICAS OPERATIONS DE BASE Información en el visualizador Q Informations sur i’affichage □ ® Cara de reproducción de la cinta Cuando O está visualizado, se reproduce la cara enfrentada a usted (la cara frontal). Cuando < está visualizado, se reproduce la otra cara (la cara alejada de usted). (D Contador de cinta El contador de cinta indica la longitud de marcha de la cinta.
RADIO RECEPTION MANUAL TUNING 1 Press the TUNER/BAND button to select the band. You can also select the tuner by pressing the TUNER/BAND button with the power off. After the power comes on, press it again as follows to select the band. C FM—*-AM □ 2 Press the DOWN or ►► UP button to select a station. Each time it is pressed, the frequency changes. When a station is received, TUNE is displayed for 4 seconds. During FM stereo reception, (((CS))l) is displayed.
RECEPCION DE LA RADIO RECEPTION SINTONIZACION MANUAL ACCORD MANUEL 1 Presione el botón TUNER/BAND para seleccionar la banda deseada. 1 Appuyer sur la touche TUNER/BAND pour sélectionner la gamme souhaitée. Es posible seleccionar la radio presionando el botón TUNER/ BAND con la alimentación desconectada. Después de la conexión de la alimentación, presiónelo nuevamente de la siguiente manera para seleccionar la banda deseada.
RADIO RECEPTION PRESEHING STATIONS The unit can store a total of 32 preset stations. When you store a station, a preset number is assigned to the station. Use the preset number to tune in to a preset station directly. (See page 46.) 1 Select a band and station. See “MANUAL TUNING” on page 42. 2 Press the II SET button to store the station. DISPLAY @ The frequency (D The preset number flashes twice. @ The preset numbers The selected preset number flashes.
RECEPCION DE LA RADIO RECEPTION RADIO MEMORIZACION DE EMISORAS MEMORISATION DE STATIONS Este aparato puede memorizar un total de 32 emisoras. Para memorizar una emisora, use el número de presintonizaclón para la asignación. Para sintonizar directamente una emisora memorizada, utilice su correspondiente número. (Véase la página 47.) L’appareil peut mémoriser un total de 32 stations. Quand on mémorise une station, un numéro de préréglage lui est affecté.
RADIO RECEPTION TUNING IN TO A PRESET STATION 1 Press the TUNER/BAND button to select a band. ICLEAR 2 Press the DIR/PRESET button to select a preset number. Each press of the DIR/PRESET button selects the next highest number. DISPLAY ® Preset number @ Frequency 1 Selecting a preset number directly 1 Press the TUNER/BAND button to select a band. TUIMER/BAND 2 J rL-! l'-'» t Press the numeric buttons and the +10 button on the remote control to select a preset number.
RECEPCION DE LA RADIO RECEPTION RÀDIO SINTONIZACION DE UNA EMISORA MEMORIZADA ACCORD SUR UNE STATION MEMORISEE 1 Presione el botón TUNER/BAND para seleccionar una banda. 1 Appuyer sur la touche TUNER/BAND pour sélectionner une gamme. 2 Presione el botón DIR/PRESET para seleccionar un número memorizado. 2 Appuyer sur la touche DIR/PRESET pour sélectionner un numéro de préréglage. Cada vez que se presione el botón DIR/PRESET se selecciona el siguiente número más alto.
OTHER SOURCES LISTENING TO OTHER SOURCES POWER See page 16 for information about connecting externai equipment. 1 Press the VIDEO/AUX button. The power is turned on (direct piay function), and the button iights in red. 2 Play the external source. Refer to the operating instructions of the connected equipment. To change a source name in the display 1 The source name in the dispiay can be changed to VIDEO, AUX, or TV. -> Q With the power on, press the POWER button whiie pressing the VIDEO/AUX button.
OTRAS FUENTES AUTRES SOURCES ESCUCHA DE OTRAS FUENTES SONORAS ECOUTE D’AUTRES SOURCES Refiérase a la página 17 para la información sobre la conexión de los equipos externos. Pourles informations concernant laconnexion d’un appareil externe, voir page 17. 1 Presione el botón VIDEO/AUX. 1 Appuyer sur la touche VIDEO/AUX. Se conecta la alimentación (función de reproducción directa) y el botón se enciende en rojo. 2 Reproduzca la fuente externa.
RECORDING RECORDING FROM THE RADIO OR CONNECTED EQUIPMENT 4 Preparation • Wind up the tape to the point where recording will start. • Use a normal (type I) tape for recording. 2 1 Insert the tape to be recorded on into the deck. Press the A EJECT mark to open the cassette holder. Insert the tape with the side to be recorded on first facing you and the exposed side down. Push the cassette holder to close it. 2 Set DOLBY NR.
GRABACION GRABACION DE LA RADIO 0 DEL EOUIPO CONECTADO ENREGISTREMENT ENREGISTREMENT A PARTIR DE LA RADIO OU DE L’APPAREIL CONNECTE Preparación Préparation • Enrolle la cinta hasta su punto inicial. • Utilice una cinta normal (tipo I) para la grabación. • Bobiner la cassette jusqu'à l’endroit où on veut démarrer l’enregistrement. • Pour enregistrer, utiliser une cassette normale (type I). 1 Inserte el cassette que desea grabar en el deck. Presione la marca ^ EJECT para abrir el portacassette.
RECORDING RECORDING FROM A CD Preparation • Wind up to the point where recording wiil start. • Use a normal (type I) tape for recording. 1 Insert the tape to be recorded on into the deck. Press the A EJECT mark to open the cassette holder. Insert the tape with the side to be recorded on first facing you and the exposed side down. 2 Set DOLBY NR. To record with DOLBY NR: Press the DOLBY NR button to turn on the □□ NR indicator.
GRABACION GRABACION DE UN DISCO COMPACTO ENREGISTREMENT ENREGISTREMENT A PARTIR D’UN DISQUE COMPACT Preparación Préparation • Enrolle la cinta hasta el punto de Inicio de la grabación. • Utilice una cinta normal (tipo I) para la grabación. • Bobiner la cassette jusqu’à l’endroit où on veut démarrer l’enregistrement. • Pour enregister, utiliser une cassette normale (type I). 1 Inserte el cassette de cinta a grabarse en el deck. Presione la marca A EJECT para abrir el portacassette.
RECORDING 2 Al EDIT RECORDING 4 The Al EDIT function lets you record CDs without worrying about tape lengths and track lengths. When you insert a CD, the unit automatically calculates track lengths. If necessary, it rearranges the order of tracks, so that no track is cut short. 5 1 1 Insert the tape to be recorded on into the deck and set the Dolby NR. See steps 1 and 2 on page 52 “RECORDING FROM A CD”. 2 Press the CD button and load discs onto the trays. 3 Press the CD EDIT/REMAIN button once.
GRABACION GRABACION CON EDICION Al La función Al EDIT le permite grabar discos compactos sin que se preocupe de la duración de ia cinta y de ias canciones. Cuando inserte un disco compacto, el aparato calcula automáticamente la duración de las canciones. Si es necesario, acomoda el orden de las canciones para que no se produzca ningún corte de canción. 1 Inserte el cassette de cinta que desea grabar en el deck y fije el Dolby NR.
RECORDING Al EDIT RECORDING To clear the edit program Before recording, press the B CLEAR button twice so that EDiT in the dispiay goes out, or press the ^ OPEN/CLOSE button. To check the edit program Before recording, press the CD EDIT/REMAIN button. The program for one side of the tape is displayed each time the button is pressed.
GRABACION ENREGISTREMENT ENREGISTREMENT AVEC MONTAGE ET GRABACION CON EDICION Al CALCUL DU TEMPS Para borrar el programa de edición Pour effacer le programme du montage Antes de ia grabación, presione dos veces el botón ■ CLEAR de manera que se apague la indicación “EDIT”, o presione el botón A OPEN/CLOSE. Avant l’enregistrement, appuyer deux fois sur la touche ■ CLEAR de manière que EDIT disparaisse de l’affichage, ou appuyer sur la touche 4 OPEN/CLOSE.
RECORDING PROGRAMMED EDIT RECORDING This function lets you program tracks to be recorded from all of the discs in the CD compartment, in any order. The remaining time on each side of the tape is displayed as you program the tracks. 3, 1 Insert the tape to be recorded on into the deck and set the Dolby NR. See steps 1 and 2 on page 52 “RECORDING FROM A CD”. 2 Press the CD button and load discs onto the trays. 3 Press the CD EDIT/REMAIN button twice. iPRGMliEDTfl CD EDIT/REMAIN 1✓ .
GRABACION ENREGISTREMENT GRABACION CON EDICION PROGRAMADA ENREGISTREMENT AVEC MONTAGE PROGRAMME Esta función le permite programar las canciones a grabarse de todos los discos contenidos en el compartimiento de discos, en cualquier orden. El tiempo remanente de cada cara de la cinta se visualiza cuando usted programa las canciones. Cette fonction permet de sélectionner, dans n’importe quel ordre, les plages à enregistrer parmi tous les disques situés dans le compartiment.
RECORDING PROGRAMMED EDIT RECORDING OOs OCJ ooc oo, oc^. 9 Program the tracks to be recorded on side B. 0(— . oc .qiQQ O After confirming 5 in the dispiay, repeat steps 5 and 6 for side B. 10 10 Press the • REC/REC MUTE button to start record ing. The tape is rewound to the beginning of the front side, piays through the ieader for 10 seconds, and then recording starts.
GRABACION ENREGISTREMENT GRABACION CON EDICION ENREGISTREMENT AVEC MONTAGE PROGRAMADA PROGRAMME 9 Programe ias canciones a grabarse en ia cara B. Después de confirmar í en ei visualizados repita los pasos 5 y 6 para la cara B. 10 Presione ei botón ( ) REC/REC MUTE para iniciar ia grabación. La cinta se reenrolla al comienzo de la cara frontal, la porción extrema avanza por 10 segundos y luego inicia la grabación.
SEHING THE TIMER The unit can be turned on at the specified time every day by the built-in timer. You can also set timer recording from the radio or the connected equipment. Preparation • Make sure the clock is set correctly. (See page 22.) • Note that the timer-on period is factory-set to 60 minutes. This period can be changed during timer setting. 1 Press the TIMER button to select timer playback mode or timer recording mode. Each time it is pressed, © or © is displayed.
TEMPORIZADOR MINUTERIE AJUSTE DEL TEMPORIZADOR REGLAGE DE LA MINUTERIE EI aparato puede encenderse a la hora especificada cada día mediante el temporizador incorporado. Usted podrá fijar el tiempo para la grabación de la radio o del equipo conectado. Avec la minuterie intégrée, l’appareil peut être mis sous tension chaque jour à l’heure spécifiée. La minuterie peut également commander l’enregistrement à partir de la radio ou de l’appareil connecté.
TIMER SETTING THE TIMER 8 Get ready for the source. In © timer playback mode To listen to CDs Load discs on the disc trays. Piay will begin with the disc in the most recently used disc tray. To listen to a tape Insert a tape into the deck. To listen to the tuner Tune in to a station. To listen to connected sources Set an external timer to turn the connected source on and off. (See the operating instructions of the connected source.
TEMPORIZADOR AJUSTE DEL TEMPORIZADOR 8 Preparativos de la fuente. REGLAGE DE LA MINUTERIE 8 Préparer la source. En el modo de reproducción por temporizador 0 Para escuchar discos compactos Coloque los discos en las bandejas de discos. La reproducción iniciará con el disco contenido en la bandeja de disco más recientemente usada. Dans le mode lecture commandée par la minuterie © Pour écouter des disques compacts Mettre des disques en place sur les plateaux.
SEHING THE SLEEP TIMER . koBoo, l-J '? The sleep timer automatically turns the unit off after the specified time passes. 1 Press the SLEEP button. SLEEP ©, (D and 60 (3) are displayed. SLEEP @ goes out in 4 seconds, and the sleep timer starts to work. The power is automatically turned off after 60 minutes. If you wish to change this time, go to step 2 before SLEEP © goes out. 2 Press the DOWN or ►► UP button to specify the time until the power is turned off.
TEMPORIZADOR MINUTERIE AJUSTE DEL CRONODESCONECTADOR REGLAGE DE LA MINUTERIE D’ARRET Con el uso del cronodesconectador, la alimentación se desconecta automáticamente después de transcurrir el tiempo especificado. La minuterie d’arrêt met automatiquement l’appareil hors tension au bout du temps spécifié. 1 Presione el botón SLEEP. 1 Appuyer sur la touche SLEEP. Se visualizan SLEEP ®, (Dy 60 ®. La indicación SLEEP ® se apaga en 4 segundos y el cronodesconectador inicia su operación.
KARAOKE MICROPHONE MIXING Up to two microphones can be connected to this unit, allowing you to sing along to music sources. Use a microphone with a mini (03.5 mm/Vs inches) plug. Before connecting a microphone VOCAL FADER/ MULTIPLEX/OFF Set the MIC MIXING control to MIN. 4 2 Press one of the function buttons to select the source to be mixed, and play it. 1 1 Connect your microphone(s) to the MIC jack(s). 3 Adjust the volume and tone of the source. 4 Adjust the microphone volume.
KARAOKE KARAOKE MEZCLA DE MICROFONO MIXAGE AVEC MICROPHONE Usted puede conectar a este aparato hasta dos micrófonos para cantar junto con una fuente musical. Utilice un micrófono con mini-clavija (03,5 mm). Pour chanter avec accompagnement par une source musicale, on peut brancher jusqu’à deux microphones à cet appareil. Utiliser un microphone à mini-fiche (3,5 mm 0). Antes de conectar un micrófono Avant de brancher un microphone Ajuste el control MIC MIXING a la posición MIN.
KARAOKE USEFUL FUNCTIONS FOR KARAOKE VOCAL FADER FUNCTION AUTO VOCAL FADER -VOCAL FADER/ MULTIPLEX/OFF ■MIC ECHO You can obtain a simulated Karaoke effect by making the singer’s voice on ordinary discs or tapes softer than the accompaniment. In addition, the vocal part can be automatically reduced only while there is audio input through a microphone, by selecting AUTO VOCAL FADER function.
KARAOKE KARAOKE FUNCIONES UTILES PARA KARAOKE FONCTIONS UTILES POUR KARAOKE FUNCION DE ATENUACION VOCAL FONCTION VOCAL FADER Puede usted obtener un efecto parecido al Karaoké atenuando la voz del cantante en los discos o cintas ordinarios. Además, la parte vocal puede reducirse automáticamente sólo cuando hay entrada de audio a través del micrófono, seleccionando la función AUTO VOCAL FADER.
CARE AND MAINTENANCE Occasional maintenance of the unit and care of the unit and care of the software are needed to optimize the performance of your unit. To clean the cabinet Use a soft cloth lightly moistened with a mild detergent solution. Do not use strong solvents such as alcohol, benzine or thinner. To clean the heads and tape paths After every 10 hours of use, clean the heads and tape paths with a head cleaning cassette or cotton swab moistened with cleaning fluid or denatured alcohol.
CUIDADO Y MANTENIMIENTO SOINS ET ENTRETIEN De vez en cuando efectúe el servicio de mantenimiento del aparato y cuidado del software para conservarlos siempre en óptimas condiciones. Un entretien et des soins réguliers de l’appareil et des disques et cassettes sont nécessaires pour assurer un fonctionnement opti mal. Para limpiar ei gabinete Nettoyage du coffret Utilice un paño suave ligeramente remojado con una solución de detergente suave.
SPECIFICATIONS TUNEFl/AMPLIFIER Frequency range Usable sensitivity (IHF) Alternate channel selectivity Signal-to-noise ratio Harmonic distortion Frequency response Stereo separation Antenna Frequency range Usable sensitivity Selectivity Signal-to-noise ratio Antenna Program timer Sleep timer Power output Harmonic distortion Input terminal Output terminal CASSETTE DECK/COMPACT Track format Frequency response Signal-to-noi
ESPECIFICACIONES SINTONIZADOR/AMPLIFICADOR Gama de frecuencia 87,5 MHz a 108 MHz Sensibilidad utilizable (IHF) 1,3 ¡iV (75 ohmios) 13,2 dBf Selectividad de canal alternativo 50 dB (±400 kHz) Relación señal a ruido ESTEREO: 70 dB Distorsión armónica Respuesta de frecuencia Separación estereofónica Antena Gama de frecuencia Sensibilidad utilizable Selectividad Relación señal a ruido Antena Temporizador de programa Cronodesconectador
SPECIFICATIONS TUNER/AMPLIFICATEUR Plage de fréquences Sensibilité utile (IHF) Sélectivité des canaux Rapport signal/bruit Distorsion harmonique Réponse en fréquence Séparation stéréo Antenne Plage de fréquences Sensibilité utile Sélectivité Rapport signal/bruit Antenne Minuterie de programmation Minuterie d’arrêt Puissance de sortie Distorsion harmonique Bornes d’entrée Borne de sortie 87.
TROUBLESHOOTING GUIDE If the unit fails to perform as expected, please read through the instructions again and check the table below: Symptom There is no sound. IlSii 15 0) c n o Solutions • Correct the connection. • An incorrect function button was pressed. • Press the function button to select the correct input. • There is a bad connection between systems. • Correct the connection.
GUIA PARA LA SOLUCION OE PROBLEMAS Si el aparato no funciona correctamente aun cuando siga las instrucciones de este manual, revise cuidadosamente de acuerdo con lo descrito en la tabla siguiente: Causa Síntoma Soluciones • El cordén CA no está conectado correctamente. No suena. • Conéctelo correctamente. • Se ha presionado un incorrecto botén de función. • Presione el correcto botón de función para seleccionar la función deseada. • Corrija la conexión. • Mala conexión entre los sistemas.
EN CAS DE PROBLEIVIE Si la chaîne ne fonctionne pas correctement, même après application scrupuleuse des instructions de ce manuel, prière de la vérifier soigneusement conformément au tableau suivant: Symptôme Il n’y a pas de son. Solutions . Causes • Le cordon secteur n’est pas branché correctement. • Corriger le branchement. • Une touche de fonction incorrecte est enclenchée. • Appuyer sur la touche de fonction adéquate pour sélectionner l’entrée correcte.
PARTS AND CONTROLS PIEZAS Y CONTROLES NOMENCLATURE The names of the buttons and controls are indicated in the following illustrations. Instruc tions about each button are in the pages indi cated in the black circles. The Illustrations are classified according to their functions. The instructions in this manual refer mainly to the buttons on the main unit. Buttons on the remote control with the same names as those on the main unit can be used as well.
TAPE function Función TAPE Fonction TAPE : ........
TUNER function NOMENCLATURE PIEZAS Y CONTROLES PARTS AND CONTROLS Función TUNER Fonction TUNER 11 ¡ O O O II ^ w ^^ ^^ 12 13 l[o 1 3 («)q;| 14 ^________ J 15 1 2 3 4 5 6 7 TUNER/BAND button ® POWER button ® II SET button ® ■ CLEAR button © DOWN button © ►>!/►► UP button © ◄ ► DIR/PRESET button © 1 2 3 4 5 6 7 Botón TUNER/BAND © Botón POWER © Botón II SET © Botón ■ CLEAR ® Botón DOWN ® Botón ►>!/►► UP © Botón DIR/PRESET ® 8 9 TUNER/BAND button © ◄ ► DIRECTION/TUNING/PRESET button © DOWN but
others Autres Otros 11 29 12 30 13 31 14 32 15 33 16 17 18 34 35 19 20 21 1 2 3 4 5 6 I 8 9 10 II 12 13 14 15 16 17 18 19 20 21 Display window POWER button © SENSOR for remote control © VIDEO/AUX button © PHONES jack © II SET button @ ■ CLEAR button @ DOWN button © ►►!/►► UP button @ DIGITAL ECHO control ® DEMO button @ VOLUME control @ DSP buttons (DISCO, LIVE, HALL) © BBE button (NSX-3900 only) © GEO buttons (ROCK, POP, CLASSIC)© T-BASS button © VOCAL FADER/MULTIPLEX/OFF button © AUTO VOCAL F
NSX-4000 C MODEL NSX-4000 MODELE C CAUTION: TO PREVENT ELECTRIC SHOCK DO NOT USE THIS ATTENTION: POUR PREVENIR LES CHOCS ELECTRIQUES NE PAS (POLARIZED) PLUG WITH AN EXTENSION CORD, RECEPTACLE OR OTHER OUTLET UNLESS THE BLADES CAN BE FULLY IN SERTED TO PREVENT BLADE EXPOSURE. UTILISER CETTE FICHE POLARISEE AVEC UN PROLONGATEUR, UNE PRISE DE COURANT OU UNE AUTRE SORTIE DE COURANT, SAUF SI LES LAMES PEUVENT ETRE INSEREES A FOND SANS EN LAISSER AUCUNE PARTIE A DECOUVERT.