PDP4290
Warning! Important SafetyInstructions CAUTION CAUTION: TO REDUCE THE RISK OF ELECTRIC SHOCK, DO NOT REMOVE COVER (OR BACK), SERVICEABLE PARTSINSIDE, REFER SERVICING TO QUALIFIED SERVICE PERSONNEL, This symbol indicates high voltage with any inside part of this product.
ThankYoufor ChoosingAKAI Thank you for designed choosing it with best products able AKAI! easy4o-use in its (:lass. service Your new AKAI on-screen We and enjoyment product menus are proud for years represents and closed to offer the captioning you a product latest in television capabilities, that will technology. making provide it one convenient, We of the depend- to come.
•Protect thepower cord. Power supply cords should berouted sothat they won't bewalked onorpinched byobjects placed onoragainst them. Pay particular attention tocords atplugs, convenience receptacles, and thepoint where they exit from theunit. • Unplug theMonitor from thewall outlet and disconnect theantenna orcable system during alightning storm orwhen left unattended and unused forlong periods oftime. This willprevent damage totheunit due tolightning and power-line surges. •Avoid overhead power lines.
FCCInformation User Instructions The Federal Frequency lowing The party responsible APH USA. Inc Communications Interference Commission Statement Radio includes the fol- warning: NOTE: This equipment has been tested and found to comply with the limits for a Class B digital device, pursuant to part 15 or the FCC Rules.
User Instructions @ ScreenImageretention Do not display a still image (such as on a video game plasma monitor panel for more than several minutes as retention is also known as "screen burn". To avoid such reduce the degree of brightness and contrast or when hooking up a PC to this Monitor) on the it can cause screen image retention. This image image retention, refer to page 28 of this manual of this screen when displaying a still image.
Tableof Contents Setup C0eeectingPCand Operation Your New Plasma Display 10 Connecting 12 Adjusting .............................. 14 Changing the Position Turrfing time PDP On and Off .............................. 18 Changing the Size of the Image Enlarging the Image Remote Control Wall hlstallation Panel ........................ Buttons .................................... Instructions Connection (ConnectingSpeaRers/ Receiver) ......................................
P L A S _,,_ A D I S P L A V P A _ E L Setup Your New Plasma Remote Control Wall Installation Turning Display Buttons Panel .................................................... ................................................................ Instructions 10 12 .......................................................... 14 the PDP On and Off ..........................................................
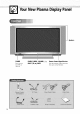
YourNew PlasmaDisplayPanel POWER SOURCE,MENU,VOLUME(-,+), PF@SS to turn SELECT (V,A), the PDPon and off. 10 MUTE Remote Control Signal Receiver Aim the remote control towards this spot on the Monitor.
0 0 0 00 O 0 ExternalSpeakerOutjacks Connect external to the video output 0 l_ S-VideoInputjack speakers, Connect or DVD O PC(RGB)Inputjack(15pin) Connect O jack on your PC. O Component Video Inputjacks (Y/Pb/Pr) Component 1 inputs are for 4801/480p. Component 1080i. 2 inputs are for signal from an S-VHS VCR Q AudioInput (Video/Componentl/2/PC(RGB)) jacks Connect a audio such as VCRs, 480p/720p/ signal from PC or DVD external sources players.
RemoteControlButtons 0 Power button Turns the PDP on and off. ID Numberbuttons _) Display button Press to display information on the PDP screen, 0 Menu button Displays the main on-screen menu. _1CH (Channel)andVOL(Volume)buttons Channel and Volume bultons are used menu items in the menu mode. for selecting _]1 Mute button Press to mute the PDP sound. 0 P,Mode button Adjust the PDP picture by selecting one of the preset factory settings (or select your personal, customized picture settings.
_)VCR control buttons Controls VCR tape functions: Stop, Rewind, Play/Pause, Fast Forward. SETbutton Used during work compatibly setup DVD, etc.) of this remote with other control, devices so that it will (:able box, (VCR, @ @ _) Clock set button Press to set clock. _) PIP control Source S.Sel Locate : : buttons Press to select one of the available sources for the PiP window. Press to select the Audio : Press to move signal (PIP or Main). the PIP window on the screen.
Wall InstallationInstructions @ Installation Notes Do not install To protect places: the PDP in any location the performance other of the PDP and • Do not install next to smoke and • Do not install in an area subjected • Do not install in an area subjected • Do not install near Use only recommended or around parts any and fire to high heating components. 34.61 inches 14 holder prevent walls. problems, to vibration.
0 Installing theDisplay ontheWall Attachment Pand See stability the drawing the where wall attachment 14 tois check the of the ofwall the PDP is panel to be shown installed, in page If the wall not enough strong Fix the wall figure: to support attachment Fixing bolts the PDP, strengthen panel on the must protrude Using wall attachment 0 to 20thedegrees. The angle panel, can each, using the angle control wall from the wall using the wall before bolts as shown appox. 0.
Remove four large screws from the rear side of the display, [ iiiiiiiiiiiii!iii%iii?ii!%i_i_ Insert the bolts and insulation sJnto the four screwholes as shown in the follow- ing figure: 0 _olt 0 Insulation holder 0 -0 II Put the insulation pointwallprotruding the rear or the displaya little in the groove on the rubber top of the attachment from panel. Lift top up the display bit so that the insulation rubber display is put in the groove (Do not lift the be taken off.
@ Separating theDisplay fromtheWall Attachment Pand Remove bottom wall the fixing of the attachment Lift the display bolts display from a small both sides amount, (left and to separate right) the of the wall insulation attachment holder point panel. from Lift and the bottom pull the of the panel. and separate the insulation holder point from the groove on top of the wall attachment panel.
OnandOff Turning the Turning the[v]onitor(PDP) OnandOff Press the Power The PDP will features. You can button on the remote be turned on and also use the Power control. you will button be ready on the front to use it's or the PDE Notes: • If your Monitor pressed: mode isn't turned on when Press the MODE has been button chosen the power to check _ button is ir the Monitor ). Viewing theMenus andDisplays Your PDP has a simple, venient and features.
DisplayingStatusInformation Press the display Display the Screen button size, on the remote Resolution, control. Current The PDP will time, and screen mode. Displaying Clock Press the Clock Display button on the remote control. The Current time will be displayed on the screen.
(Connecting Speakers / Receiver) Connecting Speakers .......................................................... 22 Connecting a VCR/Cabie Connecting a DVD Box ...................................................... Connecting a Set-Top Box .............................................................. ......................................................................
Connecting Speakers Yr External speakers Connect the speaker matching the MUST "+" and audio have a power cable "-" ends handling to the external of the (:able Fix the bracket onto the guide pole of speaker and fasten the screws. After removing the three screws thespeaker and the PDP together with located #!iiiili "®_ Guide Guide 22 m ® speaker of 7 watts output the diagram on the rear on the PDP, clamp and fasten the screws.
Connecting a VCR/CableBox PDP Video/decodificador de cable Connect Video/S-Video cable between the Video/S-Video box and the Video Inputjack on the PDP. • For better video, Connect an Audio Audio Inputjacks use an S-Video cable (Video) Outputjack on the VCR/Cable cable. between the Audio on the PDP. Outputjacks on the VCR/Cable box and the Videotape Playback: 1. Turn on PDP and press the Video or S-Video(if S-Videojack is connected.) button on your remote control. 2.
Connecting a DVD PDP DVD Connect a Video (:able between the DVD Output Video Input (Y,P_,P,) Input jacks on the PDP. Connect an Audio jacks (Component) (:able between on the PDP . the Audio jacks Output on the DVD jacks and on the DVD the Component1 and the Play to DVD: 1. Turn on PDP and press the Component button to select the Component1 2. Turn on your DVD, insert a DVD disc and press the Play button. • For an explanation 24 of Component video, see your DVD owner's instructions.
Connecting aSet.Top Box(480p/720p/108 PDP Receptor de DTV Connect a Video cable between the Set-Top Box (Y, Pb,Pr) Output the Component 2 Video Input (Y, Pb,Pr) Input jacks on the PDP. Connect an Audio (:able Input jacks (Component) between the Audio on the PDP . Output jacks jacks on the Set-Top on the Set-T op Box and Box and the Audio ToWatchDTV: 1. Turn on PDP and 2. Turn on your press the Component button to select the Component2 mode. DTV receiver.
PictureControl Customizing the Picture Using Automatic Viewing Changing Freezing ................................................................ Picture Settings the Pictureqn-Picture the Screen Size .................................................... 28 29 .......................................................... 30 ............................................................ 33 the Picture ......................................................................
Customizingthe Picture You can use the on-screen menus to change the Brightness, Contrast, Sharpness, Color, and Tint settings of your PDP, Press the enter. Menu button, then press the joystick Movewillthealso joystick left items or right"Contrast", to select You see the "Sharpness", Move wish "Color" the joystick Press the Menu 28 "Custom". "Brightness", "Tint". up or down to select left or right to change the item you to change. Moveitem.
UsingAutomaticPictureSettings Your PDP has automatic Press the enter. Move Menu button, thejoystick "Standard", "Custom" to select or "Dynamic" "High," settings press thejoystick left or right "Mild", • You can select then picture "Middle," that allow you to adjust the video display easily. to "Custom", picture setting. "Low," or in PC mode. Press the Menu button to exit.
Viewingthe Picture.in.Picture Selecting thePLP Screen Press the Menu select "PIP", then button. press Movejoystick the joystick the to enter.up or down to Move the joystick left or right to select "On'. The PIP image will appear in the corner of the screen. i_i / Press the • 30 Menu The PIP function button operates to exit. in PC mode or Component2 mode only.
Selecting anExternal Signal You (;an use PIP to view a signal from an external source, such as a VCR. Press the Menu "PIP", button. then Move joystick down to select pressthethe joystick up toor ) enter. Move move the joystick up orleft down to select "Source", then the joystick or right to enter. / ..................... J Move signal, the joystick then move up or down to select the joystick left or right. an external i ;/ Press the Menu button to exit.
Changing theLocation ofthePiPimage Press the Menu button. Move the joystick up or down to select "PIP", then press thejoystick to enter. Move the joystick up or down to select "[ocate", then move the joystick left or right to enter. Move want, the joystick Press the 32 Menu to move button the to exit.
Changingthe ScreenSize (When entering theVideo mode) When you press the sequence. • If you watch onto Aspect The screen a still the screen, button displays image View on the remote in this order: or the 4:3 the monitor Wide, mode in Wide for control, the PDP's screen Panorama, a long Zoom1, time(over or Panorama mode Wide Zoom2 Sets the picture to 16:9 wide mode. Magnifies Zoom1. should 2 hours), an image as much as possible. the size appear Stretch, of the in 4:3.
Freezingthe Picture Still Press the Still button on the remote control to freeze a moving picture. Press again to cancel.
SoundControl Customizing the Sound Using Automatic ................................................................ Sound SetUngs .................................................... Using the Surround ......................................................................
Customizingthe Sound Press the down Menu button, to select Move "BOUND", the joystick then up or press the joystick to enter, Move thejoystick left or right also items You will "Balance" Move wish Move see the and the joystick "Custom", "Bass", "Surround", up or down to select the item you left or right to change the value to change. thejoystick the item. Press the 36 to select "Treble", Menu button to exit.
UsingAutomaticSoundSettings Press the Menu "SOUND", button. Movethenthepress joystickthe joystick up or down to select to enter. Move the joystick "Standard", left or right "Music", "Movie" to select "Custom", or "Speech" sound setting. Press the Menu • The Automatic button Sound to exit. Setting function doesn't operate in PC mode.
UsingtheSurround I)ress _he Menu down to select button, "SOUND", Move the_oystick then up or press the joystick to enter, Move then the joystick move "Concert", Press the 38 up or down the joystick "Hall" Menu or "Stadium". button to select left or right to exit.
ii:_¸¸ i £ ;!!i: i_iii £ i} ii i_ i_:_ i A ? I;¸_' A iiiii i} i Time Setting Setting the Clock ..................................... Setting the Sleep Timer Setting the Timers ................................. ....................................
Settingthe Clock This PDP has a built-in remote controh Press the down clock that will Menu button. Move to select "TIME", then appear on screen the joystick when you press the Clock Display button on the up or press the joystick to enter. Move the joystick joystick move the hour. left oror clown right to up to select select hour,correct then the _ o_lime Sleet, _mer _ Move thejoystick thejoystick move minute.
Settingthe Sleep Timer You can set your PDP to automatically Press the Menu "TIME", button. down to select turn off after a preset interval. i Move press the joystick up orto then the joystick I enter. :::?i:0_,,,0:i,, 0,! Move the joystick Timer". iii_ ¸ I up or down to select "Sleep Movefor the left oron.rightTheto interval select the time val the joystick PDP to stay ranges 10 to 360 minutes. interfrom @ _,_ I _ On time v0 ullle .......
Settingthe Timers This PDP can be set to turn on or off automatically at specific timers, previously. you must set the PDP's Settin 9 the On/Off (:lock, as described times that you choose. Before using the Timer Press the Menu button. Move the joystick up or down to select "TIME", then press the joystick to enter. Move move the joystick up orleft down to select then the joystick or right. Move move hour.
Move move thejoystick the joystick left oror down right up If you to want to set Off Time, down select "OfftheTime". Set the "Off • Time"just If you want turns time on, volume". volume level Press the Menu the joystick Move the you want button level down joystick when then move the joystick as you set "On to set the volume move to to select select "Off", "On". the Time". when the to select right PDP "On to set the PDP turns on. to exit.
Connecting PCandOperation [_ Connecting Adjusting to a PC ...................................................................... 46 the PC Scleen ................................................................ 50 Changing the Position Changing the Size o[ the image Enlarging the image Moving o[ the hTlage ................................................ (Zoom) the Zoom Picture Picture ©uality Information Adjustment .................................................... .....................
Connecting to a PC This PDP is not compatible with Audio Cable Macintosh PC. PDP Power PC (15pin) Plug Cable PC Connect a PC (15pin) cable (15p D-SUB) on the PDP. • For an explanation Connect a Audio on the PDP. between of Component cable between the video, the Audio Video Outputjack see your Output]ack on the PC and the PC owner's instructions. on the PC and the Audio To watch the PC screen: 1. Turn on PDP and press the RGB button on the remote to select the PC mode. 2.
PinConfiguration • 15Pin Signal Cable _#, No _C / (based on protruded IN _C OUT Red {_} 2 Blue 4 5 6 Ble (obq {G i Gro Ground ng Red ndit_g Green IBI Grounding Sync G¢ound_ng !3 HO_lZOatal 14 Vertical /5 Clock ng IR) Grounding IG} Glean4 GIoun_ ng ng Resewed Sync Grounding Data IB} f_g IDDCI Blue/B} Rese red ]2 (G} Blue Ground Re{_ (R} Gr0und Green 1/ (8) Grour,ding 8 /0 Greel_ Grounding Z 9 £ed (R) Green/G) 3 pin) Grounding Ground (D_C I ng Data
How toSetupYour PCSoftware ONind0ws 0nly) The Windows your PC will display-settings probably ticular video apply in almost card, for a typical be different, But even all cases, if your computer depending actual (If not, contact screens your are upon shown your look different, computer On the the control and Select "Settings" The two tings for these • Size • two (sometimes 640 x 480 Color: screen million for settings or "60 the Continue(]... 48 Hz.
Notes; Both screen below position shows all an(:] size of the will display vary, modes depending that on the type Vertical Video of PC monitor and its resolution. The table are supported: Horizontal Vertical Horizontal polarity polarity Dot X Line signal Frequency(Hz) 640 X 350 640 X 400 720 X 400 640 X 480 IBM PC / AT Compatible 800 X 600 1024 • The interlace • The PDP operates mode X 768 is not Frequency(KHz) 70,086 31469 N 85.080 37861 N P P 85.
Adjustingthe PCScreen Adjusting theR,G,B Preset: • Press the ROB button to select the PC mode. Press the enter. Menu button, then press thejoystick to Move the joystick or down Control", then moveup thejoystick to left select "Color to enter. or right Move thejoystick to select want to change. up or down the item you Move thejoystick or left gauge to change the value the item, using the right on-screen as your guide. of Press the Menu 5O button to exit.
Changing thePosition of theImage After connecting the PDPto your PC,adjustthe positionof the screenif it is notwell-aligned. Preset: • Press the RGB button to select the PC mode, Press the Menu "SETUP", button. Move down to select then to enter. the joystick up or press the joystick Move adjust the joystick left or ofright to select "Position", then the position screen by using the joystick button. Press the Menu button to exit.
Changingthe Sizeof the Image Preset: • i Pressthe RGB button to select the PC mode. Press the Menu "SETUP", button. Move joystick up or down to select then the press the joystick enter. to Move move the joystick up orleft down to select "Scaling", then the joystick or right to select "Wide" or "4:3". [] 3 52 Press the Menu button to exit.
Enlargingthe Image Zoom) Preset: • Pressthe RGB button to select the PC mode, Press Menu down the to select enter. Move button. joystick up or "SETUP", Move then the press thejoystick the joystick ning", then up or down move thejoystick Move the joystick • The picture (:an to select to "Zoom/Pan- left or right to enter. left expanded or right to 0 enlarge be to 10 theZoom image. in mode. Press the Menu button to exit.
Movingthe ZoomPicture Preset: • Pressthe RGB button to select the PC mode. Press the Menu "SETUP", button. Move joystick up or to down to select then the press the joystick enter. _ Lmlguage < Scaag _ Engtmtl Wde _. _" _ z00mP_nmna /]_ _ Image Lock I J Move ning", 3 Move then Adjust button. the thenjoystick move up joystick or down the the joystick up or down move the joystick the position to select left or right "Zoom/Panto enter.
PictureQualityAdjustment Picture Automatic Adjustment On/Off Preset: • Press the RGB button to select the PC mode, Press the Menu "SETUP", button. Move down to select then enter. the joystick up or to press the joystick Move Lock", to or select left right "Image to enter. the thenjoystick move up joystick or down the Move thethen joystick down Adjust", move uptheor joystick The message screen and "Auto the toleftselect "Auto or right.
Frequency Adjustment Preset: • Press the RGB button to select the PC mode. Press the Menu button. Move down to select "SETUP", then enter. Move lock", thejoystick then move up or down to select "Image thejoystick left or right to enter. Remove picture noise by moving thejoystick (If frequency wiJJ appear the joystick up or press the joystick to (vertical stripes left or right. is not set properly, vertical on the screen stripes on the screen.
Fine Tuning (Phase) Preset: • Pressthe RGB button to select the PC mode, Press the Menu "SETUP", button. Move down to select then enter. the joystick up or to press the joystick Move Lock", the thenjoystick move up joystick or down the to or select left right "Image to enter. Move the joystick up or down Remove picture by moving (If phase noise the joystick (vertical to select stripes) "Phase". on the screen left or right. is not set properly, the picture may be blurry.
Information Preset: • Pressthe RGB button to select the PC mode. Press the Menu "SETUP", button. Move joystick up or to down to select then the press the joystick enter. Move neous", the joystick then up or down move the joystick to select "Miscella- left or right to enter. Move tion", the joystick then move up joystick or down left to or select the right "Informato enter. _ Press the Menu 58 button to exit.
PowerSaver PCmodeonly) This monitor has a built-in system saves energy certain amount of time. card installed ture. See the table power management by switching in your your This power computer. below system monitor called Power into a low-power management system You use a software utility operates Saver. This power management mode when it has not with a VESA DPMS installed on your computer been used compliant for a video to set up this fea- for details.
P L A $ M A # _ S ? L A Y ? A _ L E FunctionDescriptionE_ Selecting a Menu [dnguage Setting the Multi Control Using the Key Lock ............................. ................................ ................................... SettiNg up Youl Remote Control ...........................
Selectinga MenuLanguage Press the Menu "SETUP", button. Move joystick up or down to select then the press the joystick 10 enter, i _: Move thejoystick {eft or right to select the appropriate language: English, Spanish, or French. Press the 62 Menu button to exit.
Settingthe ColorTone Press the Menu down to select button. Move the joystick up or "SETUP", then press the joystick to enter. Move the joystick Move the joystick up or down left or right Tone : Normal, Warm1, Press the Menu button to select to select Warm2, "Color Tone". the Color Coo11, Cool2. to exit. Note • In the PC mode, you can't adjust the Color Tone.
Usingthe Key Lock When Key Lock is set to ON, the buttons (SOURCE, MENU, VOLUME, SELECT, MUTE, POWER) on the front or the PDP will not operate. However, these buttons will operate when setting Key Lock OFF. Press the Menu "SETUP", button. Move joystick up or down to select then the press the joystick to enter. Move move the joystick up orleft down to select "Key then the joystick or right to select "On" or "Off". Press the 64 Menu button to exit.
SettingupYourRemoteControl This PDP's remote properly, Pressing and your control remote can operate control the corresponding control #_oe;71e whichever remote button piece corlttol almost can operate on the remote of equipment lily any VCR, in four lot cable different control you box, modes allows or DVD. :Monitor, After it has been VCR, Cable, you to switch between set up or DVD. these modes, choose.
RemoteControlCodes VCR Codes A_/n75r;*l Aiv, a Aka 017 022 023 Audio Dynamics gel1 @ I iowe// 006 079 KI/4 IG 027 0] 5 030 0] 4 0] 6 002 Broksonic 010 Cai_dle 007 Ca_mort Ciliz_n 046 052 (}09¸ 0! 3,045 008 046 (153 052 007 009 0!3, 04_ (_o/orl3me Craig Cur_is-Mathes 007 000007,/!08,0/4, 015 046, 053 Daewoo DBX 013 064 031 015 Ma_,na_c,x MaranEx 008 029 053, 056 002, 008, 014, 0! 6, Maria 1)29 03(!¸ 0÷6, i)6¸[ 009 (}08 067 Mid}and Memorex M(;A 008 000 M//rJI_>mery D_na
ii!_ 15 iii_Jii ii!_ iii:_ i!i ii:_¸ ii!_ ii_ ill:_¸¸ ii!_ iii_i_ i:ii: ii Appendix Troubleshooting Care ............................................................................ and Maintenance Specifications ................................................................ ..............................................................................
Troubleshooting Before time you call and a service technician, please scan this list of problems Problem Poor The power blinking Check indicator Js ]he amber Remoie operate the The monitor There mcalror Check control does no[ turn is no screen The image [ne on IS using sure Check picture blinks 68 is too its power managemem Press the "Mode Make image.
Careand Maintenance With proper the maximum care, your performance PDP will give you many from your PDP. years of service. Please follow these guidelines to get IdentifyingProblems • Do not put the PDP near extremely • Do not put the PDP near appliances • Keep • Do not place the ventilation Liquids • Do not place openings hot, cold, that create humid or dusty magnetic places. fields. clear. the PDP on a rough and slanted surface, such as cloth or paper.
Specifications Exterior design performance and This PDP applies (Note: Class product specifications are subject to change without prior notice to Class B system B digital is for home This PDP has been registered as residential areas. Dimensions Display Remote Control Weight Display Remote Control device. use.) for residential use in terms of EMI.
Memo 71
BN68-00394A-00(ENG)