
Instructions


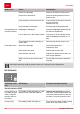
Table Of Contents
- Deckblatt A5 Geräte
- Original-Betriebsanleitung
- Zu diesem Handbuch
- Produktbeschreibung
- Lieferumfang
- Sicherheitshinweise
- Montage
- Inbetriebnahme
- Wartung und Pflege
- Lagerung
- Entsorgung
- Hilfe bei Störung
- LED-Anzeigen
- Garantie
- EG-Konformitätserklärung
- Translation of the original operating instructions
- About this handbook
- Product description
- Scope of delivery
- Safety instructions
- Assembly
- Startup
- Maintenance and care
- Storage
- Disposal
- Help in case of a malfunction
- LED displays
- Warranty
- EU declaration of conformity
- Vertaling van de originele gebruikershandleiding
- Over dit handboek
- Productbeschrijving
- Inhoud van de levering
- Veiligheidsvoorschriften
- Montage
- Inbedrijfstelling
- Onderhoud
- Opslag
- Afvoeren
- Storingen oplossen
- LED-indicators
- GARANTIE
- EG-conformiteitsverklaring
- Traduction du mode d‘emploi original
- Informations sur ce manuel
- Description du produit
- Contenu de la livraison
- Consignes de sécurité
- Montage
- Mise en service
- Maintenance et entretien
- Stockage
- Elimination
- Aide en cas de panne
- Affichages LED
- Garantie
- Déclaration de conformité CE
- Traducción del manual de instrucciones original
- Respecto a este manual
- Descripción del producto
- Volumen de suministro
- Advertencias de seguridad
- Montaje
- Puesta en servicio
- Mantenimiento y cuidados
- Almacenamiento
- Eliminación como desecho
- Ayuda en caso de avería
- Indicadores LED
- GARANTIA
- Declaración de conformidad CE
- Traduzione delle istruzioni per l‘uso originali
- Riguardo questo manuale
- Descrizione del prodotto
- Dotazione
- Indicazioni di sicurezza
- Montaggio
- Messa in funzione
- Manutenzione e cura
- Stoccaggio
- Smaltimento
- Supporto in caso di anomalie
- Spie LED
- Garanzia
- Dichiarazione di conformità CE
- Prevod izvirnika navodila za uporabo
- Spremna beseda k priročniku
- Opis izdelka
- Obseg dobave
- Varnostna opozorila
- Montaža
- Zagon
- Nega in vzdrževanje
- Skladiščenje
- Odstranjevanje
- Ukrepi za odpravljanje težav
- LED-indikatorji
- Garancija
- Izjava ES o skladnosti
- Prijevod originalnih uputa za uporabu
- Uz ovaj priručnik
- Opis proizvoda
- Opseg isporuke
- Sigurnosne napomene
- Montaža
- Puštanje u rad
- Održavanje i njega
- Skladištenje
- Zbrinjavanje
- Pomoć u slučaju smetnji
- LED indikatori
- Jamstvo
- Izjava EZ o sukladnosti
- Tłumaczenie oryginalnej instrukcji obsług
- O tym podręczniku
- Opis produktu
- Zakres dostawy
- Wskazówki bezpieczeństwa
- Montaż
- Uruchomienie
- Przeglądy i konserwacja
- Przechowywanie
- Utylizacja
- Pomoc w przypadku usterki
- Wskaźniki diodowe
- Gwarancja
- Deklaracja zgodności WE
- Překlad originálního návodu k použití
- K této příručce
- Popis výrobku
- Rozsah dodávky
- Bezpečnostní upozornění
- Montáž
- Uvedení do provozu
- Péče a údržba
- Skladování
- Likvidace
- Pomoc při poruše
- LED ukazatele
- Záruka
- Prohlášení o shodě ES
- Preklad originálneho návodu na použitie
- O tomto návode
- Popis výrobku
- Rozsah dodávky
- Bezpečnostné pokyny
- Montáž
- Uvedenie do prevádzky
- Údržba a ošetrovanie
- Skladovanie
- Likvidácia
- Pomoc pri poruche
- LED ukazovatele
- Záruka
- Vyhlásenie o zhode ES
- Oversættelse af original brugsanvisning
- Om denne vejledning
- Produktbeskrivelse
- Leveringsomfang
- Sikkerhedsanvisninger
- Montering
- Ibrugtagning
- Vedligeholdelse og service
- Opbevaring
- Bortskaffelse
- Hjælp ved fejl
- LED-visninger
- Garanti
- EU-overensstemmelseserklæring
- Översättning av orginalbruksanvisning
- Om denna handbok
- Produktbeskrivning
- Leveransomfattning
- Säkerhetsinstruktioner
- Montering
- Idrifttagning
- Underhåll och skötsel
- Förvaring
- Bortskaffande
- Hjälp vid störningar
- LED-visningar
- Garanti
- EU-försäkran om överensstämmelse
- Oversettelse av original bruksanvisning
- Om denne håndboken
- Produktbeskrivelse
- Leveranse
- Sikkerhetsanvisninger
- Montering
- Igangkjøring
- Vedlikehold og pleie
- Lagring
- Avhending
- Hjelp ved feil
- LED-indikeringer
- Garanti
- EU-samsvarserklæring
- Alkuperäisen käyttöohjeen käännös
- Käsikirjaa koskevia tietoja
- Tuotekuvaus
- Toimitussisältö
- Turvaohjeet
- Asennus
- Käyttöönotto
- Huolto ja hoito
- Varastointi
- Hävittäminen
- Häiriöiden korjaaminen
- LED-näytöt
- Takuu
- EY-vaatimustenmukaisuusvakuutus
- Tõlge originaalkasutusjuhendist
- Käsiraamat
- Tootekirjeldus
- Tarnitav varustus
- Ohutusjuhised
- Kokkupanek
- Commissioning
- Hooldus ja korrashoid
- Ladustamine
- Käitlemine
- Abi tõrgete korral
- LED-märgutuled
- Garantii
- EÜ vastavusavaldus
- Originalios instrukcijos vertimas
- Prie šio vadovo
- Gaminio aprašymas
- Komplektas
- Saugos patarimai
- Montavimas
- Eksploatacijos pradžia
- Aptarnavimas ir priežiūra
- Sandėliavimas
- Šalinimas
- Pagalba atsiradus sutrikimui
- Šviesos diodai
- Garantija
- EB atitikties deklaracija
- Oriģinālās ekspluatācijas instrukcijas tulkojums
- Par šo rokasgrāmatu
- Izstrādājuma apraksts
- Piegādes komplektācija
- Drošības norādījumi
- Montāža
- Nodošana ekspluatācijā
- Apkope un kopšana
- Uzglabāšana
- Utilizācija
- Traucējumu novēršana
- LED indikatori
- Garantija
- EK atbilstības deklarācija
- Az eredeti használati utasítás fordítása
- A kézikönyvről
- Termékleírás
- Szállítás terjedelme
- Biztonsági utasítások
- Szerelés
- Üzembe helyezés
- Karbantartás és ápolás
- Tárolás
- Hulladékkezelés
- Hibaelhárítás
- LED-jelzőfények
- Garancia
- EK-megfelelőségi nyilatkozat
- Orjinal kullanım kılavuzunun çevirisi
- Bu el kitabına ilişkin
- Ürün tanımı
- Teslimat kapsamı
- Emniyet uyarıları
- Montaj
- Devreye
- Onarım ve bakım
- Depolama
- Atıkların yokedilmesi
- Arıza durumunda yardım
- LED göstergeleri
- GARANTI
- AB uygunluk beyanı
- Перевод оригинального руководства по эксплуатации
- Предисловие к руководству
- Описание продукта
- Комплект поставки
- Указания по безопасности
- Монтаж
- Ввод в эксплуатацию
- Техобслуживание и уход
- Хранение
- Утилизация
- Устранение неисправностей
- Светодиоды
- Гарантия
- Заявление о соответствии ЕС
- Переклад оригінального посібника з експлуатації
- Передмова до посібника
- Опис виробу
- Комплект поставки
- Вказівки щодо безпеки
- Монтаж
- Введення в експлуатацію
- Технічне обслуговування і догляд
- Зберігання
- Утилізація
- Допомога в разі неполадок
- Світлодіодні індикації
- Гарантія
- Декларація про відповідність стандартам ЄС
- ETK HW 4000 FCS / HW 4500 FCS
- ETK HW 4000 FCS / HW 4500 FCS

Maintenance and care
467776_d 17
5. Before fitting the filter, check the filter seal
(Fig. C -20) and the housing seal (Fig. C -24)
for damage, and replace if necessary.
6. Fit the filter, screw the filter clear sight cover in
place and tighten hand-tight with the filter key.
Cleaning the check valve
1. Removing and fitting the filter (see Section
"Cleaning the Filter").
2. Unscrew check valve (Fig. C -22) and clean
under flowing water.
3. Replace seal (Fig. C -23) if necessary.
4. Fit check valve.
Unscrew float body
1. Pressure line (Fig. B -13), with elbow nipple
(Fig. B -14), and connecting nipple (Fig. B -16)
.
2. Unscrew screw-in nipple (Fig. D -25) with seal
(Fig. D -26) . Note the fitting position of the
float body (Fig. D -27) . Pull out the float body
and clean it.
3. Replace the float body - note fitting position.
Remove blockages
1. Isolate the unit from the mains and secure
against switching on again.
2. Remove the suction hose from pump inlet.
3. Connect the pressure hose to the water sup-
ply.
4. Allow water to run through the pump housing
until the blockage is removed.
5. Check that the pump is running freely by swit-
ching it on briefly.
6. Start the house water system again as descri-
bed.
STORAGE
ADVICE
If there is a risk of frost, the entire sys-
tem must be drained (pump, lines, sto-
rage vessel and filter chamber).
1. Drain the suction line (Fig. B -18) and the
pressure line (Fig. B -13).
2. Unscrew the drain screw on the filter chamber
(Fig. A -10) and allow the water to flow out of
the pump.
➯
The water in the storage vessel (Fig. A
-6) is pushed out by the air bellows at the
same time.
3. Unscrew the drain screw on the pump cham-
ber (Fig. A -9) and allow the storage vessel
(6) to empty.
4. Screw the drain screws (Fig. A -9, 10) back in
position and store the pump, lines and storage
vessel in a frost-free environment.
DISPOSAL
Do not dispose of worn-out machines
or spent batteries (including recharge-
able batteries) in domestic waste!
The packaging, machine and accessories
are made from recyclable materials and
must be disposed of accordingly.
HELP IN CASE OF A MALFUNCTION
CAUTION!
Disconnect the mains plug before any fault rectification work. Faults in the electrical system
must be rectified by an expert electrician.
Malfunction Cause Rectification
Impeller blocked Cleaning the pump.
Release the motor shaft of the impeller
with a screwdriver.
Overheating by running dry or water
which is too hot (thermal protection
switch has switched the pump off).
Check the water level on the suction
side. Allow the conveying fluid to cool
down. Repair the pump or replace it.
Pump motor does
not run
No mains voltage Check fuses and power supply.
Pump not drawing
water
The suction line is not in the water. Submerge the end of the suction line
into the water by min. 30 cm.