
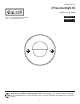
Installation Guide


4
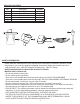
PREPARATION
Before beginning assembly of the product, make sure that all parts are present. Compare parts
with package contents list and diagram on previous page. If any part is missing or damaged, do
not attempt to assemble the product. Contact customer service for replacement parts.
Estimated Installation Time: 1 hour
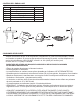
Tools Required for Installation: Power drill, 1” wood drill bit (included), Philips head screw driver
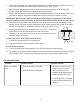
INSTALLATION INSTRUCTIONS
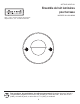
Mount the photo sensor with the included screw on a wall
within 1 foot (30cm) of the electrical outlet where the
transformer will be connected. (Fig.1)
* Alternate photo sensor installation: If there is no area
within 1 foot (30cm) of the transformer to install the
photosensor, it is possible to install the extension wire
directly to the transformer and to install the photo
sensor between the extension wire and the first
light.
• The wire should run from the photo sensor to each light without being cut. Do not run the wire
within 10 feet (3m) of a pool, spa or fountain.
• Loose wire should be tied up and kept clear of walking paths and away from children or animals.
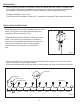
Fig. 1
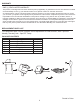
Fig. 2
Transformer
Photo sensor
Extension wire
Connector
Light fixture
4.92’
(1.5m)
4.92’
(1.5m)
4.92’
(1.5m)
4.92’
(1.5m)
4.92’
(1.5m)
4.92’
(1.5m)
4.92’
(1.5m)
4.92’
(1.5m)
12”
(30.5cm)