AlliedView™-EMS 4.0 INSTALLATION GUIDE AlliedView™-EMS 4.
TABLE OF CONTENTS 1 INTRODUCTION.............................................................................................................................................. 3 2 SYSTEM REQUIREMENTS ................................................................................................................................ 3 2.1 2.2 2.3 WINDOWS ..............................................................................................................................................................
1 INTRODUCTION This Installation Guide describes the installation, configuration, and registration procedures for AlliedView-EMS 4.0 on Windows and UNIX. It also describes the system requirements for the application. AlliedView-EMS comprises the Device Manager application for managing Allied Telesis devices, the MIB browser AMIGO, the MIB Compiler, VLAN Manager and QoS Manager. 2 SYSTEM REQUIREMENTS The following software and hardware components are required to run AlliedView-EMS 4.0.
3 BEFORE YOU BEGIN Make sure that you satisfy the following requirements before installing AlliedView-EMS 4.0. • • • • • • 4 You must have administrative rights on the machine where you will install AlliedView-EMS 4.0. To make sure that you have administrative rights, log on as administrator before installing AlliedView-EMS 4.0.
Click Next to continue. AlliedView-EMS supports Windows 2000, Windows XP and Windows 2003. The next window will be displayed if the installer has detected that your Windows platform is not supported. AlliedView™-EMS 4.
If you do not wish to continue with the installation, select No and click Next to terminate the installation setup program. If you wish to continue with the installation, select Yes and click Next. However, successful installation and full functionality support of AlliedView-EMS will not be guaranteed since the Windows platform is not supported. If you plan to integrate AlliedView-EMS 4.0 with an NMS, the NMS should be in the correct state: • • • For SNMPc and OpenView, services should not be running.
If you plan to integrate AlliedView-EMS 4.0 with SNMPc, OpenView or WhatsUp, select No and click Next to continue. Selecting No will terminate the installation setup program. You will then need to stop SNMPc or OpenView services and start the installer again. For WhatsUp, you will need to stop the WhatsUp Engine service, start the WhatsUp SQL services and then start the installer again. If you do not plan to integrate AlliedView-EMS 4.0 with SNMPc, OpenView or WhatsUp, select Yes and click Next to continue.
Click Next to continue. If you choose to install the AlliedView-EMS 4.0 application only, the documentation for the application will not be available after the installation. You will have to run the installer again and choose the option “AlliedView-EMS Documentation” to install the documentation. If you choose to install the AlliedView-EMS 4.0 documentation only, you will have to specify a folder where the documents will be installed, unless AlliedView-EMS 4.0 application is already installed.
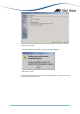
Click Next to continue. If NetView integration is selected, the following message is displayed: Click OK to continue. 6. Read the license agreement. To continue with the installation, accept the terms of the license agreement then click Next. AlliedView™-EMS 4.
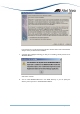
If you choose not to accept the license agreement, the Next button will remain disabled and you cannot proceed with the installation. 7. A message box is displayed informing you that you are installing a 45-day trial version of AlliedView-EMS 4.0. Click OK to continue. 8. You can install AlliedView-EMS 4.0 in the default directory or you can specify the directory where you want to install AlliedView-EMS 4.0. AlliedView™-EMS 4.
Click Next to continue. 9. Specify the folder where AlliedView-EMS 4.0 program icons will be stored. The default folder is AlliedView-EMS. Click Next to continue. 10. Verify that the installation information you have specified is correct. AlliedView™-EMS 4.
Click Next to continue. 11. The progress of the installation is displayed. At this point, the AlliedView-EMS 4.0 installer initializes the WEB and Telnet external command fields used by the AlliedView-EMS Device Manager application for the current user. Current user refers to the login name that you used when you logged into the system.
neither of the two browser programs exists, the external command field is left blank. On the UNIX platform, the installer checks if Mozilla is installed. In setting the Telnet external command field on UNIX, the installer uses the standard Telnet application that comes with the operating system. For Windows 2000, Windows XP, and Windows 2003, the HyperTerminal application is used. 12. Click Next to continue. 13. The release notes will be displayed. Click Finish to close the installation wizard.
4.2 HP-UX To install AlliedView-EMS 4.0 on HP-UX, perform the following procedure. 1. 2. 3. 4. Make sure that you have root privilege. Copy the EMS400H.bin file to a temporary directory. Move to the directory where the installation file is. Make sure that the installation file is executable. Use the chmod command to correct the permissions mode of the file. chmod u+x EMS400H.bin 5. Enter the following on the command line: ./EMS400H.bin 6. 4.3 Press Enter to start the AlliedView-EMS 4.0 installer.
6 INTEGRATING ALLIEDVIEW-EMS 4.0 WITH SNMPC The AlliedView-EMS 4.0 installer automatically detects if SNMPc is installed and will perform the necessary integration so that AlliedView-EMS 4.0 can be started from within SNMPc. If AlliedViewEMS 4.0 is installed before SNMPc, integration will not take place. Reinstallation of AlliedView-EMS 4.0 will be required.
If a device icon is displayed as a computer in SNMPc, double clicking it may not launch Device Manager. In this case, poll the device to change its icon to an ATI product icon then double click the icon again. Note - SNMPc v7.0.16 and later versions do not allow spaces in device object names. As a result, ATI devices whose system name contains spaces will not be discovered correctly. Labels for such devices will show the device’s system name instead of its IP address.
To start AlliedView-EMS for an Allied Telesis device, follow the steps below: 1. 2. 3. Select an Allied Telesis device on the network map. Select Tools or right click on the device icon then choose AlliedView-EMS>Device Manager or AMIGO. Device Manager or AMIGO will be launched. AlliedView™-EMS 4.
8 INTEGRATING ALLIEDVIEW-EMS 4.0 WITH NETVIEW The AlliedView-EMS 4.0 installer automatically detects if NetView is installed and will perform the necessary integration so that AlliedView-EMS 4.0 can be started from within NetView. After integration, the “AlliedView-EMS” submenu is added to the “Tools” menu. “AlliedView-EMS” contains the options “Device Manager” and “AMIGO”. After installing AlliedView-EMS 4.0, NetView does not immediately update its maps to show Allied Telesis icons.
9 INTEGRATING ALLIEDVIEW-EMS 4.0 WITH WHATSUP The AlliedView-EMS 4.0 installer automatically detects if WhatsUp is installed and will perform the necessary integration so that AlliedView-EMS 4.0 can be started from within WhatsUp. After integration, the options “AlliedView-EMS Device Manager” and “AlliedView-EMS AMIGO” are added to the device context menu. To start AlliedView-EMS for an Allied Telesis device, follow the steps below: 1. 2. 3. Select an Allied Telesis device on the network map.
10 UNINSTALLING ALLIEDVIEW-EMS OR AT-VIEW PLUS Before uninstalling AlliedView-EMS or AT-View Plus, make sure that you have administrative rights. If the machine where you installed AlliedView-EMS is defined as an Active Directory Domain Controller, make sure that you use the same administrator account that installed AlliedView-EMS to uninstall it. Using a different administrator account to uninstall AlliedView-EMS will not uninstall the application completely.
3. A new window is displayed stating that AlliedView-EMS or AT-View Plus and its components will be uninstalled from its installation folder. Click Next to uninstall AlliedView-EMS or AT-View Plus. 4. This window is displayed only if the uninstallation program has detected that SNMPc or OpenView services are running or if NetView services are not running or if the WhatsUp Engine service is running and the WhatsUp SQL services are not running. Click OK to terminate the uninstallation.
5. 10.2 Click Finish. You have successfully uninstalled AlliedView-EMS or AT-View Plus from your computer. UNIX To uninstall AlliedView-EMS or AT-View Plus from UNIX, run the application “uninstaller.bin” found in the _uninstx folder of the AlliedView-EMS or AT-View Plus installation directory, where x is the latest number. The Uninstall Wizard will appear. To uninstall AlliedView-EMS or AT-View Plus, perform steps 2 to 5 of the uninstallation procedure for Windows. AlliedView™-EMS 4.
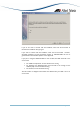
11 LICENSE REGISTRATION This installation automatically provides you with a 45-day trial period. You will need to enter a license key if you wish to continue to use AlliedView-EMS 4.0 after the trial period expires. For existing AT-View Plus and AlliedView-EMS users, your license key will not work on this release. Please contact your Allied Telesis sales representative to upgrade your license. To register the License Key: 1. Start AlliedView-EMS 4.0. 2. Select Help>License Registration.
2. Select Help>License Registration. The License Registration dialog box opens. 5. Click the Modify License key button. The Modify License dialog box opens. Edit License Key and/or Company Name. 6. Click the OK button. The registered License Key and License Type will be displayed. 12 INSTALLATION/UNINSTALLATION NOTES 12.1 Installation If OpenView is installed, a command window (black screen) is displayed for a few seconds after clicking the “Next” button in the Welcome dialog.
When installing AlliedView-EMS 4.0 with NetView integration, the installation setup program will invoke NetView’s “loadmib” application to load the MIB files used by Allied Telesis devices. Loading the MIB files may take some time to complete. When installing AlliedView-EMS 4.0 with NetView integration, the following warning message may be displayed: “C:\usr\ov\symbols\ati_device_sym.bak exists on this system and is newer than the file being installed.
The following notes apply when uninstalling AlliedView-EMS 4.0 with NetView integration: o The process to unload MIB files for Allied Telesis devices may take some time to complete. o When the NetView applications “\usr\ov\bin\ovw_fields” and “\usr\ov\bin\ovw_ config” are run after AlliedView-EMS 4.0 is uninstalled, some information related to AlliedView-EMS are retained in the NetView database. NetView will continue to recognize Allied Telesis devices but the Allied Telesis icons will not be shown.
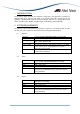
Error/Alert Message AT-View Plus m.n is already installed on this system. Please uninstall AT-View Plus m.n prior to installing AlliedView-EMS 4.0. AlliedView-EMS 4.0 Installer will now terminate. SNMPc [or OpenView] services running. For AlliedView-EMS to integrate with SNMPc [or OpenView], SNMPc [or OpenView] services must be stopped. NetView services not running. For AlliedView-EMS to integrate with NetView, NetView services must be started.
Error/Alert Message service. AlliedView-EMS 4.0 Uninstaller will now terminate. A directory name cannot contain any of the following characters: ;+!@#$%^&()={}[]’,*?”<>|` Invalid format for the directory name. A program folder name cannot contain any of the following characters ;+!@#$%^&()={}[]',*?"<>|\:./`~ AlliedView™-EMS 4.0 INSTALLATION GUIDE Description/Solution services. In Windows, do not use the following characters ;+!@#$%^&()={}[]’,*?”<>|` for the directory name .
© 1998-2009 Allied Telesis K. K. All rights reserved. No part of this publication may be reproduced without prior written permission from Allied Telesis, K. K. Microsoft is a registered trademark of Microsoft Corporation. Netscape Navigator is a registered trademark of Netscape Communications Corporation. All other product names, company names, logos or other designations mentioned herein are trademarks or registered trademarks of their respective owners. Allied Telesis K. K.