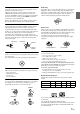
EN R CD/HD Radio™/ADVANCED BLUETOOTH WITH SiriusXM Tuner CDE-HD148BT FR CD RECEIVER WITH ADVANCED BLUETOOTH CDE-147BT ES Work s With This HD Radio receiver enables: (CDE-HD148BT only) • OWNER’S MANUAL Please read before using this equipment. • MODE D’EMPLOI Veuillez lire avant d’utiliser cet appareil. • MANUAL DE OPERACIÓN Léalo antes de utilizar este equipo. Thank you for purchasing this Alpine product.
ALPINE ELECTRONICS MARKETING, INC. 1-7, Yukigaya-Otsukamachi, Ota-ku, Tokyo 145-0067, JAPAN Phone: 03-5499-4531 ALPINE ELECTRONICS OF AUSTRALIA PTY. LTD. 161-165 Princes Highway, Hallam Victoria 3803, Australia Phone 03-8787-1200 ALPINE ITALIA S.p.A. Viale C. Colombo 8, 20090 Trezzano Sul Naviglio (MI), Italy Phone 02-484781 ALPINE ELECTRONICS FRANCE S.A.R.L. (RCS PONTOISE B 338 101 280) 98, Rue de la Belle Etoile, Z.I. Paris Nord Il, B.P.
Contents Operating Instructions WARNING WARNING ....................................................... 6 CAUTION ........................................................ 6 PRECAUTIONS ............................................... 6 Getting Started Accessory List ...............................................................9 Turning Power On and Off.......................................9 Source Selection..........................................................
Contents Other Functions Displaying the Text.................................................. 23 About “Text” .......................................................... 24 Using the Front AUX Input Terminal ................. 24 Option Menu Setting.............................................. 24 Applying TuneIt ........................................................ 25 Adjusting the sound via Smartphone .......... 25 Facebook Notification Function .....................
Contents Flash Memory (optional) Playback ...................................................................... 36 Searching for a Desired Song .............................. 36 Repeat Play................................................................. 36 M.I.X. (Random Play) ............................................... 37 Select Folder .............................................................. 37 Search Position Memory .......................................
Operating Instructions WARNING WARNING This symbol means important instructions. Failure to heed them can result in serious injury or death. DO NOT OPERATE ANY FUNCTION THAT TAKES YOUR ATTENTION AWAY FROM SAFELY DRIVING YOUR VEHICLE. Any function that requires your prolonged attention should only be performed after coming to a complete stop. Always stop the vehicle in a safe location before performing these functions. Failure to do so may result in an accident.
Inserting Discs Disc Cleaning Your player accepts only one disc at a time for playback. Do not attempt to load more than one disc. Make sure the label side is facing up when you insert the disc. “ERROR” will be displayed on your player if you insert a disc incorrectly. If “ERROR” continues to be displayed even though the disc has been inserted correctly, push the RESET switch with a pointed object such as a ballpoint pen.
• Some of the following CDs may not play on this unit: Flawed CDs, CDs with fingerprints, CDs exposed to extreme temperatures or sunlight (e.g., left in the car or this unit), CDs recorded under unstable conditions, CDs on which a recording failed or a re-recording was attempted, copy-protected CDs which do not conform to the audio CD industry standard. • Use discs with compressed audio files written in a format compatible with this unit. For details, refer to “About MP3/WMA/AAC” on page 15.
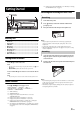
*8 Displayed only when AUX SETUP is set to ON. Refer to “Setting the AUX SETUP mode” on page 27. Getting Started Detaching and Attaching the Front Panel / Rotary encoder /ENTER Detaching 1 2 3 Turn off the unit power. Press e (Release) at the lower left side until the front panel pops out. Grasp the left side of the front panel and pull it out. AUDIO/SETUP SOURCE e Accessory List Notes • • • • • • • • • Head Unit ..................................................................................
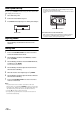
Initial System Start-Up Be sure to press the RESET switch when using the unit for the first time, after changing the car battery, etc. 1 2 3 Controllable with Remote Control This unit can be controlled with an optional Alpine remote control. For details, consult your Alpine dealer. Point the optional remote control transmitter at the remote control sensor. Turn off the unit power. Remove the detachable front panel. Press RESET with a ballpoint pen or similar pointed object.
Note Radio/ HD Radio™ Reception (CDE-HD148BT only) • If SEEK TYPE is set to DIGITAL, the SEEK UP/DOWN functions only stop on digital station frequencies while receiving HD Radio signal. Refer to “Setting the Digital Seek” on page 28. Presetting Stations Manually 1 Rotary encoder /ENTER 2 Select the radio band and tune in a desired radio station you wish to store in the preset memory.
Frequency Search Function You can search for a radio station by its frequency. 1 2 Press ENTER in Radio mode to activate the search mode. If a frequency has a Multicast station broadcast, the Multicast indicator lights up. Use the Multicast search mode to select a desired program from the Multicast stations available. Turn the Rotary encoder to select “F SEARCH”, and then press ENTER to enter the frequency search mode.
About the Feature Logos RBDS (CDE-147BT only) Rotary encoder /ENTER/OPTION • Digital, CD-quality sound. HD Radio Technology enables local radio stations to broadcast a clean digital signal. AM sounds like today’s FM and FM sounds like a CD. • Program Service Data: Contributes to the superior user experience of HD Radio Technology. Presents song name, artist, station IDs, HD2/ HD3 Channel Guide, and other relevant data streams. VIEW • Adjacent to traditional main stations are extra local FM channels.
• The playback time may not be correctly displayed when a VBR (Variable Bit Rate) recorded file is played back. CD/MP3/WMA/AAC Repeat Play Rotary encoder /ENTER 1 Press z 4. The song is played back repeatedly. REPEAT ONE*1 REPEAT FOLDER*2 REPEAT OFF REPEAT ONE *1 Only a track is repeatedly played back. *2 Only files in a folder are repeatedly played back. (MP3/WMA/ AAC mode only) SOURCE 2 5 4 Preset buttons (1 through 6) Note • a indicator lights up during repeat play mode. M.I.X.
Folder/File Name Search (concerning MP3/WMA/AAC) About MP3/WMA/AAC Folder and file names may be searched and displayed during playback. Except for private use, duplicating audio data (including MP3/ WMA/AAC data) or distributing, transferring, or copying it, whether for free or for a fee, without permission of the copyright holder is strictly prohibited by the Copyright Act and by international treaty.
Producing MP3/WMA/AAC discs MP3/WMA/AAC files are prepared, then written to a CD-R or CD-RW using CD-R writing software. A disc can hold up to 509 files/255 folders. Playback may not be performed if a disc exceeds the limitations described above. Media supported The media that this device can play back are CD-ROMs, CD-Rs, and CD-RWs. Corresponding File Systems This device supports discs formatted with ISO9660 Level 1 or Level 2. Under the ISO9660 standard, there are some restrictions to remember.
Sound Setting Sound Setting You can flexibly customize the unit to suit your own preference and usage. From the AUDIO SETUP menu, Audio Setting can be modified. Rotary encoder /ENTER Use steps 1 to 5 to select the category you wish to modify. For details on how to change each setting, see the following sections below. 1 2 *1 Adjustment cannot be performed during phone call. *2 Displayed only when a SiriusXM Tuner is connected.
Adjusting the Parametric Equalizer Curve (9BAND P-EQ) You can modify the Equalizer settings to create a response curve more appealing to your personal taste. 1 After selecting a BAND (BAND1 ~ BAND9) from the 9BAND P-EQ adjustment mode, turn the Rotary encoder to select the desired setting item, and then press ENTER. CENTER FRQ WIDTH (Q) LEVEL CENTER FRQ 2 3 Turn the Rotary encoder to select the desired setting value, and then press ENTER. Press t to return to the previous step.
External Device Setting the Media Xpander mode Connecting to an External Amplifier (POWER IC) When an external amplifier is connected, sound quality can be improved by stopping the power supply of the built-in amplifier. Setting item: POWER IC MX (Media Xpander) makes vocals or instruments sound distinct regardless of the music source. The CD and iPod, etc. will be able to reproduce the music clearly even in cars with a lot of road noise.
Note Storing the 9BAND P-EQ/TCR/X-OVER Settings • The total adjustment distance for all speakers should be less than 510 centimeters (201 inches). 3 Repeat steps 1 and 2 for setting other speakers. By setting these values, sound from all speakers can be made to reach the listener at the same time. Adjusting SPATIAL The Settings of 9BAND P-EQ/TCR/X-OVER can be stored in the preset memory. 1 This function allows you to change the sound field easily. There are three modes to choose from.
Example 2. Listening Position: All Seats About Time Correction Adjust the time correction level of each speaker to almost the same level. The distance between the listener and the speakers in a car vary widely due to the complex speaker placement. This difference in the distances from the speakers to the listener creates a shift in the sounds image and frequency characteristics. This is caused by the time delay between the sound reaching the listener’s right versus the left ear.
Delay Number Time Difference (msec) Distance (cm) Distance (inch) Delay Number Time Difference (msec) Distance (cm) Distance (inch) 36 3.6 122.4 48.2 86 8.6 292.4 115.2 37 3.7 125.8 49.6 87 8.7 295.8 116.6 38 3.8 129.2 50.9 88 8.8 299.2 117.9 39 3.9 132.6 52.3 89 8.9 302.6 119.3 40 4.0 136.0 53.6 90 9.0 306.0 120.6 41 4.1 139.4 54.9 91 9.1 309.4 121.9 42 4.2 142.8 56.3 92 9.2 312.8 123.3 43 4.3 146.2 57.6 93 9.3 316.2 124.6 44 4.
Level adjusting (0 to −12 dB) Other Functions Output frequency range Slope FLAT Slope adjusting Rotary encoder /ENTER/OPTION (Different from actual display) 20 Hz HPF cut-off frequency LPF cut-off frequency Notes • HPF (high pass filter): Cuts the lower frequencies and allows the higher frequencies to pass. • LPF (low pass filter): Cuts the higher frequencies and allows the lower frequencies to pass. • Slope: The level change (in dB) for a frequency change of one octave.
The display in BLUETOOTH Audio mode: BT AUDIO/ELAPSED TIME*4 ARTIST NAME*3/SONG NAME*3 ALBUM NAME*3/SONG NAME*3 BT AUDIO/CLOCK BT AUDIO/ELAPSED TIME *1 Displayed during playback of a disc with CD text. If there is no Text (Disc Name or Track Name), “DISC TEXT”/ “TRACK TEXT” is displayed. *2 Only for MP3/WMA/AAC disc mode. *3 ID3 tag/WMA tag If an MP3/WMA/AAC file contains ID3 tag/WMA tag information, the ID3 tag/WMA tag information is displayed (e.g., song name, artist name, and album name).
*8 USB SKIP can be selected in this mode. For details, refer to “Setting the USB Skip function” on page 28. *9 Refer to “Setting the iPod Control” on page 38. *10 The setting items are the same as iPod setting in SETUP mode. For details, refer to “iPod/iPhone Search Mode Setting” on page 29. *11 AUX NAME can be selected in this mode. For details, refer to “Setting the AUX NAME mode” on page 27. *12 FW VERSION can be selected in this mode.
Displaying Notification List (Ready on future update) SETUP You can view the received Notification from Facebook in the connected Smartphone via this unit. 1 Rotary encoder /ENTER Press and hold VSOURCE for at least 2 seconds. The received Notification will be displayed according to when it was posted. 2 3 Turn the Rotary encoder to select the desired Notification, and then press ENTER. Then go to step 2 of “Receiving Notification”.
4 Turn the Rotary encoder to change the setting, and then press ENTER. (e.g. Select ON or OFF) 5 Press and hold AUDIOSETUP for at least 2 seconds to return to normal mode. Notes • Press t to return to the previous mode. • If no operation is performed for 60 seconds, the unit will return to normal mode automatically. Sound (Beep) Guide Function This function will give audible feedback with varying tones depending upon the button pressed or a notification is received from a paired Smartphone, etc.
MANUAL: The display is scrolled when a disc is loaded or when a track is changed, etc. Note • The unit scrolls CD text names, folder names, file names or tag display. DIGITAL MC: Keep receiving the digital radio signal while listen to a Sub-program Service of a Multicast station. ANALOG: Only receive the analog radio signal, even when the digital signal is strong. Scroll Type Setting Setting the Live mode (LIVE MODE) Choose from two scrolling methods. Select the type you prefer.
iPod/iPhone Search Mode Setting The unit allows you to search for the iPod/iPhone using nine different search modes. BT Hands Free Calling Setting item: IPOD LIST /VOICE CTRL. Rotary encoder /ENTER Further setting items: PLAYLISTS / ARTISTS /ALBUMS / AUDIOBOOKS / PODCASTS / GENRES / COMPOSERS / SONGS / GENIUS MIX Setting contents: OFF / ON Notes • The search mode for Playlists/Artists/Albums/Podcasts/Genres/Songs/ Genius Mix is initially set to On.
How to connect to a BLUETOOTH compatible device (Pairing) 3 BLUETOOTH: BT IN* PAIRED DEV VISIBLE M* SEARCH DEV* CALL SOUND CALLER ID PB UPDATE* PB ORDER AUTO ANS SEV NAME SPEAKER SL FW VERSION FW UPDATE* BT IN For details on the control from a BLUETOOTH compatible device, refer to the Owner’s Manual of the BLUETOOTH compatible device.
Notes • If the connection is successfully changed, “CONNECTED” is displayed for 2 seconds and the indicator lights up, then the display returns to the SETUP screen. • If a Smartphone is connected to this unit successfully, the C indicator lights up to show the battery charge of the connected Smartphone. The X indicator lights up when the battery charge is about 50%, the Z indicator lights up when the battery charge is not enough, and it blinks as a low level warning.
Setting the Phone Book Update You can update the phone book automatically or manually. Setting item: PB UPDATE Further Setting contents: AUTO/MANUAL Setting the Phone Book Auto Update ON/OFF (AUTO) When you select AUTO ON in this step, whenever the vehicle’s ignition is turn ON or after the phone is connected with this unit, the phone book will be updated automatically. Setting contents: AUTO OFF / AUTO ON (Initial setting) Note • “UPDATING” will be displayed during the phone book update.
• Certain Smartphone features are dependent on the capabilities and settings of your service provider’s network. Additionally, certain features may not be activated by your service provider, and/or the provider’s network settings may limit the feature’s functionality. Always contact your service provider about feature availability and functionality.
Phone book Alphabet Search Function You can select the first three letters to search for a desired name in phone book list by using the Phone book alphabet search function. For example: Searching a name “Michael James” The following example explains how the search is performed. Depending on the setting in PB ORDER (refer to “Changing the Phone book List Order” on page 32), the phone book is listed in first name or last name order. Please search for the first name or last name according to the setting.
Adjusting the volume when receiving a Call Pausing Press . While calling, you can adjust the volume. A playback stops. Pressing again will resume a playback. Turn the Rotary encoder to adjust the volume. Selecting the desired Group (Folder) Note • You may need to increase volume from your regular audio listening source level. However, increasing the volume excessively may result in feedback. Feedback is directly related to the volume. Turning down the volume as low as acceptable, will reduce it.
Flash Memory (optional) Flash Memory can contain hundreds of songs. By organizing songs by folder, you can quickly find a desired folder/file. This operation is similar to search a folder/file from PC. Rotary encoder /ENTER Searching for a Desired Song 1 2 3 Press ENTER to activate the search mode. Turn the Rotary encoder to select a desired folder/file. Press ENTER to play the selected file or enter the selected folder.
M.I.X. (Random Play) 1 iPod/iPhone (optional) Press 5 x. The songs are played back in random sequence. Rotary encoder /ENTER/OPTION MIX FOLDER*1 MIX ALL*2 MIX OFF MIX FOLDER *1 All songs in the current folder are played back in random sequence. Any one song does not play back again until all songs have been played back. *2 All songs in the Flash Memory are played back in random sequence. Any one song does not play back again until all songs have been played back. 2 To cancel M.I.X.
Setting the iPod Control Searching for a desired Song When an iPod/iPhone is connected, operate it from its own controls or from the head unit. An iPod/iPhone can contain hundreds of songs. By using file tag information and keeping these songs organized in playlists, this unit’s search functions will ease song searches. Each music category has its own individual hierarchy.
• When search is made during M.I.X. play, the M.I.X. play mode will be canceled. • When search is made during song downloading on iPhone, “UPDATING” will be displayed for a few second and the search mode will be canceled. • “NO SONG” will be displayed if there are no songs in the selected playlist in the PLAYLIST search mode. • “NO PODCAST” will be displayed if there is no podcast data in the iPod/iPhone in the PODCAST search mode.
Random Play Shuffle (M.I.X.) Displaying the Text The Shuffle function of the iPod/iPhone is displayed as s on this unit. You can display the tag information of a song in the iPod/iPhone. Press k VIEW. Shuffle Albums: The songs on each album are played back in the order they were recorded. Upon completion of all the songs on the album, the next album is selected randomly. This continues until all albums have been played. Each press changes the display.
Pandora® internet radio (Optional) “Thumbs” Feedback You can personalize your stations with “THUMBS UP” or “THUMBS DOWN” feedback, which the system takes into account for future music selections. During playback, press u or d for thumbs up or thumbs down. Rotary encoder /ENTER u: The “u” icon appears in the display. Pandora® will add similar music to your station. d: The “d” icon is displayed. Pandora® will ban that song from your station, and the current song is skipped.
QuickMix Search Position Memory Use QuickMix to create a playlist based on two or more of your Pandora® stations. Edit your QuickMix station selections on the Pandora® Compatible Application for iPhone when it is not connected to this unit. During playback, you can quickly return to the last-selected hierarchy level in the search mode. 1 2 Press ENTER to activate the Search mode. Turn the Rotary encoder to select “A-Z” or “BY DATE”, and then press ENTER.
SiriusXM Satellite Radio Operation (CDE-HD148BT only) (Optional) The following steps 1 to 5 are common to the various SiriusXM functions. For details, refer to each individual function. 1 2 Rotary encoder /ENTER/OPTION SiriusXM Setting Press and hold AUDIOSETUP for at least 2 seconds to activate the SETUP mode. Turn the Rotary encoder to select “SIRIUSXM”, and then press ENTER. The SIRIUSXM setup mode is activated.
EDIT CODE: Change the passcode. DELETE ALL This operation will delete all alerts (artists, songs and team) stored in memory. After selecting this item, 1 Input the old passcode as steps 1 to 4 in “How to input passcode?”. After the old passcode is entered, the new passcode input screen will be displayed. 2 Input the new passcode as steps 1 to 4 in “How to input passcode?”. A confirm screen (CONFIRM) will be displayed and the new passcode must be entered again for confirmation.
3 Repeat the procedure to store up to 5 other channels onto the same band. Receiving and Tuning to an Alert Notes • A total of 18 channels can be stored in the preset memory, 6 Channels for each band (SXM1, SXM2 and SXM3). • If you store a new channel into a preset which already has a channel assigned, the current channel will be cleared and replaced with the new one. Whenever a stored sports team, artist, or song is playing on another channel, an interruption ALERT appears on the unit display.
Searching by My Music 1 Turn the Rotary encoder to select MY MUSIC* after step 1, and then press ENTER. The artist names and song names that you have stored and are currently playing will be displayed in a list. Replay Function In SiriusXM mode, you can pause, rewind and replay of live SiriusXM Satellite Radio. 1 * Displayed only when the stored song or artist is broadcasting. 2 Turn the Rotary encoder to select the desired artist/song, and then press ENTER to confirm.
Storing iTunes Tagging information iTunes Tagging lets you tag songs heard on SiriusXM channels. Use this unit in conjunction with an optional SiriusXM Tuner and a Tagging compatible iPod/iPhone to tag the music that you listen to. This tag information is automatically transferred to your iPod/iPhone. Later, when your iPod/iPhone is connected to iTunes, you can preview, buy and download your tagged songs. For details, refer to the Owner’s Manual of the Tagging compatible iPod/iPhone.
• The CD is being improperly inserted. – Make sure the CD is being inserted following instructions in the CD Player Operation section. Unable to fast forward or backward the CD. • The CD has been damaged. – Eject the CD and discard it; using a damaged CD in your unit can cause damage to the mechanism. CD playback sound skips due to vibration. • Improper mounting of the unit. – Securely re-mount the unit. • The disc is very dirty. – Clean the disc. • The disc has scratches. – Change the disc.
SiriusXM Advisory Messages (CDE-HD148BT only) • A copy-protected WMA file was played back. – You can only play back non-copy-protected files. The following messages may be displayed while operating the unit in SiriusXM mode. NO SUPPORT • Text information that is not recognizable by the unit is being used. – Change the text information to text that is supported by the unit. DEVICE ERROR • The SiriusXM Tuner is disconnected or the unit is having trouble communicating with the Tuner.
Note • If wrong passcode is input, “WRONG CODE” will be displayed and the unit will revert to the previous selected channel. • Buffer for Replay will full within 11 seconds. • Buffer for Replay is full. Indication for Pandora® Mode NO PANDORA • A Smartphone is not connected. – Make sure a Smartphone is correctly connected. NO STATION • You have not created any personalized Pandora® Stations.
Specifications FM TUNER SECTION Tuning Range Mono Usable Sensitivity 50 dB Quieting Sensitivity Alternate Channel Selectivity Signal-to-Noise Ratio Stereo Separation Capture Ratio 87.7~107.9 MHz 9.3 dBf (0.8 μV/75 ohms) 13.5 dBf (1.3 μV/75 ohms) 80 dB 65 dB 35 dB 2.0 dB AM TUNER SECTION Tuning Range Sensitivity (IEC Standard) 530~1,710 kHz 22.
Installation and Connections Before installing or connecting the unit, please read the following and refer to “Operating Instructions” on page 6 for proper use. CAUTION WARNING HAVE THE WIRING AND INSTALLATION DONE BY EXPERTS. MAKE THE CORRECT CONNECTIONS. The wiring and installation of this unit requires special technical skill and experience. To ensure safety, always contact the dealer where you purchased this product to have the work done.
Installation Screw Hex Nut (M5) * Bolt Stud Air ventilation hole Metal Mounting Strap This unit Rear of the Unit Caution Do not block the unit’s fan or heat sink, thus preventing air circulation. If blocked, heat will accumulate inside the unit and may cause a fire. Note • For the screw marked “*”, use an appropriate screw for the chosen mounting location. 3 CAUTION When you install this unit in your car, do not remove the detachable front panel.
Mounting the Microphone For the sake of safety, mount the microphone in the following location. • In a stable and secure location. • In a location that does not inhibit safely driving the vehicle. • Mount the microphone in a location where the driver’s voice can easily be picked up. Choose a location for the microphone that can easily pick up the drivers voice. Requiring the driver to move towards the microphone for audibility causes a distraction that could be dangerous.
Connections To Flash Memory or iPod/iPhone POWER ANT (Blue) (Blue/White) To power antenna REMOTE TURN-ON To amplifier (Orange) ILLUMINATION (Red) IGNITION (Yellow) BATTERY (Black) To the instrument cluster illumination lead Ignition Key GND Battery (Gray) SPEAKER RIGHT FRONT (Gray/Black) Speakers Front Right (Violet/Black) SPEAKER RIGHT REAR (Violet) Rear Right (Green) SPEAKER LEFT REAR (Green/Black) Rear Left (White/Black) SPEAKER LEFT FRONT (White) Front Left Microphone Front
Rear USB Terminal Connect this to a Flash Memory or an iPod/iPhone (sold separately). Power Antenna Lead (Blue) Connect this lead to the +B terminal of your power antenna, if applicable. Note • This lead should be used only for controlling the vehicle’s power antenna. Do not use this lead to turn on an amplifier or a signal processor, etc. Remote Turn-On Lead (Blue/White) Connect this lead to the remote turn-on lead of your amplifier or signal processor.
LIMITED WARRANTY ALPINE ELECTRONICS OF AMERICA, INC. AND ALPINE OF CANADA INC. (“Alpine”), are dedicated to quality craftsmanship and are pleased to offer this Warranty. We suggest that you read it thoroughly. Should you have any questions, please contact your Dealer or contact Alpine at one of the telephone numbers listed below. This Warranty covers Car Audio Products and Related Accessories (“the product”). Products purchased in the Canada are covered only in the Canada. Products purchased in the U.S.A.
About the Rules of Bluetooth Electromagnetic Radiation Regulation USA/Canada FCC CAUTION Changes or modifications not expressly approved by the party responsible for compliance could void the user’s authority to operate the equipment. This device complies with Part 15 of FCC Rules and Industry Canada licence-exempt RSS standard(s).