EN R CD/USB RECEIVER CDE-152/CDE-151/CDE-150 FR ES (CDE-152/CDE-151 only) • OWNER’S MANUAL Please read before using this equipment. • MODE D’EMPLOI Veuillez lire avant d’utiliser cet appareil. • MANUAL DE OPERACIÓN Léalo antes de utilizar este equipo. Thank you for purchasing this Alpine product. Please take a moment to protect your purchase by registering your product now at the following address: www.alpine-usa.com/registration.
ALPINE ELECTRONICS MARKETING, INC. 1-7, Yukigaya-Otsukamachi, Ota-ku, Tokyo 145-0067, JAPAN Phone: 03-5499-4531 ALPINE ELECTRONICS OF AUSTRALIA PTY. LTD. 161-165 Princes Highway, Hallam Victoria 3803, Australia Phone 03-8787-1200 ALPINE ITALIA S.p.A. Viale C. Colombo 8, 20090 Trezzano Sul Naviglio (MI), Italy Phone 02-484781 ALPINE ELECTRONICS FRANCE S.A.R.L. (RCS PONTOISE B 338 101 280) 98, Rue de la Belle Etoile, Z.I. Paris Nord Il, B.P.
Contents Operating Instructions ENGLISH Adjusting the Parametric Equalizer Curve (3BAND EQ).............................................................14 Setting the Control ....................................................14 WARNING WARNING ....................................................... 5 CAUTION ........................................................ 5 PRECAUTIONS ............................................... 5 Getting Started Accessory List .............................................
Contents Select Playlist/Artist/Album/Genre/ Composer ................................................................... 23 Random Play Shuffle (M.I.X.) ................................ 23 Repeat Play................................................................. 23 Information In Case of Difficulty.................................................. 24 Basic.......................................................................... 24 Radio..................................................................
Operating Instructions WARNING WARNING This symbol means important instructions. Failure to heed them can result in serious injury or death. DO NOT OPERATE ANY FUNCTION THAT TAKES YOUR ATTENTION AWAY FROM SAFELY DRIVING YOUR VEHICLE. Any function that requires your prolonged attention should only be performed after coming to a complete stop. Always stop the vehicle in a safe location before performing these functions. Failure to do so may result in an accident.
Inserting Discs Disc Cleaning Your player accepts only one disc at a time for playback. Do not attempt to load more than one disc. Make sure the label side is facing up when you insert the disc. “ERROR” will be displayed on your player if you insert a disc incorrectly. Playing a disc while driving on a very bumpy road may result in skips, but this will not scratch the disc or damage the player. Fingerprints, dust, or soil on the surface of the disc could cause the CD player to skip.
• Use discs with compressed audio files written in a format compatible with this unit. For details, refer to “About MP3/WMA” on page 11. • ROM data other than audio files contained in a disc will not produce sound when played back. Protecting the USB Port • Only Flash Memory devices and iPod/iPhone can be connected to the USB port on this unit. Correct performance using other USB products cannot be guaranteed. A USB hub is not supported.
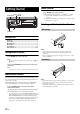
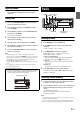
Getting Started Source Selection Press SOURCE to change the source. Rotary encoder AUDIO/SETUP /ENTER TUNER DISC USB AUDIO/iPod*1 AUXILIARY*2 TUNER *1 Only for CDE-152/CDE-151 and when the iPod/iPhone is connected. *2 Only when AUX SETUP is set to ON. Refer to “Setting the AUX SETUP mode” on page 19. Detaching and Attaching the Front Panel e Detaching SOURCE/ Accessory List • • • • • • Head Unit ..................................................................................
Adjusting Volume Radio Turn the Rotary encoder until the desired sound is obtained. SOURCE/ Rotary encoder /ENTER Setting Time 1 2 3 Press and hold AUDIOSETUP for at least 2 seconds to activate the SETUP selection mode. Turn the Rotary encoder to select GENERAL, and then press ENTER. BAND TUNE/A.ME Turn the Rotary encoder to select the CLOCK ADJ mode, and then press ENTER. Preset buttons (1 through 6) The time indication will blink.
Presetting Stations Automatically 1 2 CD/MP3/WMA Press BAND repeatedly until the desired radio band is displayed. SOURCE/ Rotary encoder /ENTER Press and hold TUNEA.ME for at least 2 seconds. The frequency on the display continues to change while the automatic memory is in progress. The tuner will automatically seek and store 6 strong stations in the selected band. They will be stored into preset buttons 1 to 6 in order of signal strength.
Repeat and Random Play 1 During playback, Press z 4 or 5 x repeatedly until the setting appears. RPT ONE a: Track/file is played back repeatedly. RPT FOLDER a*: Files in a folder are played back repeatedly. MIX FOLDER s*: Files in a folder are played back randomly. MIX ALL g: All files in the disc or Flash Memory are played back randomly. • Press and hold r for at least 2 seconds in the search mode to cancel. Or, the search mode is canceled if no operation is performed for 10 seconds.
Method for creating MP3/WMA files Audio data is compressed using software with MP3/WMA codecs. For details on creating MP3/WMA files, refer to the user’s manual for that software. MP3/WMA files that are playable on this device have the file extensions “mp3” / “wma”. Files with no extension cannot be played back (WMA ver. 7.1, 8 and 9 are supported). Order of files Files are played back in the order that the writing software writes them to the disc. Therefore, the playback order may not be what is expected.
Audio Setup Sound Setting You can flexibly customize the unit to suit your own preference and usage. From the AUDIO SETUP menu, Audio Setting can be modified. Rotary encoder AUDIO/SETUP /ENTER Use steps 1 to 5 to select one of the setting modes to modify. See the applicable section below for details about the selected setting item. 1 2 Press and hold AUDIOSETUP for at least 2 seconds to activate the SETUP mode. Turn the Rotary encoder to select AUDIO, and then press ENTER.
Equalizer Presets Setting the Bandwidth (WIDTH (Q)) 10 typical equalizer settings are preset at the factory for a variety of musical source material. USER settings are created in the 3BAND EQ mode. BASS WIDE 0.50 MEDIUM 1.00 MEDIUM 1.50 NARROW 2.00 MID WIDE 0.75 MEDIUM 1.00 MEDIUM 1.25 NARROW 1.50 Setting item: EQ PRESETS TREBLE WIDE 0.75 NARROW 1.
ON: Adjusting the Low Pass Filter Speakers The Low Pass Filter on this unit can be adjusted to suit your personal taste. SPEAKER RIGHT FRONT Setting item: SUBW LPF Setting contents: OFF (Initial setting) / 60 (Hz) / 80 (Hz) / 120 (Hz) / 160 (Hz) SPEAKER RIGHT REAR All frequencies lower than the selected cutoff are output. Front Right Rear Right Setting the Subwoofer Phase SPEAKER LEFT REAR The subwoofer output phase is toggeled between SUBWOOFER NORMAL (0°) or SUBWOOFER REVERSE (180°).
BASS ENGINE SQ Function BASS Rotary encoder /ENTER With the BASS ENGINE SQ function on this unit, several parameters affecting Bass performance are adjusted simultaneously. The BASS ENGINE SQ Level adjustment varies these parameters uniformly for optimum Bass effect at different levels. Setting BASS ENGINE SQ ON/OFF Press and hold BASS for at least 2 seconds to switch the sound mode.
Other Functions SOURCE/ Rotary encoder /ENTER/OPTION About “Text” Text compatible CDs contain text information such as the disc name and track name. Such text information is referred to as “text”. Notes • Some characters may not be displayed correctly with this device, depending on the character type. • “NO SUPPORT” is displayed if text information is not supported by the unit. • The text or tag information may not be correctly displayed, depending on the contents.
Option Menu Setting You can quickly adjust the setting items relevant to the current SOURCE by using Option Menu. 1 Press and hold ENTER/OPTION for at least 2 seconds to activate the Option menu of the current source. SETUP AUDIO/SETUP Rotary encoder SOURCE/ /ENTER Note • The option menu varies depending on the source. 2 3 Turn the Rotary encoder to select the desired setting item, and then press ENTER. Turn the Rotary encoder to change the setting, and then press ENTER.
• If no operation is performed for 60 seconds, the unit will return to normal mode automatically. Setting the Demonstration mode This unit has a demonstration feature for display. General Setting GENERAL is selected on the setup main menu in step 2. Setting the AUX SETUP mode You can input the audio of an external device, (such as a Portable audio player) to the AUX connector of this unit.
iPod/iPhone Setting Flash Memory (optional) “iPod” is selected on the setup main menu in step 2. iPod/iPhone Search Mode Setting SOURCE/ The unit allows you to search the iPod/iPhone using nine different search modes.
iPod/iPhone (optional) (CDE-152/CDE-151 only) SOURCE/ Rotary encoder /ENTER/OPTION / II BAND 1 5 4 2 Preset buttons (1 through 6) iPod classic (160 GB) (Late 2009): Ver.2.0.4 iPod touch (2nd generation): Ver.4.2.1 iPod nano (4th generation): Ver.1.0.4 iPod classic (120 GB): Ver.2.0.1 iPod touch (1st generation): Ver.3.1.3 iPod nano (3rd generation): Ver.1.1.3 iPod classic (80 GB, 160 GB): Ver.1.1.2 • Confirmed devices regarding Made for iPhone.
5 Notes • A song playing on the iPod/iPhone while it is connected to this unit will continue to play from where it was paused after disconnection. • If you listen to an episode from a selected Podcast or Audiobook, the episode can be changed by pressing 1 or 2. • An episode may have several chapters. The chapter can be changed by pressing or . • During iPod/iPhone playback, press r, and then you can quickly return to the hierarchy level selected last time in the search mode.
Select Playlist/Artist/Album/Genre/ Composer Repeat Play Playlist/Artist/Album/Genre/Composer can be easily changed. For example, if you listen to a song from a selected album, the album can be changed. Repeat One: A single song is repeatedly played back. Only Repeat One is available for the iPod/iPhone. 1 Press 1 or 2 to select the desired Playlist/Artist/ Album/Genre/Composer. The song is played back repeatedly. a* (off ) a * Repeat One.
Information In Case of Difficulty If you encounter a problem, please turn the power off, then on again. If the unit is still not functioning normally, please review the items in the following checklist. This guide will help you isolate the problem if the unit is at fault. Otherwise, make sure the rest of your system is properly connected or consult your authorized Alpine dealer. Basic No function or display. • Vehicle’s ignition is off.
• Mechanism error. 1 Press the button and eject the CD. If not ejecting, consult your Alpine dealer. 2 When the error indication remains after ejecting, press the button again. If the error indication still does not turn off after pressing the button for a few times, consult your Alpine dealer. • A copy-protected WMA file was played back. – You can only play back non-copy-protected files. • A sampling rate/bit rate not supported by the unit is used.
• Power surge error Excessive voltage/current is supplied to the iPod/iPhone. – Try another iPod/iPhone, if available. – Turn the power off. – Turn the ignition key off, and then set to ON again.
Note Specifications FM TUNER SECTION Tuning Range Mono Usable Sensitivity 50 dB Quieting Sensitivity Alternate Channel Selectivity Signal-to-Noise Ratio Stereo Separation Capture Ratio • Due to continuous product improvement, specifications and design are subject to change without notice. 87.7 ~ 107.9 MHz 9.3 dBf (0.8 μV/75 ohms) 13.5 dBf (1.3 μV/75 ohms) 80 dB 65 dB 35 dB 2.0 dB 530 ~ 1,710 kHz 22.
Installation and Connections Before installing or connecting the unit, please read the following and refer to “Operating Instructions” on page 5 for proper use. CAUTION WARNING HAVE THE WIRING AND INSTALLATION DONE BY EXPERTS. MAKE THE CORRECT CONNECTIONS. The wiring and installation of this unit requires special technical skill and experience. To ensure safety, always contact the dealer where you purchased this product to have the work done.
Installation Screw Hex Nut (M5) * Bolt Stud To prevent external noise from entering the audio system. • Locate the unit and route the leads at least 10 cm away from the car harness. • Keep the battery power leads as far away from other leads as possible. • Connect the ground lead securely to a bare metal spot (remove any paint, dirt or grease if necessary) of the car chassis. • If you add an optional noise suppressor, connect it as far away from the unit as possible.
Connections POWER ANT (Blue) (Blue/White) To power antenna REMOTE TURN-ON To amplifier (Orange) ILLUMINATION (Red) IGNITION (Yellow) BATTERY (Black) To the instrument cluster illumination lead Ignition Key GND Battery (Gray) SPEAKER RIGHT FRONT Speakers Front Right (Gray/Black) (Violet/Black) SPEAKER RIGHT REAR (Violet) Rear Right (Green) SPEAKER LEFT REAR (Green/Black) Rear Left (White/Black) SPEAKER LEFT FRONT (White) Front Left Amplifier Front (CDE-152 only) Rear (CDE-152 only) A
Power Antenna Lead (Blue) Connect this lead to the +B terminal of your power antenna, if applicable. Note • This lead should be used only for controlling the vehicle’s power antenna. Do not use this lead to turn on an amplifier or a signal processor, etc. Remote Turn-On Lead (Blue/White) Connect this lead to the remote turn-on lead of your amplifier or signal processor. Illumination Lead (Orange) This lead may be connected to the vehicle’s instrument cluster illumination lead.
LIMITED WARRANTY ALPINE ELECTRONICS OF AMERICA, INC. (“Alpine”), is dedicated to quality craftsmanship and is pleased to offer this Warranty. We suggest that you read it thoroughly. Should you have any questions, please contact your Dealer or contact Alpine at one of the telephone numbers listed below. This Warranty covers Car Audio Products and Related Accessories (“the product”). Products purchased in the Canada are covered only in the Canada. Products purchased in the U.S.A. are covered only in the U.S.
Don’t forget to take a moment to protect your purchase by registering your product now at the following address: www.alpine-usa.com/registration. N’oubliez pas de consacrer un moment à la protection de votre achat en enregistrant votre produit dès maintenant à l’adresse suivante : www.alpine-usa.com/registration. Recuerde que con solo unos pocos pasos podrá proteger su producto, registrándolo a través de la siguiente dirección: www.alpine-usa.com/registration.
&W/ILP INE. CD/USB RECEIVER CDE-152 /CDE-151 / CDE-150 ,,,,, For details on all functions , refer to the Owner's Manual stored in the supplied CD-ROM . (As it is data CD, the CD cannot be used for playing back music and images on the player.) If required, an ALPINE dealer will readily provide you with a print out of the Owner's Manual contained in the CD-ROM. Pour obtenir de plus ample s informations sur !'ensemble des fonctions , reportez-vous au mode d 'emploi tourni sur le CD-ROM.
Contents /lnhalt I Contenu IMPORTANT Please record the serial number of your unit in the space provided below and keep it as a permanent record. WARNING I AVERTISSEMENT I ADVERTENCIA ......................................................... 3 SERIAL N U M B E R : - - - - - - - - - - - - - - INSTALLATION D A T E : - - - - - - - - - - - - - INSTALLATION T E C H N I C I A N : - - - - - - - - - - - - CAUTION I ATTENTION I PRUDENCIA ...........
&wARNING &AVERTISSEMENT &ADVERTENCIA This symbol means important instructions. Failure to heed them can result in serious injury or death. Ce symbole designe des instructions importantes. Le non-respect de ces instructions peut entrainer de graves blessures, voire Ia mort. Este slmbolo indica que las instrucciones son importantes. De no tenerse en cuenta, podrla ocasionarse heridas graves o muerte. DO NOT OPERATE ANY FUNCTION THAT TAKES YOUR ATTENTION AWAY FROM SAFELY DRIVING YOUR VEHICLE.
USE THIS PRODUCT FOR MOBILE 12V APPLICATIONS. Use for other than its designed application may result in fire, electric shock or other injury. DO NOT PLACE HANDS, FINGERS OR FOREIGN OBJECTS IN INSERTION SLOTS OR GAPS. Doing so may result in personal injury or damage to the product. MAKE THE CORRECT CONNECTIONS. UTILISER CET APPAREIL POUR DES APPLICATIONS MOBILES DE 12 v. Toute utilisation autre que 1' application designee comporte un risque d'incendie, de choc electrique ou de blessure.
&CAUTION &ATTENTION &PRUDENCIA This symbol means important instructions. Failure to heed them can result in injury or material property damage. Ce symbole designe des instructions importantes. Le non-respect de ces instructions peut entrainer des blessures ou des degats materiels. Este slmbolo indica que las instrucciones son importantes. De no tenerse en cuenta, podrla ocasionarse heridas graves o dafios materiales. HAlT USE IMMEDIATElY IF A PROBlEM APPEARS.
Getting Started I Mise en route I Primeros pasos ![] ~==~~~~~~~~~~~0~ English Franrais Turning Power On Press any button (except ~ and turn power on. .! ) to • When installing this unit in a car for the first time, DEMO OFF screen will be displayed for 30 seconds after turning on the unit. Press ~/ENTER within 30 seconds to turn off the Demonstration mode. Press and hold SOURCE/ for at least 2 seconds to turn off the unit.
Changing the Source Changement de source Cambio de Ia fuente TUNER~ DISC~ USB AUDIO/iPod* 1 ~ AUXILIARY*2 ~ TUNER *1 Only for CDE-152/CDE-151 and when the iPod/iPhone is connected. *2 Only when AUX SETUP is set to ON. TUNER~ DISC~ USB AUDIO/iPod* 1 ~ AUXILIARY*2 ~ TUNER *1 Uniquement pour les modeles CDE-152/CDE151 et lorsque I' iPodliPhone est connecte. *2 Uniquement lorsque AUX SETUP est defini sur ON.
BASS ENGINE SQ Function I Fonction BASS ENGINE SQ I Funci6n BASS ENGINE SQ English Franrais Espaiiol With the BASS ENGINE SO function on this unit, several parameters affecting Bass performance are adjusted simultaneously. The BASS ENGINE SO Level adjustment varies these parameters uniformly for optimum Bass effect at different levels. Grace a Ia fonction BASS ENGINE SO de cet appareil, il est possible de regler simultanement plusieurs parametres lies aux performances des graves.
English Espaiiol Franrais Activate BASS ENGINE SQ mode. Activez le mode BASS ENGINE SQ. Active el modo BASS ENGINE Press and hold to switch to BASS ENGIN mode. BASS ENGIN ~ MANUAL SET (Initial setting) Maintenez cette touche enfoncee pour passer au mode BASS ENGIN. BASS ENGIN ~ MANUAL SET (reglage initial) Pulse sin soltar para cambiar al modo BASS ENGIN. BASS ENGIN ~ MANUAL SET (Ajuste inicial) Adjusting BASS ENGINE SQ level. Reglage du niveau du mode BASS ENGINE SQ.
Radio l l·lli - []/. I \ I ;'I ' (@I Espaiiol English Recalling the TUNER Mode Rappel du mode TUNER Select the TUNER mode. Selectionner le mode TUNER. Recuperaci6n del modo TUNER Seleccione el modo TUNER .
CD/MP3/WMA English Espaiiol Recalling the DISC mode Rappel du mode DISC Recuperaci6n del modo DISC Select the DISC mode . Selectionner le mode DISC . Seleccione el modo DISC .
Selection du marceau de votre choix Selecci6n de Ia canci6n deseada Appuyez sur Ia touche~ ou ~,puis relachez-la pour aller au debut du marceau actuel ou du marceau precedent. Pulse y suelte ~ o ~ para omitir el principia de Ia canci6n actual o de Ia siguiente. Press and hold ~ or ~ to fast backward or fast forward. Maintenez Ia touche ~ ou ~ enfoncee pour effectuer une recherche rapide vers l'arriere ou vers !'avant. Pulse y mantenga presionado ~ o ~para el avance o el retroceso rapido.
Flash Memory (Optional) I Cl9 USB (en option) I Memoria USB (opcional) • If a flash memory device is connected to this unit, MP3IWMA files stored in the flash memory device can be played back. I Si un peripherique de stockage USB est connecte a l'appareil, les fichiers MP3IWMA contenus dans celui-ci peuvent etre Ius. I Si se conecta un dispositivo de memoria USB a esta unidad, se podran reproducir los archivos MP3IWMA guardados en el dispositivo de memoria USB.
M.I.X. (Random Play) M.I.X. (Lecture aleatoire) M.I.X. (Reproducci6n aleatoria) L::::J X: All songs in the current folder are played back in random sequence. L::::J X: Tous les morceaux du dossier actuel sont Ius dans un ordre aleatoire. L::::J X: : Todas las canciones de Ia carpeta actual se reproducen de forma aleatoria. RLL:X: All songs in the flash Memory are played back in random sequence. RLL:X: Tous les morceaux de Ia cle USB sont Ius dans un ordre aleatoire.
iPodliPhone (Optional) (CDE-1521CDE-151 only) I iPodliPhone (en option) (mod91es CDE-1521 CDE-151 uniquement) 1 iPodliPhone (opcional) .(Solo serie CDE-1521CDE-151) • 0 English Franrais Espaiiol An iPod/iPhone can be connected to this unit by using the Interface cable for iPod/ iPhone (included with iPod/iPhone). Un iPod/iPhone peut etre connecte a cet appareil a l'aide d'un cable d'interface pour iPod/iPhone (inclus avec iPod/ iPhone).
Selecting the desired song Selection du morceau de votre choix Selecci6n de Ia canci6n deseada Appuyez sur Ia touche ~ ou ~, puis relachez-la pour aller au debut du marceau actuel ou du marceau precedent. Pulse y suelte ~ o ~ para omitir el principia de Ia canci6n actual o de Ia siguiente. Press and hold ~ or ~ to fast backward or fast forward through the current song. Maintenez Ia touche ~ ou ~ enfoncee pour une recherche rapide vers l'arriere ou vers !'avant au sein du marceau actuel.
Random Play Shuffle All Lecture aleatoire ALL 1 Press (\/ENTER to activate the search selection mode. 2 Turn the Rotary encoder to select SHUFFLEALL, and then press (\!ENTER. 1 Appuyez sur (\/ENTER pour activer le mode de selection de recherche. 2 Tournez le Bouton rotatif pour selectionner SHUFFLEALL, puis appuyez sur (\/ENTER. :x.! :x.! Press 5 : :x.! Shuffle ALL plays all songs in the iPod/iPhone randomly.
Searching for a desired Song (iPodliPhone) I Recherche d'un morceau souhaite (iPodliPhone) I BLisqueda de Ia cancion que desea escuchar (iPodliPhone) Playlist I Liste de lecture I Lista de reproducci6n Artist I Artiste I Artista Album I Album I Album Song I Marceau I Canci6n Podcast I Podcast I Podcast Genre I Genre I Genero Composer I Compositeur I Canciones Audiobook I Livre audio I Audiolibro Genius Mix List I Liste Mix Genius I Lista Genius Mix Song I Marceau I Canci6n Album I Album I Album Song I Ma
Enter. Entree. Pulse lntro para confirmar. Select the desired title. Selectionnez le titre de votre choix. Seleccione el titulo deseado. Enter. Entree. Pulse lntro para confirmar. Song/Audiobook/ Genius Mix Search mode: The selected song/audiobook/ genius mix list is played back. Others Search mode: Proceeds to the next hierarchy level . Search for a title by performing steps 4 and 5 repeatedly.
English Espaiiol Activate the SETUP mode. Activez le mode SETUP. Press and hold for at least 2 seconds. Maintenez cette touche enfoncee pendant au moins 2 secondes. Active el modo de configuraci6n. Pulse y mantenga presionado durante, al menos, 2 segundos. Select GENERAL mode. Selectionnez le mode GENERAL. Seleccione el modo GENERAL. Enter. Entree. Pulse lntro para confirmar.
Select CLOCK ADJ mode. Selectionnez le mode CLOCK ADJ. Seleccione el modo CLOCK ADJ. Enter. Entree. Pulse lntro para confirmar. Adjust the hours. Reglez les heures. Ajuste Ia horas. Enter. Entree. Pulse lntro para confirmar. Repeat 6 and 7 to adjust minutes. Repetez les etapes 6 et 7 pour regler les minutes. Repita Ia selecci6n de 6 y 7 para ajustar los minutos . Return to normal mode. Revenez au mode normal. Permite volver al modo normal. Press and hold for at least 2 seconds.
Specifications I Specifications I Especificaciones Tuning Range 87.7-107.
• iPhone, iPod, iPod classic, iPod nano, and iPod touch are trademarks of Apple Inc., registered in the U.S. and other countries. "Made for iPod," and "Made for iPhone," mean that an electronic accessory has been designed to connect specifically to iPod, or iPhone, respectively, and has been certified by the developer to meet Apple performance standards. Apple is not responsible for the operation of this device or its compliance with safety and regulatory standards.
Installation /Installation /lnstalaci6n • When making connections to the vehicle's electrical system, be aware of the factory installed components (e.g. on-board computer). Do not tap into these leads to provide power for this unit. When connecting the CDE-152/CDE-151/CDE-150 to the fuse box, make sure the fuse for the intended circuit of the CDE-1521 CDE-151/CDE-150 has the appropriate amperage. Failure to do so may result in damage to the unit and/or the vehicle. When in doubt, consult your Alpine dealer.
2 2 2 Screw Vis Ecrou Hex Nut (MS) a six pans (MS) '----./ Attache de montage en metal '----./ This unit Secure the ground lead of the unit to a clean metal spot. • For the screw marked " * '', use an appropriate scre"'v for th e chosen mounting location. 3 Slide the CDE-152/CDE-151/CDE-150 into the dashboard until it clicks. This ensures that the unit is properly locked and will not accidentally come out from the dashboard.
Connections I Raccordements I Conexiones POWER ANT (Blue) I (Bieu) I (Azul) C>--(Blue/White) I (Bieu/Bianc) I (Azul/Blanco) REMOTE TURN-ON (Orange) I (Orange) I (Naranja) ILLUMINATION (Red) I (Rouge) I (Rojo) IGNITION (Yellow) I (Jaune) I (Amarillo) BATTERY (Black) I (Noir) I (Negro) GND Ignition Key Speakers (Gray) I (Gris) I (Gris) SPEAKER RIGHT FRONT (Gray/Black) I (Gris/Noir) I (Gris/Negro) (Violet/Black) I (Violet/Nair) I (Violeta/Negro) Antenna Receptacle To power antenna I A.
GARANTIE LIMITEE Fidele a son engagement de ne fournir que des produits de qualite, ALPINE ELECTRONICS OF AMERICA, INC.(« Alpine») est heureuse de vous offrir cette garantie. Nous vous suggerons de le lire attentivement et en entier. Si vous avez Ia moindre question, veuillez contacter l'un de nos concessionnaires ou appeler directement Alpine aux numeros listes ci-dessous. e PRODUITS COUVERTS PAR LA GARANTIE Cette garantie couvre les produits audio de voiture et les accessoires connexes ( « le produit »).
e COMMENT SE PREVALOIR DE LA GARANTIE CD II vous faut remettre le produit necessitant des reparations a un centre de service autorise Alpine ou a Alpine meme et en assumer les frais de transport. Alpine a le choix entre reparer le produit ou le remplacer par un produit neuf ou revise, le tout sans frais pour vous. Si les reparations sont couvertes par Ia garantie et si le produit a ete envoye a un centre de service Alpine ou a Alpine, le paiement des frais de reexpedition du produit incombe Alpine.
LIMITED WARRANTY ALPINE ELECTRONICS OF AMERICA, INC. ("Alpine"), is dedicated to quality craftsmanship and is pleased to offer this Warranty. We suggest that you read it thoroughly. Should you have any questions, please contact your Dealer or contact Alpine at one of the telephone numbers listed below. e PRODUCTS COVERED: This Warranty covers Car Audio Products and Related Accessories ("the product"). Products purchased in the Canada are covered only in the Canada. Products purchased in the U.S.A.
e HOW WE LIMIT IMPLIED WARRANTIES: e HOW TO CONTACT CUSTOMER SERVICE: ANY IMPLIED WARRANTIES INCLUDING FITNESS FOR USE AND MERCHANTABILITY ARE LIMITED IN DURATION TO THE PERIOD OF THE EXPRESS WARRANTY SET FORTH ABOVE AND NO PERSON IS AUTHORIZED TO ASSUME FOR ALPINE ANY OTHER LIABILITY IN CONNECTION WITH THE SALE OF THE PRODUCT. Should the product require service, please call the following number for your nearest Authorized Alpine Service Center.
Owner's Manual Mode d 'emploi MADE IN THAILAND DESIGNED BY ALPINE JAPAN FABRIOUE EN THAILANDE CONCU PAR ALPINE JAPON ALPINE ELECTRONICS, INC.
• System Requirements The CD can be used on the following operating systems: Microsoft®, Wind ows®, 95/98/Me/NT/2000/XP/VIST A/7 or Appl e Mac OS X 104/ 10 5/10 6 In order to use the CD . Ac rob at Reader 4.0 (or above) is required. • How to Use the CD In sert the CD, open it, then click twice the fil e for th e model purchased . • Caution on Handling the CD Never try to play the CD on any oth er audio CD player Resultant loud volume may cause hearing damage or damage to the speaker.
YAMAGATA (THAILAND) Co., Ltd. 324 Moo 4, Bangpoo Industrial Estate Soi6, Sukhumvit Road T.Phraeksa, A.
Thank you for choosing Alpine for your car audio equipment needs. Our goal is to produce the best audio/video/navigation products in the world and hope your expectations are met. Please take a moment to protect your purchase by registering your product now at the following address: www.alpine-usa.com/registration. You will be informed of product and software updates (if applicable), special promotions, and news about Alpine.