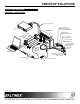
TABLETOP SOLUTIONS The PNP300 is shown above.
TABLETOP SOLUTIONS TABLE OF CONTENTS Page PRECAUTIONS / SAFETY WARNINGS................ 2 GENERAL..........................................................2 HANDLING ........................................................2 CLEANING.........................................................2 FCC NOTICE .....................................................2 ABOUT YOUR PNP300/350 .................................... 3 TECHNICAL SPECIFICATIONS.............................. 3 PRODUCT DESCRIPTION .................
TABLETOP SOLUTIONS PRECAUTIONS / SAFETY WARNINGS • 1 Please read this manual carefully before using your PNP300/350 and keep it handy for future reference. These safety instructions are to ensure the long life of your PNP300/350 and to prevent fire and shock hazards. Please read them carefully and heed all warnings. • If the PNP300/350 interface is not used for an extended period, disconnect the unit from the wall to avoid fire, shock, and loss of power.
TABLETOP SOLUTIONS ABOUT YOUR PNP300/350 2 TECHNICAL SPECIFICATIONS 3 Specifications are subject to change. See www.altinex.com for up-to-date information. PNP300/350 Pop ‘N Plug Slim Interconnect Box FEATURES/ DESCRIPTION The PNP300/350 is designed for installation in a conference room table, podium, or anywhere computer audio, video, and communications connections are needed.
TABLETOP SOLUTIONS PRODUCT DESCRIPTION 4 RCA JACK FOR AUDIO LEFT RCA JACK FOR VIDEO RJ-11 JACK FOR PHONE/MODEM 3.
TABLETOP SOLUTIONS APPLICATION DIAGRAMS 5 DIAGRAM 1: TYPICAL SETUP AUDIO / VIDEO CABLES STEREO AUDIO TO AUDIO DISTRIBUTOR OR AMPLIFIED SPEAKERS DVD PLAYER PNP300 DB9 CABLE TO REMOTE CONTROLLER RS-232 CABLE VGA CABLE RJ-11 CABLE TO TELEPHONE LINE STEREO AUDIO CABLE RJ-45 CABLE TO NETWORK HUB 15-PIN HD CABLE TO DISTRIBUTION AMPLIFIER OR COMPUTER DISPLAY ETHERNET CABLE RJ-11 MODEM CABLE LAPTOP BLACK, RED, AND YELLOW RCA CONNECTORS FOR AUDIO / VIDEO AC ADAPTER TO AC SUPPLY OUTLET 400-0114-004 5
TABLETOP SOLUTIONS DIAGRAM 2: DIMENSIONS The PNP300 faceplate is shown here. 10.033" [255mm] 3.390" [86mm] TOP VIEW R Slim PNP300 2.190" [56mm] 6.140" [156mm] 2.890" [73mm] 9.
TABLETOP SOLUTIONS DIAGRAM 3: MOUNTING The PNP300 faceplate is shown here.
TABLETOP SOLUTIONS DIAGRAM 4: CABLE CLAMPS TABLE POWER CORD ATTACH THE POWER CORD TO A SECURED SURFACE OR TO THE TABLE WITH A CABLE CLAMP 400-0114-004 8
TABLETOP SOLUTIONS INSTALLING YOUR PNP300/350 PNP300: 6 AC power cable Black RCA cable Red RCA cable Yellow RCA cable Black DB-15 HD DB-9 cable Red RJ-45 cable Silver RJ-11 cable Step 1. Cut an opening into the table’s surface. Refer to the ALTINEX website at www.altinex.com for the cutout requirements. Note: The table can be 0.25 in (6 mm) to 3.75 in (95 mm) thick. Always confirm dimensions before cutting to ensure that specifications have not changed. Step 2.
TABLETOP SOLUTIONS TROUBLESHOOTING GUIDE 8 ALTINEX POLICIES The PNP300/350 supplied unit was carefully tested and no problems were detected; however, we would like to offer these suggestions. • • 9.1 LIMITED WARRANTY/RETURN POLICIES Please see the ALTINEX website at www.altinex.com for details on warranty and return policies. Please make sure that the highest quality video, audio, network, and telephone cables or connectors are used. Make sure that no cable or power cord is damaged or pinched.