
Product Manual
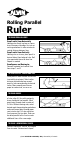

Rolling Parallel
Ruler
©2006 ALVIN & COMPANY, INC., Bloomfield, CT 06002
TO DRAW PARALLEL LINES
Draw Parallel Lines Horizontally
Holding ruler firmly in place as shown,
draw line across top edge. Use inch or
metric graduations in roller window to
control distance between lines.
Draw Parallel Lines Vertically
Holding ruler as shown, place pencil in
desired hole at front edge of ruler. Roll
ruler required distance to draw line.
Repeat as needed.
Draw Squares and Rectangles
Connect horizontal and vertical lines
from steps 1 and 2.
TO DRAW CIRCLES, CURVES AND ARCS
Place pencil in hole at either end of ruler
to establish pivot point. Select radius
distance desired and place second
pencil in hole corresponding to desired
radius. Move second pencil across
paper to create circle, curve or arc.
TO DRAW ANGLES
Using open protractor slot in center
of ruler, align 0-0 line with previously
drawn horizontal line beneath. Mark
pencil point through hole in center of
0-0 line. Without moving ruler, select
desired angle from protractor graduations
and mark second point through open
semi-circular slot. Lift ruler and draw
line to connect the two dots. Ruler can
be rolled parallel to this line to create
additional lines at the same angle.
TO DRAW 3-DIMENSIONAL SHAPES
Combine horizontal, vertical, and angled
lines to create 3-dimensional shapes.