An-z.erican FIerit:age FLEEJWCOD. RV I'LEETWClJD. RV 2002 ©200l by Fleetwood Enterprises, Inc. All rights reserved. No part of this publication may be reproduced or transmitted in any form or by any means, electronic or mechanical, including photocopying, recording, or by any information storage or retrieval system without written pennission from Fleetwood Entelprises, Inc. Manufacturing subsidiaries of Fleetwood Enterprises, Inc.
TO FT. WAYNE, IN t BACK 40 RESTAURANT WAL-MART MAP OF FLEETWOOD'S DECATUR, INDIANA FACILITIES A = PLANT #44 MOTOR HOME (HERITAGE, EAGLE, DREAM, TRADITION, DISCOVERY, REVOLUTION, BOUNDER DIESEL, EXPEDITION) B = AMERICAN COACH SERVICE CENTER WITH OVERNIGHT PARKING (EAGLE, DREAM, TRADITION, FLYERS, LIMITED, REVOLUTION) C = PLANT #91 REGIONAL SERVICE CENTER (ALL OTHER FLEETWOOD MOTOR HOMES) A D = PLANT 343 GOLDSHIELD FIBERGLASS BELLMONT HIGH SCHOOL ~ w $: • =STOP LIGHT _ =STOPSIGN ..
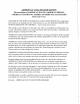
AMERICAN COACH ASSOCIATION The association of AMERICAN EAGLE, AMERICAN DREAM, AMERICAN TRADITION, AMERICAN HERITAGE and LIMITED Motorcoach Owners WELCOME TO THE WORLD OF AMERICAN COACH ASSOCIATION! We can appreciate how much you are enjoying your new coach because we, too, own EAGLES, DREAMS, TRADITIONS, HERITAGES AND LIMITEDS - and we invite you to join us. Why should you join? Because it's fun, that's why.
r
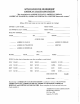
APPLICATION FOR MEMBERSHIP AMERICAN COACH ASSOCIATION "The Association for AMERICAN EAGLE, AMERICAN DREAM, AMERICAN TRADITION, AMERICAN HERITAGE & LIMITED Motorcoach owners" Date: _ _ _ _ _ _ _ _ __ (Please fill in your name as you want it to appear on a badge) OWNER'S LAST NAME,_ _ _ _ _ __ RRSTNAME _ _ _ _ _ _ __ CO-OWNER'S LAST NAME,_ _ _ _ __ FIRST NAME _ _ _ _ _ _ _ __ MAILING ADDRESS, _ _ _ _ _ _ _ _ _ __ CITY _ _ _ _ _ _ _ _ __ ZIP _ _ _ _ __ STATE_ _ _ _ _ __ PHONE _ _ _ _ _ __ (CHECK ONE)
I·
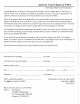
American Coach Chapter of FMCA The Family Motor Coach Association Congratulations on your choice of an American Coach Product. We are confident that you will enjoy it as much as we have ours. To enhance your utilization and pleasure we invite you to join our organization. It is called the American Coach Chapter of the Family Motor Coach Association (FMCA). FMCA is the foremost motor home organization in the world and offers a large number of free and for-cost benefits.
TABLE OF CONTENTS WARRANTY . ....................... .01-1 Coverage Provided ................... 01-1 Owner's Obligations .................. 01-1 Dealer's Obligations ..................01-1 When the Dealer Does Not Resolve the Problem ................ 01-1 Manufacturer's Obligations ............. 01-1 What is Not Covered by This Warranty .... 01-2 IMPORTANT NOTICES .............. .02-1 AMERICAN COACH SPECIFIC INFORMATION .................... .
Table of Contents Carbon Monoxide DetectOlIAlarm ..... 05-18 Emergency Towing .................. 05-18 Attaching Accessories to Your Motor Home ..................... 05-19 LIVING WITH YOUR MOTOR HOME . . .06-1 Hydraulic Leveling System (If Equipped) .. 06-1 Power Entry Step (If Equipped) .......... 06-1 Manual Stepwell Cover (If Equipped) .....06-1 Pneumatic Stepwell Cover (If Equipped) ...06-1 Step Cover Operation ............... 06-2 Entry and Screen Doors ................
Table of Contents Generator (If Equipped) .............. 08-5 Generator Fuel Supply . .............. 08-5 LP Generator (If Equipped) ........... 08-5 Generator Operations ............... 08-5 Generator Operating Safety Precautions .. 08-6 Generator Cooling System . ........... 08-6 Generator Slide-Out (If Equipped) ...... 08-7 Generator Maintenance . ............. 08-7 Automatic Generator Start Control System (If Equipped) ........ 08-7 Main Features . .................... 08-7 Electrical Wiring Diagrams ..
This page intentionally blank.
LIMITED ONE-YEAR/THREE YEAR WARRANTY For Motor Homes Manufactured by subsidiaries of Fleetwood Enterprises, Inc., sold in the United States and Canada COVERAGE PROVIDED Your new motor home, including the structure, plumbing, heating and electrical systems, all appliances and equipment installed by the manufacturer, is warranted under normal use to be free from manufacturing defects in material or workmanship.
Warranty WHAT IS NOT COVERED BY THIS WARRANTY This warranty does not cover: 1. The automotive chassis system (including the chassis and drive train), tires and batteries, which are covered by the separate warranties of the respective manufacturers of these components. a. Abuse, misuse, negligence or accident; Some states do not allow the exclusion or limitation of incidental or consequential damages, so the above limitation or exclusion may not apply to you. b.
IMPORTANT NOTICES The particle board, hardwood plywood, or paneling used in your motor home are made with urea-formaldehyde resin. The companies that supply us with these materials have asked that we tell you about urea-formaldehyde with the statements on this page. Ventilation is important for making the interior of your motor home comfortable. Please read the section about ventilation and prolonged occupancy in the Living With Your Motor Home chapter in this Owner's Manual.
Important Notices AI WARNING I It is not safe to use cooking appliances for comfort heating. Cooking appliances need fresh air for safe operation. Before operation: WARNING Portable fuel-burning equipment, Including wood and charcoal grills and stoves, shall not be used inside this recreational vehicle. The use of this equipment inside the recreational vehicle may cause fires or asphyxiation. 1. Open overhead vent or turn on exhaust fan, and 2. Open window.
AMERICAN COACH SPECIFIC INFORMATION ELECTRICAL CIRCUIT BREAKER PANELS, CIRCUIT FUSE PANELS AND BATTERY DISCONNECT SWITCH LOCATIONS American Heritage (All Models) • Chassis 12-Volt Fuse Front Panel ..................................... In the entry stepwell • Chassis Fuse 12-Volt Rear PaneL ..................................... In the battery compartment • Chassis Engine Preheat 12-Volt Breaker ........................... Under the bedroom engine access cover • Chassis 12-Volt Battery Disconnect Switch .....
American Coach Specific Information American Tradition (All Models) • Chassis 12-Volt Fuse Front Panel ..................................... In the entry step-well • Chassis Fuse 12-Volt Rear Panel... .................................... In the battery compartment • Chassis Engine Preheat 12-Volt Breaker. .......................... Under the bedroom engine access cover • Chassis 12-Volt Battery Disconnect Switch ......................
American Coach Specific Information TOWED VEHICLE WIRING Your motor home is equipped with an electrical connector, from here on referred to as a hitch plug, which provides an electrical connection for your towed vehicle. The hitch plug is located at the rear of the motor home near the hitch receiver. It is a 7 position connector wired as follows: TO POWER OlSTRIBUTION BOX (BATTERY COMP'T) Some towed vehicles will not have amber turn signals separate from the brake lights.
American Coach Specific Information HERITAGE DRIVER'S CONTROLS 38 6 Il" 39 40 41 58 59 53 60 61 52 62 51 03-4
American Coach Specific Information 68 69 65 Instrument Panels 1. Hazard Indicator Light 2. Hazard Light Switch 29. Check Engine Indicator Warning Light 52. Leveler Control Panel 53. Aqua-Hot Defrost Blower Switch 30. High Beam Indicator Light 54. Aqua-Hot Defrost Temp Switch 55. Aqua-Hot On/Off Switch 5. Head Lights Switch 31. Stop Engine Indicator Warning Light 32. Engine Brake Indicator Light 6. Dome Light Dimmer Switch 33. ABS Indicator Light 7. Docking Lights Switch 34.
American Coach Specific Information EAGLE, DREAM AND TRADITION DRIVER'S CONTROLS 53 52 54 - VIP MODULAR RV SMARTWHEEL SWITCH LAYOUT Head ~:s~ CruIse On/Off Cruise Cancel 30 Cruise Resume CruIse Set 55 Shifter Selector (Side-Pod) 03-6 Marker Lamp Flash Wiper Off WIper HlILo WIper VarIable WlperWash
American Coach Specific Information Instrument Panels 31. ABS Systems Warning Indicator Light 1. Air Vents 32. Antenna Up Warning Indicator Light 2. Blank 33. High Beam Indicator Light 3. Brake Pedal 34. Exhaust Brake Indicator Light 4. Hood Light Switch/Chassis & Generator Engine Areas 35. Check Engine Warning Light 36. Leveling Jacks Down Indicator Light 5. Dome Light Switch 37. Stop Engine Warning Light 6. Luggage Lights Switch 7. Docking Lights Switch 38.
This page intentionally blank.
INTRODUCTION Welcome to the recreational vehicle life-style and the growing family of motor home owners. We sincerely thank you for choosing a Fleetwood motor home! .II NOTE I This manual describes many features of your RV and includes some instructions for its safe use. This manual, including photographs and illustrations, is of a general nature only.
Introduction Because of the continuous program of prodnct change conducted by Fleetwood, it is possible that recent product changes may not be included in this manual. Specifications may change without notice.
Introduction 3. We sincerely believe that your dealer and the factory representative will be able to solve any problem which might arise. If their combined efforts are not satisfactory, please send a letter describing the circumstances to: Fleetwood American Coach Service 1420 West Patterson St. Decatur, IN 46733 Please include the brand name and serial number of your motor home. The serial number is located on the identification tag next to the entry door, and on your warranty card. 4.
IR'IItroduci ioR'll INSPECT AND MAINTAIN Follow a consistent schedule of inspection and maintenance for your motor home. Your continuing safety and comfort depend on it. This manual includes a section outlining maintenance intervals. If you follow the maintenance guidelines, you will minimize the possibility of failure of any important system or part of your motor home. PLANNING AND PREPARATION Each year millions of Americans embark on trips using some type of recreational vehicle.
Introduction (Example) (Example) FEDERAL CERTIFICATION TAG V.I.N. (Vehicle Identification No.) MFD BY: DATE MFD: INC VEH MFD BY: DATE OF VEH MFD: GVWR: FRONTGAWR: INTERMEDIATE GAWR: - @ KGS ( LBS) KGS ( WITH: TIRES AT: ( LBS) KGS ( WITH: TIRES AT: LBS) ( GAWR REAR: GAWR COMBINED INTERMEDIATE AND REAR: KGS ( WITH: TIRES AT: ( KGS ( RIMS KPA COLD SINGLE PSI) @ BARCODE This tag is located on the left top of the instrument paneI. RIMS KPA COLD DUAL PSI) FLEETWOOD.
Introduction WARNINGS, TERMS AND CONCEPTS FOR SAFE OPERATION OF YOUR MOTOR HOME Vehicle Crash Like any other vehicle you may drive, your motor home can be involved in a vehicle crash, including a rollover. The motor home will be damaged and you and others can be injured or killed. Ddve defensively at all times.
Introduction • You CANNOT increase the towed weight limit by changing the size of your hitch. • Properly load what you tow to avoid a vehicle crash. • Do not attempt to tow something that is too heavy for your chassis. • When driving in mountainous areas, look for and obey highway signs concerning grades and curves. Your driving experience when pulling and stopping a towed unit on mountain roads will be very different from what you experience on level ground.
This page intentionally blank.
ON THE ROAD Responsibility for Proper Loading GAWR (Gross Axle Weight Rating)* means the maximum permissible loaded weight a specific axle is designed to carry. As the operator of this motor home, you are responsible for its proper and safe loading. This section is intended to provide you with helpful information concerning the loading of your motor home. MTW (Maximum Tongue Weight)* is the maximum permissible downward force exerted on the hitch ball by the towed vehicle coupler.
On The Road Towing a Vehicle or Trailer ("Towed Load or Towed Unit") .II NOTE I Some states and provinces require brakes and safety chains when towing vehicles. Consult the proper authorities in the states or provinces through which you will be traveling. When you use your motor home to tow, remember that you must stop the towed load with your motor home's brakes. This is critical on hills and in the mountains where you may encounter sharp curves and possibly irregular road surfaces.
01'11 The Road Weight-Distributing Hitch Head Assembly I 1-) Receiver Tube Chain Loop Chain Bracket Weight-Carrying Hitch Head Assembly ~~/ ./ Typical Hitch System Components The equipment supplied with your motor home is called the "hitch receiver." This component is attached to the motor home frame. The square tube opening "receives" any of a wide variety of hitch head assemblies. The "hitch head" is the component that includes the hitch ball.
On The Road The table on the previous page outlines the hitch head assembly combinations and the resulting maximum towed loads that are available to you. The ratings associated with the particular hitch receiver supplied with your motor home are noted on the weight tag and on a label affixed to the hitch receiver. rect type of hitch head assembly you should use for the towed load you intend to pull.
On The Road Cargo Carrying Capacity and Load Distribution .(1 NOTE I Cargo Carrying Capacities (CCC) of your motor home are specified on a label affixed to the inside of the motor home. The label includes all factory installed options. If other equipment such as leveling jacks, awnings, roof pods, etc., are installed after the motor home leaves the factory the weight of these items must be subtracted from the total of the passenger and cargo carrying capacities.
On The Road To calculate the opposite side of the vehicle wheel position weight, subtract this side's weights from the weights recorded in steps 1, 2 and 3. If there is a towed vehicle, proceed to step 4 to obtain the "towed vehicle only" weight. 4. If a boat, trailer or other vehicle is being towed, it should be weighed and combined with the towing vehicle's GVW (Gross Vehicle Weight) to ensure the total weight does not exceed the GCWR (Gross Combined Weight Rating).
On The Road WEIGHING YOUR MOTOR HOME To Obtain Individual Wheel Positions Weights: STEP 3S STEP1S 1 : 1 I: 1 ] 31 One Side Scale Weight Ibs. One Side Scale Weight Calculate Other Side Weight Ibs. (Step 1 - 1S) Tire Load (Ibs.) Ibs. Calculate Other Side Weight Ibs. (Step 3 - 3S) Tire Load (Ibs.) Ibs. (See Note') (See Note') Inflation Ibs. (Step 3S) (Step 1S) psi. Inflation psi.
On The Road WARNING Modification of your vehicle by addition of racks not originally equipped by the manufacturer to carry additional equipment, vehicles or cargo will reduce your warranty coverage and may cause personal injury or property damage. WARNING Do not store or carry LP gas containers, gasoline, or other flammable liquids inside your motor home.
On The Road Air Pressure The most important factor in maximizing the life of your tires is maintaining proper inflation. Driving on a tire that does not have the correct inflation pressure for the load of the vehicle is dangerous and may cause premature wear, tire damage, andlor loss of control of the vehicle. A tire that is underinflated will bnild up excessive heat that may go beyond the prescribed limits of endurance of the rubber and the radial cords. This could result in sudden tire failure.
On The Road dual, you might also spot it with a visual inspection. However, if it is an inside rear dual, the chances of spotting it without an air pressure check are velY slim.
On The Road WARNING Make sure that you and your passengers, including pregnant women, wear safety belts, Be sure that lap belts fit snugly and as low as possible around the hips, If safety belts are not used properly, the risk of you or your passengers being injured in a collision greatly increases.
On The Road for these children. Check your local and state laws for specific requirements. Safety belts and seats can become hot in a vehicle that has been closed up in sunny weather, and could burn a child. Check seat covers and buckles before you place a child anywhere near them. Children who are too large for child safety seats should always wear safety belts. WARNING Never leave a child unattended in your vehicle. Always remove the key from the ignition and take it with you.
On The Road motor home is heavily loaded, or the grade is steep, preselection of a lower gear prior to the grade may be desirable. Gear preselection means the selection of a lower gear to match the driving conditions you encounter or expect to encounter. Preselection will give you better control on slick or icy roads and on downgrades. Downshifting to lower gears increases engine braking.
On The Road • Avoid driving your vehicle through 01' over combustible materials such as leaves, grass, vegetation 01' stubble high enough to touch, catch 01' collect on its hot exhaust system. • Parking 01' idling should be done only ill an area where there are 110 combustible materials under the vehicle. WARNING Do not park or idle the motor home over combustible materials such as tali grass or dried leaves.
On The Road CAUTION Don't use the Night Vision System to replace your normal view of the road ahead. It can't tell you how far away things are. It senses only warmer or colder objects, not all objects. Driving by staring at the image might cause you not to see important objects in the road ahead. If you don't see something in time, you could have a crash in which you and others could be injured. Use the Night Vision System only as a driving aid.
On The Road MC 1000TRIP COMPUTER (If Equipped) To protect the fuel system from excessive pressure or vacuum, or from sudden release of pressure, replace lost or damaged fuel fill caps with caps of the same design which are available from your Fleetwood motor home dealer. The trip information system constantly monitors and records various engine and operating data necessary to track both engine and driver performance. The data can be viewed using the display monitor.
On The Road charges and the resulting spark ignites gasoline vapors around the fill spout. A simple precaution to help avoid this potential problem is to stay near the vehicle's fueling point. Do not get back into your vehicle during refueling - even when using the nozzle's automatic hold-open latch.
On The Road WARNING Exhaust gases are deadly. Do not block the tailpipes, or exhaust ports, or situate the vehicle in a place where the exhaust gases have any possibility of accumulating either outside, underneath, or inside your vehicle or any nearby vehicles. Outside air movements can carry exhaust gases inside the vehicle through windows or other openings remote from the exhaust outlet.
On The Road Spartan Motors chassis assistance: 1-800-543-4334 CAUTION The air brake system and air suspension system may require recharging with air before towing to release the brakes and provide proper ride height. An air inlet fitting is located in the front road side compartment or under the front hood. Tow truck operators should be equipped to re-charge these air systems.
This page intentionally blank.
LIVING WITH YOUR MOTOR HOME HYDRAULIC LEVELING SYSTEM (If Equipped) Controls for the leveling system are located in the driver's compartment. A detailed operating and maintenance guide is included in your Owner's Information Package. Read all instructions for this system carefully before operating the system. WARNING The leveling system is designed as a leveling system only. Do not use the system as a jack or with a jack. Do not attempt to raise the tires off the ground.
Living With Your Motor Home WARNING Do not operate the pneumatic stepwell cover while anyone is positioned in the stepwell. A person standing in the stepwell could lose their balance and fall if the stepwell cover is operated. WARNING Feet, legs, hands, and other body parts could be pinched or injured during stepwell cover operation. Keep clear of the stepwell cover during operation. Stepwell Cover Operation 1. The stepwell cover control is located on the passenger side of the overhead. 2.
Living With Your Motor Home • Pull the red handle and remove the screen, or; • Lift the red latch to release the window. Slide it completely through the slot so the window swings free. When parked, be sure the exit window is not blocked by trees or other obstacles. REMOTE MIRROR CONTROL (If Equipped) To lower: Pull straight down on the cord slightly, and move it about 45 degrees to either the left or right and lower the blind. Stop the blind in mid-travel by moving it back to the straight down position.
Living With Your Motor Home in mid-travel by moving it back to the straight down position. Re-attach the retainers when traveling. To adjust the angle: Turn the adjusting rod either direction. STORAGE Exterior Compartments Extedor storage compartments should accommodate most of your storage needs. All of the storage compartments, except the LP gas tank compartment, can be locked. Fire prevention regulations require that the LP gas tank compattment be unlocked at all times.
Living With Your Motor Home CAUTION Never attempt to move your motor home with the slide-out room(s) extended. Damage can occur to the slide-out or motor home. CAUTION In case of a power failure, the slide-out room can be retracted manually. Be sure to understand the operation section as explained in the slide-out systems Operations Manual in the Owner's Information Package. INTERIOR AND FURNISHINGS The materials used inside your motor home have been selected for durability and comfort.
Living With Your Motor Home To restore the sleeper sofa: 1. Lift the front edge of the bedframe up and rotate it back. 2. Lift the middle section of the bed up and push it back towards the rear until the bed is fully into position. 3. Replace the cushions. Folding Doors/Privacy Curtain Dividers The dividers allow you to separate areas in the motor home. They glide on nylon rollers. They are held closed by a catch.
Living With Your Motor Home depressed. If the tank is full, all lights will be on. Lights are sequential, and indicate levels in approximately 113 or I14-tank increments depending on monitor or panel design. It the tank selected is approximately 1!2-full, for example, lights E, 114 and 112 will be on. Erroneous tank level indications can be caused by: a. Water with low mineral content. The level is measured by a very low level electrical signal traveling through the liquid.
Living With Your Motor Home Here are some frequently asked questions about condensation and some answers that will help you understand more about your RV and how to keep it comfortable. Q. - In cold weather, my windows and walls look like they're sweating. Is that condensation? A. - Yes. Your windows are a good way to know if the humidity in your RV is too high. All air contains water vapor. When air is warm it can hold much more water vapor than when it is cold.
living With Your Motor Home Reduce moisture released illto the air and increase ventilation To reduce moisture released inside the RV.· I. Run the vent fan when cooking and the bath vent fan (or open the bath vent) when bathing. 2. Avoid making steam from excessive boiling or use of hot water. 3. Remove water or snow from shoes before entering to avoid soaking the carpet. 4. Avoid drying clothes inside (except in the dryer, if equipped). The water drying out of the clothes goes into the air. 5.
Living With Your Motor Home interior air. While use of a dehumidifier is not a "cure-all," and ventilation, storm windows, and moisture reduction continue to be important, operation of the dehumidifier will reduce the amount of outside air needed for ventilation. Heating load on the furnace will be reduced, and the interior will be less drafty. Dripping Ceiling Vents During cold weather condensation frequently forms on ceiling vents and may even accumulate to the point of dripping onto the surfaces below.
Living With Your Motor Home • Never smoke in bed or leave cigars/cigarettes unattended. • Keep candles or any open flames away from curtains/fabrics/walls and ceiling. • Keep matches and igniter devices safely stored and away from small children. • Do not store combustibles inside your RV (gasoline, charcoal lighter, etc.). WARNING Do not store or carry LP gas containers, or other flammable liquids inside your recreational vehicle. WARNING Explosive fuel clouds may be present at fuel filling stations.
This page intentionally blank.
PLUMBING SYSTEMS AND HOLDING TANKS The plumbing systems in your motor home are constmcted of durable thermoplastic materials. Holding tanks and piping components are strong, lightweight, and corrosion resistant. Holding tanks are of three types: • Fresh - Fresh potable water • Grey - Lavy/shower effluent • Black - Toilet effluent It is recommended to discharge as many fluid tanks as practical before driving.
Plumbing Systems and Holding Tanks CAUTION Overfilling the fresh water tank from a pressurized source may cause damage to the water system. Monitor water tank filling continually. 2. Gravity fill -The external gravity water fill is located on the exterior of the motor home. The on-board water tank can be filled here. To fill the fresh water tank, remove the cap, remove the vent plug, and fill the tank using a potable water hose. Turn the pump master switch ON to pressurize the system.
Plumbing Systems and Holding Tanks improper winterization, and poor battery maintenance, Most water system problems can be avoided by conscientious maintenance. Leaks Vibration, flexing and twisting while traveling can work pipe fittings loose. Check all plumbing for leaks at least once a year. If the water pump runs when a faucet is not open, suspect a leak. Be sure the tank drain valves are tightly closed. Leaks occur most often around threaded fittings.
Plumbing Systems and Holding Tanks Drinking Water Filter System (If Equipped) The water filter helps provide consistent drinking water quality. The filter cartridge is located in the cabinet under the galley sink. Your Owner's Illformation Package contains detailed operating and maintenance instructions concerning this system. Please note that the separate faucet at the galley, and the optional icemaker are the outlets for the filtered water.
Plumbing Systems and Holding Tanks Whenever possible, drain the holding tanks before traveling. Waste water and sewage in the holding tanks reduce the carrying capacity of the motor home. See the Motor Home Loading chapter. During extended or semi-permanent hookups to sewage systems, waste materials will build up in the tank and cause serious plugging if the tank valves are continuously open. In these cases, keep the valves closed until the tanks are 'I.-full, and then drain into the sewage system.
Plumbing Systems and Holding Tanks 3. Turn off water supply to garden hose. 4. Remove hose from black tank flush inlet connection and store hose. S. Rinse out the sewer hose with fresh water and remove the sewer hose from the dump station. 6. Replace sewer or dump station covers. 7. After rinse water has thoroughly drained from the black tank, close the knife valve and replace the termination cap.
Plumbing Systems and Holding Tanks • Use a special holding tank deodorant chemical approved for septic tank systems in the black water holding tank. These chemicals aid the breakdown of solid wastes and make the system much more pleasant to use. Do not put facial tissue, paper, ethylene glycolbased or other automotive antifreeze, sanitary napkins or household toilet cleaners in the holding tanks. • Do not put anything solid in either tank that could scratch or puncture the tank.
Plumbing Systems and Holding Tanks POWER CORD J BOX POTABLE WATER HOSE STORAGE WATER PW/P SWITCH SPRAY NOZZLE N/CABlE TELEPHONE CONNECTIONS ELECTRIC CORD STORAGE BYPASS VALVE HOT & COLD VALVES FOR DRAIN COLO WATER OUTDOOR SHOWER Utility Compartment (detail varies depending on product) 07-8 BLACK WATER KNIFE VALVE
ELECTRICAL SYSTEMS Your motor home is equipped with three electrical systems: the chassis 12-volt system the Fleetwood 12-volt house system the 120-volt AC system. They operate together to give you electrical power for many different situations. CHASSIS 12-VOLT ELECTRICAL SYSTEM CAUTION Always replace bulbs and fuses with equivalent types. The type is marked on the bulb or fuse.
Electrical Systems Battery Disconnect (If Equipped) Some accessories or equipment such as clocks, radios or the refrigerator may draw small amounts of current even when turned OFF. A manual operated rotary switch disconnect system allows you to disconnect either the chassis batteries or the coach batteries or both. Disconnecting the batteries will help reduce the likelihood of battery discharge over long storage periods.
Electrical Systems you drive, and while you are connected to 120-volt AC power thwugh the converter/ charger circuit. • Do not break live circuits at the terminals of the battery. Use care when connecting or disconnecting booster leads or cables. Attaching booster cables, and poor connections are a common cause of electrical arcs which can cause explosion. o Check and adjust the electrolyte level before charging. Fill each cell to the indicator with distilled water.
Electrical Systems 120-VOLT SYSTEM This system provides grounded 120-volt AC electrical service for appliances such as air conditioners, TV, microwave ovens, etc. This system includes: the generator the main elech'ical power cord ("shore chord") YOill' motor home is equipped with a heavy duty, power cord. It is commonly called the "shore cord." TIlls cord is used to connect to external 120volt AC service. The cord and connector is molded together to form a weatherproof cable assembly.
Electrical Systems 3. If the RESET button does not pop out when the test button is pushed, a loss of ground fault protection is indicated. Do not use any electrical outlets. Have the motor home electrical system checked at an authorized Fleetwood Service Center or by a qualified electrician. Do not use the system until the problem has been corrected. 4. To restore power push the RESET button. Your Owner's Information Package contains a card that can be used to record test dates.
Electrical Systems Generator Operating Safety Precautions Read and understand the generator operating, maintenance and safety instruction furnished in your Owner's Illformation Package. • Do not smoke or use an open flame near the generator unit or fuel tank. • Do not use generator ventilation air for heating any space. • Check engine fuel lines. Fuel leakage in or around the compartment is an extreme fire hazard. Do not use the generator until fuel leaks are repaired.
Electrical Systems Generator Slide-Out (If Equipped) Main Features The generator may be mounted on a slide-out cradle. Easy to use push button operation controls all functions of the AGS. WARNING Keep all obstacles and body parts clear of the generator and slide-out mechanism when extending or retracting the generator. Time is indicated to the hour by an internal real time clock.
This page intentionally blank.
lP GAS SYSTEM Liquefied petroleum (LP) gas is available from an approved storage container to operate your range, oven, furnace and water heater, and as an alternate energy source for some refrigerators. With proper handling precautions, LP gas is safe and provides modern conveniences wherever you travel. LP gas is stored as a liquid under pressure and vaporizes under the control of a pressure regulator. A typical LP gas tank installation is illustrated below.
LP Gas System WARNING AlWARNING 7. Turn off LP gas main valve before filling LP gas container or entering an LP gas bulk plant or motor fuel service station. Turn off all pilot lights and appliances individually before refueling of motor fuel tanks andlor LP gas containers. When not individually turned off, automatic ignition appliances may continue to spark when LP gas is turned off at the container. 8. Do not fill LP gas containers to more than 80% capacity.
IlP Gas System WARNING Do not fill LP gas containers to more than 80% capacity. Overfilling can result in uncontrolled gas flow which can cause fire and explosion. A properly filled container holds about 80% of its volume as liquid. WARNING Turn off LP gas main valve before filling LP gas tank or entering an LP gas bulk plant or motor fuel service station. Turn off all pilot lights and appliances individually before refueling of motor fuel tanks and/or LP gas containers.
This page intentionally blank.
APPLIANCES The appliances installed in your motor home are tested and listed, and comply with standards established by these organizations. All appliances are covered by Fleetwood's Ownercare Warran/}' program. Each appliance is also wan'anted by its . manufacturer. NOTE To bypass the water heater, turn the lever valve vertical. To supply water heater with water, turn lever horizontal.
Appliances the registers or the return air to the furnace. Storage under cabinets should be done carefully so as to not crush or damage any furnace ducting. Smoke and fumes created as a result of burning off manufacturing compounds are sometimes present the first time the furnace is used. This is normal; however, when you light the furnace the first time, open all windows and doors until the residues are completely burned off. Always follow the appliance manufacturer's lighting and operating instructions.
Appliances 3. Slide new filter into filter box. Be sure air flow arrows point downward. 4. Turn retainers to secure filter. AQUA-HOT MOTORCOACH HEATING SYSTEM (If Equipped) Your motor home may be equipped with an Aqua-Hot Motorcoach heating system. The Aqua-Hot heating system is an on-board heating system that provides an on-demand, continuous supply of domestic hot water, as well as interior heat where and when it is needed.
Appliances tive maintenance requirements. Remember that air conditioners use a large portion of your available electric power. See the Elech-ical System chapter for operating details on the Fleetwood Climate Control System. Experience has shown that some RV parks may experience reduced power (low voltage) on days with high heat or humidity, commonly referred to as a "brown out." This condition may result in the air conditioner circuit breaker tripping in your power distribution center.
Appliances WARNING Do not raise antenna near overhead electric wires as contact may cause serious injury. SATELLITE DISH ANTENNA (If Equipped) The roof-mounted satellite dish antenna is designed for reception of digital satellite television signals. Before traveling, remember to lower the antenna and secure it to prevent damage to the antenna, motor home roof, or objects in the path of the antenna, such as overhead wires. Do not travel with the antenna raised. 3.
This page intentionally blank.
MAINTENANCE • Your motor home has been designed to provide you with many years of use with a minimum amount of maintenance. This section will familiarize you with the areas of your motor home that require scheduled care. Time spent taking care of your motor home on a regular basis will pay for itself in extended service and will help protect your investment.
Maintenance Exterior Graphics Care The pressure sensitive graphics installed on the exterior sutfaces of your motor home require little maintenance and should be treated similarly to a painted surface. Here are some guidelines to help you keep your exterior graphics looking like new. 1. Wash your graphics with any mild car wash soap solution. Be sure to rinse thoroughly. 2. Keep high-pressure wash nozzles at least I y, feet from the edge of the graphics.
Maintenance The adhesives and sealants used in the construction of your motor home were developed to remain waterproof under sustained effects of weather and vibration. However. even the finest materials will eventually dry out and lose their effectiveness. .II NOTE I Failure to seal could cause serious damage and will affect your warranty coverage. Your dealer can perform the resealing inspection and work for you.
Maintenance material. Simply spray or apply the solution to the spot and blot with a clean dry rag or paper towel. Aggressive scrubbing may damage the texture or pattern. Attaching Accessories to Your Motor Home The sidewalls of your motor home are built with a dense fiber and polymer panel or rigid wood panel used as a substrate to the exterior fiberglass or interior finish surface. If you want to attach items to the interior walls, YOU MUST USE RIVETS.
Maintenance WARNING When installing the engine cover, be sure the cover is fully seated on the gasket seal and secured by the clamps. Do not allow insulation, carpeting, or other material to interrupt the seal between the cover and the engine compartment. If the engine cover is not installed correctly, engine exhaust gases could leak into the passenger compartment creating a safety hazard.
Maintenance MAINTENANCE GUIDELINE For your convenience, a maintenance guideline is presented. Options and accessories usually have their own owner/user manuals that often contain maintenance instructions. Consult these manuals as required. Modify any suggested maintenance schedule as use conditions or perjonnance requires.
STORAGE STORAGE CHECKLISTS The following checklists will help you perform the steps necessary to prepare your motor home for storage. Use the checklist that applies to the storage conditions you anticipate. These checklists do not include every detail required, and you may want to expand them to snit your needs. Contact your dealer for additional suggestions suitable to your climate and storage conditions, particularly extremes of hot and cold. Short-Term Storage (Less Than 60 Days) 1.
Storage Long-Term Storage (Over 60 Days) 1. Perform all steps as required for short-term storage. 2. Run chassis engine to normal operating temperature. Operate automotive air conditioner(s) to lubricate compressor seals. Drain engine oil, replace filter, refill engine with fresh oil. 3. Remove windshield wiper blades and store inside the motor home. 4. Charge and remove both the chassis and house battery(ies). Store in a cool, dry place, and check the charge and water level every 30 days.
Storage 3. Winterize the LP gas system. Your LP gas dealer or service station will perform this for you. 4. Winterize all appliances as outlined in the individual operator's manuals. 5. Remove snow accumulations as often as possible. Water System Winterizing Read this section completely before performing winterization. CAUTION Draining the water system alone will not provide adequate cold weather protection.
Storage 19. Pour one cup of antifreeze solution down each drain. 20. Install all protective caps: Water tank fill City water inlet cap Waste tank drain outlet cap 21. If your refrigerator is equipped with an ice maker, winterize it as follows: I. Shut off the water supply valve to the ice maker. 2. Place a shallow pan under the water solenoid valve. 3. Remove the inlet fitting to the ice maker water solenoid valve. Drain the water from the supply line. 4.
Storage 13. Operate all faucets and fixtures in the fresh water system. Check for leaks at all joints and fittings. Repair if necessary making sure the water heater bypass is open. 25. Operate each LP gas appliance. Have the LP gas regulator adjusted for proper pressure by a qualified technician. 14. Check operation of 12-volt circuit breakers and inspect fuses. Replace as necessary. 27. Check the sealant around all roof, floor and body seams and windows. Reseal if necessary. See Sealant Renewal section.
This page intentionally blank.
GLOSSARY AC Inverter - An electronic device that changes 12-volt DC energy from the batteries to 120volt 60-cycle, AC energy to operate microwave ovens, TVs, VCRs, or other appliances that require 120-volt 60-cycle power. Belted Seating Positions - These are seats with seat belts. Anyone riding in the motor home must use one of these seats any time the motor home is in motion. Black Water Tank - The water tank in your plumbing system that is designed to contain waste water from the toilet ONLY.
Glossary GVWR (Gross Vehicle Weight Rating) - Is the maximum pennissible weight of this fully loaded motor horne. The GVWR is equal to or greater than the sum of the Unloaded Vehicle Weight plus the Cargo Carrying Capacity. Hitch Rating - Means the maximum allowable weight of a towed trailer or towed vehicle. The GCWR of the motor horne must never be exceeded, even if the weight of the towed trailer or towed vehicle is less than the hitch rating.
NOTES
NOTES
i-