
Installation & Assembly


11
Installation Guide
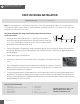
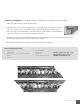
Note: Some installations cover multiple walls at right angles. To achieve a finished look on
these corners, you will use our Inside Corner Trim. Before applying a panel to a corner, measure
the height of the inside corner. Then, cut the Inside Corner Trim in accordance with that mea-
surement and attach it to the panel.
9. After all the panels are set, attach the switch or outlet plates.
10. Caulk the bottom seam along the countertop with clear silicone or colored caulk. This will
eliminate water from getting behind the panels.
11. If the seams need to be tighter, we would recommend that you use cone head nails on the
overlapping seams. The nail points would be between the “dimples” of the nail rail.
TOOL/SUPPLIES REQUIRED:
• Tape measure
• Straight edge (framing square or 4” level)
• Fine point Sharpie
• Construction adhesive (Loctite
®
Power Grab
®
)
• Silicone caulking (color match)
• Caulking gun
• Cone head nails
• Aviation tin snips
• Hacksaw (for J Channel Edge Trim
and Inside Corner Trim)
• Hammer
• 1/2” drill bit
• Drill
If you have any questions, please call:
1-888-231-7500 or visit us online at
www.AmericanTinCeilings.com