Thank you very much for choosing AMOI A211a, the fashionable and elegant mobile phone. A211a is a perfect integration of unparalleled contemporary design and consummate craftsmanship, bringing you easy communication and entertainment, as well as highlighting your tastes.
Specifications: GSM/GPRS: 850/ 1800/ 1900 MHz Voice Encoding: FR/ EFR/ HR/ AMR Screen: 1.8" CSTN display (128 x 160 Pixels) Dimension: 82 x 43 x 21.5 mm; 3.23" x 1.69" x 0.85" Weight: 84 g; 2.97 oz Battery Capacity: 630 mAh Standby Time: 100 hrs Talk Time: 3~5 hrs The manufacturer may, at any time and without notice, make changes or improvements to the products offered, but provide necessary corrigendum with this manual or release new version of this manual for the following lot.
INTELLECTUAL PROPERTY All Intellectual Property, as defined below, owned by or which is otherwise the property of AMOI or its respective suppliers relating to the AMOI mobile phones, including but not limited to, accessories, parts, or software relating thereto (the “Phone System”), is proprietary to AMOI and protected under federal laws, state laws, and international treaty provisions.
TABLE OF CONTENTS Safety Precautions ......................................…........................ 7 Unpacking ................................................….......................….9 Your Phone ...........................………........…….........…...... 11 Phone’s Layout ............................……………..................... 11 Keys Description ……...…...……………………………….13 Display .........................................………………................. 14 Getting Started ......................................……………….
Dictionary .................................................……………….... 34 eZI Esp………………………………………………………34 eZi Eng……………..............……..……………................... 31 Es Abc………………………………………………………33 Abc................................………………………..................... 32 123………………….....................……………................. 33 Using Menus …………..……….……................................. 41 Accessing a Menu Function…………………………...…….41 List of Menu Functions ...........……….…………................. 42 Phonebook ...............
Personality...............................………………….............. 52 Music Select…………………… ................…….................. 53 Sound Effect Setting…………...……………………………53 Alert Type……………….……………………..................... 54 Ring Volume…..………………......……………….............. 54 Standby Interface...………………….……………............... 52 Power On/ Off Display………………....…………….......... 52 Multimedia…………………………………………………53 Recorder……………………………………………………..53 Image………………………………………………………..53 Audio…………………………………………………….
PC Sync…...………………………………………………...68 Browser Settings…………...................……………….........68 Settings .......................................………….......................... 55 Time…………………………………………………………55 Mobile……………………...............……………................. 55 Call………………………….......……………...................... 57 Network…………………..........……………………........... 59 Security Info…………………………………………….…72 Reference Information .......……….…………................... 71 Access Codes ....……………………...................................
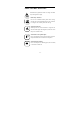
SAFETY PRECAUTIONS Read these brief guidelines. Failure to comply with them may be dangerous or illegal. Road safety comes first Do not use a hand-held mobile phone while driving; park the vehicle first. Remember that in some countries, it is illegal to use a mobile phone while driving. Switch off on aircraft Mobile phones can cause interference. Using them on aircraft is both illegal and dangerous. (Please also close the power-off alarm clock.
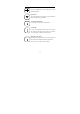
Switch off in hospital Follow any regulations or rules. Switch phone off near medical equipment. Interference All wireless phones may be subject to radio interference, which may affect their performance. Accessories and batteries Use only approved accessories and batteries. Use sensibly Use only in the normal position (to ear). Do not touch the antenna unnecessarily when the phone is switched on. Your package contains the following items.
UNPACKING Your package contains the following items.
YOUR PHONE Phone’s Layout The following illustrations show the main elements of your phone.
Closed View Antenna Speaker - 12 -
Rear View Side Keys Earphone Jack Hand Strap Hole - 13 -
Keys Description Key Description Two soft keys perform the functions indicated by the text above them (in the bottom line of the display). Navigation Keys: In the menu facility, scroll through the menu Options and Phonebook memory. In Standby mode, the ▲ key to enter Amusement, the d key to view the phonebook entries, the e key to enter the Call Lists and the f key to enter Messages. OK Soft Key: In the menu facility, confirms your selection or entry.
Display The display consists of three areas. Areas Description First area Displays various icons Middle Displays phone numbers, messages, graphics and any data area that you enter. Last area Shows the functions currently assigned to the two soft keys.
Icons Signal Strength: Shows the received signal strength. The greater the number of bars, the better the signal strength. Ring: Indicates that your phone will ring when there is an incoming call or message. Vibrate: Indicates that your phone will vibrate when there is an incoming call or message. Tone & Vibrator: Indicates that your phone will ring and vibrate when there is an incoming call or message. No Notification: Indicates that there is no notification when there is an incoming call or message.
GETTING STARTED Installing a SIM Card When you subscribe to a mobile network, you are provided with a plug-in SIM (Subscriber Identity Module) card loaded with your subscription details (PIN, Phone book information and so on). Note: The SIM card can be easily damaged by scratching or bending, so you should be careful when handling, inserting or removing the card. Follow the instructions supplied with the SIM card. Keep all SIM cards out of the reach of small children. 1. 2. Switch the phone off.
3. Insert the SIM card into the SIM card holder so that the holder locks the card in the position. Make sure that the notched corner is at the top right and the gold contacts of the card face into the phone. 4. Reinstall the battery. To do so: ① Place the battery back, taking care to match the tabs on the battery with the grooves on the phone. ② Push the battery down until it clicks into place,then place back the battery cover.
Charging a Battery Your phone is powered by a rechargeable Li-ion battery. You are provided with a travel charger when buying the phone. Use only approved batteries and chargers. Ask your local dealer for further details. Note: You must fully charge the battery before using your phone for the first time. The phone can be used while the battery is charging. Using the Travel Charger 1.
Low Battery Indicator When the battery charge level gets low, you can see an empty battery icon at the top right of the display and a text notification. If the battery level gets too low, the phone will turn off automatically. Unfortunately, if this happen, you’ll lose whatever you are doing, including dropping your call. Watch the battery strength icon and make sure your battery is adequately charged.
Switching the Phone On/Off 1. 2. Open the phone. Hold the Power On/Off key for more than one second to switch the phone on. 3. Enter the PIN code (if you have set to PIN check On), and press OK soft key. Then your phone connects to the GSM network automatically, and you’ll see the following display: Note: If the phone is out of service, ‘No Service’ appears. In this case, you cannot make or receive any calls. Wait for a better signal or move into an open area to regain the service. 4.
Your Phone’s Mode Standby Mode Standby is the most basic state of your phone. The phone goes into Standby mode soon after you turn it on, or whenever you briefly press key. When your phone is in Standby mode, you will the typically see the current date and time. Press the key at any time to return to Standby mode. Be careful if you are on a call when you press the key, you will return to Standby mode, but it also disconnects the call.
CALL FUNCTIONS Making Calls Before you can make or receive a call, you must turn on the phone and be within the range of a network. 1. In Standby mode, enter the area code and phone number. (If you make a mistake while dialing, use the e or f key to move the cursor to the right of the digit, press the right soft key to erase; and hold it to erase the entire number.) Note: While entering the number, hold the # key to insert a pause (for example: between the switchboard and the extension).
Last Number Redialing To redial the last number you dialed, press the key to view the outgoing call list, then choose the desired one by using the c, d key and then press the key to dial it. Your phone can store up to 10 last numbers you dialed. Making a Call from the Phonebook Press the right soft key to enter the phonebook, search the desired number from it, and press the key to dial it.
Rejecting a Call Pressing and holding down the Volume key for about 3 seconds to reject a call when the phone is closed; press the Reject soft key to reject it when the phone is opened. Adjusting the Volume During a call, use the volume key on the left side of the phone to adjust the volume of the voice. Press the Up key to increase the volume, the Down key to decrease it. In Standby mode, you can adjust the key tone volume by using the volume key.
options may change in different conversation circumstances. The followings are the possible options: Record: Record the conversation during a call. It can be recorded up to 30 seconds. Note: Recording conversation in some countries is illegal, so please first get the consent from the other party before you begin the recording. Mute: You can switch the microphone off so that the caller can’t hear you. Hold ( current call ): You can hold the current call. Resume held call: Connect the held call.
ENTERING TEXT When storing a name in the phonebook, creating your personal greetings or scheduling events in your calendar or writing any other message, you will need to enter text. You are provided with the following eZi text input modes: • Symbol • Template • English/ ENGLISH/ english • Spanish / SPANISH/ Spanish • eZi English • eZi Spanish • Abc/ ABC/ abc • 123 (Numeric input mode) Note: The current input mode is indicated on the top left of the display.
Note: The text input mode may vary in different markets. Insert Symbol Symbols mode enables you to enter symbols into a text message. To enter a symbol, you should: 1. When entering text, press the OK key to enter the ‘eZi Menu’. 2. Enter the ‘Insert Symbol’ and you will see a symbol chart. Press the c or d key to select the column which includes the symbol you want to use. 3. Press the corresponding numeric key on the bottom of the chart to insert the desired symbol mark.
which allows you to add a new word and then the word has a high priority in English mode. New 1. In the text entry mode, press OK key to enter the ‘eZi Menu’. 2. Scroll to ‘Dictionary’ and press OK soft key to enter. 3. Select “New” and input the word you want to add. 4. Press ‘Options’ and select ‘Save’, then the word is saved in your dictionary; select ‘Delete’ to cancel the input. Now, the word saved in your dictionary becomes the one with first priority for the associated key press.
This mode allows you to enter English words with only one keystroke per letter. Each key on the keypad has more than one letter. For example, when you press the 5 key J, K, or L may be displayed. The English mode automatically compares your keystrokes with an internal linguistic dictionary to determine the correct word, thus requiring far fewer keystrokes than the ABC mode. For example, to enter ‘hello’, press the following keystrokes: 4,3,5,5,6.
“K”. Note: When you require the same letter twice or more in succession (or a different letter on the same key), just wait for a few seconds for the cursor to automatically move right , and then select the next letter. List of characters available: 123 123 Mode enables you to enter numbers into a text. You can enter your desired digits by simply pressing the key on which the digit is.
PHONEBOOK You can store your phone numbers and their corresponding names in your SIM card or in your phone memory. You can store up to 500 numbers in local memory; the number of the entries which SIM card can store, depends on the type of the SIM card. AMOI SMART DIAL This Option allows you to find an entry quickly in your PB. 1. When Smart Dial is highlighted, press Left soft key to enter. 2. Input the corresponding first letter of the desired name. 3. Scroll to your desired entry and press Left soft key.
Search Enter the name you want to search, then press Left soft key. The phone will display to search by name or position. Search Name: Enter the desired name, and then press ok left soft key to search. Search Position: Search the entry by entering a position number. The entries stored in the phone are numbered from 1 to 300; and the entries stored in the SIM card are numbered from 301. New It allows you to add new entries to your Phonebook. Press Left soft key to enter New, and choose Save to Local or SIM.
for the entry. Save to SIM: (1) Input name, press Left soft key. (2) Key in the numbers and press OK left soft key to confirm. (3) When finish, press Back right soft key, the phone displays “Save it ?’, press Ok soft key to confirm, Back key to cancel. Number Group The phone allows you to group the numbers stored in the Local. (The numbers stored in the SIM card cannot be grouped.) It allows you to set 6 groups, Family, Sweetie, Friend, Colleague, VIP & User-Defined.
Calls 1. Missed Calls When an incoming call is not answered for any reason, the Missed call log displays on your screen. Your phone can store up to 20 pieces of missed call info. Enter the missed call list, and choose the desired one. Press Options left soft key, you’ll have: Call: Dial the number. Detail: View the details of the missed call (the caller’s name, number & calling time of the call. Save to Local/ SIM: Allows you to add the number of the missed call to the phonebook or SIM card.
4. Last Time It allows you to view the duration of your last call. Press Reset left soft key to reset it back to Zero. 5. Total Time You can view the duration of total calls (outgoing & incoming). Press Reset left soft key to reset it back to Zero. 6. Charge Info The function allows you to set the Unit price & Max charge for your call (The function needs the support of your network.): Total Charge: The function allows you to view the total charge for your calls.
of Steven as the first one in the Speed Dial list, in standby mode, hold the corresponding 1 numeric key, the number can be dialed quickly and directly. PhBook Manager 1. Duplicate (Take “Local to SIM” for example) (1) Duplicate One: Press c or d to view the phone number one by one and press Left soft key to copy the desired one. (2) Duplicate Range: Input the beginning number and the last number, then press Left soft key to copy these entries you want to SIM card.
that they will never get through your phone; and put numbers into ‘Accept List’ in some special circumstances, only the numbers in the ‘Accept List’ can get through. Reject List: It allows you to enter 10 rejected numbers. The option allows you to view all the numbers put in the list. Reject Number: Press numeric keys to enter the numbers you want to reject, or search the number from the phonebook. Accept List: The same as the Reject List. Accept Number: The same as the Reject Number.
6. Memory Status Check the memory status of the SIM & Local. Country/ Area Codes Press the ▲or▼ key to view the country/ area codes, press the left soft key to search by name or by code.
MESSAGES The SMS (Short Message Service) function is network service and may not be supported by your network. You must obtain the number of the SMS center from your service provider. Mostly it is automatically available from your SIM card. Your phone can store up to 50 incoming and outgoing messages. SIM card memory depends on the type of the SIM card. Two message boxes are available: Personal SMS and Broadcasting SMS. Personal SMS: It is the message for mobile users to transmit personal information.
SMS 1. Inbox Inbox stores the messages you have received. 1. Use the direction key to scroll to the desired message. 2. Press OK left soft key to enter the message, then press Options soft key to have the following operations: Reply: Reply to the sender. You can write a piece of new message and then choose ‘Send’, ‘Save & Send’, ‘Save’ or ‘Multiple Send’. Forward: Allows you to send the message to others. You can edit the message and then choose ‘Send’, ‘Save & Send’, ‘Save’ or ‘Multiple Send’.
Send: Write down your own message. When finish, press the Ok left soft key to enter the number you want to send or search the number from the Phonebook. Save & Send: Allows you to save and send the message. Even if the sending fails, the message can be stored in the Outbox. Save: Allows you to save the message in the Outbox so that it can be sent later. The message marked with * is the unsent message. Multiple Send: Allows you to send the message to up to 5 receivers. 3.
MMS MMS is a current technology of message development with highest standard. Its feature contains: supporting multimedia function, supporting sending several kinds of message (letters, pictures, voice and other multimedia message). It makes multimedia sending as phone-to-phone and phone terminal-to-network possible. MMS also needs the support of your SIM card and service provider. Contact with your network service for more details.
MIDI audio file AMR audio file 1. Inbox When a new MMS is received, the phone rings or vibrates (if you have set for that), a new MMS icon displays. The message will be stored in the Inbox automatically. ① Press or key to choose the desired message. ② Press OK soft key to view details of message. ③ Press Options left soft key and you can have the following options: Play/View: Press OK soft key to play the selected MMS. Reply: Reply to the sender. Delete: Delete this message.
Add Slide: Press left soft key to add one slide. You can add up to 9 slides. When you finish editing, press Menu soft key to choose the following options: Send: Select ‘Send’ to enter the Number editing interface. Press the Left soft key to select the number or E-mail address from your Phonebook, or input a new number or E-mail address. Only when the cursor is in the editing frame can you make the editing.
①. Press Up or Down direction key to choose the desired message. ②. Press Left soft key and the following options are available: Edit: Edit the multimedia message. Delete: Delete the MMS. 4. Outbox Outbox stores the messages that fail to be sent. ①. Press Up or Down direction key to choose the desired message. ②. Press Left soft key and you can operate as follows: Edit: Edit the MMS. Delete: Delete the MMS. 5. Sent The Sent box stores the messages that have been sent successfully. ①.
Edit: Edit the MMS. Delete: Delete the MMS. Detail Info: View the details of the multimedia message. Voice Mail This menu provides you a quick way to access your voice mail. In standby mode, hold the 1 numeric key to dial the number directly. In the Voice Mail menu facility, the following options are available: Number: Allows you to input or modify the number of the voice mail. Call: Press the ‘OK’ soft key to call the number and listen to your messages.
All: Allows you to receive all the broadcast messages. None: No broadcast messages will be received. List: Only the message sent from the list can be received. You are allowed to add or delete the channel to the list. Settings 1. SMS Use the function to set the special features for the SMS. You can have the following options: Auto Display: If set the function to be ‘On’, the new incoming message displays automatically on the screen.
list, but also reset the parameter of the selected server. --List: Add new servers from the list. To a specified sever, (for example Cingular MMS) you are allowed to: --Activate: Enable the server. --Modify: Modify the settings of the server. --Delete: Delete the server. Reception: It allows you to set the receiving mode for your MMS. 2 modes are available: Auto or Manual. Ad Allowed: You can choose whether or not to receive the adverts.
PERSONALITY Music Select Enter the Music Select. The phone allows you to set the ring tone for the incoming call, message, alarm clock, and so on. You can choose the ring tones from the Immobile Data, More Downloading or Multimedia. Sound Effect Setting 1. Key Sound Allows you to set the key sound On or Off. 2. Delivery Report Tone Allows you to set the Delivery Report Tone On or Off. 3. CB Tone Allows you to set the CB Tone On or Off.
Ring Volume Adjust the volume for the ring and the key. Use the volume key on the side of the phone to increase and decrease the volume, or use the Left or Right direction key to adjust it. Standby Interface By using this menu, you can set your standby interface. Picture: Set the picture as your standby interface. 10 pictures are available. Standby Text: Edit your own words as the standby interface. Animations: Set the animation as your standby interface.
MULTIMEDIA The Multimedia is a menu that helps to manage the mobile phone resources, such as “Recorder”, “Downloaded Resource”, “User Custom1” and “User Custom2”. Recorder 1. Enter Choose ‘Enter’, and then press ‘Options’ left soft key and the following operations are available. --Play: Play the voice memo. --Copy: Copy the voice memo to “User Custom1” or “User Custom2”. --Move: Move the voice memory to “User Custom1” or “User Custom2”. --Rename: Rename the voice memo.
Image Press ‘Options’ left soft key and then “Enter” key to view image. Other operations are the same as the Voice Memo. Audio Press ‘Options’ left soft key and then “Enter” key to view the list of ring tones you’ve downloaded. Other operations are the same as in “Voice Memo”. User Custom 1 You can store voice memos, pictures, phonebook, photos and ring tones in User Custom1. 1.Enter Press OK and then “Enter” key to view “User Custom1”. Operations are the same as the “Voice Memo”. 2.
4. Rename Rename User Custom 1. For example, you can rename ‘User Custom 1’ as ‘Ring tone’. User Custom 2 The operations are the same as the User Custom 1. View Allows you to view the total files and memory status of the Multimedia.
AMUSEMENT 3 amusing games are providing for you. It can give your more interest in your leisure time. Gobang Start: Start the new game. Load Game: Continue the game you last played. Select Level: 3 levels are provided, Primary, Middle & Serior. Help: Tells you how to play the game. Push Box You are successful if you can push all boxes to the desired destinations. You can push boxer by direction keys and restart/end game by pressing some keys, and you can select pass by pressing “2” and “8” key.
Beep: Switch on/off the sound when playing the game. Scores: Keep the record the best five players. Help: Illustrates the rules of the game.
TOOLBOX Alarm There are three alarm clocks provided for you. For every alarm, you can make the following operations: 1. On / Off: Press the Select soft key repeatedly to switch between On & Off. An ‘√’ indication displays when you set the alarm activated. 2. Time: Set the time when you want the alarm to ring. 3. Mode: Set the mode for your alarm. ① Everyday: The alarm bell rings at the set time every day. ② Workday: The alarm bell rings at the set time from Monday to Friday.
Notes: Recording voice conversations during a call is illegal in some countries. Make sure the other part on the line has stated his consent to being recorded. Record 1. Press the OK left soft key to begin the recording. 2. Record the voice memo by speaking into the microphone, and the progress bar will show you the current recording status. Note: When recoding, press d direction key to pause; Exit right soft key to stop recording.
Performing the Calculation 1. Use the numeric key to enter the first desired number. 2. Press c for multiplication sign ‘+’, d for division sign ‘-’, e for plus sign ‘x’, and f for subtraction sign ‘÷’; 3. Enter the second number. 4. To calculate the result, press Equal soft key to get the result. 5. Repeat steps 1 to 4 as many times as needed. Notes: Press the # key to enter a decimal point and the * key to change the sign of a number to a negative (-).
1. Settings Set a new log for Memo, Call & Anniversary. Enter one type: • Memo: Make a note of general schedule, i.e. appointments or meetings. It allows you to set the title and reminder date for your memo. • Call: Schedule a call. Enter the scheduled call number or search one from the phonebook. The phone will remind you automatically at the scheduled time. You can set the phone to remind you on time, 1 hour before, 1 day before, 2 or 3 days before the scheduled time.
Unit Conversion This menu allows you to convert the original unit to the desired one. To use the Unit Conversion, do as follows: 1. Press the c or d key to scroll to the desired category: Length, Area, Volume and Weight. 2. Press OK or Left soft key to enter one of the categories you desire and you can see two columns. The upper unit column is comprised of the current units, while the lower unit column is comprised of the units which you want to convert to. 3.
DATA SERVICE Browser Enter the browser, you’ll have: Homepage: By selecting this item, your mobile phone will connect to the homepage that you’ve preset directly. Bookmarks: You can store the commonly used websites in your favorite and entitle them. Choose one to connect to it automatically. Alert Message: The function allows you to view the WAP Push information you’ve sent to the Internet. Go To URL: Enter a URL and press OK soft key to connect to the page.
Browser Settings 1. Connection: Scroll with ▲or▼ to choose ‘Cingular GPRS’, ‘New’ or ‘From List’. To Cingular GPRS, you can perform the following operations: ● Activate ● Modify ● Delete Select ‘New’, you can add a new server as your operator: New: Edit your name of the new server. Bearer: Set the types of data service, choose from GPRS, CSD & Serial. Homepage: You can set a homepage. IP Address: Set IP address linking to homepage. APN: Input AP name. User ID: Set the user name for WAP.
2. Clear Cache Clear the Cache. 3. Reset Reset all of the settings.
SETTINGS Many different features of your phone can be customized for your preferences. Time This function allows you to adjust the current time and date displayed in standby screen. The following options are available: Time: Make a modification of the current time. Time Format: Choose between 24 hours mode and 12 hours mode. Date: Make a modification of the current date.
time. 2. Contrast The function allows you to set the contrast of the main and sub LCD. The contrast range for the main LCD is 158-214; range for the sub LCD is 16-56. Press f or e key to adjust, and Left soft key to confirm your operation. 3. Backlight Level Set your backlight level, 3 options are available: High Backlight, Middle Backlight or Low Backlight. 4. Standby Color It allows you to set the standby color On / Off. 5. Language Spanish: All the menus and information is displayed in Spanish.
Call Press the OK or left soft key to enter the Call setting, you’ll have the following operations: 1. Call Volume It allows you to adjust the volume of the call. Use the f or e to adjust it; or you can use the side key to adjust the voice volume during the call. 2. Divert This network service enables the incoming calls to be transferred to the number that you specify. For example: You may hope to transfer your business calls to a colleague when you are on holiday.
Call Key: You can answer the call only by pressing the Call key. Open Mobile: Open the phone to answer the call. Auto: If you insert a Car Kit, the phone can answer the call automatically 3 seconds later. Before the Auto answer, you can also press the Call key to answer it. 3. Call Waiting The phone supports the function of ‘Call Waiting’ and ‘Call Holding’ of GSM net. If you select this function, the network will inform you when there is a new incoming call during another call.
Note: The function needs the support of the network service. Network When you use the phone, the phone will automatically select the Internet service. When the phone is out of the service area or in abroad, you can select the appropriate Internet manually. Mode Switch between these two modes: Auto & Manual. Search To select this item, the phone displays " Searching ...". After you get it, the GSM will auto display the found networks.
Band Press the ▲ or ▼ key to view choose the desired band, press the OK soft key to confirm. There are three bands are provided: GSM850/1900, GSM 1800 and Automatic. You can select one of them. Security Info 1. Check PIN: Press "OK" left soft key to enter this function. On: To select "On". Input the PIN code and enable the function of PIN check by pressing the Left soft key. Note: If you have enabled the function of PIN check, you’ll have to input the PIN code each time you switch on your phone.
3. Access Code Press OK or Left soft key to enter this function. You can set access code for ‘Call Lists’, ‘SMS’, ‘Phonebook’, ‘Photo’ & ‘All’, you can also cancel all the access code. 1. Enter the one for which you want to set access code and select "On". 2. Input the PWD and activate the function of Access Code by pressing Left soft key. 3. Select “Off” to cancel this function. 4. PWD Manager Change PWD 1. Press OK or Left soft key and input the old PWD, then press Left soft key. 2.
5. LCD displays "PIN Changed". Note: Only when the PIN check is set on can you alter the PIN code. Change PIN2 The process is the same as "PIN1 Changed". Note: PIN code is provided with the SIM card, which is used for some special service such as "Call Charge" function etc. If you want to know whether your SIM card can support these functions, please contact the network service supplier. 5. Bar Calls The Call Barring function helps you to restrict the incoming and outgoing calls.
incoming calls when in abroad. Cancel All: To select this item, the phone will allow making and answering all calls. Note: You need to input the Net PWD to set above functions.
REFERENCE INFORMATION Access Codes There are several access codes that are used by your phone and its SIM card. These codes help you protect the phone against unauthorized use. Phone Password The security code can be used to avoid unauthorized use of your phone. The security code 0000 is usually supplied with the phone. Change the security code before you start using your phone. Keep the new code secret and in a safe place, which is separate from the phone.
some functions, such as charging unit counters. These functions are only available if supported by your SIM card. If you key in an incorrect PIN2 code three times in succession, the PIN2 will be locked. To unlock the PIN2, you’d key in the PUK2 code and press OK soft key (or OK key), and key in a new PIN2 code twice. PUK code The PUK (Personal Unblocking Key) code is required to change a blocked PIN code. The PUK code may be supplied with the SIM card.
Using the Batteries A rechargeable Li-ion standard battery powers your phone. The following batteries are also available (ask your local dealer for further details): Type Capacity Talk Time Standby Time Li-ion 630 mAh 3~5 hrs 100 hrs Precautions When Using Batteries Never use any charger or battery that is damaged in any way. Use the battery only for its intended purpose.
If left unused, a fully charged battery will discharge itself over time. Use only approved batteries; and recharge your battery only with approved chargers. When a charger is not in use, disconnect it from the power source. Do not leave the battery connected to a charger for more than a week, since overcharging may shorten its life. Extreme temperatures will affect the charging capacity of your battery: it may require cooling or warming first.
Care & Maintenance Your phone is a product of superior design and craftsmanship and should be treated with care. The suggestions below will help you to fulfill any warranty obligations and allow you to enjoy this product for many years. When using your phone, battery, charger, or any accessory: Keep it and all its parts and accessories out of small children’s reach. Keep it dry. Precipitation, humidity and liquids contain minerals that will corrode electronic circuits.
Do not use harsh chemicals, cleaning solvents, or strong detergents to clean it. Wipe it with a soft cloth slightly dampened in a mild soap-and- water solution. Do not paint it. Paint can clog the device’s moving parts and prevent proper operation. Use only the supplied or an approved replacement antenna. Unauthorized antennas, modifications of attachments could damage the phone and may violate regulations governing radio devices.
GLOSSARY Antenna A device for transmitting or receiving signals. The size and shape of antennas is determined, in part, by the frequency of the signal they receive. Wireless phones and the base station must have antennas. Alarm Clock Your pager alarm can be set for a specific time and date or can used as a daily alarm. AMOI Smart Dial An intelligent way to dial a number which is stored in your phonebook. Say you want to dial Steven, at idle, press st, then press *, you can find the number of Steven.
Call Barring Enable it to restrict outgoing and incoming calls. Call Divert Allows you to set your phone to forward calls to an alternate phone number. (network and subscription dependent feature -- not available in all areas). Call Holding You can put callers on hold. (network and subscription dependent feature -- not available in all areas). Call Waiting While making a call, the phone will alert you that another person is trying to call you.
GSM was designed for markets to provide the advantage of automatic, international roaming in multiple countries. The SIM (Subscriber Identification Module) card is a vital component in GSM operation. The user can store all relevant data for the phone on a removable plastic card. The card can be plugged into any GSM compatible phone and the phone is instantly personalized to the user. GSM850 The digital GSM network used in America. GSM1800 The digital GSM network used in Europe and Asia.
LED (Light Emitting Diode) It is commonly used to refer to a small light on the wireless phone or on the desktop charger. The LED lights on the phone to indicate an incoming call. The lights on the charger indicate that battery charging is taking place. Line Identification Services Service allowing subscribers to view or block the telephone numbers of callers. Mobile Phone The term that can be inter-changed with cellular phone or wireless phone.
been entered three times in succession. The eight-digit number is supplied by the service provider with the SIM card. Roaming A service offered by most cellular service providers that allows subscribers to use cellular service while traveling outside their home service area. When they are outside their home service area and come within range of another cellular system, the ROAM indicator on the cellular phone will light to show that they are in range.
Soft Keys Keys marked • and o on the phone, the purpose of which: • Varies according to the function that you are currently using • Is indicated on the bottom line of the display just above the corresponding key. Standby Time The time a battery can power a phone in the standby mode, ready to make or receive a call, without being used for an actual call. The longer a phone is in standby mode, the less standby time remains in the battery.
agreements are in place.) Voice Mail Computerized answering service that automatically answers your calls when you are not available, plays a greeting (Optionally in your own voice) or records a message.
TROUBLESHOOTING If the phone does not work properly, please check the following troubleshooting and find a solution. If you can’t solve the problems, please contact your local dealer for help. Questions Solutions ● Check whether the phone is powered on or not. ● Check if the battery is lack of power. Cannot make or receive calls. ● Check if the signal is strong enough. ● Check if you’ve set ‘Call Barring’, SDN or the other options in Call Set menu. ● Check if you’ve set the ‘Call Divert’.
For body worn operation this phone has been tested and meets FCC RF exposure guidelines when used with an accessory that contains no metal and that positions the handset a minimum of 1.5 cm from the body. Use of other accessories may not ensure compliance with FCC RF exposure guidelines.” We hold the privilege of modifying the product described in this manual without prior notice. For any errors in publishing, we will make some necessary modification in the new edition.
IMPORTANT SAR INFORMATION Your wireless phone is a radio transmitter and receiver. It is designed and manufactured not to exceed the emission limits for exposure to radiofrequency (RF) energy set by the FCC of USA. These limits are part of comprehensive guidelines and establish permitted levels of RF energy for the general population. The guidelines are based on standards that were developed by independent scientific organizations through periodic and thorough evaluation of scientific studies.
when worn on the body, as described in this user guide, is 1.48 W/Kg. (Body-worn measurements differ among phone models, depending upon available accessories and FCC requirements). While there may be differences between the SAR levels of various phones and at various positions, they all meet the government requirement for safe exposure. * In the United States and Canada, the SAR limit for mobile phones used by the public is 1.6 watts/kg (W/kg) averaged over one gram of tissue.
Body-worn accessories that do not meet these requirements may not comply with RF exposure requirements and should be avoided. Use only the supplied or an approved antenna. Unauthorized antennas, modifications, or attachments could impair call quality, damage the phone, or result in violation of regulations. Do not use the phone with a damaged antenna. If a damaged antenna comes into contact with the skin, a minor burn may result. Please contact your local dealer for replacement antenna.
communications. However, there is no guarantee that interference will not occur in a particular installation. If this equipment does cause harmful interference to radio or television reception, which can be determined by turning the equipment off and on, the user is encouraged to try and correct the interference by one or more of the following measures: . Relocate this device . Increase the separation between the device and the receiver .