CONTENTS Before you begin System Requirements 3 5 Product Activation 6 Configuring for Windows 10 10 Configuring for macOS (10.
CUSTOMER SUPPORT INFORMATION 67 MY ANTELOPE AUDIO PRODUCT ISN’T WORKING.
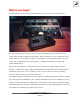
Before you begin Congratulations on your purchase! We would like to turn your attention to the following: Zen Go Synergy Core is the first ever bus-powered desktop interface packed with tech featured only in high-end professional studios, giving you instant access to premium sound quality wherever you are. Our vast library of Synergy Core analog-modeled effects lets you shape your sound with precision and character – all while monitoring in real-time with imperceptible latency.
Thus, we encourage you to familiarize yourself with the 'Control Panel Application' chapter before you begin working. Several 'Quick Start' examples are provided as well. This way, you can overcome common stumbling blocks for users new to Antelope Audio products. Should you ever find yourself struggling, do not hesitate to contact our Customer Support team over phone, live chat and our ticket system.
System Requirements Mac: • Apple Mac 2012 or newer with USB 2.0/3.0/3.1 port (native or using an adapter) • Minimum: Mac OS X 10.12 Sierra. Recommended: Mac OS X 11.02 Big Sur • Available storage space (Minimum 4 GB) • Memory (RAM): 4 GB minimum (8 GB or more recommended) Windows: • PC computer with USB 2.0/3.0/3.
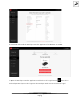
Product Activation Please note that the mandatory device activation procedure requires an active Internet connection on your computer. Activating an Antelope Audio device offline is not possible. Your Zen Go Synergy Core must be activated online to work. This chapter contains the necessary instructions: 1. Connect the Zen Go Synergy Core to a Windows or macOS computer. 2. Open your internet browser and navigate to https://en.antelopeaudio.com/login/ 3.
6. Download and install the Antelope Launcher application for Windows or macOS. 7. Open the Antelope Launcher application and click on the 'Login' button. Enter the e- mail and password you used to login into the Antelope Audio user area and click 'Login'.
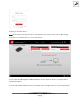
8. Click on 'Activate device'. Note: If the Zen Go Synergy Core does not appear in the 'Devices' tab, click on 'Not seeing your device?' and follow the on-screen instructions. 8. In the Antelope Management Wizard window, choose 'Activate device or assign features' and click 'Continue'. 9. In the subsequent window, place a checkmark next to 'Register device' and click 'Continue'.
. Upon successful activation, the final window will read 'Congratulations! You have successfully activated your device.' Click 'Done' and the activation is finished. Please proceed with the 'Setting up' chapter below to configure the Zen Go Synergy Core for use with your Windows or macOS computer. Note: The Zen Go Synergy Core will be listed in the 'My Hardware' page of the Antelope Audio user area with its serial number and activation date.
SETTING UP After online activation is complete, please update the Zen Go Synergy Core to the latest software and firmware versions available. To do this, simply open Antelope Launcher and click the 'Update' button below the 'Bundle Version' drop-down menu. After the update is complete, you can proceed with the instructions for your operating system. Configuring for Windows 10 Windows 10 needs a few tweaks to get the Zen Go Synergy Core up and running: 1.
5. Enter the ‘Enhancements’ tab and disable all enhancements. 6. Back in Sound settings, click 'Device Properties' under 'Input'. Then, click 'Additional Device Properties'. Enter the 'Enhancements' tab and disable all enhancements. Click 'OK' to close the window. Tips If you are experiencing interruptions or failure when using your DAW and trying to playback audio from your OS at the same time, make sure that the device sample rate matches the one of your DAW session.
1. Launch your DAW and choose Zen Go Synergy Core as the input device. The following dialog box will appear (if using Ableton Live 10 Suite, for example): 2.Click 'OK' and your DAW should function normally. However, if the events above did not occur for some reason, or you are using multiple DAWs, you must do a manual tweak for each in 'Security & Privacy' settings: 1. Click the 'Apple' symbol and choose 'System Preferences'. Head to the 'Security & Privacy' settings menu. 2. Click the 'Privacy' tab.
Note: You may have to click the padlock symbol in the bottom left corner and enter your password to make changes.
Connectivity and charging options The Zen Go Synergy Core's dual USB-C ports offer the following connection and charging/power supply possibilities: Connect to a Windows or macOS computer with USB bus power Simply connect the Zen Go Synergy Core to your computer with a USB cable. Use the USB-C port marked 'AUSB' . The computer will power the interface through the USB connection (bus power). Note that it is possible to connect to USB Type-A ports using USB Type-C to USB Type-A adapters and cables.
USB bus power. The interface needs to be powered from an external USB power source, such as adapter, power bank, or powered USB hub. Here's how to do this: 1. Connect the Zen Go Synergy Core to your mobile device using the USB-C port marked 'AUSB' . 2. Connect the USB power source to the Power USB-C port on the interface. 3. Press and hold the 'HP/MON' button on the interface's top panel to enter the System Menu. 4. Turn the rotary control to select the 'Power Source' menu entry.
Antelope Launcher The Antelope Launcher is a streamlined hub for managing and troubleshooting your Antelope Audio products. The application is organized into the following tabs: ‘Devices’ tab All Antelope Audio devices currently connected to your computer are listed in this section. The application functionality is identical for each Antelope device. The following functionality is available in the 'Devices' tab: Device Click the black field to enter a name for your device.
Start Control Panel Click to start the device’s Control Panel application. You can also click the device’s picture. Place a check mark next to ‘Autorun Control Panel’ to have the Control Panel for a specific device launch automatically when you open Antelope Launcher. Note: Feel free to bypass any operating system prompts, such as Windows Firewall. Manage Device Click to launch the Antelope Management Wizard.
Choose your device and connection type from the drop-down menus, disconnect the device from your computer, and click ‘Next’ to perform a driver re-install. Note: If the issue persists, please contact Antelope Audio Customer Support.
'Plug-ins’ tab This section lets you install, update, and uninstall Antelope Audio software such as native mic emulations and AFX2DAW. By default, the Bundle Version drop-down menus show the most recent software bundle available for each product. Clicking the menu shows the currently installed software bundle version and lets you roll-back to an older build.
'System’ tab Here, you can do the following: ● Update or roll-back the Manager Server and Thunderbolt™ Driver versions. Choose your desired Bundle Version from the drop-down menu, click the check mark, then click the ‘Update’ button on the bottom right. ● Restart the Manager Server and enable/disable remote connections from other computers on your network. ● Install the Antelope Audio Thunderbolt™ driver.
Login button Click and enter your Antelope Audio username and password, then click ‘Login’. If you don't have an Antelope Audio account, click ‘Register’ and follow the on-screen instructions. Settings button Click to open the Settings window.
Here, you can do the following: ● Click ‘View Logs’ to view, save, and send activity logs to Antelope Audio Customer Support. ● Click 'Advanced' to enable or disable automatic updates for each of the following: - Device firmware - USB Driver - Control Panel - Effects - Thunderbolt™ driver Make your selection(s) in the drop-down menu(s) and click 'OK'. ● Click ‘Network’ to view network status and logs.
Panels Explained Top Panel 1. Display The display provides the following information: ● Gain/Volume metering for up to three inputs and outputs e.g. Analog inputs (inputs 1 - 2), S/PDIF inputs (channels 1 - 2) and HP1 output (L/R channels). ● Current clock source - Internal, S/PDIF, or USB. Note that in USB mode, the unit still syncs to its internal clock. ● Lock indicator - lights up when the unit is 'locked' to an S/PDIF audio and clock source. ● Current device sample rate e.g. 32kHz - 192kHz.
2. Function Keys - Gain, HP/MON, Antelope button. 'Gain' button - the 'Gain' button features the following functionality: ● Press (and keep pressing) 'Gain' to cycle through input gain adjustments for the interface's dual analog inputs. Turn the rotary control to adjust input gain. Press the 'Antelope button' to exit. ● Press and hold 'Gain' to enter the Control Menu.
Control Menu Press and hold 'Gain' to enter the Control Menu. Turn the rotary control to navigate the menu and select an entry. Press the rotary control to enter the sub-menu for the entry. Turn the rotary control to browse the available choices and make adjustments. Press the rotary control to confirm. The Control Menu has the following entries: ● Power OFF - press the rotary control to enter standby. Press again to wake the device.
System Menu Press and hold the 'HP/MON' button to enter the System Menu. Turn the rotary control to navigate the menu and select an entry. Press the rotary control to enter the sub-menu for the entry. Turn the rotary control to browse the available choices and make adjustments. Press the rotary control to confirm. The System Menu has the following entries: ● Device Info - display the device's serial number, hardware revision and firmware version. This information is useful when contacting Customer Support.
Additional Controls Save hardware presets To save a preset of the current session, including all Control Panel and hardware settings, to one of the five available slots: - Press and hold the ‘HP/MON’ and ‘Antelope’ buttons simultaneously Navigate to a slot using the rotary knob and press it to save a preset. Recall hardware presets To recall a stored preset: - Press and hold the ‘Gain’ and ‘Antelope’ buttons simultaneously Navigate to a preset slot using the rotary knob and press it to load the settings.
Front Panel The Zen Go Synergy Core front panel is home to a pair of stereo headphone outputs on 1/4inch TRS jacks labeled 'HP1' and 'HP2'. The outputs have dedicated volume controls accessed from the 'HP/MON' button on the unit's top panel, and from the Windows/macOS Control Panel application.
Dual microphone/line level/high-impedance instrument (Hi-Z) mono inputs on combined 3-pin XLR and 1/4-inch TS/TRS connectors. Use the Windows/macOS Control Panel application to choose the mode of operation (Mic/Line/Hi-Z) and to activate or deactivate 48V phantom power for condenser microphones. Important! Always use the following connections: ● Connect microphones with 3-pin XLR microphone cables.
Monitor outputs The Zen Go Synergy Core has dual 1/4-inch TS/TRS (L/R) and dual RCA (L/R) monitor outputs. While the majority of studio monitor speakers have 1/4-inch audio inputs, smaller monitors and listening speakers (i.e. "desktop", "bookshelf"), home stereo systems, and DJ equipment usually have RCA audio inputs. The interface connects to both.
S/PDIF digital audio input and output 2 channels of incoming and outgoing stereo digital audio over coaxial RCA cables. For use with compatible equipment. Power USB-C port The Power USB-C port is a modern solution that turns the Zen Go Synergy Core into a truly mobile portable audio interface. It has the following applications: ● Power the Zen Tour Synergy Core from an external USB power source, such as adapter, powered USB hub, or power bank (a minimum of 1A electric current is required).
● Connect to mobile devices, such as smartphones and tablets, while supplying USB power to both interface and mobile device. The Zen Go Synergy Core is classcompliant with modern mobile devices and readily connects to them for use with playback and recording apps. To take advantage of these features: 1. Connect a USB power source with a minimum of 1A electric current to the dedicated Power USB-C port. 2. Connect your laptop or mobile device (smartphone or tablet) to the other USB-C port. 3.
USB bus power to the interface. The connection is compatible with USB Type-A ports as well - use a standard USB Type-C to USB Type-A adapter or cable. Kensington lock Anti-theft system used to physically lock the unit inside kiosks, stores, demonstration rooms and so on.
Control Panel Welcome to the Zen Go Synergy Core Windows/macOS Control Panel application! More than just an alternative to the physical top panel controls, it provides straightforward and comprehensive access to each aspect of the interface's functionality. This includes settings, signal routing, audio mixing, effects chains, monitoring, metering, and presets. We encourage you to get comfortable with the application to make the most of your investment.
Monitor incoming microphone audio via headphones Say you want to monitor incoming microphone audio from input A1 via Headphone output 1 (HP1). Connect your equipment and open the Control Panel. Do the following: 1. In the 'PREAMPS' section, head to the leftmost preamp and click on the signal type selector drop-down menu. Choose 'Mic' and don't forget to activate 48V phantom power if your microphone requires it. 2. Click the input selector above the 'AFX' area and choose PREAMPS > PREAMP 1 from the menu. 3.
Record in your DAW Recording with the Zen Go Synergy Core is very simple. First, make sure the interface is chosen as your main input and output device in your DAW. Next, open the Control Panel and click on 'DAW I/O'. Note the following: ● Inputs 1 - 8 in your DAW correspond to the 8 channels labeled 'Record 1 - 8' in the 'TO DAW' row. Use the input selectors to choose your audio sources and add Synergy Core FX from the 'AFX' area.
Main View From top to bottom, the Control Panel application is organized as follows: Function strip 1 Contains the following: On/Standby button Click to put the Zen Go Synergy Core in standby mode. Click again to power on.
Settings Window Click to choose an audio signal trim value for the monitor outputs (14dBu - 20dBu). By default, this option is set to 20dBu. Trim can Monitor Out Trim be used to compensate for the perceived volume differences between two or more sets of speakers so that they produce the same perceived volume level. Click to specify Panning Law compensation between 0dB (none) to -4.5dB.
Law compensation to calibrate the interface's outputs to your listening equipment. Mute Click to mute or un-mute Oscillator 1. Click to choose Oscillator 1 frequency Oscillator 1 (440Hz or 1kHz). Oscillator 1 generates a test signal which is fed to the monitor outputs for troubleshooting and calibration. Click to choose the output level for Level Oscillator 1 and Oscillator 2 (-18dBFS 0dBFS). Click to choose Oscillator 2 frequency Oscillator 2 (440Hz or 1kHz).
Minimize button Click to minimize the Zen Go Synergy Core Control Panel application. Maximize button Click to maximize the Zen Go Synergy Core Control Panel application window. Click the button again, or the adjacent Resize button, to return to default size. Resize button When you maximize or manually resize the Zen Go Synergy Core Control Panel application window, clicking this button will return it to its default size. Close button Click to close the Zen Go Synergy Core Control Panel application.
Click to choose the clock source (Internal, S/PDIF or USB) from the drop-down menu. Note that in USB mode, the unit still syncs to its internal clock. Sample Rate selector Click to choose the device sample rate (32kHz - 192kHz) from the drop-down menu. Make sure your choice always matches the DAW and operating system sample rates. Lock indicator Lights up when the unit is 'locked' to an S/PDIF audio and clock source. Session controls Sessions are 'snapshots' of Control Panel configurations.
In the Load Session window, you can browse your computer for Session files (*.as) and choose which components to load. You can also choose from a drop-down list of recently loaded Sessions or load the last used Session. Clicking the 'Set Defaults' button restores the component selection to its default setting. Clicking the 'Set Defaults' button followed by the 'Load' button will return the Control Panel application to its default state.
Preamps strip Contains the following controls for the Zen Go Synergy Core's dual analog audio inputs (A2 A1): Signal type selector Click to choose the signal type you are recording from the drop-down menu: ● Mic - choose this when recording a microphone. ● Line - choose this when recording line-level musical instruments and equipment, such as synthesizers, keyboards, samplers, mixer outputs, external preamps, effects processors and so on.
Gain control Click and drag to adjust input gain. The available gain range is defined by the signal type: ● Mic: 0dB to 65dB ● Line: -6dB to 20dB ● Hi-Z: 0dB to 60dB As a rule of thumb, adjust gain until you get the input signal to consistently peak around -12dB on the peak meter. If you manage that and there's an excessive amount of noise (such as hiss and hum), decrease gain until you obtain a comfortable signal-to-noise ratio (the signal is not too weak, and the noise is much quieter or inaudible).
48V Button Click to activate 48V phantom power for condenser microphones. Click again to de-activate. As a general precaution, make sure to deactivate 48V phantom power before connecting dynamic and ribbon microphones. The 48v phantom power button is protected with a tooltip. Press Ctrl + Left Click to enable phantom power on the selected mic preamp. Phase flip button Click to reverse (flip) the input signal's phase. Click again to return to normal.
Click and type text to change the channel's label. Function strip 3 Contains the following: Control Panel View selector Click to choose between three Control Panel views - 'Monitors & Headphones', 'Digital Outs', and 'DAW'. The three views are explained in the Control Panel Views sub-chapter below. Understanding them is crucial to operating the Zen Go Synergy Core. AuraVerb button Click to open the AuraVerb effect window. AuraVerb is explained in the AuraVerb subchapter.
Control Panel Views The three Control Panel views - 'Monitors & Headphones', 'Digital Outs', and 'DAW' - contain input selectors, Synergy Core FX chains, mixer controls, volume controls, and peak meters for the Zen Go Synergy Core's analog and digital audio outputs. The majority of your Control Panel application activity is going to happen here. Please read this sub-chapter thoroughly. Monitors & Headphones view The 'Monitors & Headphones' view contains two separate 15-channel virtual mixers.
From top to bottom, the 'Monitors & Headphones' view is organized as follows: Input selectors Each mixer channel has its own audio input selector found above it. The inputs are colorcoded. Click on an input selector to make your choice. The following inputs are available: Analog inputs A2 - A1 found on the PREAMP 1 -2 interface's rear panel. Analog inputs A2 - A1 with Antelope Audio Edge & Verge Mic Emulations applied.
AFX strip Mixer channels 1 to 4 let you apply Synergy Core FX to the input signal. Click inside the AFX areas above channels 1 to 4 to open the FX Rack (explained below). Click the 'BP' button inside the area to bypass all FX applied to that channel. Synergy Core FX Rack The Synergy Core FX Rack looks like this and offers the following functionality: ● Use the 'SAVE' and 'LOAD' buttons to store and recall FX Chains. ● Click the 'BP ALL' button to bypass all FX in the rack. Click again to re-activate.
● Click the drop-down menu below the audio input label to choose factory presets. ● Click the 'ADD NEW EFFECT' button to add Synergy Core FX. Their graphics and parameters appear to the right. ● On the left, you can click and drag the FX to change their order in the effects chain. A 'BP' button is available next to each effect to bypass it. ● Hold Ctrl (Windows) or Command (Mac) and drag to adjust the effects parameters in smaller increments.
Output volume and metering This section contains the following: ● Output volume knob with Dim and Mute buttons for the Zen Go Synergy Core's monitor output. The monitor output is shared between the 1/4-inch TS/TRS and RCA analog outputs on the interface's rear panel. ● Output volume knob with Dim and Mute buttons for the Zen Go Synergy Core's Headphone 1 output, labeled 'HP1' on the interface's front panel. ● Peak meters for the 'Monitor/HP1' virtual mixer's 2-channel stereo output.
Digital Outs view Contains the following: ● Input selectors for digital output channels 'S/PDIF 1' and 'S/PDIF 2'. Click to choose the audio inputs you want to feed into the Zen Go Synergy Core's S/PDIF digital audio outputs. ● Peak meters visualizing the output signal strength. Note the lack of output volume controls. That's because volume control is not a feature of digital audio transmission protocols like AES/EBU, S/PDIF and ADAT.
DAW I/O view 'DAW I/O' view provides an overview of audio going in to and out of your DAW. Please read this carefully to grasp the working principles and minimize confusion. The inputs and Synergy Core FX assigned to Channels 1 - 8 of the virtual mixers in 'Monitors & Headphones' view are routed to Inputs 1 - 8 in your DAW. Think of it like this - when you open your DAW, create a new track, and assign it to record audio from 'Input 1', you will get the audio from mixer Channel 1.
The rest of the 'COMPUTER PLAY' inputs receive audio from DAW Outputs 3 - 8. Thus, if you want to send an audio track from your DAW to any of the interface's analog and digital outputs, and/or into the Synergy Core FX - assign this track to Output 3 - 8, switch to the Control Panel application, and assign the 'COMPUTER PLAY' input with the matching number anywhere you want. Note that the Input Selectors and AFX areas from 'Monitors & Headphones' view are mirrored in 'DAW I/O' view.
AuraVerb AuraVerb provides richness and color using a special new approach and a unique algorithm. The reverb features eight different controls, including a ‘Color’ parameter to create everything between darkened textures to bright, sizzling presence. In addition, there are 24 presets done by award-winning audio engineer and producer Brian Vibberts. AuraVerb is a Send effect designed for live performance and monitoring.
Color The Color control lets you adjust the overall tone of the reverb. At 0, the space created is darker, like a lushly carpeted area. At 100, the reverb is at its brightest, which can add some ‘sizzle’ to a lead vocal, for example. PreDelay Common for most reverbs, the pre-delay lets you create a bit of space between the source and the onset of reverb. This happens by controlling the amount of delay time that precedes the initial sound from the reverb.
Late Reflection Delay Among other things, AuraVerb calculates reflected energy from the side walls and ceiling of the virtual space. Late Reflection Delay controls the delay of these bursts of reflections, either creating echoes or supporting the spatial impression of the simulated acoustic space. Richness Richness controls the complexity of the reverb envelopment and dampening nuances. At 0, there is less dampening and a brighter decay.
Room Size Room Size increases the virtual space dimensions Reverb Level This is the output level control of the reverb. Since inputs for AuraVerb are assigned to Send knobs on Mixer 1’s channels, we recommend balancing the channel volume levels from the Send controls and using Reverb Level to adjust the amount of reverb in the Master bus. REVERB FX ON/OFF Switch Use it to enable and disable AuraVerb. Preset Manager The Preset Manager lets you save and load presets.
Loopback function for streaming This chapter explains how to configure the Zen Go Synergy Core for use with a streaming application. The basic workflow is like this: 1. Use the Control Panel application to create the audio mix you want to send to your streaming application. This mix can be the 'Monitor/HP1' mix, the 'Headphone 2' mix, or both. The mixes can include both input audio (such as audio from a microphone) and operating system/computer audio (playback, DAW output, sound effects, and so on). 2.
1. Open the Control Panel and head to the leftmost preamp from the PREAMPS row. Click on the input selector above the 'AFX' area and choose PREAMPS > PREAMP 1 from the menu. 2. Choose 'Mic' from the signal type drop-down menu and activate 48V phantom power. 3. Click on the mic emulations button to open the mic emulations window. Choose Edge Solo with the dial. 4. Adjust microphone gain with the gain knobs. You should be hearing mic audio in your headphones at this point.
Edge Solo Mic Emulations Window The following functionality is available: ● Choose mic emulations from the drop-down menu on the right. ● Click and turn the ‘Phase Invert’ dial to flip the microphone’s polarity. ● Click and drag the ‘48’V switch to activate or turn off phantom power. Recording and Monitoring Edge Solo Edge Solo is a single-membrane condenser microphone. This means the microphone will occupy one physical mic preamp input and one virtual ‘MIC EMU’ output.
● Route the ‘PREAMP’ input for Edge Solo to your desired outputs to monitor ‘dry’ audio. ● Route the ‘EMU MIC’ output for Edge Solo (same number as the ‘PREAMP’ input) to your desired analog and digital outputs to monitor/record ‘mic emulation’ audio. ● Route ‘PREAMP’ and ‘EMU MIC’ channels to different outputs and record or monitor from them to get both 'dry' and 'mic emulation' audio. For more information about Edge Solo, visit its product page.
● Click and turn the ‘Channel Swap’ dial to swap the Edge Duo inputs. ● Click and turn the ‘Pattern’ knob to adjust the polar pattern. Note that some mic models have fixed or limited polar pattern adjustment. Recording and Monitoring Edge Duo Edge Duo is a dual-membrane condenser microphone – it has one capsule with dual membranes and connects with a Y-XLR cable (included), one XLR connector for each membrane. The Left (white) connector is the front membrane, the Right (red) is for the rear membrane.
Recording and monitoring Edge Duo as a modeling microphone Make sure that ‘Edge Duo’ mic emulations are enabled. Route the ‘MIC EMU’ inputs corresponding to the ‘PREAMP’ inputs occupied by Edge Duo to your desired outputs for monitoring and record from Inputs 1 – 8 in your DAW (e.g. you are using Channel 1 in the mixer, so you are recording from Input 1).
Verge Mic Emulations Window The following functionality is available: ● Choose mic emulations from the drop-down menu on the right. ● Click and turn the ‘Phase Invert’ dial to flip the microphone’s polarity. ● Click and drag the ‘48’V switch to activate or turn off phantom power. Recording and Monitoring Verge Verge is a single-membrane, small-diaphragm condenser microphone. This means the microphone will occupy one physical mic preamp input and one ‘MIC EMU’ virtual output.
● Route ‘PREAMP’ and ‘EMU MIC’ blocks to your desired outputs to monitor and record both ‘dry’ and ‘mic emulation’ audio. ● Record from Inputs 1 – 8 in your DAW. For more information about Verge, visit its product page.
CUSTOMER SUPPORT INFORMATION Antelope Audio Customer Support can be reached by the following means: Online Visit support.antelopeaudio.com Phone We are there for you around the clock, 21 hours/day, Monday to Friday. North America +1-916-238-1643 01:00 a.m. – 10:00 p.m. (EST) International +44 19 2593 3423 06:00 a.m. – 03:00 a.m. (GMT) Pour le Support francophone: +44 20 3389 8108 09:00 a.m. - 17:30 p.m.
MY ANTELOPE AUDIO PRODUCT ISN’T WORKING. WHAT SHOULD I DO? If you can't find a solution on your own, please get in touch with us so we check if you are having a hardware-related issue. If this is the case, we'll guide you through the repair process. If the product should be returned, a RMA number will be issued so we can begin the procedure. What's an RMA number? Issuing a RMA (Return Merchandise Authorization) number is required for any factory service or repair procedure.
multiple layers between the unit and the box walls to prevent from shock, vibration and various tears and scratches. Please remove any labels or old shipment markings it may have and ensure you add your shipping address inside the box in case the original shipment label becomes illegible during transportation. The shipping costs are covered by the owner of the product. Antelope Audio will not cover any local customs charges. We recommend using a courier service of your choice (e.g. DHL, UPS, FedEx).
LIMITED WARRANTY POLICY This is a non-transferable voluntary Limited Product Warranty provided to end-customers who have purchased Antelope Audio-branded hardware product (hereinafter referred to as “Product”) from an authorized Antelope Audio re-seller.
This version of the warranty applies to products purchased on or after January1,2018. For prior versions of the Antelope Audio limited warranty, please contact customer service. Limited Factory Refurbished (B-stock) Warranty Antelope Audio warrants products sold as “B-stock, Factory Refurbished or Open Box” to be free from defects in materials (unless otherwise stated in product description) and workmanship.
written notice of any nonconformity;(ii) after Antelope Audio’s written authorization, customer has returned the nonconforming product to the designated place; and (iii)Antelope Audio has determined that the Product is nonconforming and that such non conformity is not the result of any of the exclusions designated below.
such restriction is prohibited by applicable local law; (vii)Any other cause which does not relate to a Product defect in materials or workmanship. The warranty does not apply to any Products which have been subject to misuse, neglect, accident or modification or which have been soldered or altered such that they are not capable of being tested under normal test conditions. This warranty does not cover (i) any counterfeit products, i.e.
No Other Warranties No Antelope Audio employee, dealer, re-seller, or other agent is authorized to make any modification, extension, or addition to this warranty. How to Make a Warranty Claim Valid warranty claims should be processed through your point of purchase. Please also verify the return policy directly with the retailer where you purchased your product. Any warranty claims that cannot reprocessed through your original point of purchase should be addressed directly to Antelope Audio.
(I) For end user customers, submit a claim online at: support.antelopeaudio.com. For business to business (B2B) / Direct customers of Antelope Audio please email us at techsupport@antelopeaudio.com (ii) A valid proof of purchase is required for RMA processing (i.e. receipt, invoice, etc). Antelope Audio will provide you with the RMA number within 2 working days as of the claim submission date. RMA Return Addresses We have multiple RMA receiving locations worldwide.
If any term hereunder is held to be illegal or unenforceable, it shall be severed from this warranty and the legality or enforce ability of the remaining terms shall not be affected.
SAFETY NOTES To reduce the risk of electrical shocks, fire, and related hazards: ● Do not remove screws, cover, or cabinet. There are no user serviceable parts inside. Refer servicing to qualified service personnel. ● Do not expose this device to rain, moisture or spillover of liquid of any kind. ● Should any form of liquid or a foreign object enter the device, do not use it. Switch off the device and then unplug it from the power source.
● Both occasional and continued exposure to high sound pressure levels can cause permanent ear damage via headphones and monitors. ● The device is designed to operate in a temperate environment, with a correct Operating Temperature of 0-50° C, 32-122° F.
TECHNICAL SPECIFICATIONS ANALOG Analog Inputs 2 × Mic / Line Inputs / Hi-Z Inputs 48V phantom power and independent preamp gain for each input Analog Outputs 1 × Primary Monitor Out on TRS 1/4 Jacks, +20 dBu max, signal balanced, DC-coupled 1 × Secondary Monitor Out on RCA mirrored from the primary out 2 × Stereo Headphone Outputs Mic Preamp EIN: -128 dBu (A-weighted) Dynamic Range: -121 dB (A-weighted) THD: -106 dB Max input level: +20 dBu Max Gain: 65 dB Monitor Max output level +20 dBu D/A Monitor Conver
THD + N: -100 dB DIGITAL Digital Inputs 1 × S/PDIF Digital Outputs 1 × S/PDIF Computer I/O 1 × USB-C (compatible with USB Type A) 2.0 Power Bus-powered through USB-C Additional USB-C connector available for power only. Supports reverse charging. CLOCKING Clocking System 4th Generation Acoustically Focused Clocking (AFC™) 64-bit DDS Sample Rates (kHz) 44.1, 48, 88.2, 96, 176.4, 192 Physical Dimensions: 198 х 117 х 57.5 mm Weight: 700 g (approx.
1.77″ IPS Screen on a 2.