
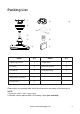
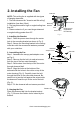
Instructions / Assembly


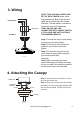


3. Wiring
NOTE: THIS FAN ONLY NEEDS ONE
SET OF INPUT WIRES (black, white
and ground wire). Both of the fan and
lights will be controlled by the remote
controller. The wall switch is not able to
control the fixture full functionally.
THIS FAN CAN ONLY BE
CONNECTED ONTO ON/OFF SWITCH
IF YOU HAVE ONE, NOT SUITABLE
FOR DIMMAER SWITCH.
Step 1. Connect the fan live wire (black)
to your house live wire (black).
Step 2. Connect the fan neutral wire
(white) to your house neutral wire
(white).
Step 3. Connect the fan ground wire
(from downrod, green/yellow stripe) to
your house ground wire
(optional).
Step 4. After connecting the wires,
spread them apart so that the live wires
are on one side of the outlet box and the
neutral wires are on the other side.
4. Attaching the Canopy
Black
White
Ground wire
Black
White
Green/yellow
House Wires
Outlet box
Outlet box
Mounting
bracket
Canopy
Fig. 8
Fan Wires
Screw Screw
Step 1. Insert the wires and wire connec-
tors into the outlet box.
Step 2. Slide the canopy upto the ceiling
and attach it to the mounting bracket with
the screws provided. Tighten all screws
securely.
Fig. 9
Email: homechandelier@qq.com 6