ARCSOFT® PRODUCT FAMILY ArcSoft PhotoStudio ® Awesome photo editing for the home or office. Work with layers and enhance your photos in a number of ways. ArcSoft VideoImpression TM Create multimedia presentations by combining photos and video clips with audio, text and scene transitions. Windows (V. 5.5) • Macintosh (V. 4) Windows ArcSoft PhotoImpression TM This all-in-one solution blends powerful photo editing with project templates and a slick, easy-to-use interface.
- LICENSING AGREEMENT The following is a legal software license agreement between you, the software end user, and ArcSoft, Inc. Carefully read this license agreement before using the product. Using the product indicates that you have read this license agreement and agree to its terms. If you do not agree to the terms, promptly return the package to the place it was purchased within 10 days of the date you acquired it for a full refund. Grant of License.
ARCSOFT SHOWBIZ DVD 2.
ARCSOFT SHOWBIZ DVD 2.1 - SYSTEM REQUIREMENTS • • • • • • • • • Windows 98SE/ME/2000/XP (Windows 2000/XP recommended) Pentium III 800 MHz or higher (P4 1.6 GHz or higher recommended) 400 MB free hard drive space for program installation 4 GB+ free hard drive space for video capture and editing 128 MB RAM (512 MB DDR RAM recommended) 16-bit color display at 1024 x 768 DirectX 9 Windows Media Player 9 recommended 7200 RPM hard drive recommended Note: 1 hour of DV video requires 13 GB of hard drive space.
ARCSOFT SHOWBIZ DVD 2.1 - INTRODUCTION Welcome! Are you ready to learn how to capture, edit, and create DVDs on your computer? Great! We'll walk you through these three main processes to help you put together and share your own home movies. Don't forget to consult the built-in Help file--it goes over every button and command found in the program. Here, we'll go step-by-step through the video capture, edit, and authoring procedures.
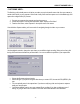
ARCSOFT SHOWBIZ DVD 2.1 - CAPTURING VIDEO The first thing you'll probably want to do before you make your movie is transfer some video from your camera (or another video device) to your computer. We've made it easy. We'll start from square one. In this walkthrough, we'll capture from a digital video (DV) camera. 1. Connect your camera to the computer and turn the power on. 2. Launch the program. From the welcome wizard, select "Capture or Edit Video." 3.
ARCSOFT SHOWBIZ DVD 2.1 - EDITING / ASSEMBLING VIDEO CLIPS Because the creative possibilities here are limitless, it's a bit difficult to do a step-based walkthough. Instead, we'll talk about the fundamentals of creating a custom video clip. The heart of the program lies in this section; here's where you can get really creative by making truly unique and professional-looking videos. Don't forget to use this tutorial along with the built-in Help file.
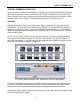
ARCSOFT SHOWBIZ DVD 2.1 The bulk of your options are accessed through the top portion of the screen that is divided into numerous tabs: MEDIA, TEXT, TRANSITIONS, EFFECTS, and EXPORT (this last may not appear until you've actually started to construct your video). All of your content comes from "albums." Before we go any further, you're going to need to have a basic understanding of what albums are and how they work.
ARCSOFT SHOWBIZ DVD 2.1 3. Click where indicated to browse your system for files to add to the album. You can add still pictures, video clips, and audio tracks. 4. To add additional files at any other time, click the Add button. Once your album is ready, you can then add content to the Storyboard/Timeline. Remember, the album thumbnails only link to the actual files on your system.
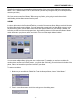
ARCSOFT SHOWBIZ DVD 2.1 You can either follow the above method (highlight the thumbnail you want to add, then click the "Add" arrow), double-click the thumbnail, or click-and-drag the item you want to the next available spot on the Storyboard. Click on the "Transitions" tab. Choose a transition that you like and add it before or after any photo or video. HINT: If you want a quick and easy way to apply transitions to your movie, right-click the Storyboard and choose "Random Transition to All.
ARCSOFT SHOWBIZ DVD 2.1 "The Player" offers standard playback controls for viewing your entire movie, or only specific sections. If you want to view your movie in its entirety, click "Entire Movie." Easy, right? Told you so. Then just click "Play" and see all the content you worked so hard to put on the Storyboard come to life in the preview window. If you only want to view a specific piece of your movie, click "Active Clip." Then, click the thumbnail on the Storyboard that you want to preview.
ARCSOFT SHOWBIZ DVD 2.1 You may also notice that photos offer a "Pan & Zoom" option. Pan & Zoom is discussed later, when we get to creating slideshows. EDITING / TRIMMING VIDEO CLIPS When you click on a video clip on the Storyboard, you'll see editing options similar to those available when editing photos. In addition to being able to modify the video color, you can also adjust the volume and playback speed.
ARCSOFT SHOWBIZ DVD 2.1 THE TIMELINE & ADVANCED EDITING Look how much you've learned! You now know how to add still images, video clips, and transitions to the Storyboard. You know that when you compile your movie, everything on the Storyboard is smooshed together to create a single video. You know how to enhance your still images and trim video clips. Now, let's find out how to add a soundtrack, special effects, and text to your movie.
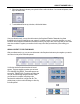
ARCSOFT SHOWBIZ DVD 2.1 ADDING TEXT EFFECTS Just like the pros, you can add scrolling text effects to your movies. In fact, you can choose from a variety of effects to add to your text. Click on the Text tab to get started. Start off by choosing the text style. There are two categories: Simple and Fancy. Simply click the style you want, then click-and-drag the text style you want to the Timeline. A new window will appear, allowing you to enter in the text, modify the font, etc.
ARCSOFT SHOWBIZ DVD 2.1 ADDING SPECIAL EFFECTS Click the Effects tab to see all of the fun and unusual effects. Effects are added to specific items on the Video track. You can modify the duration of the effect by clicking and dragging the edges. Note that effects are added to individual components of the video track. You can't, for example, extend an effect over two pictures. You need to add the effect over both of them.
ARCSOFT SHOWBIZ DVD 2.1 Type in a file name for your movie, and save it in a location that's easy to remember. VERY IMPORTANT: Check the box called "Add to album" and then select the album to which the saved file will be added. It isn't critical, but if you want to use this video clip when you're creating your DVD, it'll need to be in an album anyway. That's it! You're done. Just relax while your movie is compiled and saved.
ARCSOFT SHOWBIZ DVD 2.1 - CREATING A DVD The Create module of the program is where you actually put together your DVD (or VCD). It's really simple. If you've created your own custom clips in the edit section, here's where your work really pays off, because you can now add it as a chapter on your DVD. You can do all of the following: 1. 2. 3. 4. 5. Choose the video clips that you want to add to your movie (they'll be added as individual chapters).
ARCSOFT SHOWBIZ DVD 2.1 ADDING AN INTRODUCTION VIDEO Introduction videos play as soon as the disc is inserted into a DVD player. Once the video clip completes, the movie menu is shown. To add an introduction video to your disc, click and drag the desired video from the album area to the Introduction Video box. You will see a thumbnail of the video appear. DESIGNING YOUR MENU Now that your content is added, you can customize the look and feel of your menu.
ARCSOFT SHOWBIZ DVD 2.1 CHOOSING A NEW BACKGROUND Click the "Themes" tab. An entire collection of backgrounds are available. The "Animated Menu" album contains a collection of video backgrounds. Of course, you can also choose a photo (or video!) from your personal collection to use as the menu background. To do so, simply click "New Background" in the preview area. You can then browse your system for the file that you want to use.
ARCSOFT SHOWBIZ DVD 2.1 ANIMATED CHAPTER BUTTONS Instead of having static chapter buttons, they can actually run the videos that they represent. From the "Media" tab, check the "Animated Thumbnails" box. You set the time (in seconds) that you want them to play before they loop. Click "Preview Animation" to see how it looks. Note that there may be considerable processing time depending on your system and the length of the animated loop.
ARCSOFT SHOWBIZ DVD 2.1 BREAKING UP LONGER VIDEO CLIPS / CREATING SUBMENUS Longer video clips can be broken into separate chapters. To do this: 1. Highlight the video clip you wish to break up into smaller segments. 2. Click the "Set Chapters" tab. 3. Use the playback controls/slider to go to the point where you'd like to insert a break. 4. Click "Set Chapter." A chapter break will be inserted. 5. You can also trim the overall length of the video.
ARCSOFT SHOWBIZ DVD 2.1 CREATING A SLIDESHOW You can easily create a photo slideshow, which is added to your movie as a separate chapter. To create a slideshow: 1. From the Media tab, click "Create Slideshow." 2. 3. 4. 5. 6. 7. Choose the album or folder that contains the photos you wish to include in your slideshow. Hold down the CTRL key and single-click the photos you wish to add. Click "Add" (click "Add All" to add all of the photos in the current location).
ARCSOFT SHOWBIZ DVD 2.1 9. If you'd like to include a soundtrack, click "Select Files" and choose the audio tracks you'd like to add. 10. In the "Pacing" section, set the display time for the slides. If you'd like the program to time the slideshow according to the length of your soundtrack, choose "Fit slideshow to soundtrack." 11. Transitions, or special effects, can occur as one slide changes to the next.
ARCSOFT SHOWBIZ DVD 2.1 Once you're ready to burn your movie to disc, click "Start." You'll be prompted to save your project. Then, there are just a few things you need to set before the program begins compiling your final movie and burning it to disc. 1. First off, choose the playback format. If you're in the US, choose NTSC. Most of Europe uses PAL. 2. Next, choose where you wish to save the movie. From the pull-down, choose your DVD burner drive (or your hard drive if you're saving your movie locally).
ARCSOFT SHOWBIZ DVD 2.1 - TECHNICAL SUPPORT Europe Unit 14, Shannon Industrial Estate Shannon, Co. Clare, Ireland Tel: +353 (0) 61-702087 Fax: +353 (0) 61-702001 Email: eurosupport@arcsoft.com N. America ArcSoft, Inc. 46601 Fremont Blvd Fremont, CA 94538 Tel: 1.510.440.9901 Fax: 1.510.440.1270 Web: www.arcsoft.com Japan ArcSoft Japan 9F, 1-21-9, Higashi-Gotanda, Shinagawa-ku, Tokyo 141-0022, Japan Tel: +81-3-5795-1392 Fax: +81-3-5795-1397 Web: www.arcsoft.jp Email: support@arcsoft.