
User Guide


ARCSOFT SHOWBIZ DVD 2.1
- 4 -
- CAPTURING VIDEO -
The first thing you'll probably want to do before you make your movie is transfer some video from your camera (or
another video device) to your computer. We've made it easy. We'll start from square one. In this walkthrough, we'll
capture from a digital video (DV) camera.
1. Connect your camera to the computer and turn the power on.
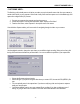
2. Launch the program. From the welcome wizard, select "Capture or Edit Video."
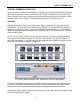
3. From the next screen, select "Capture" in the top left corner of the screen.
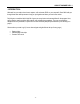
Once within the Capture module, you'll see controls for navigating through the video on your camera:
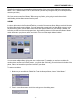
Use the playback controls to jump to the spot where you would like to begin recording. When you're all set, click
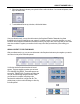
the big red Record button beneath the preview window. You can now define the specifics of your captured file:
•
Choose the file name and save location
•
Set the file type. If you plan on using the video when you create a DVD, choose the DVD (MPEG-2) file
type.
•
You can optionally enter in the capture time. If you have a really long video and only want to capture a
small part, use this option.
•
You'll almost definitely want to save your captured file to an album. If you plan on doing any type of
editing, it's going to need to be in an album. You'll learn more about albums in the Edit section.