
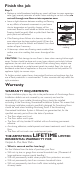
Warranty


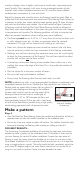


Step 2. Inspect and prepare subfloor. Subfloor must be clean, dry,
and smooth. A subfloor is the surface over which your new
Armstrong sheet flooring is installed.
Prepare subfloor
Only single layer
Must be noncushioned-backed and firmly bonded. Check for loose vinyl,
gapped seams, cuts, tears, rips, or other damage.
VINYL FLOORING
Use medium grit sandpaper
and sanding block for
smoothing rough areas of
the Embossing Leveler
Utility knife
to remove
loose vinyl
Use New
Beginning
®
Resilient Deep
Cleaning Floor
Stripper to
remove dirt
and wax buildup
PREPARE
IF INSTALLING OVER...
S-199 One Part
Embossing Leveler,
fills and levels embossing on
your old vinyl flooring
Use smooth edge
trowel for applying
S-199
Preinstallation care & materials
estimating
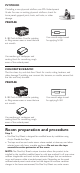
Step 1.
● When transporting or storing floor prior to installation, do not kink
o
r distort.
● Always roll flooring face out until ready to install.
● Just prior to installation, lay flooring out flat to acclimate to conditions.
● Flooring and room temperature should be a minimum of 65° F (18° C)
for 48 hours preinstallation, during installation, and 48 hours after
installation. Minimum 55° F (13° C) thereafter.
● Plan layout for minimum number of seams.
● Accurately measure length and width of room. Include recessed
areas/doorways.
● Allow an extra 1-1/2˝ of flooring on each end for trimming.
● If more than one piece of flooring is needed, allow for correct pattern
match at seam.
NOTE: Do not install over particleboard, waferboard or single-layer
STURD-I-FLOOR
®
panels, existing resilient tile floors that are on or below
grade, existing cushioned-vinyl flooring, carpet, strip wood or plank flooring.