Ihr Satellitenempfänger Your satellite receiver Su receptor satelite Il vostro ricevitore da satellite Xena 1700 Bedienungsanleitung User manual Manual del usuario Istruzioni per l’uso
Kurzübersicht / Brief presentation / Presentacion breve / Breve panoramica In wenigen Schritten zum ersten Bild Get an image in a few steps Su primera imagen en pocos pasos In pocchi passi si otterra la prima immagine 1 1 1 1 1. Ihr Satellitenempfänger Your satellite receiver Su receptor satelite Il vostro ricevitore da satellite 12 22 34 42 2. Anschlüsse Connections Conexiones Allacciamenti 13 23 35 43 3.
1
2
3
4
5
6
7
8
9
10
Inhaltsverzeichnis 1. 1.1 1.2 1.3 Ihr Satellitenempfänger Die Vorderseite des Empfängers Die Rückseite des Empfängers Ihre Fernbedienung 12 12 12 12 2. Anschlüsse 13 3. Allgemeines 13 4. Parametereinstellung 13 5. 5.1 5.2 5.3 Installation Installation mit Festantenne Installation mit motorisierter Antenne Installation Kollektivmodus (Multiswitch) 14 14 15 16 6. 6.1 6.2 6.3 6.
1. Ihr Satellitenempfänger 1.1 Die Vorderseite Ihres Empfängers (siehe Seite 41) 1 4-stellige LED-Anzeige, die normalerweise den aktuell eingestellten Kanal anzeigt. Bei ausgeschaltetem Gerät sind die Zeichen «-» zu sehen, womit die «Stand-by-Position» (Bereitschaftsposition) angezeigt wird. 2 Kontrollleuchte 3 CHANNEL: Programmwechsel CD 4 POWER: Mit diesem Knopf wird der Receiver ausgeschaltet (auf Stand-by-Position) bzw. eingeschaltet.
2. Anschlüsse Bevor Sie Ihren Empfänger anschliessen, empfehlen wir Ihnen, einige Gebrauchs- und Sicherheitshinweise zu beachten. • Versuchen Sie nie, den Deckel des Gehäuses zu öffnen, wenn das Gerät angeschlossen ist. Wenden Sie sich an einen Fachmann. • Stellen Sie das Gerät an einen trockenen Platz. Wie jedes Elektrogerät gibt Ihr Empfänger Wärme frei, wenn er in Betrieb ist. Das ist vollkommen normal.
• • Gehen Sie auf den Punkt SPRACHE AUDIO und wählen Sie mit den Tastern CH+/CH- die Sprache, die der Ton haben soll (2/3). Drücken Sie auf den Taster OK, um Ihre Paramter zu bestätigen und zum vorhergehenden Menü zurückzukehren. Anmerkung: Sie können dieses Menü jederzeit verlassen, ohne die durchgeführten Änderungen zu speichern, indem Sie auf den Taster ESC Ihrer Fernbedienung drücken. (1) Wenn Sie diesen Wert nicht kennen, lassen Sie das Feld bitte frei.
• Sie die Auflistung der Antennen mit Hilfe der Taster CD durch. Wenn die Ausrichtung einer Antenne korrekt ist, erscheint eine graphische Anzeige, die die Signalqualität anzeigt. Wenn Sie fertig sind, drücken Sie auf OK. Ab jetzt können Sie mit der Installation der Sender beginnen (siehe Punkt 6). 5.2 Installation mit einer motorisierten Antenne Ihr Empfänger ist mit einem Positionierer DiSEqC 1.2 ausgestattet. • • • • • • • • • • • • • • • • • • Drücken Sie auf den Taster MENÜ der Fernbedienung.
5.3 • • • • • • • Installation Kollektivmodus für professionelle Anlagen (Multiswitch) Drücken Sie auf den Taster MENÜ der Fernbedienung. Wählen Sie INSTALLATION. (Benützen Sie die Taster CD und bestätigen Sie mit OK). Wählen Sie PARAMETER, ANTENNEN UND SATELLITEN. (Benützen Sie die Taster CD und bestätigen Sie mit OK). Gehen Sie auf INSTALLATIONSTYP und wählen Sie mit Hilfe von CH+/CH- «KOLLEKTIV».
• • Satellit zu parametrieren. Jede Symbolrate kann als aktiv oder inaktiv erklärt werden (ausser der ersten, die immer aktiv ist). Wenn eine Symbolrate für aktiv erklärt wird, wird sie bei der automatischen Suche verwendet. Wiederholen Sie diesen Vorgang für alle Satelliten, die sie verändern wollen. Drücken Sie auf ESC zur Bestätigung und um das Menü zu verlassen. 6.3 Automatische Senderinstallation Sie haben auf Ihrem Empfänger eine automatische Sendersuche, die ein komplettes Scanning durchführt.
• • Um einen Sender neu zu benennen, gehen Sie mit dem Cursor auf den gewählten Sender und wählen Sie den neuen Namen, indem Sie direkt auf die alphanumerischen Taster Ihrer Fernbedienung drücken. Bestätigen Sie mit OK. Speichern Sie Ihren neuen Namen, indem Sie ESC drücken. Wenn Ihre Änderungen beendet sind, drücken Sie auf den Taster ESC. (1) Drücken Sie auf den Taster ZOOM, um das Bild zu vergrössern. (2) Drücken Sie auf den Taster LANG, um die gesendete Sprache zu ändern. 7.
• • • Wählen Sie den Fernsehsender, Radiosender bzw. Datenkanal, den Sie Ihrer Favoritenliste hinzufügen möchten, indem Sie den Cursor darauf positionieren (benützen Sie die Taster CD), und drücken Sie anschliessend auf OK. Indem Sie erneut auf OK drücken, wird dieser Sender von der Favoritenliste entfernt. Wenn diese Liste voll ist, drücken Sie auf den Taster FAV, um diese Liste durchzugehen.
• • • Wenn das Kürzel «info» blinkt, bedeutet das, dass zusätzliche Informationen vorhanden sind (z.B.: Zusammenfassung des Films...). Drücken Sie in diesem Fall auf den Taster , um diese Informationen lesen zu können. Drücken Sie erneut auf den Taster , um diese Informationen auszublenden. Drücken Sie auf den Taster GUIDE, um den Balken auszublenden. 7.5 Gebrauch des Teletext Ihr Empfänger hat alle Modi des Teletext, auch wenn Ihr Fernsehgerät diese nicht hat. 7.5.
Table of contents 1. 1.1 1.2 1.3 Your satellite receiver Your receiver’s front panel Your receiver’s back panel Your remote control 22 22 22 22 2 Connections 23 3 Global considerations 23 4 Local parameters 23 5 5.1 5.2 5.3 Installation Installation with fixe antennas Installation with motorized antenna IF to IF installation 24 24 25 28 6 6.1 6.2 6.3 Channels installation Search criteria Channels automatic installation Channels update 28 28 29 29 7 7.1 7.2 7.3 7.4 7.4.1 7.4.
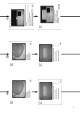
1. Your satellite receiver 1.1 Your receiver’s front panel (see page: 51) 1 2 3 4 5 VFD display: will show channel’s name when selected and all menu options. When the receiver is OFF, display will show the clock. V.F.D Channel: To increase or decrease channel’s number Power: This button allows you to put your receiver ON or in Standby mode Push: Smart card readers and Common interface compartiment 1.
17 INFO+: When on programme guide mode, press here to obtain additional information on current and next program. Use this key to open a window and get technical details of a channel during video list mode. 18 CH-/Page down: To access to the previous channel of the main list, to go to the previous page of a list and to change data on menu mode. 19 NAVIGATION: Allows you to navigate within a menu or a list and to directly access the favorites up and down from the last used favorite list.
• Move to the LONGITUDE item (CD) and enter your value. In order to know it, consult an atlas or a map, which shows the exact longitude. (1) For a fixed setting, LATITUDE and LONGITUDE are optional information, it allows exact calculation of the Azimuth and Elevation for each satellite, In case of motorized system those data are very important for automatic satellite location (LocSat function). • • Move to the LOCAL DATE item (CD) and enter it using the digital keys on your remote control.
The number of selected satellite can not exceed the number of antenna or LNB outside. • Once you have selected the satellites you wish to receive, press OK to confirm and go back to the next step. A new menu will appear, you must specify LNB type as well as the connecting accessories that are used in your outdoor installation. • • • Select the dish you want to set up(only in case of multiple installation using (F E) and choose the type of LNB(UNIVERSAL 1, UNIVERSAL 2, C BAND) using CH+/CH- keys.
Use of DiSEqC motor • • • • • • Press MENU on your remote control. Select INSTALLATION (CD) Press OK to confirm. Select ANTENNAS AND SATELLITES PARAMETERS (CD). Press OK to confirm. Select INSTALLATION TYPE press CH+/CH- to choose <> Press OK to confirm and go to the next step. Press CH+/CH- to choose the LNB type. Press OK to confirm. Use (CD) to select and access the following options and modify the corresponding parameters if needed.
POINTING • Select POINTING (CD) then press OK. From now on the LocSat function is activated. It uses the automatic satellite finding. • (1) A new menu will appear, you must select the desired satellite that will be considered as a reference satellite to adjust your motor. Each parameter can be modified if necessary, please refer to chapter 4.1.
B-Save a satellite position • When the aiming to a single satellite needs to be modified and saved separately, without affecting the other satellites in memory then go to SAVE CURRENT SATELLITE POSITION and press OK. NB: All other satellite positions will not be modified. C-Quitting without saving • When proceeding with a check adjustment on an already saved position, go to QUIT WITHOUT SAVING and press OK.
• • • • Press (F E) to move to SYMBOL RATE FOR SCANNING. You have the choice between 1 to 8 symbol rates per satellite. Each SYMBOL RATE can be declared active or non-active (except for the first one which is always active). Each time a SYMBOL RATE is declared active for the selected satellite, it will be used in the automatic channel installation. Press (CD) to go back to the list of satellites. Repeat this operation for each satellite you want to scan.
• • To add a new channel, select the channel list window (F E), press ADD(red key), enter the corresponding parameters and press OK. The new channel will added to the list if found. To move a channel or a bouquet, select a channel or a bouquet (F E), press OK. The selected bouquet or channel will be displayed in green. Move the cursor (CD) to the new position, press OK to insert. Repeat for each channel or bouquet you want to move. Press ESC to save modifications and return to the previous menu.
• • • • • • • • Select a channel by using (CD) then press OK to access to the favorite channel. Use CH+/CH- to move by page up or down within the list (10 channels by 10 channels). Press I+ to obtain the channel’s parameters. Press I+ again to make this box disappear. Press (F E) to change favorite list. Press ESC or FAV at any time to make the list of favorites disappear. Use the (F E) keys to access to a different favorite. Press I+ to obtain the channel’s parameters.
32
Indice 1. 1.1 1.2 1.3 Su receptor satelite La parte frontal de su receptor La parte de detras de su receptor Su mando a distancia 34 34 34 34 2 Conexiones 35 3 Considerationes generales 35 4 Parametros locales 35 5 5.1 5.2 5.3 Instalacion Instalacion con antenas fijas Instalacion con antena motorizada Instalacion de tipo colectivo 36 36 36 37 6 6.1 6.2 6.3 6.
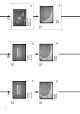
1. Su receptor satelite 1.1 La parte frontal de su receptor 1 VFD diplay: le informa sobre el nombre del canal visionado 2 VFD 3 Canales: para cambiar de canal (CD) 4 Power: Permite poner en marcha o apagar su receptor 5 Push: Apretar para aceder al compartimento de los lectores de tarjetas y del interfaz comun 1.
2. Conexiones Antes de conectar su receptor le rogamos observar las siguientes recomendaciones . • • • • No intente abrir el receptor si permanece conectado. Le rogamos que se ponga en contato con una persona calificada. Su receptor debe paermanecer en un sitio ventilado, estable y seco. No limpie su receptor cuando permanece conectado y usa solo un tejido seco. En caso de largua ausencia, le recomendamos desconectar su aparato. 3.
5. Instalacion 5.1 Instalacion con antena fija • • • • • • • Apretar la tecla MENU del mando a distancia. Selecionar INSTALACION (CD) y confirmar con OK. Selecionar PARAMETROS, ANTENAS Y SATELITES (CD) y confirmar con OK. Selecionar TIPO DE INSTALACION y elegir INDIVIDUAL FIJO apretando las teclas CH+/CH-. Selecionar NUMEROS DE ANTENAS y elegir el numero corespondiente con las teclas CH+/CH-. Selecionar ALIMENTACION DEL LNB y elegir SI. Apretar la tecla OK para confirmar.
• • • • Cuando ha encontrado et satelite de referencia, aprarece el nivel de senal. Es todavia posible mejorar la focalisacion apretando las teclas EST/OUEST o AUTOFOCUS. Confirmar con OK. Selecionar MEMORIZAR LA POSICION DEL SATELITE ACTIVADO (CD) y confirmar con OK. Selecionar MEMORIZAR Y SALIR (CD) y confirmar con OK. Desde aqui es posible proceder con la instalacion de los canales (par 6) 5.3 Instalacion en modo colectivo (multiswitch) • • • • • • • • • Apretar la tecla MENU del mado a distancia.
• • • • Selecionar ACTIVACION DE LOS SYMBOL RATE (CD) y confirmar con OK. Elige el satelite (CD). Seleciona el menu de parametros (CD) para entrar y activar los symbol rate (hay que repetir esta operacion por cada satelite). Apretar ESC para confirmar y salir del menu. 6.3 Instalacion automatica de los canales • • • Apretar la tecla MENU del mado a distancia. Selecionar INSTALACION (CD) y confirmar con OK. Selecionar BUSCA DE LOS CANALES (CD) y confirmar con OK para empezar la busca.
7.1 Uso de la lista de canales • • • • • Apretar la tecla LIST para llamar la lista de canales. Apretar (CD) para cambiar de canal en la lista y confirmar con OK. Apretar las teclas CH+/CH- para cambiar de canales (10 por 10). Apretar i para obtener los parametros sobre el canal selecionado. Apretar ESC o LIST para hacer desaparecer la lista de canales en calquier momento. 7.2 Creacion de las listas favoritas • • • • • • • • • • Apretar la tecla MENU del mando a distancia.
7.5 Uso del teletexto Su receptor es transparente al teletexto y lo genera. 7.5.1 Su televisor recibe el teletexto Usa el mando distancia de su televisor. 7.5.2 Su televisor no recibe teletexto • • • • • 40 Apretar la tecla TXT del mando a distancia. Usar CH+/CH- para cambiar de pajinas. Usar las teclas de color para aceder a la pajina corespondiente. Apretar la tecla TXT para la imagen y el teletexto en el mismo tiempo. Apretar la tecla TXT para salir del modo teletexto.
Indice 1. 1.1 1.2 1.3 Il vostro ricevitore da satellite La parete anteriore del Vostro terminal La parete posteriore del Vostro terminal Il Vostro telecomando 42 42 42 42 2. Allacciamenti 43 3. Considerazioni generali 43 4. Impostazione dei parametri 43 5. 5.1 5.2 5.3 Installazione Installazione con antenne fisse Installazione con antenna motorizzata Installazione in modo collettivo(Multiswitch) 44 44 45 45 6. 6.1 6.2 6.3 6.
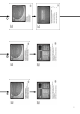
1. Il vostro ricevitore da satellite 1.1 La parete anteriore del Vostro terminal (pagina 41) 1 Visualizzazione con LED a 4 cifre e normalmente indicazione del numero del canale in uso. Quando l’apparecchio è disinserito, i segni «-» si devono vedere; grazie a ciò viene indicata la «Stand-by-Position» (posizione di attesa). 2 LED 3 CHANNEL: Si possono usare questi tasti per selezionare a mano i canali aumentando o diminuendo passo per passo il numero del canale CD.
2. Allacciamenti Prima d’allacciare il Vostro ricevitore, Vi raccomandiamo di osservare alcune prescrizioni d’utilizzazione e di sicurezza. • No cercare mai d’aprire l’involucro dell’apparecchio se questo è sotto tensione. Rivolgersi a personale qualificato. Evitare di piazzare l’apparecchio in luoghi umidi.
Osservazione: Potete lasciare in qualsiasi momento questo menu senza salvare le modifiche effettuate premendo il tasto ESC del Vostro telecomando. (1) Se non conoscete questo valore lasciate libero il campo. (2) Questo non vuol dire che tutto quello che ascolterete sarà nella lingua che avete scelto, ma che tutte le bande sonore in questa lingua saranno prescelte in sua vece se queste sono diffuse dalla trasmittente.
5.2 Installazione con antenna motorizzata Il Vostro ricevitore è equipaggiato con un posizionatore DiSEqC 1.2. • Premere il tasto MENU del telecomando. • Selezionare INSTALLAZIONE. (Utilizzare i tasti CD poi confermare con OK). • Selezionare PARAMETRI ANTENNE E SATELLITI. (Utilizzare i tasti CD poi confermare con OK). • Portarsi sulla posizione TIPO D’INSTALLAZIONE e scegliere utilizzando CH+/CH- «MOTORIZZATO». • Premere OK.
• • Portarsi sulla posizione ALIMENTAZIONE LNB e scegliere, utilizzando CH+/CH-, se volete o meno alimentare LNB dal Vostro ricevitore. Premere OK. A partire da questo momento potete procedere all’installazione delle bande, guarda 6. 6. Installazione dei canali Se il Vostro ricevitore non ha ora tutti i parametri necessari per la ricerca automatica dei canali, avete tuttavia lo stesso la possibilità di modificare tutti i parametri di ricerca: • Symbol rate di ricerca automatica.
• • • • Premere il tasto MENU del telecomando. Selezionare INSTALLAZIONE. (Utilizzare i tasti CD poi confermare con OK). Selezionare RICERCA AUTOMATICA DEI CANALI (Utilizzare i tasti CD poi confermare con OK). Premere OK per lanciare la ricerca. Potete interrompere in qualsiasi momento la ricerca automatica premendo il tasto ESC: tutti i canali già trovati saranno memorizzati. • Quando la ricerca è terminata, premere ESC per confermare la ricerca e ritornare al menu precedente.
Dopo che è comparso del immagine, potete cambiare i canali, nella lista generale, utilizzando i tasti CH+/CH-. Durante la ricezione video, se premete i tasti CD effettuate un cambiamento di canale nella lista dei canali preferiti (l’ultimo utilizzato). Vedi capitolo 7.2 «Creazione delle liste preferite». Durante la ricezione video, premete i tasti VOL+/VOL– per regolare il volume del suono.
Attenzione: quando è stata attivata una lista preferita (col tasto FAV o CD), il ricevitore funzione in modo preferito. Tornerà al modo normale non appena sarà richiamata la lista generale dei canali (tasto LIST).7.4 Utilizzazione della guida dei programmi Il Vostro ricevitore è in grado di gestire la guida dei programmi della maggioranza delle trasmittenti presenti sui satelliti, quando è trasmessa. • Durante la ricezione video/audio, premere il tasto GUIDE.
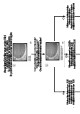
1 2 4 3 1 Fach 1 (integriertes Viacess) 2 Fach 2 (integriertes Viacess) 3 Common Interface: Sie haben die Möglichkeit, ein Modul Ihrer Wahl (Irdeto, Conax, Cryptoworks, Viacess) mit einer dazu passenden Karte zu verwenden. 4 Entnahme und Einführung des CI Moduls: Common Interface Modul mit einem spitzen Gegenstand gemäss Abbildung herausnehmen. Einführung des Moduls vorsichtig und mit Gefühl vollziehen.
Vorderseite /Front panel/Parte frontal/ Panello anteriore 2 3 4 1 3 5 Rückseite / Rear panel/Parte de detras / Panello posteriore 1 2 3 4 5 6 7 Fernbedienung / Remote control/ Mando a distancia / Telecomando 1 2 9/12 3 4 13 6 6 5 4 11 11 13 16 10 14 15 18 7 17 8 51
52
Technical Features • Digital DVB multistandard C & Ku band reception • MCPC & SCPC reception from 1.8 to 40 Mb/ps • For fixed, SMATV, or motorised installation • DiSEqC 2.