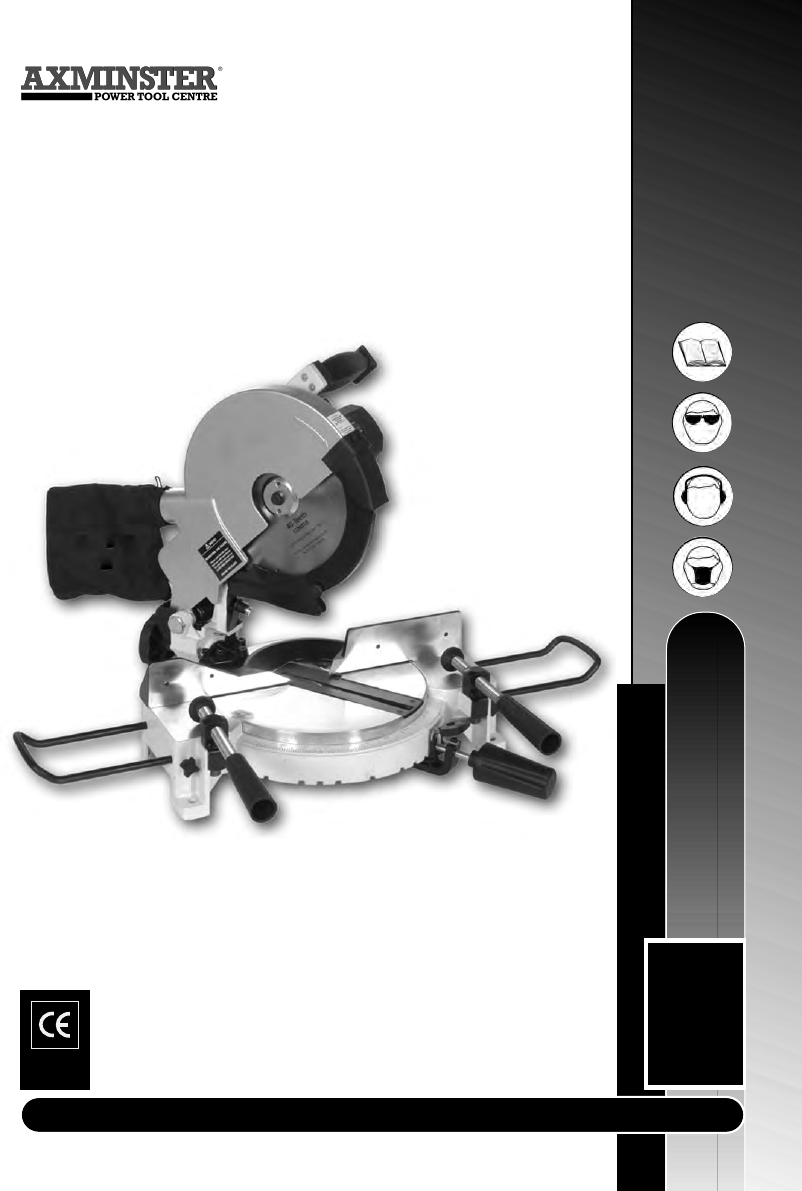
250mm Variable Speed Compound Mitre Saw Axminster Reference No: AWMS10 w w w. a x m i n s t e r. c o .
Index of Contents... Page No. Index of Contents................................................................................................................... 02 Declaration of Conformity………….………........……..…………........................................03 What’s in the Box………….………........……..…………..........................................................04 General Instructions for 230v Machines................................................. 05-06-07-08 Initial Setup......................................
Declaration of Conformity... W AXMINSTER W H I T E Copied from CE Certificate The undersigned, K. Bodenstein authorised by Zhangjiagang MFG Co., Ltd. No. 8 Haifeng Road, Nan Feng Town Zhangjiagang, Jiangsu 215628 P.R. China declares that this product: MIS-250E-2 Mitre Saw manufactured by Zhangjiagang MFG Co.
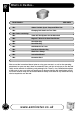
W What’s in the Box... AXMINSTER W H I T E Model Number: MIS 250E-2 1 No. 250mm Variable Speed Compound Mitre Saw 1 No. Clamping Bolt Handle for Turn Table 1 No. Packet containing:1 No. 13mm A/F Box Spanner for the Arbor bolt 1 No. Nippled 'Y' Wrench for Saw Plate Washer 1 No. 5mm Allen Key 1 No. 6mm Allen Key 2 No. AAA Batteries for Laser 1 No. Saw Dust Collection Bag 2 No. Work Piece Clamps 1 No. Instruction Manual 1 No.
General Instructions for 230v Machines... W AXMINSTER W H I T E Good Working Practices/Safety The following suggestions will enable you to observe good working practices, keep yourself and fellow workers safe and maintain your tools and equipment in good working order. ! WARNING!! KEEP TOOLS AND EQUIPMENT OUT OF THE REACH OF YOUNG CHILDREN General Advice If you are totally unfamiliar with the use of a power saw, please seek at least a minimum of tuition and advice from an informed, qualified source.
W General Instructions for 230v Machines... AXMINSTER W H I T E ! WARNING!! UNDER NO CIRCUMSTANCES SHOULD CHILDREN BE ALLOWED IN WORK AREAS Once the saw is mounted, carry out any setting operations, (mitre, tilt..?), and remove all tools used in the setting operations (if any) and place safely out of the way. If you are using long lengths of material arrange for extra support beyond the boundary of the machine.
General Instructions for 230v Machines... W AXMINSTER W H I T E General Safety Precautions for Compound Mitre Saw (Continued) DO NOT change blades with power connected. Always use the correct accessories; especially the correctly sized spanner on the arbor bolt, DO NOT risk damaging the saw by using incorrectly fitting accessories. If the saw does not have a specific device to lock the saw shaft, DO NOT jam/wedge the motor fan, it is better to wedge the saw blade with a piece of scrap timber.
W AXMINSTER W H I T E General Instructions for 230v Machines... General Safety Precautions for Compound Mitre Saw (Continued) When you have finished the cut, allow the saw to rise to its 'up' position, check that the lower guard has returned to cover the saw blade. Allow the blade to come to a stop before removing the workpiece. When working with timber than is bent, bowed, in wind, cupped, etc.
Initial Setup... If required at this stage, insert the work support rails (remember to insert right through to the support brackets (See Fig 3). Clamp in position using the star head clamping bolts (See Figs 4 & 4a). Extend the rear support bracket. W AXMINSTER W H I T E Well done, one mitre saw 'ready to go' . Having unpacked your saw and its accessories please dispose of any unwanted packaging properly. A lot of the packaging is biodegradable.
W Specification... AXMINSTER W H I T E Axminster No. AWMS10 (108004) Blade size. 250mm x 16mm Bore Motor 230V 50Hz 1400W Speed SOFT START Max Mitre Angle Left Table presets 1800- 4500 rpm 47˚ Right 47˚ Left and Right 15˚, 22.5˚, 30˚ and 45˚ Max Tilt Angle Vertical to Left 45˚ Table Size 450mm x 140mm Dust Extraction Port 48mm Diameter Weight 14.5 Kgs Maximum footprint, Saw 'up', sawdust bag and support rails fitted.
Illustration & Parts Description...
W AXMINSTER W H I T E 12 Identification & Description of the Mitre Saw... Operating Handle The operating handle contains the trigger switch and is the handle used to pull the saw over into the work. Trigger switch Housed in the handle of the Operating handle the Trigger Switch is a good width switch that can be easily 'squeeze' operated whilst pulling the saw over into the work. The whole hand is used to grip both the operating handle and the switch simultaneously.
Illustration & Parts Description... W AXMINSTER W H I T E Preset speed selector Power cable Trigger switch Dust extraction outlet Motor vent cover Saw body frame Main saw chassis Work piece clamp Stabilising extension Lock down pin Typ.
W Identification & Description of the Mitre Saw... AXMINSTER W H I T E Stabilising extension A length of 10mm bar bent and shaped to form a support foot. It is situated at the rear of the main chassis casting, and can be extended to provide extra stability for the saw. It is held captive in the chassis by pins, so that it cannot be completely pulled out.
Illustration & Parts Description... Tilt and pivot assembly W AXMINSTER W H I T E 45˚ degrees Angle scale Tilt angle pointer Tilt adjustment stop Tilt clamping knob Laser Identification & Description of the Mitre Saw... Dust extraction port A 48mm (2”)dust extraction outlet extruded from the top guard that allows the saw to be connected to a suitable extraction system. If dust extraction is not available, a sawdust collecting bag is supplied for 'quick' jobs.
W AXMINSTER W H I T E Setting Up the Machine... The machine has been fully and accurately set up at the factory. If, however, you are not happy that the saw is correctly set, or that it has been put out of true by an accident e.g. a 'knock' or a 'drop' etc., there is a very small amount of 'correction' adjustment available. Carry out the setting up procedures as follows:- MAKE SURE THE SAW IS DISCONNECTED FROM THE SUPPLY. ! Set the table to zero mitre angle.
Setting Up the Machine... W AXMINSTER W H I T E Tilt Adjustment Make sure the saw body frame is set in the upright position with the heel of the tilt frame casting hard against the stop. Pull the saw over and pin in the 'housed' position. Place a square reference on the table and move it into contact with the saw blade (not the teeth).
W Setting Up the Machine... AXMINSTER W H I T E Depth Adjustment It is possible to carry out a small adjustment to the depth of cut. ( i.e. the amount that the saw enters the table) It is done by adjusting the preset stop (See Fig 9) Ideally the geometry of the 'pull over' puts the centre line of the bore just slightly below the centreline of the pivot shaft. If you have cause to adjust the depth setting, remember to leave sufficient clearance to relieve the pressure on the lock down pin.
Setting the Laser... W AXMINSTER W H I T E WARNING!! THIS PRODUCT IS EQUIPPED WITH A CLASS 2 LASER. DO NOT LOOK DIRECTLY INTO THE LASER BEAM ! Warning. Under no circumstances should you tamper with or modify the laser to try to increase its power output. ! Dispose of spent batteries responsibly. NOTE: The laser is individually powered. It does not switch on/off with the application of Mains Power. REMEMBER to switch the Laser off when you have finished using it to conserve the batteries.
W AXMINSTER W H I T E Setting the Laser... Aligning the Laser (Continued) Check that the laser line is a fine line, not dispersed or splayed. Adjust this by loosening the screw of the holder slightly, and twist the laser to give a fine straight line;(See Fig 16) retighten the holding screw. Loosen the two caphead bolts that secure the mounting bracket to the frame. (See Fig 17) Move the fitting until the laser is lined up, (this can involve a small amount of twisting) almost lined up etc.
Table of Capacities... W AXMINSTER W H I T E Always use a 250mm Saw Blade with a rated speed in excess of 4,500 r.p.m. The machine is supplied with a 250mm GP TCT (40 tooth) Saw blade, with a 16mm bore for cutting TIMBER. For Precision trimming e.g. fine cut finish of bead, frame, dado etc., a 72/80 tooth saw blade is recommended and for cutting non-ferrous metals, an 80 tooth negative rake saw blade. It is also recommended that you use a lubricant when cutting aluminium.
W Changing the Saw Blade... AXMINSTER W H I T E By trial and error, this is the best method we have found for changing the saw blade. Locate the nippled 'Y' wrench and the 13mm A/F box spanner. Put to hand. ! DISCONNECT THE SAW FROM THE MAINS SUPPLY Put the saw in the housed position. Remove the lower front fixed guard, by undoing the two fixing screws, put carefully aside.
Changing the Saw Blade... W AXMINSTER W H I T E Fig 23 Fig 24 ‘Y’ wrench Box spanner Check the blade, the fabric, the sharpness, the set, etc. If all is o.k., place in its keeper and stow safely away, if not all O.K. place in its keeper to await the ministrations of your local saw doctor. Take the opportunity, (with the blade off and the guard out of the way,) to clean the saw thoroughly. If you had removed it, replace the inner saw plate flange, make sure it is seated correctly on the arbor.
W Illustrated Parts Breakdown for the Mitre Saw... AXMINSTER W H I T E 24 www.axminster.co.
Maintenance... W AXMINSTER W H I T E (1) Keep machine clean ! (2) DO NOT allow the kerf slot to become jammed full of sawdust/splinters etc. (3) Lightly oil moving joints etc.
W Notes... AXMINSTER W H I T E 26 www.axminster.co.
Notes...
250mm Variable Speed Compound Mitre Saw 108004 Axminster Reference No: AWMS10 W AXMINSTER W H I T E Axminster Devon EX13 5PH UK FREEPHONE 0800 371822 2005 www.axminster.co.