Cover1-4 C M Y K XF9969-1011
INTRODUCTION INTRODUCTION Thank you for purchasing this embroidery and sewing machine. Before using this machine, carefully read the “IMPORTANT SAFETY INSTRUCTIONS”, and then study this manual for the correct operation of the various functions. In addition, after you have finished reading this manual, store it where it can quickly be accessed for future reference. IMPORTANT SAFETY INSTRUCTIONS Please read these safety instructions before attempting to use the machine.
IMPORTANT SAFETY INSTRUCTIONS 5 Always keep your work area clear: • Never operate the machine with any air openings blocked. Keep ventilation openings of the sewing machine and foot control free from the build up of lint, dust, and loose cloth. • Do not store objects on the foot controller. • Do not use extension cords. Plug the machine directly into the electrical outlet. • Never drop or insert any object into any opening.
IMPORTANT SAFETY INSTRUCTIONS Use this machine only for its intended use as described in the manual. Use accessories recommended by the manufacturer as contained in this manual. Use only the interface cable (USB cable) included with this machine. Use only the mouse designed specifically for this machine. Use only the sensor pen included with this machine. The contents of this manual and specifications of this product are subject to change without notice.
IMPORTANT SAFETY INSTRUCTIONS Trademarks IMPORTANT: READ BEFORE DOWNLOADING, COPYING, INSTALLING OR USING. By downloading, copying, installing or using the software you agree to this license. If you do not agree to this license, do not download, install, copy or use the software. Intel License Agreement For Open Source Computer Vision Library Copyright © 2000, Intel Corporation, all rights reserved. Third party copyrights are property of their respective owners.
IMPORTANT SAFETY INSTRUCTIONS Federal Communications Commission (FCC) Declaration of Conformity Responsible Party: Tacony Corporation 1760 Gilsinn Lane, Fenton, Missouri 63026 USA declares that the product Product Name: Model Number: Baby Lock Sewing Machine BLDY/BLDY2 This device complies with Part 15 of the FCC Rules.
IMPORTANT SAFETY INSTRUCTIONS Laser Notices Laser Safety This sewing machine is certified as a Class 1 laser product under the U.S. Department of Health and Human Services (DHHS) Radiation Performance Standard according to the Radiation Control for Health and Safety Act of 1968. This means that the sewing machine does not produce hazardous laser radiation. IEC 60825-1 Specification This sewing machine is a Class 1 laser product as defined in IEC 60825-1:2007 specifications.
IMPORTANT SAFETY INSTRUCTIONS 7
OUTSTANDING FEATURES IQ Designer Draw your own shape or lines to design original embroidery patterns. You can specify colors, line type and fill stitch type. Try the stipple-like embroidery pattern. It’s very easy and fun! Spool Stand LED Lighting Now, your sewing machine shows you the thread color you are going to embroider next. Couching Dual Feed Foot with Dual Feed Decorative couching gains more popularity everyday.
Improved Camera Function Can you imagine a sewing machine with a built-in camera? Not only viewing the close up view of the needle position, but also you can align the embroidery position, connect the embroidery patterns and place the pattern position while checking the fabric image. The camera functions become clearer and more accurate. Playing MPEG-4 (MP4) Videos Your MPEG-4 (MP4) videos can be played and saved from USB media.
WHAT YOU CAN DO WITH THIS MACHINE Getting Ready Sewing Basics To learn the operation of the principal parts and the screens To learn how to prepare for sewing and basic sewing operations Chapter 1 Page 27 Chapter 2 Page 79 Utility Stitches Pre-programmed with more than 100 frequently used stitches Character/Decorative Stitches The variety of stitches widen your creativity Chapter 3 Page 107 Chapter 4 Page 167 Basic Embroidery Advanced Embroidery Maximum 36 cm × 24 cm (approx. 14 × 9.
HOW TO USE THIS MANUAL Chapter 1 and Chapter 2 explain your sewing machine’s basic operation procedures for someone who is using the sewing machine for the first time. If you want to sew utility stitches or character/ decorative stitches, read Chapter 1 and Chapter 2, then go on to Chapter 3 (Utility Stitches) or Chapter 4 (Character/ Decorative Stitches).
CONTENTS CONTENTS INTRODUCTION ................................................. 1 IMPORTANT SAFETY INSTRUCTIONS ................ 1 Trademarks ............................................................................ 4 OUTSTANDING FEATURES ................................. 8 WHAT YOU CAN DO WITH THIS MACHINE ... 10 HOW TO USE THIS MANUAL ........................... 11 NAMES OF MACHINE PARTS AND THEIR FUNCTIONS ........................................................ 15 Machine .........................
CONTENTS Multi-directional Sewing (Straight Stitch and Zigzag Stitch)..... 156 Zipper Insertion ................................................................. 157 Edge Sewing ...................................................................... 160 Chapter 4 Character/Decorative Stitches 167 SELECTING STITCH PATTERNS .......................
CONTENTS Using a Frame Pattern to Make an Appliqué (2).................. 304 Sewing Split Embroidery Patterns ....................................... 305 Fabric is Caught in the Machine and Cannot be Removed..... 385 List of Symptoms................................................................ 388 USING THE CAMERA TO CONNECT PATTERNS .... 307 ERROR MESSAGES........................................... 394 SPECIFICATIONS............................................. 400 UPGRADING YOUR MACHINE’S SOFTWARE..
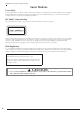
NAMES OF MACHINE PARTS AND THEIR FUNCTIONS NAMES OF MACHINE PARTS AND THEIR FUNCTIONS The names of the various parts of the sewing machine and their functions are described below. Before using the sewing machine, carefully read these descriptions to learn the names of the machine parts. Machine ■ Front View ■ Right-side/Rear View a Connector for the presser foot a Top cover Open the top cover when threading the machine or winding the bobbin.
NAMES OF MACHINE PARTS AND THEIR FUNCTIONS Needle and Presser Foot Section Measurements on the needle plate, bobbin cover (with mark) and needle plate cover The measurements on the bobbin cover are references for patterns with a middle (center) needle position. The measurements on the needle plate and the needle plate cover are references for stitches with a left needle position. a Buttonhole lever The buttonhole lever is used with the one-step buttonhole foot to create buttonholes.
NAMES OF MACHINE PARTS AND THEIR FUNCTIONS Embroidery Unit Operation Buttons a “Start/Stop” button Press this button and the machine will sew a few stitches at a slow speed and then begin sewing at the speed set by the sewing speed controller. Press the button again to stop the machine. Hold the button in to sew at the machine’s slowest speed. The button changes color according to the machine’s operation mode. a Carriage The carriage moves the embroidery frame automatically when embroidering.
NAMES OF MACHINE PARTS AND THEIR FUNCTIONS Using the Flat Bed Attachment Pull the top of the flat bed attachment to open the accessory compartment. ■ Closing the Accessory Case a Fully slide the bar on each side of the accessory case lid to the unlocked position. b Place the lid on top of the case so that the notches in the lid align with the tabs on the case, and then slide the bars on each side back to the locked position.
NAMES OF MACHINE PARTS AND THEIR FUNCTIONS ■ Using the Accessory Trays Two presser foot storage trays are stored in the included accessory case. One is for presser feet for utility sewing, and the other is for presser feet for embroidery and machine quilting. a For presser feet for utility sewing b For presser feet for embroidery and machine quilting For your convenience, a presser foot storage tray can be stored in the accessory compartment of the flat bed attachment.
NAMES OF MACHINE PARTS AND THEIR FUNCTIONS Included Accessories 1 2 3 J 9 4 N 10 5 I G 11 12 13 O 20 18 14 19 8 M 15 16 21 22 23 75/11 2 needles 90/14 2 needles 90/14 2 needles: Ball point needle (gold colored) 2.
NAMES OF MACHINE PARTS AND THEIR FUNCTIONS 53 54 58 59 60 61 62 63 66 67 68 69 70 71 No.
NAMES OF MACHINE PARTS AND THEIR FUNCTIONS No. Part Name 62 Stabilizer material 63 Chalk pencil 64 Sensor pen 65 Pen holder Part Code X81176-001 10 11 12 13 14 15 XE8568-001 XF4702-101 66 LCD cleaning cloth 67 Dust cover 68 Accessory case 69 Power cord XF2973-001 XE5023-101 XG0717-001 XF9966-001 XC6052-051 70 Instruction and Reference Guide 71 Quick reference guide XF9969-001 XF9970-001 *1 75/11 2 needles 90/14 2 needles 90/14 2 needles: Ball point needle (gold colored) *2 2.
NAMES OF MACHINE PARTS AND THEIR FUNCTIONS No.
NAMES OF MACHINE PARTS AND THEIR FUNCTIONS ■ Position “3” CAUTION The multi-purpose screwdriver can be positioned over the screw on the embroidery frame to tighten the screw after hooping the fabric or when removing the fabric. • Do not lift the handle of the machine while the spool stand is installed. • Do not push or pull the telescopic thread guide or spool pins with extreme force, otherwise damage may result. • Do not place any object other than spools of thread on the spool support.
NAMES OF MACHINE PARTS AND THEIR FUNCTIONS Note • Make sure that the stoppers on the telescopic thread guide shaft are firmly in place and that the thread guide openings are directly above the two holes for spool pins in the spool support. In addition, check that the shaft is securely tightened in the spool support. c d e ■ How to remove a Pull the spool stand up to remove it from the machine. b Attach the upper cover to the machine.
NAMES OF MACHINE PARTS AND THEIR FUNCTIONS Using the Multi-function Foot Controller (Only for supplied models) c Insert the plug for the main foot controller into the foot controller jack on the right side of the machine. Refer to see “Specifying the Multi-Function Foot Controller (Only for supplied models)” on page 82, before using this foot controller. 1 2 a Multi-function foot controller b Foot controller jack 3 4 ■ Adjusting the Pedal Positions No.
Chapter 1 Getting Ready Setting Your Machine for the First Time....................................29 ■ Attaching/Detaching toe...........................................................71 ■ Using the Dual Feed Position Lever ..........................................72 ■ Adjusting the Amount of Fabric Feeding of the Dual Feed Foot .....72 LCD SCREEN ........................................................... 30 CHANGING THE NEEDLE ......................................73 ■ Home Page Screen .........
TURNING THE MACHINE ON/OFF TURNING THE MACHINE ON/OFF WARNING • Use only regular household electricity for the power source. Using other power sources may result in fire, electric shock, or damage to the machine. • Make sure that the plugs on the power cord are firmly inserted into the electrical outlet and the power cord receptacle on the machine. Otherwise, a fire or electric shock may result. • Do not insert the plug on the power cord into an electrical outlet that is in poor condition.
TURNING THE MACHINE ON/OFF a Insert the power supply cord into the power cord receptacle, then insert the plug into a wall outlet. b Press c The message screen, confirming if you want . to set time/date, appears. To set the time/ date, press press ; to cancel the setting, . Press or Getting Ready → The screen to set time/date appears. d to set time date. a Main power switch b Power supply cord b Turn the main power switch to “I” to turn on the machine.
LCD SCREEN LCD SCREEN When the machine is turned on, the opening movie is played. Touch anywhere on the screen for the home page screen to be displayed. Touch the LCD screen or a key with your finger or the included touch pen to select a machine function. Memo • Only touch the screen with your finger or the included touch pen. Do not use a sharp pencil, screwdriver, or other hard or sharp object. It is not necessary to press hard on the screen.
LCD SCREEN Using the Machine Setting Mode Key Press to change the default machine settings (needle stop position, embroidery speed, opening display, etc.). To display the different settings screens, press “General settings” or for “Sewing settings”, for 1 for “Embroidery settings”. Memo or to display a different settings screen.
LCD SCREEN General settings a i b c j d k e l f m g n h o p q r CAUTION • If “Upper and Bobbin Thread Sensor” is set to “OFF”, remove the upper thread. If the machine is used with the upper thread threaded, the machine will not be able to detect if the thread has become tangled. Continuing to use the machine with tangled thread may cause damage. a Select the needle stop position (the needle position when the machine is not operating) to be up or down.
LCD SCREEN Embroidery settings 1 g a n h b i d j e k f l o Getting Ready c m a b c d e f g h i j k l m n o Select from among 23 embroidery frame displays (see page 292). Change the thread color display on the “Embroidery” screen; thread number, color name (see page 291). When the thread number “#123” is selected, select from six thread brands (see page 291). Adjust the maximum embroidery speed setting (see page 291). Adjust the upper thread tension for embroidering (see page 288).
LCD SCREEN ■ Saving a Settings Screen Image to USB Media An image of the settings screen can be saved as a BMP file. A maximum of 100 images can be saved on a single USB media at one time. a Insert the USB media into the USB port on the right side of the machine. ■ Selecting the “Eco Mode” or “Shutoff Support Mode” You can save the machine power by setting the eco mode or the shutoff support mode.
LCD SCREEN ■ Changing the Screen Saver Image Note • If you turn off the machine while the machine is in the “Eco Mode” or the “Shutoff Support Mode”, wait for about 5 seconds before turning on the machine again. In the settings screen, the shape can be selected for the pointer that appears when a USB mouse is connected. Depending upon the background color, select the desired shape from the three that are available. Compatible image files Format JPEG format (.jpg) File size Max.
LCD SCREEN f * g * h Connect the USB media or the computer (using a USB cable) that contains your personal image to the USB port of the machine. i Press a file name to select image and then press . See page 46 about USB connectivity. Press to select the first image. The images will appear in a list in this screen. Select the desired number to specify the image. Select the device that is connected. → The selected image is stored on your machine. * j Press to view the previous page.
LCD SCREEN * * * Press to return to the original screen. ■ Changing the Background Colors of the Embroidery Patterns In the settings screen, the background colors can be changed for the embroidery pattern and pattern thumbnails. Depending on the pattern color, select the desired background color from the 66 color thumbnails shown. Different background colors can be selected for the embroidery pattern and pattern thumbnails. a Press b Press . → The settings screen appears.
LCD SCREEN e Select the background color from the 66 color thumbnails shown. ■ Specifying the Size of Pattern Thumbnails The thumbnails for selecting an embroidery pattern can be set to be displayed at the normal size or a larger size. The larger size is 1.5 times the normal size. a b a Embroidery pattern background b Selected color a b a Pattern thumbnails background b Selected color f Press to return to the original screen. Memo • The setting remains selected even if the machine is turned off.
LCD SCREEN d Press or to select the desired thumbnail size. 1 Getting Ready Note • When thumbnail size setting has been changed the pattern selection screen will not immediately reflect the chosen size. To view the patterns with the new thumbnail size, return to the category selection screen, and then select the pattern category again.
LCD SCREEN Using the Sewing Machine Help Key Press below. to open the sewing machine help screen. Four functions are available from the screen shown a b c d a Press this key to see explanation for upper threading, winding the bobbin, changing the presser foot, preparing to embroider a pattern, and how to use the machine (see page 45). b Press this key to select utility stitches when you are not sure which stitch to use or how to sew the stitch (see page 41).
LCD SCREEN Using the Operation Guide Function Press to open the screen shown below. Six categories are displayed at the top of the screen. Press a key to see more information about that category. 1 Getting Ready displays information about the main parts of the machine and their functions. This is the first screen displayed when you press displays information about the operation buttons. . displays information about attaching the embroidery unit, preparing fabric for embroidering, etc.
LCD SCREEN Example: Displaying information about upper threading a Press b Press . c Press . . → The lower half of the screen will change. d Press (upper threading). Using the Sewing Guide Function The sewing guide function can be used to select patterns from the Utility Stitch screen. Use this function when you are not sure which stitch to use for your application, or to get advice about sewing particular stitches.
LCD SCREEN Playing a Tutorial Video d Play the tutorial video. Memo a • When you find this icon on the title in this manual, you can find the tutorial video of the procedure in your machine. a Press b Press c Press the title of the desired tutorial video. Getting Ready This machine provides tutorial videos on how to use the machine. Together with the help guides, which offer descriptions through text and illustrations, the tutorial videos assist with machine operation. 1 . .
LCD SCREEN d Playing MPEG-4 (MP4) Videos Select the video that you want to play. Your MP4 videos can be played from USB media. In addition, the MP4 video can be saved to the machine so that a tutorial video on creating a project, for example, can be viewed at any time. Videos that can be played MP4 file format: Video - H.264/MPEG-4 AVC, Audio – AAC Size: 450 (H) × 800 (W) Memo • MP4 file size will be changed to fit the screen. If you view the large MP4 file, the file will be reduced to fit the screen.
LCD SCREEN Using the Pattern Explanation Function c Press . 1 If you want to know more about the uses of a stitch pattern, select the pattern and press and then to see an explanation of the stitch selection. Getting Ready Note • With the pattern explanation function, descriptions can be displayed for the patterns available on the Utility Stitch and Character/Decorative Stitch screens. • Descriptions are displayed for each pattern in the Utility Stitch screen.
CONNECTING THE ACCESSORY TO THE MACHINE CONNECTING THE ACCESSORY TO THE MACHINE Using USB Media Refer to “Connecting Your Machine to the PC” on page 187 for the available computer operating systems. When sending or reading patterns using the USB media, connect the device to the USB port. a USB port b USB media Memo Note • USB media is widely used, however some USB media may not be usable with this machine. Please visit our website for a detailed listing of approved USB media devices.
CONNECTING THE ACCESSORY TO THE MACHINE Using a USB Mouse (Sold Separately) The USB mouse, connected to the sewing machine, can be used to perform a variety of operations in the screens. Connect a USB mouse to the USB port marked When the mouse is connected, the pointer appears on the screen. Move the mouse to position the pointer over the desired key, and then click the left mouse button. 1 Memo • Double-clicking has no effect. Getting Ready with ■ Clicking a Key .
USING THE SENSOR PEN USING THE SENSOR PEN Convenient Sewing Features by Using the Sensor Pen By using the sensor pen, you have the option of four separate functions • Setting the guideline as a reference for your sewing position. • Set the needle position of straight stitch. • Adjust the width and “L/R Shift” position of a zigzag stitch. • Set the ending point of a stitch pattern sequence. CAUTION • The guideline marker is a laser; therefore, do not stare at the laser light directly.
USING THE SENSOR PEN Using the Sensor Pen Holder When connecting the sensor pen to the machine, attach the sensor pen holder to keep the sensor pen with the machine. The right side of the holder can be used to hold the touch pen. c Set the sensor pen in the sensor pen holder with the pen tip pointing downward, and then connect the sensor pen to the machine.
USING THE SENSOR PEN Calibrating the Sensor Pen Memo • The sensor pen can be used to touch on the screen as a touch pen. Important Information about Sensor Pen The sensor pen emits the signal to the machine, and then the sensor pen receiver receives the signal to specify the position. a Sensor pen receiver b Signal is waved out from the sensor pen CAUTION • Do not insert any object into the sensor pen and the receiver, otherwise the machine may be damaged.
USING THE SENSOR PEN e Touch the first point of green dot marking using the sensor pen. 1 Getting Ready * Touch on the needle plate cover. a Flat bed attachment b Embroidery unit g to finish the calibration. To repeat the calibration touch the first point again using the sensor pen, and continue with step f. a Needle plate cover f Press Touch the second point of center of crosshair using the sensor pen. * Touch on the point in the illustrations.
LOWER THREADING LOWER THREADING Winding the Bobbin a Turn the main power to ON and open the top cover. b Align the groove in the bobbin with the spring on the bobbin winder shaft, and set the bobbin on the shaft. CAUTION • The included bobbin was designed specifically for this sewing machine. If bobbins from other models are used, the machine will not operate correctly. Use only the included bobbin or bobbins of the same type (part code: X52800120). X52800-120 is Class 15 type bobbin.
LOWER THREADING CAUTION e Memo • When sewing with fine, cross-wound thread, use the small spool cap, and leave a small space between the cap and the thread spool. 1 Getting Ready • If the thread spool and/or spool cap are set incorrectly, the thread may tangle on the spool pin and cause the needle to break. • Use the spool cap (large, medium, or small) that is closest in size to the thread spool.
LOWER THREADING h Pass the end of the thread through the guide slit in the bobbin winder seat, and pull the thread to the right to cut the thread with the cutter. Note • changes to while the bobbin is winding. • Stay near the machine while winding the bobbin to make sure the bobbin thread is being wound correctly. If the bobbin thread is wound incorrectly, press immediately to stop the bobbin winding.
LOWER THREADING b Memo • When removing the bobbin, do not pull on the bobbin winder seat. Doing so could loosen or remove the bobbin winder seat, and could result in damage to the machine. Align the groove in the bobbin with the spring on the bobbin winder shaft, and set the bobbin on the shaft.
LOWER THREADING f Pass the thread through the thread guide. Memo • See page 24 to assemble the spool stand. • See page 65 to thread the machine using the spool stand. CAUTION a Thread guide g Pass the thread around the pre-tension disk making sure that the thread is under the pre-tension disk. • When winding thread on the bobbin, do not cross the bobbin winding thread with the upper thread in the thread guides.
LOWER THREADING b Cut the thread with scissors near the pretension disk. Setting the Bobbin CAUTION 1 • Use a bobbin thread that has been correctly wound. Otherwise, the needle may break or the thread tension will be incorrect. Getting Ready a Pre-tension disk c Push the bobbin winder switch to the right, and then raise the bobbin at least 100 mm (4 inches) from the shaft. • The included bobbin was designed specifically for this sewing machine.
LOWER THREADING c Remove the bobbin cover. Note d Hold the bobbin with your right hand and hold the end of the thread with your left hand. e Set the bobbin in the bobbin case so that the thread unwinds to the left. • If the thread is not correctly inserted through the tension spring of the bobbin case, it may cause incorrect thread tension. (see page 90) a Tension spring CAUTION • Be sure to hold down the bobbin with your finger and unwind the bobbin thread correctly.
LOWER THREADING Pulling Up the Bobbin Thread e Gently pull the upper thread. A loop of the bobbin thread will come out of the hole in the needle plate. 1 There may be some sewing applications where you want to pull up the bobbin thread; for example, when making gathers, darts, or doing free motion quilting or embroidery. Memo a Follow steps a to d in “Setting the Bobbin” on page 57 for installing the bobbin into the bobbin case.
UPPER THREADING UPPER THREADING Upper Threading → The upper thread shutter opens so the machine can be threaded. CAUTION • Be sure to thread the machine properly. Improper threading can cause the thread to tangle and break the needle, leading to injury. • When using the walking foot, the side cutter or accessories not included with this machine, attach the accessory to the machine after threading the machine.
UPPER THREADING e Push the spool cap onto the spool pin as far as possible, then return the spool pin to its original position. f While holding the thread with both hands, pull the thread up from under the thread guide plate. 1 CAUTION a Thread guide plate g While holding the thread in your right hand, pass the thread through the thread guide in the direction indicated. h Guide the thread down, up, then down through the groove, as shown in the illustration.
UPPER THREADING i Pass the thread through the needle bar thread guide (marked “6”) by holding the thread with both hands and guiding it as shown in the illustration. Note • When using thread that quickly winds off the spool, such as metallic thread, it may be difficult to thread the needle if the thread is cut. Therefore, instead of using the thread cutter, pull out about 80 mm (approx. 3 inches) of thread after passing it through the thread guide disks (marked “7”).
UPPER THREADING o Pull out about 100-150 mm (approx. 4-6 inches) of the thread, and then pass it under the presser foot toward the rear of the machine. → Raise the presser foot lever if the presser foot is lowered. Using the Twin Needle Mode The twin needle can only be used for patterns that show after being selected. Before you select a stitch pattern, make sure the stitch can be sewn in the twin needle mode (refer to the “STITCH SETTING CHART” at the end of this manual).
UPPER THREADING c Thread the machine for the first needle according to the procedure for threading a single needle (“Upper Threading” on page 60). d Press e Pass the thread through the needle bar thread guides on the needle bar, then thread the needle on the left side manually. to lock the machine. g Place the additional spool of thread on the supplemental spool pin, so that the thread unwinds from the front. Push the spool cap onto the spool pin as far as possible to secure the thread spool.
UPPER THREADING k Continue threading however do not pass the thread in the needle bar thread guide “6” on the needle bar. Thread the needle on the right side. l Select a stitch pattern. (Example: * ) → The selected stitch is displayed. Note • If the key is light gray after selecting the stitch, the selected stitch cannot be sewn in the twin needle mode. m Press Sample of Twin Needle Sewing 1 Memo Refer to “Sewing a Stitch” on page 80 for selecting the stitch.
UPPER THREADING • When using thread on a thin spool, place the included spool felt on the spool pin, place the thread spool on the spool pin so that the center of the spool is aligned with the hole at the center of the spool felt, and then insert the spool cap onto the spool pin. a Spool felt • When using thread on a cone spool, use the spool holder. When using cone shaped thread spool with other than cotton thread, it is not necessary to use spool caps. a Attach the spool stand to the machine.
UPPER THREADING c Pull the thread off the spool. Pass the thread from the back to the front through the thread guides at the top. 2 3 ■ Using the Spool Net If using transparent nylon monofilament thread, metallic thread, or other strong thread, place the included spool net over the spool before using it. When using specialty threads, threading must be done manually. If the spool net is too long, fold it once to match it to the spool size before placing it over the spool.
CHANGING THE PRESSER FOOT CHANGING THE PRESSER FOOT CAUTION • Always press on the screen to lock all keys and buttons before changing the presser foot. If is not pressed and the “Start/Stop” button or another button is pressed, the machine will start and may cause injury. • Always use the correct presser foot for the selected stitch pattern. If the wrong presser foot is used, the needle may strike the presser foot and bend or break, and may cause injury. • Only use presser feet made for this machine.
CHANGING THE PRESSER FOOT Attaching the Presser Foot with the Included Adapter Loosen the screw of the presser foot holder to remove the presser foot holder. 1 a Multi- purpose screwdriver b Presser foot holder screw c Presser foot holder c Remove the screw of the presser foot completely from the presser foot shaft. d Set the adapter on the presser foot bar, aligning the flat side of the adapter opening with the flat side of the presser bar.
CHANGING THE PRESSER FOOT f Set the operation lever of the walking foot so that the needle clamp screw is set in the fork. Position the shank of the walking foot on the presser foot bar. Using the Dual Feed Foot Dual feed foot enables you to have best fabric control when sewing difficult fabrics that slip easily, such as quilted fabrics or fabrics that tend to stick to the bottom of a presser foot, such as vinyl, leather or synthetic leather.
CHANGING THE PRESSER FOOT d Hold the dual feed foot in place with your right hand, then using the included screwdriver securely tighten the large screw. ■ Attaching/Detaching toe Attach the toe by aligning the pins with the notches and snap it into place. 1 Getting Ready CAUTION • Use the included screwdriver to firmly tighten the screw. If the screw is loose, the needle may strike the presser foot and possibly cause injury.
CHANGING THE PRESSER FOOT ■ Using the Dual Feed Position Lever When the feed position lever is up, the black roller belt on the dual feed is not engaged. d Use or to increase or decrease the feeding of the top fabric. * * * Select “00” for sewing in most cases. If the feed amount for the top fabric is too little, causing the fabric to be longer than the bottom fabric, press to increase the feed amount for the top fabric.
CHANGING THE NEEDLE CHANGING THE NEEDLE CAUTION c Memo • To check the needle correctly, place the flat side of the needle on a flat surface. Check the needle from the top and the sides. Throw away any bent needles. Use the screwdriver to turn the needle clamp screw toward the front of the machine and loosen the screw. Remove the needle. Getting Ready • Always press on the screen to lock all keys and buttons before changing the needle.
CHANGING THE NEEDLE d With the flat side of the needle facing the back, insert the new needle all the way to the top of the needle stopper (viewing window) in the needle clamp. Use a screwdriver to securely tighten the needle clamp screw. a Needle stopper b Hole for setting the needle c Flat side of needle CAUTION • Be sure to push in the needle until it touches the stopper, and securely tighten the needle clamp screw with a screwdriver.
CHANGING THE NEEDLE About the Needle The sewing machine needle is probably the most important part of the sewing machine. Choosing the proper needle for your sewing project will result in a beautiful finish and fewer problems. Below are some things to keep in mind about needles. The smaller the needle number, the finer the needle. As the numbers increase, the needles get thicker. Use fine needles with lightweight fabrics, and thicker needles with heavyweight fabrics.
NEEDLE CALIBRATION USING THE BUILT IN CAMERA NEEDLE CALIBRATION USING THE BUILT IN CAMERA Setting the camera needle position is essential when you use camera function. It is not necessary to perform this operation each time, but we recommend performing it when the needle is changed. Use the white stickers (solid) included with the machine. b Press the “Automatic Threading” button. → Camera needle position setting screen appears.
NEEDLE CALIBRATION USING THE BUILT IN CAMERA 3. Affix white sticker on needle dropping point area. d The operation is finished when “OK” appears. If “NG” appears, remove the sticker, and then follow the on-screen instructions to repeat steps 3 and 4 of step c. If multiple attempts to set the position are not successful, contact your nearest Baby Lock retailer. 1 Getting Ready a White sticker Note • Use a new sticker.
NEEDLE CALIBRATION USING THE BUILT IN CAMERA 78
Chapter 2 Sewing Basics SEWING .................................................................. 80 Sewing a Stitch..........................................................................80 ■ Using the Multi-Function Foot Controller ................................ 81 Specifying the Multi-Function Foot Controller (Only for supplied models) .......................................................82 ■ Functions That Can Be Specified ..............................................
SEWING SEWING CAUTION • To avoid injury, pay special attention to the needle while the machine is in operation. Keep your hands away from moving parts while the machine is in operation. • Do not stretch or pull the fabric during sewing. Doing so may lead to injury. • Do not use bent or broken needles. Doing so may lead to injury. • Do not attempt to sew over basting pins or other objects during sewing. Otherwise, the needle may break and cause injury.
SEWING g * Press the “Start/Stop” button to start sewing. Note • When cutting thread thicker than #30, nylon monofilament thread, or other decorative threads, use the thread cutter on the side of the machine. Guide the fabric lightly by hand. 2 • When the foot controller is being used, you cannot start sewing by pressing the “Start/ Stop” button. Press the “Start/Stop” button again to stop h sewing. When the needle has stopped moving, raise the presser foot and remove the fabric.
SEWING a * Insert the multi-function foot controller plug into its jack on the machine. ■ Functions That Can Be Specified Before connecting the multi-function foot controller, be sure to assemble the controller. Refer to “Assembling the Controller” on page 26.
SEWING a Press b Display page 2 of the Sewing Settings . the end of sewing (Refer to the next procedure “Automatic Reinforcement Stitching”.). screen. c Select the functions to be performed by the multi-function foot controller. 2 a Reverse stitch b Reinforcement stitch Memo d Press • When you press the “Reinforcement Stitch” button while sewing character/decorative stitch pattern, you can end sewing with a full stitch instead of at a mid-point.
SEWING “Reverse Stitch” Memo • Some stitches, such as buttonholes and bar tacks, require reinforcement stitches at the beginning of sewing. If you select one of these stitches, the machine will automatically turn on this function (the key appears as c button + when the stitch is selected). Set the fabric in the start position and begin sewing. + + a Reverse stitches (or reinforcement stitches) → The machine will automatically sew reverse stitches (or reinforcement stitches) and then continue sewing.
SEWING Sewing Curves Sew slowly while keeping the seam parallel with the fabric edge as you guide the fabric around the curve. ■ Sewing a Seam Allowance of 0.5 cm or Less Baste the corner before sewing, and then, after changing the sewing direction at the corner, pull the basting thread toward the back while sewing. 2 Changing Sewing Direction Stop the machine. Leave the needle in the fabric, and press the “Presser Foot Lifter” button to raise the presser foot.
SEWING ■ If the Fabric does not Fit under the Presser Foot c Release the black button. If the presser foot is in the up position, and you are sewing heavyweight or multiple layers of fabric which do not fit easily under the presser foot, use the presser foot lever to raise the presser foot to its highest position. The fabric will now fit under the presser foot. → The presser foot remains level, enabling the fabric to be fed.
SEWING Make sure that the needle passes through the hook-and-loop fastener tape by rotating the handwheel and lower the needle into the hookand-loop fastener tape before sewing. Sew the edge of the hook-and-loop fastener tape at a slow speed. If the needle does not pass through the hook-andloop fastener tape, replace the needle size with the needle for thick fabrics (page 75). Sewing Stretch Fabrics First, baste together the pieces of fabric, and then sew without stretching the fabric.
STITCH SETTINGS STITCH SETTINGS When you select a stitch, your machine automatically selects the appropriate stitch width, stitch length, and upper thread tension. However, if needed, you can change any of the individual settings. Note • Settings for some stitches cannot be changed (refer to the “STITCH SETTING CHART” at the end of this manual).
STITCH SETTINGS Setting the Stitch Length Follow the steps below when you want to change the stitch pattern length. Example: Press Setting the “L/R Shift” Follow the steps below when you want to change the placement of the zigzag stitch pattern by moving it left and right. 2 Example: to shorten the stitch length. Press to shift the pattern to the left. Sewing Basics → The value in the display gets smaller. Press to lengthen the stitch length. → The value in the display appears with a minus sign.
STITCH SETTINGS Setting the Thread Tension Memo • When you finish sewing, remove the bobbin cover and then make sure that the thread is shown as below. If the thread is not shown as below, the thread is not inserted through the tension-adjusting spring of the bobbin case correctly. Reinsert the thread correctly. For details, refer to page 57. You may need to change the thread tension, depending on the fabric and thread being used. Follow the steps below to make any necessary changes.
USEFUL FUNCTIONS USEFUL FUNCTIONS Automatic Thread Cutting c Set the fabric in the start position and start sewing. After selecting a stitch pattern, turn on the automatic thread cutting function before sewing, and the machine will automatically sew reinforcement stitches (or reverse stitches, depending on the stitch pattern) at the beginning and end of sewing, and trim the threads at the end of sewing. This function is useful when sewing buttonholes and bar tacks. Select a stitch pattern.
USEFUL FUNCTIONS Adjusting the Needle Drop Position with the Guideline Marker The red guideline marker indicates the sewing position on the fabric. You can adjust the sewing position by moving the guideline marker while checking the guideline marker on the fabric. CAUTION • The guideline marker is a laser; therefore, do not stare at the laser light directly. Otherwise it may cause blindness.
USEFUL FUNCTIONS ■ Adjusting the Brightness of the Guideline Marker a Follow steps from a to c to display the “Guideline Marker Adjustment” screen. b Use or Memo • When the pivot setting is selected, the height of the presser foot when sewing is stopped can be changed according to the type of fabric being sewn. Press to display “Pivoting Height” of the settings screen. Press or to select one of the three heights (3.2 mm, 5.0 mm or 7.5 mm). To raise the presser foot further, increase the setting.
USEFUL FUNCTIONS b Press to select the pivot setting. e Rotate the fabric, and then press the “Start/ Stop” button. → The presser foot is automatically lowered, and sewing continues. Using the Knee Lifter → The key appears as c . Place the fabric under the presser foot with the needle at the starting point of the stitching, and then press the “Start/Stop” button. The machine will begin sewing.
USEFUL FUNCTIONS b Align the tabs on the knee lifter with the notches in the knee lifter slot on the front of the machine. Insert the knee lifter bar as far as possible. Automatic Fabric Sensor System (Automatic Presser Foot Pressure) The thickness of the fabric is automatically detected and the presser foot pressure is automatically adjusted with an internal sensor while sewing, to insure that your fabric is fed smoothly. The fabric sensor system works continuously while sewing.
USEFUL FUNCTIONS Needle Position - Stitch Placement When the “Needle Position - Stitch Placement” is “ON”, the needle will be partially lowered for precise stitch placement and then press the “Needle Position” button to lower the needle completely. Each press of the “Needle Position” button changes the needle to the next position. When the “Needle Position - Stitch Placement” is “OFF”, each press of the “Needle Position” button simply raises and then lowers the needle.
USEFUL FUNCTIONS ■ Using the Camera View Window NEEDLE DROP POSITION Press a e b d c to show the needle drop position in the screen as “ ”. Lower the presser foot before pressing . Once the needle drop position appears on the screen, you can raise the presser foot and change the needle drop position by moving the fabric. 2 a The camera view window appears. CAMERA IMAGE GRID VIEW OK NEEDLE DROP POSITION ZOOM CAMERA IMAGE Press this key to save a camera image to the USB media.
USING SENSOR FUNCTIONS WITH SEWING STITCH USING SENSOR FUNCTIONS WITH SEWING STITCH Before using the sensor functions, carefully read “Utility Stitches” chapter to familiarize yourself with the machine operations. The sensor functions are performed using the sensor pen. Sensor Function Area Memo • There are borderline areas between setting area and adjustment areas, which allow you to set quickly to the most decreased/ increased value. • The borderline areas are respectively 6.5 mm (approx.
USING SENSOR FUNCTIONS WITH SEWING STITCH c Press . Memo • The position can be precisely adjusted by touching the adjustment areas with the sensor pen. • When using the sensor pen to specify the guideline marker position, it may not be possible to exactly specify the desired location. In this case, use either of the following operations to make fine adjustments. - Touch an adjustment area with the sensor pen to adjust the position in 0.5 mm increments.
USING SENSOR FUNCTIONS WITH SEWING STITCH Specifying the Needle Drop Position With the Sensor Pen a Select a stitch pattern. b Press d With the sensor pen, touch the location to be specified as the needle drop position. → The guideline marker moves to the touched position and flashes. → The distance from the left reference line to the touched position appears in the reference position setting screen.
USING SENSOR FUNCTIONS WITH SEWING STITCH e Press to apply the reference position b Press . setting. * The setting can also be applied by extended touch in the adjustment area with the sensor pen. → The needle moves to the specified position to start sewing. → The stitch selection screen appears again, and the stitch width changes to the setting specified with the sensor pen. 2 → The guideline marker stops flashing.
USING SENSOR FUNCTIONS WITH SEWING STITCH g Note • The following error message appears if the area outside of the sensor pen touch range is touched. Press , and then touch within the sensor pen touch range. Press to apply the second point of the stitching width. * The setting can also be applied by long touching an adjustment area with the sensor pen. → The needle moves to the specified position to start sewing.
USING SENSOR FUNCTIONS WITH SEWING STITCH Using the Sensor Pen to Specify the Sewing End Point b Press . Note • In order to specify the end point of a longer piece of fabric more accurately, use the sensor pen to touch the end point twice. Be sure to touch the same point. • Before starting to sew, mark the end point of this longer piece of fabric. 2 a Start sewing after a stitch has been selected, and then stop the machine when the desired sewing end point enters the sensor pen touch range.
USING SENSOR FUNCTIONS WITH SEWING STITCH d With the sensor pen, touch the location to be specified as the sewing end point. → The distance from the current needle position to the touched location appears. f Note • The displayed distance is not the length of a straight line connecting the current needle position and the location touched with the sensor pen. It is the length of a perpendicular intersection for the location touched with the sensor pen and the sewing line.
USING SENSOR FUNCTIONS WITH SEWING STITCH f Note location to be specified as the sewing end point. • The stitch end mode key is not available with the following situations. e * Press → The distance from the current needle position to the touched location appears. 2 Note • By using the sensor pen to touch the sewing end point twice, the distance will be accurately specified. Be sure to touch the same point.
USING SENSOR FUNCTIONS WITH SEWING STITCH ■ Reusing the Previous Setting When using the same fabric and pattern to sew the same length, the previous setting can be used again, instead of using the sensor pen to specify the sewing end point each time. To use the previous setting, repeat steps a through c in step d, instead of using the then press sensor pen. * If pressing was pressed, it is unnecessary to specify the sewing end point for the second time.
Chapter 3 Utility Stitches SELECTING UTILITY STITCHES............................. 108 ■ Utility Stitch LCD Screen ....................................................... 108 ■ Key Functions ......................................................................... 109 ■ Stitch Selection Screens.......................................................... 110 Selecting a Stitch.....................................................................111 ■ ■ ■ ■ ■ Hemstitching (1) (Daisy Stitch) .................
SELECTING UTILITY STITCHES SELECTING UTILITY STITCHES ■ Utility Stitch LCD Screen Press a key with your finger to select the stitch pattern, to select a machine function, or to select an operation indicated on the key. b a c f d e g No. Display a Key Name Needle position setting display Explanation Shows single or twin needle mode setting, and the needle stop position.
SELECTING UTILITY STITCHES ■ Key Functions a b c d e f g h i j s q u t k l m Display Key Name o n Explanation Page a Utility stitch key b Character/Decorative Press this key to select character or decorative stitch patterns. stitch key 168 c Image key Press this key to display an enlarged image of the selected stitch pattern. 112 d Free motion mode key Press this key to enter free motion sewing mode.
SELECTING UTILITY STITCHES No. Explanation Page p Display Stitch width and stitch length key Key Name Shows the zigzag width and stitch length settings of the currently selected stitch pattern. You can use the plus and minus keys to adjust the zigzag width and stitch length settings. 88 q Guideline marker key Press this key to display the guideline marker along the sewing line. The guideline marker makes it easier to align stitches with the fabric edge or other marker on the fabric.
SELECTING UTILITY STITCHES ■ Using the Mirror Image Key Selecting a Stitch a Turn the main power to ON and press Depending on the type of utility stitch you select, you may be able to sew a horizontal mirror image of the stitch. to display the utility stitches. If is lit when you select a stitch, it will be possible to make a mirror image of the stitch. → Either “1-01 Straight stitch (Left)” or “1-03 Straight stitch (Middle)” is selected, depending on the setting selected in the settings screen.
SELECTING UTILITY STITCHES ■ Returning to the Beginning of the Stitch ■ Using the Image Key You can display an image of the selected stitch. You can check and change the colors of the image of the screen. Even if you stopped stitching while sewing, you can return to the beginning of the stitch pattern. This function is useful after trial sewing or when the stitching is sewn incorrectly. a Press Press before start sewing, to return to the beginning of the stitch. b Press .
SELECTING UTILITY STITCHES Saving Your Stitch Settings The settings for the zigzag stitch width, stitch length, thread tension, automatic thread cutting, automatic reinforcement stitching, etc., are preset in the machine for each stitch. However, if you have specific settings that you wish to reuse later for a stitch, you can change the settings so that they can be saved for that stitch. Five sets of settings can be saved for a single stitch.
SEWING THE STITCHES SEWING THE STITCHES Straight Stitches Stitch Stitch name Presser foot Straight stitch (Left) Straight stitch (Left) Straight stitch (Middle) a Reverse stitch b Reinforcement stitch Memo Straight stitch (Middle) • If the selected stitch has a double mark “ ” at the top of the key display, you can sew reverse stitches holding the “Reverse Stitch” button (see page 83).
SEWING THE STITCHES c Hold the thread tail and fabric with your left hand, and rotate the handwheel with your right hand to insert the needle into the fabric. f When sewing is completed, hold the “Reverse Stitch” button or the “Reinforcement Stitch” button to sew 3-4 reverse stitches or reinforcement stitches at the end of the seam. a Sewing start position Lower the presser foot, and hold the d “Reverse Stitch” button or the “Reinforcement Stitch” button to sew 3-4 stitches.
SEWING THE STITCHES ■ Changing the Needle Position (Left or Middle Needle Position Stitches Only) When you select left or middle needle position stitches, you can use and in the stitch width display to change the position of the needle. Match the distance from the right edge of the presser foot to the needle with the stitch width, then align the edge of the presser foot with the edge of the fabric during sewing for an attractive finish.
SEWING THE STITCHES ■ Aligning the Fabric with the Vertical Stitch Alignment “V” Foot Sew while keeping the right edge of the fabric aligned with a desired position of markings on the vertical stitch alignment “V” foot. You can also use the vertical stitch alignment “V” foot for setting a stitch width using the built-in camera (see page 160). c Remove the flat bed attachment or the embroidery unit if either are attached. d Grasp both sides of the needle plate cover, and then slide it toward you.
SEWING THE STITCHES k Note • Align the two screw holes on the needle plate with the two holes on the machine. Use the multi-purpose screw driver included with the machine to secure the screws in the needle plate. h Insert the bobbin case in its original position, and then attach the needle plate cover. i After reinstalling the needle plate cover, select any of the straight stitches. Note • Selecting other stitches will cause an error message to be displayed.
SEWING THE STITCHES Dart Seam a b Select and attach presser foot “J”. Gathering Use on waists of skirts, sleeves of shirts, etc. a Sew a reverse stitch at the beginning of the dart and then sew from the wide end to the other end without stretching the fabric. Select a straight stitch and attach presser foot “J”. 3 a Basting * Utility Stitches c Cut the thread at the end leaving 50 mm (approx. 1-15/16 inches), and then tie both ends together. Do not sew a reverse stitch at the end.
SEWING THE STITCHES d Sew two rows of straight stitches parallel to the seam line, then trim excess thread leaving 50 mm (approx. 1-15/16 inches). a Seam line b 10 to 15 mm (approx. 3/8 inch to 9/16 inch) c About 50 mm (approx. 1-15/16 inches) e a About 12 mm (approx. 1/2 inch) b Wrong side c Spread the fabric out along the finish line. Pull the bobbin threads to obtain the desired amount of gather, then tie the threads. a Finish line b Wrong side f Smooth the gathers by ironing them.
SEWING THE STITCHES Finished flat fell seam d * Sew a straight stitch along the fold. When the automatic thread cutting and automatic reinforcement stitching are preset, reverse stitches will be sewn automatically at the beginning of sewing. Press the “Reinforcement Stitch” button to sew a reinforcement stitch and trim the thread automatically at the end of sewing. a Surface Pintuck a Mark along the folds on the wrong side of the fabric.
SEWING THE STITCHES ■ Appliqué (Using a Zigzag Stitch) Zigzag Stitches Zigzag stitches are useful for overcasting, appliqué, patchwork, and many other applications. Select a stitch, and attach presser foot “J”. If the stitch which you select has a double mark “ ” at the top of the key display, you can sew reverse stitches by holding the “Reverse Stitch” button.
SEWING THE STITCHES ■ Cord Guide Bobbin Cover (Using a Zigzag Stitch) a Remove the bobbin cover from the machine (see page 57). b Thread the gimp thread through the hole in the cord guide bobbin cover from top to bottom. Position the thread in the notch at the back of the cord guide bobbin cover. g Lower the presser foot and start sewing to make a decorative finish. Elastic Zigzag Stitches Use elastic zigzag stitches for tape attaching, overcasting, darning, or a wide variety of other uses.
SEWING THE STITCHES c ■ Overcasting Sew along the presser foot guide. Use this stitch to sew overcasting on the edge of stretch fabrics. Sew the overcasting along the edge of the fabric while positioning the right-hand side needle drop point just outside the edge of the fabric. a Guide CAUTION Overcasting Use for the edge of seams in skirts or trousers, and the edge of all cuttings.
SEWING THE STITCHES ■ Overcasting Using Presser Foot “J” Stitch Stitch name Presser foot Overcasting stitch ■ Overcasting Using the Side Cutter (Sold Separately) By using the side cutter, you can do overcasting while cutting the fabric. CAUTION Overcasting stitch Overcasting stitch Overcasting stitch • Recommended stitches are noted “S” in the lower right corner, therefore sure to only select one of these stitches listed below.
SEWING THE STITCHES d Position the fork on the side cutter’s operating lever onto the needle clamp screw. a Needle clamp screw b Operating lever g a 20 mm (approx. 3/4 inch) h Memo • Make sure that the fork of the operating lever is set onto the needle screw firmly. e Make a cut of approximately 20 mm (approx. 3/4 inch) in the fabric. Position the fabric so that the right side of the cut is on top of the guide plate and the left side of the cut is underneath the presser foot.
SEWING THE STITCHES Memo • When using the side cutter, sew between low and mid-speed and do not touch the knives or operation lever of the side cutter while sewing to avoid equipment damage or injury. • The fabric will not be cut if the whole fabric is simply spread out underneath the presser foot guide plate. Set the fabric as explained in step h from the previous section, and then start sewing.
SEWING THE STITCHES Presser foot Stitch Stitch name Presser foot Stitch Stitch name Stem stitch Decorative stitch Quilting appliqué zigzag stitch Decorative stitch Zigzag stitch (Right) Hemstitching Zigzag stitch (Left) Hemstitching 2 steps elastic zigzag Single diamond overcast 3 steps elastic zigzag Overcasting stitch Quilting appliqué stitch Piecing stitch (Right) Shell tuck edge Piecing stitch (Middle) Blanket stitch Piecing stitch (Left) Quilting stippling Hand-look quilting Ove
SEWING THE STITCHES ■ Piecing ■ Quilting Sewing two pieces of fabric together is called piecing. When cutting pieces for quilt blocks, make sure the seam allowance is 6.5 mm (approx. 1/4 inch). a Select b Align the edge of the fabric with the edge of the presser foot, and start sewing. * To sew a 6.5 mm (approx. 1/4 inch) seam allowance or and attach presser foot “J”. Sewing the quilt top, batting, and backing together is called quilting.
SEWING THE STITCHES e ■ Appliqué a Trace the pattern onto the appliqué fabric and then cut around it, leaving a 3 to 5 mm (approx. 1/8 to 3/16 inch) seam allowance. Use the quilting appliqué stitch to attach the appliqué. Sew around the edge while dropping the needle as close to the edge as possible. a Seam allowance: 3 to 5 mm (approx. 1/8 to 3/16 inch) b Place a piece of stabilizer cut to the finished size of the appliqué design onto the fabric, and then fold over the seam margin using an iron.
SEWING THE STITCHES ■ Quilting with Satin Stitches Memo For better fabric control, use the foot controller to sew with satin stitches. Set the speed control slide to control the stitch width to make subtle changes in the stitch width during sewing. a Attach the foot controller (see page 81). b Select and attach presser foot “J”. c Press in the length display to shorten • You can use the speed control slide to adjust the stitch width. Use the foot controller to adjust the sewing speed. f Press .
SEWING THE STITCHES Using Free motion Quilting Foot “C” Use the free motion quilting foot “C” with straight stitch needle plate for free motion sewing. a Attach the straight stitch needle plate (see page 117). C C Free motion quilting foot “C” a Round hole Memo CAUTION • With free motion quilting, control the feeding speed of the fabric to match the sewing speed. If the fabric is moved faster than the sewing speed, the needle may break or other damage may result.
SEWING THE STITCHES CAUTION a • Be sure to securely tighten the screws with the included multi-purpose screwdriver. Otherwise, the needle may touch the quilting foot, causing it to bend or break. g Use both hands to stretch the fabric taut, and then move the fabric at a consistent pace in order to sew uniform stitches roughly 2.0-2.5 mm (approx. 1/16 - 3/32 inch) in length. 3 d Remove the presser foot holder (see page 69).
SEWING THE STITCHES Using free motion Open Toe Quilting Foot “O” The free motion open toe quilting foot “O” is used for free motion quilting with zigzag or decorative stitches or for free motion quilting of straight lines on fabric with an uneven thickness. Various stitches can be sewn using free motion open toe quilting foot “O”. For details on the stitches that can be used, refer to the “STITCH SETTING CHART” at the end of this manual.
SEWING THE STITCHES g Press mode. to cancel the free motion sewing Memo • When starting to sew, the internal sensor detects the thickness of the fabric, and the quilting foot is raised to the height specified in the machine settings screen. Press to display “Free Motion Foot Height” of the settings screen (see page 31). Press or → Rotate the handwheel toward you (counterclockwise) to raise the feed dogs. Memo • Do not be discouraged with your initial results. The technique requires practice.
SEWING THE STITCHES f * Tighten the screw with the included multipurpose screwdriver. Finished project Use the multi-purpose screw driver setting the position to “1”. (see page 23) h Press to cancel the free motion sewing mode. → Rotate the handwheel toward you (counterclockwise) to raise the feed dogs. Blind Hem Stitches CAUTION • Be sure to securely tighten the screws with the included multi-purpose screwdriver. Otherwise, the needle may touch the quilting foot, causing it to bend or break.
SEWING THE STITCHES b Fold the fabric along the desired edge of the hem, and press. 2 4 1 1 Wrong side of fabric Right side of Fabric Edge of fabric Desired edge of hem 6 5 2 1 2 a b c d e f Wrong side of fabric Right side of fabric Edge of fabric Desired edge of hem 5 mm (3/16 inch) Basting Fold back the fabric inside along the basting.
SEWING THE STITCHES k Adjust the stitch width until the needle slightly catches the fold of the hem. 1 2 a Wrong side of fabric b Right side of fabric a Needle drop point When you change the needle drop point, raise the needle, and then change the stitch width. ■ If the Needle does not Catch the Hem Fold The needle is too far to the right. Press to increase the stitch width so that the needle slightly catches the fold of the hem.
SEWING THE STITCHES ■ Appliqué Sharp Curves Appliqué a * Use a temporary spray adhesive, fabric glue or a basting stitch to attach the appliqué to the fabric. Stop the machine with the needle in the fabric outside the appliqué. Raise the presser foot and turn the fabric a little bit at a time while sewing for an attractive finish to the seam. This will keep the fabric from moving during sewing. ■ Appliqué Corners b * Select or .
SEWING THE STITCHES Shelltuck Stitches Shelltuck stitches give an attractive appearance of shells along the curve of a collar. This stitch pattern can be used for edging the neckline or sleeves of dresses and blouses. a Select . Memo • For details on each stitch, refer to the “STITCH SETTING CHART” at the end of this manual. b a Needle drop position e Unfold the fabric, and iron the tucks to one side.
SEWING THE STITCHES b Attach presser foot “N”. Sew scallop stitches along the edge of the fabric. * c c Select a stitch for top stitching. d Place the fabric right side up in the machine, and center the presser foot over the seam when sewing. Do not sew directly on the edge of the fabric. Trim along the seam, making sure not to cut the stitches. 3 a Right side of fabric Use smocking stitches for decorative sewing on clothes, etc.
SEWING THE STITCHES e Pull the bobbin threads to obtain the desired amount of gather, and then smooth the gathers by ironing them. Fagoting When there is a space between two fabrics with thread sewn over the space to join the fabrics together, it is called fagoting. Use this stitch when sewing blouses or children’s clothes. a * f Select or Baste two pieces of fabric onto thin paper, leaving a space of 4 mm (approx. 3/16 inch) between the fabrics.
SEWING THE STITCHES Tape or Elastic Attaching a Select a straight stitch and attach presser foot “J”. b Set the stitch length to 4.0 mm (approx. 3/16 inch), and loosen the upper thread tension to 2.0 (see “Setting the Stitch Length” on page 89 and “Setting the Thread Tension” on page 90). e Select or . Memo • For details on each stitch, refer to the “STITCH SETTING CHART” at the end of this manual. f Sew over the tape (or elastic).
SEWING THE STITCHES ■ Hemstitching (2) (Drawn Work (1)) Heirloom a ■ Hemstitching (1) (Daisy Stitch) * Use for sewing tablecloths, decorative hems, and decorative stitching on shirt fronts. Pull out several threads from one area on a piece of fabric to open the area. Pull out 5 or 6 threads to leave a 3 mm (approx. 1/8 inch) area open. Memo • Use a light to medium weight homespun fabric with a little stiffness. a * Insert a type 130/705H, size 100/16 Wing needle.
SEWING THE STITCHES e Match beginning needle drop points on the opposite edge of the open area to keep the stitching symmetrical. Memo • A wing needle can be used for Hemstitching (3). Decorative Couching You can easily sew decorative stitching using yarn, etc. CAUTION • When using yarn, we recommend selecting yarn of weight 4 (MEDIUM ).
SEWING THE STITCHES b Insert the top left yarn guide into the slot on g the top left of the machine. a Slot c Press to lock all keys and buttons. Attach the dual feed foot to the machine d without attaching the toe of the couching dual feed foot. * Refer to “Attaching the Dual Feed Foot” on page 70. Pass the yarn, etc. through the telescopic e thread guide and the yarn guide (1) to (2). Attach the toe of the couching dual feed foot shown below to the dual feed foot.
SEWING THE STITCHES c Rotate the handwheel to set the needle in the sewing start position. Start sewing on the right side of the yarn. Make sure that the yarn, etc. passes straight d through the slit in the back of the toe of the couching dual feed foot, and then lower the presser foot. One-step Buttonholes With one-step buttonholes, you can make buttonholes appropriate to the size of your button.
SEWING THE STITCHES One-step buttonholes are sewn from the front of the presser foot to the back, as shown below. c Pull out the button holder plate on the presser foot, and insert the button that will be put through the buttonhole. Then tighten the button holder plate around the button. a Button holder plate Memo • The size of the buttonhole is determined by the size of the button in the button holder plate. d Align the presser foot with the mark on the fabric, and lower the presser foot.
SEWING THE STITCHES e Lower the buttonhole lever so that it is positioned behind the metal bracket on the buttonhole foot. g Insert a pin along the inside of one of the bar tacks, and then insert the seam ripper into the center of the buttonhole and cut towards the pin. a Buttonhole lever a Basting pin b Seam ripper 3 CAUTION f * Gently hold the end of the upper thread, and then start sewing. Feed the fabric carefully by hand while the buttonhole is sewn.
SEWING THE STITCHES ■ Sewing Stretch Fabrics When sewing on stretch fabric with or , sew the buttonhole stitches over a gimp thread. a Hook the gimp thread onto the back of presser foot “A”. Insert the ends into the grooves at the front of the presser foot, and then temporarily tie them there. a Upper thread b Lower the presser foot and start sewing.
SEWING THE STITCHES b Four-step Buttonholes Attach monogramming foot “N”, and select stitch You can sew 4-step buttonholes using the following 4 stitches together. You can sew any desired length for the buttonhole when using 4step buttonholes. 4-step buttonholes are a good option when attaching oversize buttons. Note to sew the left side of the buttonhole. c Press the “Start/Stop” button to start sewing. d Sew the desired length for the buttonhole and press the “Start/Stop” button again.
SEWING THE STITCHES c ■ Darning Use darning stitches for mending and other applications. Stitch Stitch name Check that the needle drops at the desired position and lower the presser foot, making sure the upper thread passes underneath the buttonhole foot. Presser foot Darning Darning Darning is performed by sewing from the front of the presser foot to the back as shown below. Note • Pass the thread underneath the presser foot.
SEWING THE STITCHES e Gently hold the end of the upper thread, and then press the “Start/Stop” button to start the machine. Memo • Bar tacks can be between 5 mm (approx. 3/16 inch) and 28 mm (approx. 1-1/16 inches). Bar tacks are usually between 5 mm (approx. 3/16 inch) and 10 mm (approx. 3/8 inch). c Set the fabric so that the pocket moves toward you during sewing. → Once sewing is completed, the machine automatically sews reinforcement stitches, and then stops.
SEWING THE STITCHES e Lower the buttonhole lever so that it is positioned behind the metal bracket on the buttonhole foot. Memo • If automatic thread cutting is turned on before you start sewing, both threads are automatically cut after the reinforcement stitches are sewn. If the fabric does not feed (for example, because it is too thick), increase the stitch length setting. Button Sewing Buttons with 2 or 4 holes can be attached, using the machine.
SEWING THE STITCHES e Gently hold the end of the upper thread and start sewing. → The machine stops automatically when sewing is finished. ■ Attaching a Shank to the Button a Pull the shank lever toward you before sewing. CAUTION • Make sure the needle does not strike the button during sewing. The needle may break and cause injury. f From the wrong side of the fabric, pull the end of the bobbin thread to pull the upper thread through to the wrong side of the fabric.
SEWING THE STITCHES a Select b Use or e . Use the eyelet punch to make a hole in the center of the stitching. in either the stitch width display or the stitch length display to choose the size of the eyelet. * a b c Multi-directional Sewing (Straight Stitch and Zigzag Stitch) Actual size Large 7 mm (approx. 1/4 inch) Medium 6 mm (approx. 15/64 inch) Small 5 mm (approx. 3/16 inch) Use these stitch patterns to attach patches or emblems to pant legs, shirt sleeves, etc.
SEWING THE STITCHES c Set the needle in the fabric at the sewing start point, and sew seam “1” as shown. Zipper Insertion ■ Centered Zipper Use for bags and other such applications. a Select . Memo • For details on each stitch, refer to the “STITCH SETTING CHART” at the end of this manual. a Start Point d * Select and sew seam “2” as shown. Note The fabric will move sideways, guide the fabric by hand to keep sewing straight. • Make sure you sew using the middle needle position.
SEWING THE STITCHES d Remove presser foot “J”. Align the right side of the pin in zipper foot “I” with the presser foot holder, and attach the zipper foot. ■ Inserting a Side Zipper Use for side zippers in skirts or dresses. a Select . Note • Make sure you sew using the middle needle position. b Attach presser foot “J” and sew straight stitches up to the zipper opening. Change to a basting stitch and sew to the top of the fabric.
SEWING THE STITCHES e Align the right side of the pin in zipper foot “I” with the presser foot holder, and attach the presser foot. a Right b Left c Needle drop position f Set the presser foot in the 3 mm (approx. 1/8 inch) margin. g Starting from the end of the zipper opening, sew to a point about 50 mm (approx. 2 inches) from the edge of the fabric, then stop the machine. h Pull down the zipper slider, then continue sewing to the edge of the fabric.
SEWING THE STITCHES n Open the zipper and sew the rest of the seam. Note • Clean stitching cannot be sewn if this function is used when the edge of the fabric has corners as shown below. a b c d Basting stitches 7 to 10 mm (approx. 1/4 inch to 3/8 inch) Reverse stitches 50 mm (approx. 2 inches) • When edge sewing using the built-in camera, make sure that the room is evenly lit. If the brightness in the room changes while edge sewing, the built-in camera may not be able to detect the edge of the fabric.
SEWING THE STITCHES b Attach the vertical stitch alignment foot “V”. V CAUTION • When edge sewing with the built-in camera, be sure to use the vertical stitch alignment foot “V”. In order to maintain a fixed distance from the edge of the fabric, the needle will slightly move to either side, even when sewing with a straight stitch. If a different presser foot is used, it may be hit by the needle, causing the needle to break or resulting in injuries.
SEWING THE STITCHES → Depending on the stitch, the straight stitch with the middle (center) needle position is selected, regardless of the preset stitch width. * Regardless of the setting selected in the machine settings screen, the brightness of the light changes to “5”. h Move the fabric to the desired position for edge sewing. Position the fabric so that its edge is as straight as possible. Note • After is pressed, the stitch width and stitch length cannot be changed.
SEWING THE STITCHES (with a blue starting point), blue (with a black starting point) or black (with a red starting point). When the Fabric Edge Indicator Line Is Not Aligned With the Edge of the Fabric The fabric edge indicator line that appears is not aligned with the edge of the fabric. The fabric at the beginning of sewing is not straight. b a Try to straighten the edge of the fabric at the beginning of sewing (so it is parallel with the edge of the presser foot).
SEWING THE STITCHES j While checking the screen for the distance from the fabric edge to the edge sewing position, move the fabric to the desired position. * Note • Distances between 1.5 mm (about 1/16 inch) and 38.5 mm (about 1-1/2 inches) can be measured. The distance is displayed in the screen in 0.5 mm (about 1/64 inch) increments. • The distance is displayed in millimeters. However, depending on the measurement setting, it can also be displayed in inches.
SEWING THE STITCHES l Press the “Start/Stop” button to start edge sewing. m When sewing is between 10 and 20 mm (about 3/8 and 3/4 inch) from the edge of → Sewing starts with the set distance to the edge of the fabric maintained. * While sewing, use the red scale marks on the vertical stitch alignment foot “V” as a guide to keep a fixed distance from the edge of the fabric. the fabric, sewing stops automatically and the following message appears. To stop sewing, press * .
SEWING THE STITCHES 166
Chapter 4 Character/Decorative Stitches SELECTING STITCH PATTERNS ............................ 168 ■ Stitch Selection Screens ......................................................... 169 Selecting Decorative Stitch Patterns/7mm Decorative Stitch Patterns/Satin Stitch Patterns/7mm Satin Stitch Patterns/ Cross Stitch/Utility Decorative Stitch Patterns .......................170 Alphabet Characters/Japanese characters...............................170 ■ Deleting Characters..................................
SELECTING STITCH PATTERNS SELECTING STITCH PATTERNS Press , then to display the screen below. a b c e f h d g i j k l n m a b c d e f g h i j k l m n Decorative stitch patterns 7mm decorative stitch patterns. You can set stitch length and width. Satin stitch patterns 7mm satin stitch patterns. You can set stitch length and width.
SELECTING STITCH PATTERNS ■ Stitch Selection Screens There are 11 categories of Character/Decorative stitch patterns. If selection screen for that category.
SELECTING STITCH PATTERNS Selecting Decorative Stitch Patterns/7mm Decorative Stitch Patterns/Satin Stitch Patterns/ 7mm Satin Stitch Patterns/ Cross Stitch/Utility Decorative Stitch Patterns a Select the category of the pattern you want to sew. b Press the key of the stitch pattern you want to sew. * Press to view the next page. * Press to view the previous page.
SELECTING STITCH PATTERNS e Press to enter a space. ■ Deleting Characters a f Press Press to delete the last character. again and enter “S”. Memo g Press • Characters are deleted individually starting with the last character entered. and then enter “ky”. b Select the correct character. The space between the characters can be adjusted. Press . Character/Decorative Stitches ■ Adjusting the Character Spacing a 4 a → The character spacing window appears.
SELECTING STITCH PATTERNS b * Press to adjust character spacing. Press to increase the character spacing and press to decrease the character spacing. Example: * Each setting equals a specific distance between characters. Value: 0 Value: 10 Value mm 0 1 2 3 4 5 6 7 8 9 10 0 0.18 0.36 0.54 0.72 0.9 1.08 1.26 1.44 1.62 1.8 Memo • The default setting is “0”. No number less than “0” can be set. • Changing character spacing by this method, pertains to all characters.
SEWING STITCH PATTERNS SEWING STITCH PATTERNS Sewing Attractive Finishes To achieve attractive results when sewing character/decorative stitches, check the table below for the proper fabric/needle/thread combinations. Note • Other factors, such as fabric thickness, stabilizer material, etc., also have an effect on the stitch, so you should always sew a few trial stitches before beginning your project.
SEWING STITCH PATTERNS Memo Note • If the fabric is pulled or pushed during sewing, the pattern may not turn out correctly. Also, depending on the pattern, there may be movement to the left and right as well as front and back. Guide the fabric with your hand to keep the fabric feeding straight and even during sewing.
SEWING STITCH PATTERNS c Compare the finished pattern to the illustration of the correct pattern below. d Press , and then adjust the pattern with → The displayed value decreases each time the button is pressed and the pattern will slide to the left. e * the “Fine Adjust Verti.” or “Fine Adjust Horiz.” displays. Sew the stitch pattern again. If the stitch pattern still comes out poorly, make adjustments again. Adjust until the stitch pattern comes out correctly.
EDITING STITCH PATTERNS EDITING STITCH PATTERNS ■ Key Functions You can create just the finish you want using the editing functions. Make patterns larger or smaller, make mirror images, etc. Note • Some editing functions cannot be used with certain stitch patterns. Only the functions for the displayed keys are available when a pattern is selected.
EDITING STITCH PATTERNS No. a Display Key Name Pattern display size Explanation Show the approximate size of the pattern selected. Page 111 : Nearly the same size as the sewn pattern : 1/2 the size of the sewn pattern : 1/4 the size of the sewn pattern * The actual size of the sewn pattern may differ depending on the type of fabric and thread that is used. b Automatic reinforcement stitch key Press this key to turn on the automatic reinforcement stitching mode.
EDITING STITCH PATTERNS Changing the Size Select a stitch pattern, then press Creating a Vertical Mirror Image to change the size of the stitch pattern. The stitch pattern will be sewn in the size highlighted on the key. To create a vertical mirror image, select a stitch pattern then press . Memo • If you continue entering stitch patterns after changing the size, those patterns will also be sewn in that size. • You cannot change the size of combined stitch patterns once the stitch pattern is entered.
EDITING STITCH PATTERNS Changing Thread Density (for Satin Stitch Patterns Only) After selecting a satin stitch pattern, press Returning to the Beginning of the Pattern to select your preferred thread density. When sewing character/decorative stitches, you can return to the beginning of the pattern after trial sewing or when the stitching is sewn incorrectly. a Press the “Start/Stop” button to stop the machine, and then press .
EDITING STITCH PATTERNS Checking the Image You can display an approximate size image of the selected stitch pattern. You can also check and change the colors of the image on the screen. a Press b Press . → An image of the selected pattern is displayed. to change the thread color in the image to red, blue, black or yellow. → The color changes every time you press the button. c Press d Use to display the enlarged image.
COMBINING STITCH PATTERNS COMBINING STITCH PATTERNS You can combine many varieties of stitch patterns, such as character stitches, cross stitches or satin stitches. You can also combine stitch patterns of different sizes, mirror image stitch patterns, and others. Before Combining Single stitch sewing is automatically selected for sewing combined patterns. If you want to sew the pattern continuously, press after finishing the stitch pattern combination.
COMBINING STITCH PATTERNS d Press . Combining Large and Small Stitch Patterns Example: e Select . a Press . → The large size stitch will be selected. b Press again, then press to select the small size. f Press to sew the pattern continuously. Memo • Patterns are deleted individually starting with the last pattern entered by pressing . → The pattern is displayed in a smaller size.
COMBINING STITCH PATTERNS c Press to sew continuously. → The entered pattern is repeated. Combining Horizontal Mirror Image Stitch Patterns b Press again, then press . → The pattern is flipped along a vertical axis. c Press . 4 Example: Character/Decorative Stitches → The entered pattern is repeated. a Press .
COMBINING STITCH PATTERNS Combining Stitch Patterns of Different Length c Press . Example: → The entered pattern is repeated. Making Step Stitch Patterns (for 7mm Satin Stitch Patterns Only) a Press , then press once. You can use the → The length of the image is set to stitch patterns to create a step effect, also called step stitch patterns. . * b keys with 7mm satin Press to move the stitch pattern a distance equal to half of the stitch pattern’s size to the left.
COMBINING STITCH PATTERNS e a Press . b Press . Press . → The next stitch pattern will move to the right. → The entered pattern is repeated. c again. ■ More Examples Press → → → → . Press → → → → → 4 Character/Decorative Stitches d Press Press . → → → . → The next stitch pattern will move to the left.
COMBINING STITCH PATTERNS Press → Press → → 186 → → → → → . .
USING THE MEMORY FUNCTION USING THE MEMORY FUNCTION Stitch Data Precautions Observe the following precautions when using stitch data other than that created and saved in this machine. ■ Types of Stitch Data that can be Used • In the Character/Decorative Stitch memory, “.pmv”, “.pmx” and “.pmu” stitch data files can be used with this machine. “.pmu” stitch data files can be retrieved; however, when the machine is used to save the file, it is saved as a “.pmv” stitch data file.
USING THE MEMORY FUNCTION Saving Stitch Patterns in the Machine’s Memory You can save often used stitch patterns in the machine’s memory. A total of about 1 MB of stitch patterns can be saved in the machine’s memory. Note • Do not turn the main power to OFF while the “Saving” screen is displayed. You will lose the stitch pattern you are saving.
USING THE MEMORY FUNCTION b Insert the USB media into either of the USB ports on the machine. a Plug the USB cable connector into the corresponding USB ports for the computer and for the machine. b Turn on your computer and select “Computer (My Computer)”. * The USB cable can be plugged into the USB ports on the computer and machine whether or not they are turned on. a USB port b USB media c Press . * Press when connecting the USB media to the USB port for mouse. * Press saving.
USING THE MEMORY FUNCTION c Press . Retrieving Stitch Patterns from the Machine’s Memory a d * Press Press saving. . to return to the original screen without → The stitch pattern will be temporarily saved to “Removable Disk” under “Computer (My Computer)”. e Press . → The pocket selection screen appears. b Choose a stitch pattern to retrieve. * If the entire saved stitch pattern is not displayed, press the thumbnail. * Press saving.
USING THE MEMORY FUNCTION c * Press Press b . to delete the stitch pattern. → The selected stitch pattern is retrieved and the sewing screen will be displayed. Recalling from USB Media a Insert the USB media into either of the USB ports on the machine (see page 188). . Press when connecting the USB media to the USB port for mouse. → Stitch patterns and a folder in a top folder are displayed.
USING THE MEMORY FUNCTION c Press when there is a subfolder to sort two or more stitch patterns to USB media, the stitch pattern in the subfolder is displayed. * Press recalling. e * Press . Press to delete the stitch pattern. The pattern will be deleted from the USB media. to return to the original screen without a → The selected stitch pattern is recalled and the sewing screen will be displayed.
USING THE MEMORY FUNCTION c Move/copy the pattern data to “Removable Disk”. f * Press . Press to delete the stitch pattern. The pattern will be deleted from the “Removable Disk” folder in your computer. → Stitch pattern data in “Removable Disk” is written to the machine. Note • While data is being written, do not disconnect the USB cable. • Do not create folders within “Removable Disk”. Since folders are not displayed, stitch pattern data within folders cannot be recalled. Press .
USING THE MEMORY FUNCTION 194
Chapter 5 Basic Embroidery BEFORE EMBROIDERING ..................................... 196 COMBINING PATTERNS .......................................238 Embroidery Step by Step ........................................................196 Attaching Embroidery Foot “W+” with LED pointer ..............197 Attaching the Embroidery Unit ..............................................197 Editing Combined Patterns ..................................................... 238 ■ About the Embroidery Unit .............
XF9969-2012