English 882-S95 XE2542-001 Printed in Taiwan
IMPORTANT SAFETY INSTRUCTIONS When using this machine, basic safety precautions should always be taken, including the following: Read all instructions before using. DANGER - To reduce the risk of electric shock: 1. The machine should never be left unattended while plugged in. Always unplug the machine from the electrical outlet immediately after using and before cleaning. WARNING - To reduce the risk of burns, fire, electric shock, or injury to persons: 1.
FOR USERS IN THE UK, EIRE, MALTA AND CYPRUS ONLY If this machine is fitted with a three-pin non-rewireable BS plug then please read the following. IMPORTANT If the available socket outlet is not suitable for the plug supplied with this equipment, it should be cut off and an appropriate three-pin plug fitted. With alternative plugs an approved fuse must be fitted in the plug.
Federal Communications Commission (FCC) Declaration of Conformity (For USA Only) Responsible Party: Tacony Corporation 1760 Gilsinn Lane, Fenton, Missouri 63026 declares that the product Product Name: Model Number: Baby Lock Sewing Machine BLG2-NZ/BLG2 This device complies with Part 15 of the FCC Rules.
CONGRATULATIONS ON CHOOSING OUR MACHINE Your machine is the most advanced computerized household embroidery and sewing machine. To fully enjoy all the features incorporated, we suggest that you study the manual. PLEASE READ BEFORE USING THIS MACHINE For safe operation 1. Be sure to keep your eye on the needle while sewing. Do not touch the handwheel, thread take-up, needle, or other moving parts. 2.
v
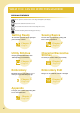
WHAT YOU CAN DO WITH THIS MACHINE SPECIAL FEATURES Check operations and view advice on the large LCD (liquid crystal display). Prepare the bobbin thread with one touch. The automatic thread tension makes trial sewing unnecessary. Automatic threading makes threading quick and easy.
HOW TO USE THIS MANUAL Chapter 1 and Chapter 2 explain your sewing machine’s basic operation procedures for someone who is using the sewing machine for the first time. If you want to sew utility stitches or character/ decorative stitches, read Chapter 1 and Chapter 2, then go on to Chapter 3 (Utility Stitches) or Chapter 4 (Character/ Decorative Stitches). When you are ready to begin using the embroidery function after reading Chapter 1 and Chapter 2, proceed to Chapter 5 (Embroidery).
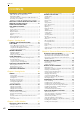
Contents CONTENTS IMPORTANT SAFETY INSTRUCTIONS ..................i FOR USERS IN THE UK, EIRE, MALTA AND CYPRUS ONLY .............................................................. ii Federal Communications Commission (FCC) Declaration of Conformity (For USA Only) .................................................... iii CONGRATULATIONS ON CHOOSING OUR MACHINE ..... iv WHAT YOU CAN DO WITH THIS MACHINE .....vi HOW TO USE THIS MANUAL ............................vii NAMES OF MACHINE PARTS AND THEIR FUNCTIONS.
Contents Chapter 5 Embroidery 143 EDITING PATTERNS ......................................... 203 BEFORE EMBROIDERING .................................144 Moving the Pattern ............................................................. 205 Rotating the Pattern ............................................................ 205 Changing the Size of the Pattern ......................................... 206 Deleting the Pattern ............................................................
Contents x
NAMES OF MACHINE PARTS AND THEIR FUNCTIONS NAMES OF MACHINE PARTS AND THEIR FUNCTIONS The names of the various parts of the sewing machine and their functions are described below. Before using the sewing machine, carefully read these descriptions to learn the names of the machine parts. Machine ■ Front View ■ Right-side/Rear View a o n m l i c j k b h d e p f g a Top cover Open the top cover to thread the machine and wind the bobbin.
NAMES OF MACHINE PARTS AND THEIR FUNCTIONS Needle and Presser Foot Section Measurements on the needle plate, bobbin cover and needle plate cover e f i g The measurements on the bobbin cover are references for patterns with a middle (center) needle position. The measurements on the needle plate and the needle plate cover are references for stitches with a left needle position. a b b h c j d d c e a Presser foot holder The presser foot is attached onto the presser foot holder.
NAMES OF MACHINE PARTS AND THEIR FUNCTIONS Embroidery Unit Operation Buttons d e f c b a a Carriage The carriage moves the embroidery frame automatically when embroidering. b Release button (located under the embroidery unit) Press the release button to remove the embroidery unit. c Feed dog position switch Use the feed dog position switch to raise and lower the feed dogs while the embroidery unit is attached.
NAMES OF MACHINE PARTS AND THEIR FUNCTIONS Included Accessories 35-38 are contained in the embroidery unit carrying case. To open the embroidery unit carrying case, raise the lock and move the latch out of position. To re-hook the latches and securely close the case, position the latch on the catch of the unit lid and lower the lock till it snaps. Included Accessories Pull the top of the flat bed attachment to open the accessory compartment.
NAMES OF MACHINE PARTS AND THEIR FUNCTIONS 16* 17 18 19 20 21 22 75/11 2 needles 90/14 2 needles 90/14 2 needles: Ball point needle (gold colored) 23 24 25 26 27 28 29 30 31 32 33 34 35 36 37 38 39 40 41 42 43 44 45 46 47 48 49 50 51 52 53 54 55 56 57 * See Additional Accessories Guide for presser foot instruction. **Included Accessories 35-38 are contained in the embroidery unit carrying case.
NAMES OF MACHINE PARTS AND THEIR FUNCTIONS No. Part Name No.
NAMES OF MACHINE PARTS AND THEIR FUNCTIONS Options Removing the LCD cover 1 2 3 4 5 6 7 8 9 a a Latch b No.
NAMES OF MACHINE PARTS AND THEIR FUNCTIONS Attaching the LCD cover a Insert the tabs at the bottom of the LCD cover into the grooves at the bottom of the LCD. a Tabs b Grooves b While pressing the latch at the top of the LCD cover, insert the tabs at the top of the LCD cover into the grooves at the top of the LCD.
1 Chapter 1 Getting Ready TURNING THE MACHINE ON/OFF....................................................10 LCD SCREEN........................................................................................11 ■ Key Functions ..................................................................................................................12 Screens Operations Performed Using a USB Mouse................................................14 ■ Clicking a key ....................................................
TURNING THE MACHINE ON/OFF TURNING THE MACHINE ON/OFF WARNING • Use only regular household electricity as the power source. Using other power sources may result in fire, electric shock, or damage to the machine. • Make sure that the plugs on the power cord are firmly inserted into the electrical outlet and the power cord receptacle on the machine. • Do not insert the plug on the power cord into an electrical outlet that is in poor condition.
LCD SCREEN LCD SCREEN Note • When the straight stitch needle plate is on the machine, the needle will automatically move to the middle position. 1 Getting Ready When switching on the machine, the screen will display the name of the machine. Touch the screen to display the utility stitch. Either “1-01 Straight stitch (Left)” or “1-03 Straight stitch (Middle)” is selected, depending on the setting selected in the setting screen (see page 16).
LCD SCREEN ■ Key Functions b c a e f d g k h i j l n No. Display m p o q s t u v Key Name r w Explanation a Utility stitch key b Character/Decorative Press this key to select character or decorative stitch patterns. stitch key 116 c Embroidery key Attach the embroidery unit and press this key to sew embroidery. 149 d Embroidery edit key Press this key to combine embroidery patterns.
LCD SCREEN No. Display Key Name Explanation Page Automatic reinforcement stitch key Press this key to use the automatic reinforcement stitching (reverse stitching) setting. If you select this setting before sewing, the machine will automatically sew reinforcement stitches at the beginning and end of sewing (depending on the pattern, the machine may sew reverse stitches). 51 j Automatic thread cutting key Press this key to set the automatic thread cutting function.
LCD SCREEN Screens Operations Performed Using a USB Mouse If a USB mouse (sold separately by computer retailers) is connected to the sewing machine, the mouse can be used to perform operations in the screens. In addition, a USB hub can be connected so that USB media and a USB mouse can be used at the same time. ■ Clicking a key When the mouse is connected, the pointer appears in the screen. Move the mouse to position the pointer over the desired key, and then click the left mouse button.
LCD SCREEN ■ Changing pages Rotate the mouse wheel to switch through the tabs of the pattern selection screens. Memo • If 1 for additional pages is displayed, page. In the or , click the left mouse button with the pointer on to move down to the next part of a or Getting Ready rotate the mouse wheel to display the next page.
LCD SCREEN Using the Machine Setting Mode Key Press to change the default machine settings (needle stop position, embroidery speed, opening display, etc.) Press , or to display the different settings screens. Memo • Some of these functions will be available in future technology upgrades. • Press or to display a different settings screen. Sewing settings a b c d e f g h a b c d Select whether to use the sewing speed controller to determine the zigzag width (see page 82).
LCD SCREEN General settings 1 Getting Ready a b c d e f h g i j a Change the brightness of the LCD (see page 19). b Select the needle stop position (the needle position when the machine is not operating) to be up or down. Select the down position when using the pivot key. c Turn the buzzer ON/OFF. d Turn the Needle Area and Work Area Lights ON/OFF. e Turn the opening screen display ON/OFF. f Use when running an application. g Change the display language (see page 20).
LCD SCREEN Embroidery settings i a b c d e f g h a Select from among 10 embroidery frame displays (see page 178). b Change the thread color display on the embroidery screen; thread number, color name or each time to embroider (see page 177). c When the thread number #123 is selected, select among six thread brands (see page 177). d Adjust the maximum embroidery speed setting (see page 176). e Adjust the thread tension for embroidering.
LCD SCREEN ■ Adjusting Screen Brightness c On the BRIGHTNESS OF LCD display, use Note a Press and to adjust the screen brightness. * Press to make the screen darker. * Press to make the screen lighter. 1 Getting Ready • All or part of the screen may sometimes become darker or lighter because of changes in the air temperature or other changes in the environment around the screen. This is normal and is not a sign of malfunction. Adjust the screen if it is difficult to read.
LCD SCREEN ■ Choosing the Display Language a Press . → The Sewing settings screen appears. b Press . → The General settings screen appears. c Use and to choose the display language. * Choose from the following languages: [ENGLISH], [GERMAN], [FRENCH], [ITALIAN], [DUTCH], [SPANISH], [JAPANESE], [DANISH], [NORWEGIAN], [FINNISH], [SWEDISH], [PORTUGEUSE] or [RUSSIAN]. a a Display language d 20 Press .
LCD SCREEN Using the Machine Operation Mode Key Press to open the screen shown below. Six categories are displayed at the top of the screen. Press a key to see more information about that category. 1 Getting Ready displays information about the main parts of the machine and their functions. This is the first screen displayed when you press displays information about the operation buttons. displays information about threading the machine, changing presser feet, etc. .
LCD SCREEN Example: Displaying information about upper threading e Press to return to the original screen. a Press b Press . . → The lower half of the screen will change. c Press (upper threading). Using the Pattern Explanation Key If you want to know more about the uses of a stitch pattern, select the pattern and press an explanation of the stitch selection. to see Example: Displaying information about a Press b Press . . → The screen shows instructions for threading the machine.
LOWER THREADING LOWER THREADING Winding the Bobbin → → Turn the main power to ON and open the top cover. b Align the groove in the bobbin with the spring on the bobbin winder shaft, and set the bobbin on the shaft. in that order to display a video example of bobbin winding on the LCD (see page 22). Follow the steps explained below to complete the operation. 1 Getting Ready → Press a a b CAUTION • The enclosed bobbin was designed specifically for this sewing machine.
LOWER THREADING f CAUTION • If the thread spool and/or spool cap are set incorrectly, the thread may tangle on the spool pin, the thread will wind uneven on the bobbin and eventually cause damage to the machine. • Use the spool cap (large, medium, or small) that is closest in size to the thread spool. If a spool cap smaller than the thread spool is used, the thread may become caught in the slit on the end of the spool and cause damage to the machine.
LOWER THREADING i Set the bobbin holder to the left, until it clicks into place. ■ Using the Spool Pin You can use the main spool pin to wind the bobbin before sewing. You cannot use this spool pin to wind the bobbin while sewing. 7 1 6 Getting Ready 2 a a Bobbin holder (switch) 5 4 Memo 8 3 When the bobbin holder is set to the left, it works as a switch to make the bobbin wind automatically. → The bobbin starts winding automatically and stops rotating when it is done winding.
LOWER THREADING d Push the spool cap onto the spool pin as far as possible, then return the spool pin to its original position. e Holding the thread with your hands, slide the thread into the grooves on the thread guide plate. Setting the Bobbin → Press → → in that order to display a video example of the operation on the LCD (see page 22). Follow the steps explained below to complete the operation. CAUTION • Use a bobbin thread that has been correctly wound.
LOWER THREADING b Slide the bobbin cover latch to the right. a g Pass the thread through the guide, and then pull the thread out towards the front. b 1 Getting Ready a a Bobbin cover b Latch → The bobbin cover opens. c Remove the bobbin cover. d Hold the bobbin with your right hand and hold the end of the thread with your left hand. e a Cutter → The cutter cuts the thread. Note Make sure that the thread is correctly inserted through the tension-adjusting spring of the bobbin case.
LOWER THREADING Pulling Up the Bobbin Thread e There may be some sewing applications where you want to pull up the bobbin thread; for example, when making gathers, darts, or doing free motion quilting or embroidery. Memo a b You can pull up the bobbin thread after threading the upper thread (see “UPPER THREADING” on page 29). a * * Guide the bobbin thread through the groove, following the arrow in the illustration. Do not cut the thread with the cutter. Do not replace the bobbin cover.
UPPER THREADING UPPER THREADING → Press → a Turn the main power to ON. b Press the “Needle Position” button to raise the needle. → 1 Getting Ready Threading Using the “Automatic Threading” Button in that order to display a video example of the operation on the LCD (see page 22). Follow the steps explained below to complete the operation. Note CAUTION • Be sure to thread the machine properly. Improper threading can cause the thread to tangle and break the needle, leading to injury.
UPPER THREADING h Memo When sewing with fine, cross-wound thread, use the small spool cap, and leave a small space between the cap and the thread spool. c Press the “Automatic Threading” button to have the machine automatically thread the needle. b a a Spool cap (small) b Thread spool (cross-wound thread) c Space e Holding the thread with your hands, slide the thread into the grooves on the thread guide plate. → The upper threading is finished.
UPPER THREADING Note 10 8 11 1 9 7 5, 6 3 4, 12 13 Getting Ready When the “Automatic Threading” button is pressed, the presser foot will be automatically lowered. If you are using an incorrect needle and thread combination, the hook may sometimes get caught in the needle. If this happens, remove the hook from the needle as described below. 14 2 15 1 CAUTION • The needle thread carrier will automatically thread the needle when the “Automatic Threading” button is pressed.
UPPER THREADING d Raise the presser foot lever. g Holding the thread with both hands, slide the thread into the grooves on the thread guide plate. a CAUTION • If the presser foot is not raised, the sewing machine cannot be threaded correctly. e a Thread guide plate h Pivot the spool pin so that it angles upward. Set the thread spool on the spool pin so that the thread unwinds from the front of the spool.
UPPER THREADING j Pull the thread up along the left side of the thread path guide to the top left corner of the threading path cover. m Holding the thread with both hands, pass the thread through both the upper and lower needle bar thread guides. 1 a (B) b 2 b a Top left corner b Threading path cover k * Pull the thread down to the needle bar along the left side of the thread path guide. Make sure the thread is hooked at the top corner and positioned behind the transparent front cover.
UPPER THREADING Using the Twin Needle Mode b * The twin needle can only be used for patterns that Manually thread the machine. Follow the steps for threading a single needle for the first threading (see “Threading Manually” on page 31). show after being selected. Before you select a stitch pattern, make sure the stitch can be sewn in the twin needle mode (refer to the “STITCH SETTING CHART” at the end of this manual). CAUTION • Use only twin needles made for this machine (part code X59296-151).
UPPER THREADING e Place the additional spool of thread on the supplemental spool pin, so that the thread unwinds from the back. Then push the spool cap onto the spool pin as far as possible to secure the thread spool. g Pass the thread through the thread guide plate, following the sequence as described below (or refer to “Threading Manually” on page 31).
UPPER THREADING j Select a stitch pattern. (Example: ) * Refer to the “STITCH SETTING CHART” at the end of this manual for proper stitch to use with presser foot “J”. → The Selected stitch is displayed. Note If the key is light gray after selecting the stitch, the selected stitch cannot be sewn in the twin needle mode.
CHANGING THE PRESSER FOOT CHANGING THE PRESSER FOOT 1 CAUTION on the screen before changing the presser foot. If is not pressed and the “Start/Stop” button or another button is pressed, the machine will start and may cause injury. • Always use the correct presser foot for the selected stitch pattern. If the wrong presser foot is used, the needle may strike the presser foot and bend or break, and may cause injury. • Only use presser feet made for this machine.
CHANGING THE PRESSER FOOT Attaching the Walking Foot d Lower the presser foot lever. Insert the screw, and tighten the screw securely with the screwdriver. The walking foot holds the fabric between the presser foot and the feed dogs to feed the fabric. This enables you to have better fabric control when sewing difficult fabrics (such as quilting or velvet) or fabrics that slip easily (such as vinyl cloth, leather, or synthetic leather).
CHANGING THE NEEDLE CHANGING THE NEEDLE 1 CAUTION on the screen before changing the needle. If is not pressed and the Start/ Stop button or another operation button is pressed accidentally, the machine will start and injury may result. • Use only sewing machine needles made for home use-type 130/705H needle. Other needles may bend or break and may cause injury. • Never sew with a bent needle. A bent needle will easily break and may cause injury.
CHANGING THE NEEDLE d With the flat side of the needle facing the back, insert the new needle all the way to the top of the needle stopper (viewing window) in the needle clamp. Use a screwdriver to securely tighten the needle clamp screw. a b c a Needle stopper b Hole for setting the needle c Flat side of needle CAUTION • Be sure to push in the needle until it touches the stopper, and securely tighten the needle clamp screw with a screwdriver.
CHANGING THE NEEDLE ■ About the Needle The sewing machine needle is probably the most important part of the sewing machine. Choosing the proper needle for your sewing project will result in a beautiful finish and fewer problems. Below are some things to keep in mind about needles. The smaller the needle number, the finer the needle. As the numbers increase, the needles get thicker. Use fine needles with lightweight fabrics, and thicker needles with heavyweight fabrics.
TURNING THE MACHINE ON/OFF 42
2 Chapter 2 Sewing Basics SEWING ..............................................................................................44 Sewing a Stitch........................................................................................................44 ■ Using the Foot Controller................................................................................................45 Sewing Reinforcement Stitches ...............................................................................46 Sewing Curves ...
SEWING SEWING CAUTION • To avoid injury, pay special attention to the needle while the machine is in operation. Keep your hands away from moving parts while the machine is in operation. • Do not stretch or pull the fabric during sewing. Doing so may lead to injury. • Do not use bent or broken needles. Doing so may lead to injury. • Take care that the needle does not strike basting pins or other objects during sewing. Otherwise, the needle may break and cause injury.
SEWING g * Press the “Start/Stop” button to start sewing. Note • When cutting thread thicker than #30, nylon thread, or other decorative threads, use the thread cutter on the side of the machine. Guide the fabric lightly by hand. j Memo Press the “Start/Stop” button again to stop sewing. This machine is equipped with a bobbin thread sensor that warns you when the bobbin thread is almost empty. When the bobbin thread is nearly empty, the machine automatically stops.
SEWING b Slowly depress the foot controller to start sewing. Sewing Curves Sew slowly while keeping the seam parallel with the fabric edge as you guide the fabric around the curve. Memo The speed set using the sewing speed controller is the foot controller’s maximum sewing speed. c Release the foot controller to stop the machine. Memo (For U.S.A. only) Foot controller: Model S This foot controller can be used with models: BLG2-NZ/BLG2 Changing Sewing Direction Stop the machine.
SEWING Sewing Heavyweight Fabrics The sewing machine can sew fabrics up to 6 mm (approx. 1/4 inch) thick. If the thickness of a seam causes sewing to occur at an angle, help guide the fabric by hand and sew on the downward slope. ■ If the Fabric does not Feed If the fabric does not feed when starting to sew or when sewing thick seams, press the black button on the left side of presser foot “J”. a Raise the presser foot.
SEWING Sewing Lightweight Fabrics Place thin paper or tear away embroidery stabilizer under thin fabrics to make sewing easier. Gently tear off the paper or the stabilizer after sewing. a a Thin paper Sewing Stretch Fabrics First, baste together the pieces of fabric, and then sew without stretching the fabric. In addition, a better result can be achieved by using thread for knits or a stretch stitch. Memo • For best results when sewing stretch fabrics, decrease the pressure of the presser foot.
STITCH SETTINGS STITCH SETTINGS When you select a stitch, your machine automatically selects the appropriate stitch width, stitch length, and upper thread tension. However, if needed, you can change any of the individual settings. Note • Settings for some stitches cannot be changed (refer to the “STITCH SETTING CHART” at the end of this manual).
STITCH SETTINGS ■ Proper Thread Tension Example: Press to shorten the stitch length. The upper and lower threads should cross near the center of the fabric. If the thread tension is not properly set, the seam may have a poor finish or the fabric may pucker. a b c → The value in the display gets smaller. Press d to lengthen the stitch length.
USEFUL FUNCTIONS USEFUL FUNCTIONS c Automatic Reinforcement Stitching After selecting a stitch pattern, turn on the automatic reinforcement stitching function before sewing, and the machine will automatically sew reinforcement stitches (or reverse stitches, depending on the stitch pattern) at the beginning and end of sewing. Select a stitch pattern. b Press 2 a a Reverse stitches (or reinforcement stitches) to set the automatic Sewing Basics a Set the fabric in the start position and start sewing.
USEFUL FUNCTIONS Automatic Thread Cutting c After selecting a stitch pattern, turn on the automatic thread cutting function before sewing, and the machine will automatically sew reinforcement stitches (or reverse stitches, depending on the stitch pattern) at the beginning and end of sewing, and trim the threads at the end of sewing. This function is useful when sewing buttonholes and bar tacks. a Select a stitch pattern. b Press Set the fabric in the start position and start sewing.
USEFUL FUNCTIONS ■ Using the Knee Lifter Using the knee lifter, you can raise and lower the presser foot with your knee, leaving both hands free to handle the fabric. a Align the tabs on the knee lifter with the notches in the jack, and then insert the knee lifter as far as possible. Pivoting If the pivot setting is selected, the machine stops with the needle lowered (in the fabric) and the presser foot is automatically raised to an appropriate height when the “Start/Stop” button is pressed.
USEFUL FUNCTIONS c Note • The “NEEDLE POSITION” (P. 2 of the settings screen) must be set in the down position for the pivot function to be used. When “NEEDLE POSITION” is set in Place the fabric under the presser foot with the needle at the starting point of the stitching, and then press the “Start/Stop” button. The machine will begin sewing. the raised position, appears as light gray and cannot be used.
USEFUL FUNCTIONS Automatic Fabric Sensor System (Automatic Presser Foot Pressure) If the screen is locked before starting to sew, the various settings such as the stitch width and stitch length are locked and cannot be changed. This prevents screen settings from accidentally being changed or the machine from being stopped while large pieces of fabric or projects are being sewn. The screen can be locked when sewing utility stitches and character decorative stitches. a Select a stitch pattern.
USEFUL FUNCTIONS 56
3 Chapter 3 Utility Stitches SELECTING UTILITY STITCHES ......................58 One-step Buttonholes ........................................................97 ■ Stitch Selection Screens............................................................ 58 ■ Sewing Stretch Fabrics ............................................................100 ■ Odd Shaped Buttons/Buttons that do not Fit into the Button Holder Plate ..........................................................100 Selecting a Stitch .........
SELECTING UTILITY STITCHES SELECTING UTILITY STITCHES ■ Stitch Selection Screens There are 5 categories of Utility Stitches. indicates that there is more than one stitch selection screen for that category.
SELECTING UTILITY STITCHES ■ Using the Mirror Image Key Selecting a Stitch a Depending on the type of utility stitch you select, you may be able to sew a horizontal mirror image of the stitch. Turn the main power to ON. → Either “1-01 Straight stitch (Left)” or “1-03 Straight stitch (Middle)” is selected, depending on the setting selected in the setting screen. b Use If is lit when you select a stitch, it will be possible to make a mirror image of the stitch.
SELECTING UTILITY STITCHES b Press to change the thread color of Saving Your Stitch Settings the stitch on the screen. * Press to display an enlarged image of the stitch. Memo • The color changes every time you press . • The units of the stitch display area are in mm. The settings for the zigzag stitch width, stitch length, thread tension, automatic thread cutting, automatic reinforcement stitching, etc., are preset in the machine for each stitch.
SELECTING UTILITY STITCHES c Press . c * Press the numbered key of the settings to be retrieved. Press to return to the original screen without retrieving settings. 3 a Utility Stitches → The settings are saved and the original screen automatically appears. Memo If you try to save settings when there are already 5 sets of settings saved for a stitch, the message “The pockets are full. Delete a pattern” will appear. Close the message and refer to “Deleting Saved Settings” on this page.
SELECTING UTILITY STITCHES Example: Displaying information about overcasting a Press * . → The advice screen is displayed. b * Press Press . to return to the original screen. → The upper part of the screen displays a selection of overcasting stitches with explanations. 62 c Read the explanations and select the appropriate stitch. Press or to scroll the page. → The screen displays directions for sewing the selected stitch. d * Follow the directions to sew the stitch.
SEWING THE STITCHES SEWING THE STITCHES Straight Stitches Stitch Stitch name Presser foot Stitch width [mm (inch.)] Applications Stitch length [mm (inch.)] Twin needle Manual Auto. Manual 0.0 (0) 0.0 - 7.0 (0 - 1/4) 2.5 (3/32) 0.2 - 5.0 (1/64 - 3/16) OK (J) General sewing, gather, pintuck, etc. Reinforcement stitch is sewn while pressing “Reverse/ Reinforcement Stitch” button. 0.0 (0) 0.0 - 7.0 (0 - 1/4) 2.5 (3/32) 0.2 - 5.
SEWING THE STITCHES a Select a stitch. CAUTION Be sure the needle does not strike a basting pin, or any other objects, during sewing. The thread could tangle or the needle could break, causing injury. b * c f When sewing is completed, hold the “Reverse/Reinforcement Stitch” button to sew 3-4 reverse stitches (or reinforcement stitches) at the end of the seam. g After sewing, press the “Thread Cutter” button to trim the threads. Attach presser foot “J”. Attach presser foot “N” when you select .
SEWING THE STITCHES ■ Changing the Needle Position (Left or Middle Needle Position Stitches Only) When you select left or middle needle position stitches, you can use and in the stitch width display to change the position of the needle. Match the distance from the right edge of the presser foot to the needle with the stitch width, then align the edge of the presser foot with the edge of the fabric during sewing for an attractive finish.
SEWING THE STITCHES a Press the “Presser Foot Lifter” button to raise the presser foot and turn the main power to OFF. g Insert the bobbin case in its original position (see page 227), and then attach the needle plate cover. b Remove the flat bed attachment or the embroidery unit if either are attached. h After reinstalling the needle plate cover, select any of the straight stitches. c Grasp both sides of the needle plate cover, and then slide it toward you.
SEWING THE STITCHES ■ Basting Dart Seam a Select b Press the “Reverse/Reinforcement Stitch” button to sew reinforcement stitches, then continue sewing. and attach presser foot “J”. a Select b Sew a reverse stitch at the beginning of the dart and then sew from the wide end to the other end without stretching the fabric. * and attach presser foot “J”. If automatic reinforcement stitching is preset, a reinforcement stitch will automatically be sewn at the beginning of sewing.
SEWING THE STITCHES e Iron the dart to one side so that it is flat. d Sew two rows of straight stitches parallel to the seam line, then trim excess thread leaving 50 mm (approx. 1-15/16 inches). b a c Gathering a Seam line b 10 to 15 mm (approx. 3/8 inch to 9/16 inch) c About 50 mm (approx. 1-15/16 inches) Use on waists of skirts, sleeves of shirts, etc. a b * Select a straight stitch and attach presser foot “J”.
SEWING THE STITCHES e Flat Fell Seam Fold the longer seam allowance around the shorter one, and sew the edge of the fold. Use for reinforcing seams and finishing edges neatly. a a Select and attach presser foot “J”. With right sides of the fabric together, sew b the seam line, then cut half of the seam allowance from the side on which the flat fell seam will lie.
SEWING THE STITCHES c Select d Sew a straight stitch along the fold. * and attach presser foot “I”. When the automatic thread cutting and automatic reinforcement stitching are preset, reinforcement stitches will be sewn automatically at the beginning of sewing. Press the “Reverse/Reinforcement Stitch” button to sew a reinforcement stitch and trim the thread automatically at the end of sewing. a b c I a Width for pintuck b Wrong side c Surface e 70 Iron the folds in the same direction.
SEWING THE STITCHES Zigzag Stitches Zigzag stitches are useful for overcasting, appliqué, patchwork, and many other applications. Select a stitch, and attach presser foot “J”. If the stitch which you select has a double mark “ ” at the top of the key display, you can sew reverse stitches by holding the “Reverse/Reinforcement Stitch” button.
SEWING THE STITCHES ■ Patchwork (for Crazy Quilt) Turn back the desired width of fabric and position it over the lower fabric, then sew so that the stitch bridges both pieces of fabric. ■ Sewing Curves (Using a Zigzag Stitch) Shorten the stitch length setting to obtain a fine stitch. Sew slowly, keeping the seams parallel with the fabric edge as you guide the fabric around the curve. c * Snap the cord guide bobbin cover into place, making sure that the gimp thread can be fed freely.
SEWING THE STITCHES Elastic Zigzag Stitches Use elastic zigzag stitches for tape attaching, overcasting, darning, or a wide variety of other uses. Stitch Presser foot Stitch width [mm (inch.)] Applications Stitch length [mm (inch.)] Twin needle Auto. Manual Auto. Manual 2 step elastic zigzag Overcasting (medium weight and stretch fabrics), tape and elastic 5.0 (3/16) 1.5 - 7.0 (1/16 - 1/4) 1.0 (1/16) 0.2 - 4.
SEWING THE STITCHES Overcasting Use for the beginning and end of seams in skirts or trousers, and the beginning and end of all cuttings. Use presser foot “G”, presser foot “J”, or the optional side cutter attachment depending on the kind of overcasting stitch you select. ■ Overcasting Using Presser Foot “G” Stitch Stitch name Overcasting stitch Overcasting stitch Overcasting stitch a Presser foot Stitch width [mm (inch.
SEWING THE STITCHES ■ Overcasting Using Presser Foot “J” Stitch Stitch name Presser foot Stitch width [mm (inch.)] Applications Overcasting stitch Reinforced seaming of stretch fabric Overcasting stitch Reinforcing of medium stretch fabric and heavyweight fabric, decorative stitching Overcasting stitch Reinforcement of stretch fabric or decorative stitching Overcasting stitch Stretch knit seam Stitch length [mm (inch.)] Twin needle Auto. Manual Auto. Manual 5.0 (3/16) 0.0 - 7.
SEWING THE STITCHES ■ Overcasting Using the Optional Side Cutter By using the side cutter, you can do overcasting while cutting the fabric. CAUTION • Make sure to only select one of the stitches listed below. Using another stitch may cause the needle to hit the presser foot and break, possibly causing injury. Memo Thread the needle manually when using the side cutter, or only attach the side cutter after threading the needle using the “Automatic Threading” button.
SEWING THE STITCHES d Position the side cutter so that the side cutter pin is aligned with the notch in the presser foot holder, and then lower the presser foot. b g Thread the needle manually and pull out a long section of the upper thread. Pass it below the presser foot and pull it out in the fabric feed direction. a b a a Notch in presser foot holder b Pin → The side cutter is attached. e h Start sewing. a a 20 mm (approx.
SEWING THE STITCHES ■ When Sewing Straight Stitches While Using the Side Cutter The seam margin should be approximately 5 mm (approx. 3/16 inch). a a Seam margin Memo • The fabric will not be cut if the whole fabric is simply spread out underneath the presser foot guide plate. Set the fabric as explained in step f from the previous section, and then start sewing. • One layer of 13 oz. denim can be cut. • Clean the side cutter after use to avoid having dust and scraps of thread build up on it.
SEWING THE STITCHES Quilting You can make beautiful quilts quickly and easily with this machine. When making a quilt, you will find it convenient to use the knee lifter and foot controller to free your hands for other tasks (see “Using the Foot Controller” on page 45 and /or see “Using the Knee Lifter” on page 53). If there is a “P” or “Q” at the bottom of the key display, the indicated stitch is intended for quilting. Pattern Name of pattern Type of presser foot Use Piecework/patchwork 6.5 mm (approx.
SEWING THE STITCHES ■ Piecing ■ Quilting Sewing two pieces of fabric together is called piecing. When cutting pieces for quilt blocks, make sure the seam allowance is 6.5 mm (approx. 1/4 inch). a Select or and attach presser foot “J”. b Align the edge of the fabric with the edge of the presser foot, and start sewing. * To sew a 6.5 mm (approx. 1/4 inch) seam allowance along the right edge of the presser foot with selected, the width should be set to 5.5 mm (approx. 7/32 inch).
SEWING THE STITCHES ■ Appliqué a Trace the pattern onto the appliqué fabric and then cut around it, leaving a 3 to 5 mm (approx. 1/8 to 3/16 inch) seam allowance. d Select e Use the quilting appliqué stitch to attach the appliqué. Sew around the edge while dropping the needle as close to the edge as possible. and attach presser foot “J”. J a a Seam allowance: 3 to 5 mm (approx.
SEWING THE STITCHES ■ Quilting with Satin Stitches Use the foot controller to sew with satin stitches. If you set the speed control slide to control the stitch width, you can make subtle changes in the stitch width during sewing. a Attach the foot controller (see page 45). b Select c Press e Set the width control to “ON”. and attach presser foot “J”. in the length display to shorten the stitch length. Memo You can use the speed control slide to adjust the stitch width.
SEWING THE STITCHES ■ Free-motion Quilting Memo With free-motion quilting, the feed dogs can be lowered (using the feed dog position switch) so that the fabric can be moved freely in any direction. For free-motion quilting, use free-motion quilting foot “C” or free-motion open toe quilting foot “O” depending on the stitch that is selected, and set the machine to free-motion sewing mode. In this mode, the presser foot is raised to the necessary height for free-motion sewing.
SEWING THE STITCHES b Press to set the machine to free- motion sewing mode. d Remove the presser foot holder (see page 38). e Attach free-motion quilting foot “C” at the front with the presser foot holder screw aligned with the notch in the quilting foot. a b a Presser foot holder screw b Notch Note Make sure that the quilting foot is attached properly and not slanted. f → The key appears as , and the quilting foot is raised to the necessary height for free-motion sewing.
SEWING THE STITCHES g Lower the feed dog position switch, located at the rear of the base of the machine, to . a The free-motion open toe quilting foot “O” is used for free-motion quilting with zigzag or decorative stitches or for free-motion quilting of straight lines on fabric with an uneven thickness. Various stitches can be sewn using free-motion open toe quilting foot “O”. For details on the stitches that can be used, refer to the “Stitch Setting Chart” at the end of this manual.
SEWING THE STITCHES a Press to set the machine to free- e motion sewing mode. Hold the quilting foot in place with your right hand, and tighten the presser foot holder screw using the screwdriver with your left hand. a a Presser foot holder screw CAUTION • Be sure to securely tighten the screws with the included screwdriver. Otherwise, the needle may touch the quilting foot, causing it to bend or break.
SEWING THE STITCHES Free-motion echo quilting foot “E” measurement a Press to set the machine to free- motion sewing mode. a 6.4 mm (approx. 1/4 inch) b 9.5 mm (approx. 3/8 inch) 3 • With free-motion quilting, control the feeding speed of the fabric to match the sewing speed. If the fabric is moved faster than the sewing speed, the needle may break or other damage may result. → The key appears as , and the quilting foot is raised to the necessary height for free-motion sewing.
SEWING THE STITCHES f Tighten the screw with the included screwdriver. Finished project h Press mode. CAUTION • Be sure to securely tighten the screws with the included screwdriver. Otherwise, the needle may touch the quilting foot, causing it to bend or break. g Using the measurement on the quilting foot as a guide, sew around the motif. a 6.4 mm (approx.
SEWING THE STITCHES Blind Hem Stitches Select from these stitches to sew the hems or cuffs of dresses, blouses, pants, or skirts. Stitch Presser foot Stitch name Blind hem stitch Hemming woven fabrics Blind hem stitch stretch a Stitch width [mm (inch.)] Applications Hemming stretch fabric d Select a stitch. Stitch length [mm (inch.)] Twin needle Auto. Manual Auto. Manual 0.0 (0) 3← - →3 2.0 (1/16) 1.0 - 3.5 (1/16 - 1/8) NO 0.0 (0) 3← - →3 2.0 (1/16) 1.0 - 3.
SEWING THE STITCHES f Remove the basting stitches and turn the fabric over. Appliqué a * a Use a temporary spray adhesive, fabric glue or a basting stitch to attach the appliqué to the fabric. This will keep the fabric from moving during sewing. b a a Wrong side of fabric b Right side of fabric Memo Blind hem stitches cannot be sewn if the left needle drop point does not catch the fold.
SEWING THE STITCHES ■ Sewing Sharp Curves Stop the machine with the needle in the fabric outside the appliqué. Raise the presser foot and turn the fabric a little bit at a time while sewing for an attractive finish to the seam. c To make rows of shell tuck stitches, fold the fabric in half along the bias. Memo Use a thin fabric. Memo d Attach presser foot “J”. Set the needle drop point slightly off the edge of the fabric, and start sewing.
SEWING THE STITCHES Scallop Stitches This wave-shaped satin stitch is called the scallop stitch. Use this stitch to decorate the edges of blouse collars and handkerchiefs or use it as a hem accent. Memo A temporary spray adhesive may be necessary for lightweight fabrics. Test sew the fabric before sewing a project. a Select Top Stitching For a decorative look called “Crazy Quilting”, the following stitches can be sewn on top of a pressed seam allowance.
SEWING THE STITCHES Smocking Stitches g Sew the spaces between the straight seams. Use smocking stitches for decorative sewing on clothes, etc. J Select a straight stitch and attach presser a foot “J”. b Set the stitch length to 4.0 mm (approx. 3/16 inch) and loosen the upper thread tension to approximately 2.0 (See pages 49 through 50). Pull the bobbin and upper threads out by 50 mm (approx. 1-15/16 inches). d Sew the seams, leaving approximately 10 mm (approx.
SEWING THE STITCHES c Attach presser foot “J”. Align the center of the presser foot with the middle of the space between the fabrics and begin sewing. d Place the tape over the gather, and hold it in place with basting pins. a a Tape a e a Basting stitches d Select or . Memo Memo Use a thick thread. For details on each stitch, refer to the “STITCH SETTING CHART” at the end of this manual. When sewing is finished, gently tear the paper away. f Sew over the tape (or elastic).
SEWING THE STITCHES c Heirloom Start sewing. Example: Illustration of finished product ■ Hemstitching (1) (Daisy Stitch) Use for sewing tablecloths, decorative hems, and decorative stitching on shirt fronts. Memo Use a light to medium weight homespun fabric with a little stiffness. a Insert a type 130/705H, size 100/16 Wing needle. CAUTION b * a * Select a stitch and attach presser foot “N”. Pull out several threads from one area on a piece of fabric to open the area.
SEWING THE STITCHES d Press to create a mirror image of the a stitch. e ■ Hemstitching (3) (Drawn Work (2)) Sew the opposite side to keep the stitch symmetrical. * Pull out several threads from both sides of the 4 mm (approx. 3/16 inch) area which are not yet open. Pull out four threads, leave five threads, and then pull out four threads. The width of five threads is approximately 4 mm (approx. 3/16 inch) or less. b N c b a a Approx. 4 mm (approx.
SEWING THE STITCHES One-step Buttonholes With one-step buttonholes, you can make buttonholes appropriate to the size of your button. Stitch Stitch name Presser foot Stitch width [mm (inch.)] Applications Stitch length [mm (inch.)] Twin needle Auto. Manual Auto. Manual 5.0 (3/16) 3.0 - 5.0 (1/8 - 3/16) 0.4 (1/64) 0.2 - 1.0 (1/64 - 1/16) NO 5.5 (7/32) 3.5 - 5.5 (1/8 - 7/32) 0.4 (1/64) 0.2 - 1.0 (1/64 - 1/16) NO 5.0 (3/16) 3.0 - 5.0 (1/8 - 3/16) 0.4 (1/64) 0.2 - 1.
SEWING THE STITCHES One-step buttonholes are sewn from the front of the presser foot to the back, as shown below. a a a a a Reinforcement stitching a Select a buttonhole stitch, and attach buttonhole foot “A”. b Mark the position and length of the buttonhole on the fabric. c Pull out the button holder plate on the presser foot, and insert the button that will be put through the buttonhole. Then tighten the button holder plate around the button.
SEWING THE STITCHES d Align the presser foot with the mark on the fabric, and lower the presser foot. f * a A Feed the fabric carefully by hand while the buttonhole is sewn. b a Mark on the fabric b Marks on the presser foot Note → Once sewing is completed, the machine automatically sews reinforcement stitches, and then stops. Memo If automatic thread cutting is turned on before you start sewing, both threads are automatically cut after the reinforcement stitches are sewn.
SEWING THE STITCHES c Memo For keyhole buttonholes, use the eyelet punch to make a hole in the rounded end of the buttonhole. Then insert a pin along the inside of one of the bar tacks, insert a seam ripper into the hole made with the eyelet punch, and cut towards the pin. Once sewing is completed, gently pull the gimp thread to remove any slack, and trim off any excess. b Memo a After using the seam ripper to cut open the threads over the buttonhole, trim off the threads.
SEWING THE STITCHES Four-step Buttonholes You can sew 4-step buttonholes using the following 4 stitches together. You can sew any desired length for the buttonhole when using 4-step buttonholes. 4-step buttonholes are a good option when attaching oversize buttons. Note When changing the stitch settings for the left side of the buttonhole, make sure that all setting should be changed to match. Stitch Presser foot Stitch name 4 step buttonhole 1 Stitch width [mm (inch.
SEWING THE STITCHES c Press the “Start/Stop” button to start sewing. d Sew the desired length for the buttonhole and press the “Start/Stop” button again. e Select stitch to sew the bar tack and press the “Start/Stop” button. → The machine will automatically stop after sewing the bar tack. f Select stitch to sew up the right side of the buttonhole, and press the “Start/Stop” button to begin sewing. g * h Sew the right side of the buttonhole and press the “Start/Stop” button again.
SEWING THE STITCHES ■ Darning Use darning stitches for mending and other applications. Stitch Stitch name Presser foot Stitch width [mm (inch.)] Applications Darning Darning of medium weight fabric Darning Darning of heavyweight fabric Stitch length [mm (inch.)] Twin needle Auto. Manual Auto. Manual 7.0 (1/4) 2.5 - 7.0 (3/32 - 1/4) 2.0 (1/16) 0.4 - 2.5 (1/64 - 1/16) NO 7.0 (1/4) 2.5 - 7.0 (3/32 - 1/4) 2.0 (1/16) 0.4 - 2.
SEWING THE STITCHES d Lower the buttonhole lever so that it is positioned behind the metal bracket on the buttonhole foot. a a Buttonhole lever a a Metal bracket e Gently hold the end of the upper thread, and then press the “Start/Stop” button to start the machine. → Once sewing is completed, the machine automatically sews reinforcement stitches, and then stops.
SEWING THE STITCHES Bar Tacks Use bar tacks to reinforce areas that will be subject to strain, such as pocket corners. Stitch Stitch name Presser foot Stitch width [mm (inch.)] Applications Bar tack Reinforcement at opening of pocket, etc. c a Select b Attach buttonhole foot “A” and set the scale to the length of the bar tack you wish to sew. . Stitch length [mm (inch.)] Auto. Manual Auto. Manual 2.0 (1/16) 1.0 - 3.0 (1/16 - 1/8) 0.4 (1/64) 0.3 - 1.
SEWING THE STITCHES e Lower the buttonhole lever so that it is positioned behind the metal bracket on the buttonhole foot. ■ Bar Tacks on Thick Fabrics Place a piece of folded fabric or cardboard beside the fabric being sewn to level the buttonhole foot and allow for easier feeding. a c b a Presser foot b Thick paper c fabric Memo a a Metal bracket f Gently hold the end of the upper thread and begin sewing.
SEWING THE STITCHES Button Sewing Buttons can be sewn on using the machine. Buttons with 2 or 4 holes can be attached. Stitch Presser foot Stitch name Button sewing Stitch width [mm (inch.)] Applications Attaching buttons Stitch length [mm (inch.)] Auto. Manual Auto. Manual 3.5 (1/8) 2.5 - 4.5 (3/32 - 3/16) — — Twin needle NO Note • Do not use the automatic thread cutting function when sewing buttons. Otherwise, you will lose the thread ends. Select .
SEWING THE STITCHES ■ Attaching 4 Hole Buttons Sew the two holes closest to you. Then raise the presser foot and move the fabric so that the needle goes into the next two holes, and sew them in the same way. c Tie the ends of the bobbin thread from the beginning and end of sewing together on the wrong side of the fabric. Note • When sewing is completed, be sure to return the feed dog position switch to its original position.
SEWING THE STITCHES Eyelet Use this stitch for making belt holes and other similar applications. Stitch Presser foot Stitch name Eyelet b Use — d . Manual — — — Twin needle NO NO Lower the presser foot and start sewing. → When sewing is finished, the machine sews reinforcement stitches and stops automatically. in either the stitch width Note If the stitch pattern comes out poorly, make adjustments (see page 121). display or the stitch length display to choose the size of the eyelet.
SEWING THE STITCHES Multi-directional Sewing (Straight Stitch and Zigzag Stitch) c Set the needle in the fabric at the sewing start point, and sew seam “1” as shown. a Use these stitch patterns to attach patches or emblems to pant legs, shirt sleeves, etc. a Remove the flat bed attachment to create the free arm function. a Start Point d * Select and sew seam “2” as shown. The fabric will move sideways, so guide the fabric by hand to keep sewing straight.
SEWING THE STITCHES c Zipper Insertion Press the seam allowance open and attach the zipper with a basting stitch in the middle of each side of the zipper tape. ■ Centered Zipper Use for bags and other such applications. a a Select . c c b a Basting stitches b Zipper c Wrong side of fabric Remove presser foot “J”. Align the right side of the pin in zipper foot “I” with the presser foot holder, and attach the zipper foot.
SEWING THE STITCHES c CAUTION Make sure the needle does not strike the zipper during sewing. If the needle strikes the zipper, the needle may break, leading to injury. Press the seam allowance open and align the folded hem along the teeth of the zipper, while maintaining 3 mm (approx. 1/8 inch) of sewing space. a ■ Inserting a Side Zipper c Use for side zippers in skirts or dresses. a Select b . d e a b c d e Zipper pull tab Wrong side of fabric Zipper teeth End of zipper opening 3 mm (approx.
SEWING THE STITCHES f Set the presser foot in the 3 mm (approx. 1/8 inch) margin. g Starting from the end of the zipper opening, sew to a point about 50 mm (approx. 2 inches) from the edge of the fabric, then stop the machine. h Pull down the zipper slider, then continue sewing to the edge of the fabric. j Remove the presser foot, and reattach it so that the left side of the pin is attached to the presser foot holder.
SEWING THE STITCHES 114
4 Chapter 4 Character/ Decorative Stitches SELECTING STITCH PATTERNS...............................................................................................116 ■ Stitch Selection Screens....................................................................................................................................... 117 Selecting Decorative Stitch Patterns/7mm Decorative Stitch Patterns/Satin Stitch Patterns/7mm Satin Stitch Patterns/ Cross Stitch/Utility Decorative Stitch Patterns ..........
SELECTING STITCH PATTERNS SELECTING STITCH PATTERNS Press to display the screen below. a b c d e f g h i j k l b a e d c h g i k j l f Decorative stitch patterns 7mm decorative stitch patterns. You can set stitch length and width. Satin stitch patterns 7mm satin stitch patterns. You can set stitch length and width.
SELECTING STITCH PATTERNS ■ Stitch Selection Screens There are 9 categories of Character/Decorative stitch patterns. indicates that there is more than one stitch selection screen for that category.
SELECTING STITCH PATTERNS Selecting Decorative Stitch Patterns/7mm Decorative Stitch Patterns/Satin Stitch Patterns/ 7mm Satin Stitch Patterns/Cross Stitch/Utility Decorative Stitch Patterns a Select the category of the pattern you want to sew. b Press the key of the stitch pattern you want to sew. * Press to view the next page. * Press to view the previous page. * To select a different stitch pattern, press Alphabet Characters a Press , or to select a font. .
SELECTING STITCH PATTERNS ■ Deleting Characters a Press to delete the last character. 4 Memo b Select the correct character. Character/Decorative Stitches Characters are deleted individually starting with the last character entered.
SEWING STITCH PATTERNS SEWING STITCH PATTERNS Sewing Attractive Finishes To achieve attractive results when sewing character/decorative stitches, check the table below for the proper fabric/needle/thread combinations. Note • Other factors, such as fabric thickness, stabilizer material, etc., also have an effect on the stitch, so you should always sew a few trial stitches before beginning your project.
SEWING STITCH PATTERNS Memo If the fabric is pulled or pushed during sewing, the pattern may not turn out correctly. Also, depending on the pattern, there may be movement to the left and right as well as front and back. Guide the fabric with your hand to keep the fabric feeding straight and even during sewing. e Press the “Start/Stop” button to stop sewing. Press the “Reverse/Reinforcement Stitch” f button to sew reinforcement stitches.
SEWING STITCH PATTERNS d Press , and then adjust the pattern with the FINE ADJUST VERTI. or HORIZ. displays. e * Sew the stitch pattern again. If the stitch pattern still comes out poorly, make adjustments again. Adjust until the stitch pattern comes out correctly. Memo You can sew with the setting screen on the display. f Press screen. * If the pattern is bunched: Press in the FINE ADJUST VERTI. display.
EDITING STITCH PATTERNS EDITING STITCH PATTERNS ■ Key Functions You can create just the finish you want using the editing functions. Make patterns larger or smaller, make mirror images, etc. Note • Some editing functions cannot be used with certain stitch patterns. Only the functions for the displayed keys are available when a pattern is selected. 4 a b cd e c f h m j n f i g o No.
EDITING STITCH PATTERNS No. Display Key Name Explanation Page i Single/Repeat sewing Press this key to choose single stitches or continuous stitches. key 125 j Elongation key When 7mm satin stitch patterns are selected, press this key to choose from 5 automatic length settings, without changing the stitch zigzag width or stitch length settings. 125 k Size selection key Use this key to select the size of the stitch pattern (large, small).
EDITING STITCH PATTERNS Changing the Length (for 7mm Satin Stitch Patterns Only) When stitch patterns are selected, press to choose from 5 automatic length settings, without changing the stitch zigzag width or stitch length settings. Creating a Horizontal Mirror Image To create a horizontal mirror image, select a stitch pattern then press . 4 To create a vertical mirror image, select a stitch pattern then press . Sewing a Pattern Continuously Press to select continuous sewing or single stitch sewing.
EDITING STITCH PATTERNS Changing Thread Density (for Satin Stitch Patterns Only) After selecting the pattern, press your preferred thread density. to select Returning to the Beginning of the Pattern When sewing character/decorative stitches, you can return to the beginning of the pattern after trial sewing or when the stitching is sewn incorrectly. a Press the “Start/Stop” button to stop the machine, and then press .
EDITING STITCH PATTERNS b Press the “Start/Stop” button to continue sewing. c Press d Use to display the enlarged image. Checking the Image You can display an approximate size image of the selected stitch pattern. You can also check and change the colors of the image on the screen. a Press . to view any part of → An image of the selected pattern is displayed. b Press to change the thread color in Character/Decorative Stitches the image that extends out of the viewable display area.
COMBINING STITCH PATTERNS COMBINING STITCH PATTERNS You can combine many varieties of stitch patterns, such as character stitches, cross stitches or satin stitches. You can also combine stitch patterns of different sizes, mirror image stitch patterns, and others. Before Combining Single stitch sewing is automatically selected for sewing combined patterns. If you want to sew the pattern continuously, press after finishing the stitch pattern combination.
COMBINING STITCH PATTERNS c Press . e Select f Press . → The display returns to the stitch selection screen. . 4 to sew the pattern Character/Decorative Stitches d Press continuously. * Press to view the completed pattern (see page 127). g Press . Memo Patterns are deleted individually starting with the last pattern entered by pressing .
COMBINING STITCH PATTERNS Combining Large and Small Stitch Patterns c Press to sew continuously. Example: → The entered pattern is repeated. a Press Combining Horizontal Mirror Image Stitch Patterns . → The large size stitch will be selected. Example: b Press again, then press to select the small size. → The pattern is displayed in a smaller size.
COMBINING STITCH PATTERNS a Press b Press Combining Stitch Patterns of Different Length . again, then press . Example: 4 → The pattern is flipped horizontally. c Press . Press , then press once. → The length of the image is set to b Select . again, then press 3 times. Character/Decorative Stitches a → The entered pattern is repeated. → The length of the image is set to .
COMBINING STITCH PATTERNS c Press . Example: a Press . b Press . → The entered pattern is repeated. Making Step Stitch Patterns (for 7mm Satin Stitch Patterns Only) You can use the keys with 7mm satin stitch patterns to create a step effect. Stitch patterns sewn so that they create a step effect are called step stitch patterns. * Press to move the stitch pattern a distance equal to half of the stitch pattern’s size to the left.
COMBINING STITCH PATTERNS d Press ■ More Examples . Press → → → → Press → → → → . → The next stitch pattern will move to the left. e Press . → → → → . 4 → → Press → → → Character/Decorative Stitches Press . → The entered pattern is repeated. → → → → → → .
USING THE MEMORY FUNCTION USING THE MEMORY FUNCTION Stitch Data Precautions Observe the following precautions when using stitch data other than that created and saved in this machine. ■ Types of Stitch Data that can be Used • In the Character/Decorative Stitch memory, only .pmu stitch data files can be used with this machine. Using data other than that created using this machine may cause the machine to malfunction.
USING THE MEMORY FUNCTION ■ Trademarks • • • • • • • • Secure Digital (SD) Card is a registered trademark or a trademark of SD Card Association. CompactFlash is a registered trademark or a trademark of Sandisk Corporation. Memory Stick is a registered trademark or a trademark of Sony Corporation. Smart Media is a registered trademark or a trademark of Toshiba Corporation. Multi Media Card (MMC) is a registered trademark or a trademark of Infineon Technologies AG.
USING THE MEMORY FUNCTION Saving Stitch Patterns in the Machine’s Memory b * Press . Press to return to the original screen without saving. You can save often-used stitch patterns in the machine’s memory. The machine’s memory can hold up to 20 stitch patterns, each holding up to 70 entries per memory pocket. Note • Do not turn the main power to OFF while the “Saving” screen is displayed. You will lose the stitch pattern you are saving. Memo • It takes a few seconds to save a stitch pattern.
USING THE MEMORY FUNCTION b * Choose a stitch pattern to delete. Press so the pattern saved in that pocket appears. * d * Press . If you decide not to delete the stitch pattern, press . Press if you decide not to delete the stitch pattern. a 4 c Press . Character/Decorative Stitches a Pockets holding saved stitch patterns → The machine deletes the stitch pattern, then automatically saves the new stitch pattern. → A confirmation message appears.
USING THE MEMORY FUNCTION Saving Stitch Patterns to USB Media (Commercially Available) b Insert the USB media into the USB port connector on the machine. When sending stitch patterns from the machine to USB media, plug the USB media into the machine’s USB port. Depending on the type of USB media being used, either directly plug the USB device into the machine’s USB port or plug the USB Card Reader/Writer into the machine’s USB port. a Memo Some USB media may not be usable with this machine.
USING THE MEMORY FUNCTION Saving Stitch Patterns in the Computer b Press c Press . Using the included USB cable, the machine can be connected to your computer, and the stitch patterns can be temporarily retrieved from and saved on your computer. Note • Do not turn the main power to OFF while the “Saving” screen is displayed. You will lose the stitch pattern you are saving. a * Plug the USB cable connector into the corresponding USB port connectors for the computer and for the machine.
USING THE MEMORY FUNCTION d Select the stitch pattern’s .pmu file and copy the file to the computer. b * Choose a stitch pattern to retrieve. Press so the pattern saved in that pocket appears. * Press to return to the original screen without saving. a Note • Do not turn off the machine while the “Saving” screen is showing. You may lose the data. Retrieving Stitch Patterns from the Machine’s Memory a Pockets holding saved stitch patterns a Press . c * Press Press .
USING THE MEMORY FUNCTION Recalling from USB Media d Press the key of the stitch pattern you want to recall. e Press You can recall a specific stitch pattern from either direct USB media or a folder in the USB media. If the stitch pattern is in a folder, check each folder to find the stitch pattern. a Insert the USB Media into the USB port connector on the machine (see page 138). b Press . * Press . to delete the stitch pattern. The pattern will be deleted from the USB media.
USING THE MEMORY FUNCTION Recalling from the Computer a Plug the USB cable connector into the corresponding USB connectors for the computer and for the machine (see page 139). b On the computer, open “My Computer” then go to “Removable Disk”. d Press . → The stitch patterns in the computer are displayed on the selection screen. e * Press the key of the stitch pattern you want to recall. Press to return to the original screen without recalling. c Move/copy the pattern data to “Removable Disk”.
5 Chapter 5 Embroidery BEFORE EMBROIDERING ............................144 Manually Resuming Embroidery After Turning Off the Power ..173 Embroidery Step by Step................................................. 144 MAKING EMBROIDERY ADJUSTMENTS ..... 174 Attaching Embroidery Foot “W”..................................... 145 Adjusting Thread Tension ................................................174 Attaching the Embroidery Unit .......................................
BEFORE EMBROIDERING BEFORE EMBROIDERING Embroidery Step by Step Follow the steps below to prepare the machine for embroidery. Step 9 Step 6, 8 Step 3 Step 4 Step 1, 2 Step 5 Step 7 Step # Aim Action Page 1 Presser foot attachment Attach embroidery foot “W”. 2 Checking the needle* Use needle 75/11 for embroidery. * 145 41 3 Embroidery unit attachment Attach the embroidery unit. 146 4 Bobbin thread setup** For the bobbin thread, wind embroidery bobbin thread and set it in place.
BEFORE EMBROIDERING Attaching Embroidery Foot “W” d Push the black button on the presser foot holder and remove the presser foot. a CAUTION • When attaching a presser foot, always press on the screen. You may accidentally press the “Start/Stop” button and possibly cause injury. • Be sure to use embroidery foot “W” when doing embroidery. Using another presser foot may cause the needle to strike the presser foot, causing the needle to bend or break and possibly cause injury.
BEFORE EMBROIDERING g Hold the embroidery foot in place with your right hand, and then use the included screwdriver to securely tighten the presser foot holder screw. Note • You can also sew utility/decorative stitches with the embroidery unit attached. Set the feed dog position switch on the embroidery unit to the appropriate setting. • Be sure to turn off the power before installing the embroidery unit. Otherwise, the machine may be damaged. • Do not touch the inner connector of the embroidery unit.
BEFORE EMBROIDERING c Insert the embroidery unit connection into the machine connection port. Push lightly until the unit clicks into place. Note • A confirmation message to lower the framesecuring lever after the carriage moves to its initial position. ab c a Embroidery unit connection b Machine connection port c Feed dog position switch • The message will disappear after 15 seconds or press Note to move to the next step. • Be sure there is no gap between the embroidery unit and the sewing machine.
BEFORE EMBROIDERING c Hold down the release button, and pull the embroidery unit away from the machine. a a Release button CAUTION • Do not carry the embroidery unit by holding the release button compartment. • Be sure to close the cover of the connection port when the embroidery unit is not being used.
SELECTING PATTERNS SELECTING PATTERNS ■ Copyright Information The patterns stored in the sewing machine and embroidery cards are intended for private use only. Any public or commercial use of copyrighted patterns is an infringement of copyright law and is strictly prohibited. There are many character and decorative embroidery patterns stored in the machine’s memory (see the “QUICK REFERENCE GUIDE” for a full summary of patterns in the machine’s memory).
SELECTING PATTERNS ■ Pattern Selection Screens There are 5 categories of patterns in this machine. indicates that there is more than one pattern selection screen for that category.
SELECTING PATTERNS Selecting Embroidery Patterns/ Floral alphabet Patterns/ Baby Lock Exclusive Embroidery Designs a Select the category of the pattern you want to embroider. b Press the key of the pattern you want to embroider. * Press to view the next page. * Press to view the previous page. c Press to create a mirror image of the pattern as needed. * d If you make a mistake selecting the pattern, press the key of the pattern you want to embroider. Press .
SELECTING PATTERNS Selecting Alphabet Character Patterns a Press b Press the key of the font you want to embroider. . c Press to change the selection screen, and then enter the characters that you want to embroider. * To enter a space, press * If you want to change the size of a character, select the character and then press . to change the size. The size changes each time you press the key, from large to medium to small. * If you make a mistake, press * mistake.
SELECTING PATTERNS d Press . Selecting Frame Patterns a Press b Press the key of the frame shape you want to embroider in the top part of the screen. . a → The sewing screen is displayed. e * b Proceed to see “VIEWING THE SEWING SCREEN” on page 155 to embroider the pattern. To return to the previous screen to select another pattern, press . a Frame shapes b Frame patterns c Press the key of the frame pattern you want to embroider.
SELECTING PATTERNS e * Proceed to see “VIEWING THE SEWING SCREEN” on page 155 to embroider the pattern. a * To return to the previous screen to select another pattern, press Insert the card completely into the slot on the right side of the machine. Insert the embroidery card so that the end with a printed arrow is facing the front. . b Press . Selecting Patterns from Embroidery Cards ■ About Embroidery Cards (Sold Separately) • Use only embroidery cards manufactured for this machine.
VIEWING THE SEWING SCREEN VIEWING THE SEWING SCREEN f g a h i b c j d e k l 5 * Embroidery a Shows the presser foot code. Attach embroidery foot “W” for all embroidery projects. When the foot presser symbol is displayed on the screen, you are able to sew. b Shows the boundary for embroidering with the extra large frame (30 cm × 18 cm (approx. 12 inches × 7 inches)). c Shows a preview of the selected pattern. d Shows the size of the selected pattern.
VIEWING THE SEWING SCREEN ■ Key Functions Using these keys, you can change the size of the pattern, rotate the pattern, etc. m n No. Display Key Name op q r s t vw u x y Explanation Page m Image key Press this key for a preview of the sewn image. 164 n Arrow keys Press an arrow key to move the pattern in the direction shown by the arrow. (Press the Center key to return the pattern to the center of the embroidery area.
PREPARING THE FABRIC PREPARING THE FABRIC CAUTION • Use fabrics with a thickness of less than 3 mm (approx. 1/8 inch). Using fabrics thicker than 3 mm (approx. 1/8 inch) may cause the needle to break. • When using layers with thicker batting etc., you can sew more attractive embroidery by adjusting the embroidery presser foot height in the embroidery settings screen (see below).
PREPARING THE FABRIC Hooping the Fabric in the Embroidery Frame ■ Types of Embroidery Frames Extra Large Large Medium Small Can embroider an area 30 cm × 18 cm (approx. 12 inches × 7 inches) Can embroider an area 18 cm × 13 cm (approx. 7 inches × 5 inches) Can embroider an area 10 cm × 10 cm (approx. 4 inches × 4 inches) Can embroider an area 2 cm × 6 cm (approx. 1 inch × 2-1/2 inches) Use when embroidering connected or combined characters or patterns, or when embroidering large patterns.
PREPARING THE FABRIC c ■ Inserting the Fabric Note • If the fabric is placed loose in the embroidery frame, the embroidery design will sew out poorly. Insert the fabric on a level surface, and gently stretch the fabric taut in the frame. Follow the steps below to insert the fabric correctly. a Slightly tighten the frame adjustment screw, and then remove the slack in the fabric by pulling on the edges and corners. Do not loosen the screw.
PREPARING THE FABRIC e Return the frame adjustment screw to its initial position. d Remove the embroidery sheet. ■ Using the Embroidery Sheet When you want to embroider the pattern in a particular place, use the embroidery sheet with the frame. a With a chalk pen, mark the area of the fabric you want to embroider. a Embroidering Small Fabrics or Fabric Edges Use an embroidery stabilizer to provide extra support. After embroidering, remove the stabilizer carefully.
PREPARING THE FABRIC ■ Embroidering Ribbons or Tape Secure with double-sided tape or a temporary spray adhesive.
ATTACHING THE EMBROIDERY FRAME ATTACHING THE EMBROIDERY FRAME Note Wind and insert the bobbin before attaching the embroidery frame. a Press the “Presser Foot Lifter” button to raise the presser foot. b Align the embroidery frame guide with the right edge of the embroidery frame holder. d Lower the frame-securing lever to be level with the frame to secure the embroidery frame in the embroidery frame holder.
CONFIRMING THE PATTERN POSITION CONFIRMING THE PATTERN POSITION The pattern is normally positioned in the center of the embroidery frame. You can check the layout before starting embroidery and change the position. Checking the Pattern Position b The embroidery frame moves and shows the pattern position. Watch the frame closely to make sure the pattern will be sewn in the right place. a Press From , press the key for the position that you want to check. .
CONFIRMING THE PATTERN POSITION Previewing the Completed Pattern a Press . → An image of the pattern as it will be embroidered appears. b Press to select the frame used in the preview. * Frames displayed in light gray cannot be selected. * Press * The pattern can be sewn as it appears in the following display. to see a full screen preview. Memo You can begin sewing from this screen by pressing the “Start/Stop” button. 164 c Press screen.
SEWING AN EMBROIDERY PATTERN SEWING AN EMBROIDERY PATTERN Sewing Attractive Finishes There are many factors that go into sewing beautiful embroidery. Using the appropriate stabilizer (see page 157) and hooping the fabric in the frame (see page 158) are two important factors mentioned earlier. Another important point is the appropriateness of the needle and thread being used. See the explanation of threads below.
SEWING AN EMBROIDERY PATTERN Sewing Embroidery Patterns c Trim the excess thread at the start of the color. If the end of the thread is under the presser foot, raise the presser foot, then trim the excess thread. d Press the “Start/Stop” button to start embroidering. Example: b a → When the first color is completely sewn, the machine will automatically trim the threads and stop. The presser foot will then automatically be raised.
SEWING AN EMBROIDERY PATTERN f Repeat the same steps for embroidering the remaining colors. → When the last color is sewn, “Finish sewing” will appear on the display. Press , and the ■ When Threading Manually a Thread the machine manually with the first color (see “Threading Manually” on page 31). b Lower the presser foot, then press the “Start/Stop” button to start embroidering. After 5-6 stitches, press the “Start/Stop” button again to stop the machine.
SEWING AN EMBROIDERY PATTERN Sewing Embroidery Patterns Which Use Appliqué There are some patterns which call for an appliqué inside the pattern. Prepare the base fabric and the appliqué fabric (appliqué piece). c * Remove the appliqué material from the embroidery frame, and then cut carefully along the stitching. After cutting, remove all of the stitching thread carefully. Carefully cut out the pattern on the outline you just sewed.
SEWING AN EMBROIDERY PATTERN f Apply a thin layer of adhesive or spray adhesive to the back of the appliqué piece and attach it to the appliqué position so that it follows the seam of the outline. Memo If the appliqué material is a lightweight fabric, you may want to use a fusible web on the back to stabilize the fabric and for appliqué placement. Fuse appliqué in place with an iron. Do not remove fabric from the frame to iron the appliqué material. g Press the “Start/Stop” button.
ADJUSTMENTS DURING THE EMBROIDERY PROCESS ADJUSTMENTS DURING THE EMBROIDERY PROCESS Note • Be careful not to bump the embroidery unit carriage or the presser foot when removing or attaching the embroidery frame. Otherwise, the pattern will not embroider correctly. If the Bobbin Runs Out of Thread When the bobbin begins to run out of thread during embroidering, the machine will stop and b * Unlock the frame-securing lever and remove the embroidery frame.
ADJUSTMENTS DURING THE EMBROIDERY PROCESS If the Thread Breaks During Sewing e Press to return to the original screen. a Press the “Start/Stop” button to stop the machine. b If the upper thread is broken, redo the upper threading. If the bobbin thread is broken, press Press Press the “Presser Foot Lifter” button to lower the presser foot, and press the “Start/ Stop” button to continue sewing.
ADJUSTMENTS DURING THE EMBROIDERY PROCESS Automatically Resuming Embroidery When the Power Goes Off d Press the “Start/Stop” button to continue embroidering. a The current color, stitch number and design position are saved when the power is interrupted during embroidering. The next time that the machine is turned on, you can resume embroidering. Memo Even if the power goes out in the middle of embroidery, the machine returns to the point where embroidery was stopped when the machine is turned on again.
ADJUSTMENTS DURING THE EMBROIDERY PROCESS Manually Resuming Embroidery After Turning Off the Power c Use , , or to advance the pattern to slightly before where sewing stopped. Example: If the power is turned off while sewing the second color a Select the pattern and press . d Press to return to the original screen. Press to move the second color to the first position in the display.
MAKING EMBROIDERY ADJUSTMENTS MAKING EMBROIDERY ADJUSTMENTS Adjusting Thread Tension a Press b Press c Press . When embroidering, the thread tension should be set so that the upper thread can slightly be seen on the wrong side of the fabric. ■ Correct Thread Tension The pattern can be seen from the wrong side of the fabric. If the thread tension is not set correctly, the pattern will not finish well. The fabric may pucker or the thread may break.
MAKING EMBROIDERY ADJUSTMENTS Using the Automatic Thread Cutting Function (END COLOR TRIM) Function (JUMP STITCH TRIM) The automatic thread cutting function will cut the thread at the end of sewing each color. This function is initially turned on. To turn this automatically trim any excess thread jumps within the color. This function is initially turned on. To function off, press key and then function can be turned on or off during embroidering. .
MAKING EMBROIDERY ADJUSTMENTS b Press to turn off JUMP STITCH TRIM. Adjusting the Embroidery Speed a Press b In the MAX EMBROIDERY SPEED display, use → The key will display as * The machine will not trim the thread before moving to the next stitching. and Embroidery. to change the maximum embroidery speed. * You can choose from 3 different speed levels.
MAKING EMBROIDERY ADJUSTMENTS Changing the Thread Color Display d When the thread number #123 is displayed, use to select from six embroidery thread brands pictured below. You can display the name of the thread colors, the time or embroidery thread number. Memo Colors on the screen may vary slightly from actual spool colors. a Press . b Press . c In the THREAD COLOR DISPLAY, use to display the name of the thread colors, the time or the embroidery thread number.
MAKING EMBROIDERY ADJUSTMENTS Changing the Embroidery Frame Display a b a Press . b Press . c In the FRAME DISPLAY, use c to change the embroidery frame display mode. * There are 10 choices. d e f a b c d e f d 178 Extra large frame embroidering area Center line Large frame embroidering area Medium frame embroidering area Small frame embroidering area Grid lines Press .
REVISING THE PATTERN REVISING THE PATTERN CAUTION • When you have revised the pattern, check the display of available embroidery frames and use an appropriate frame. If you use an embroidery frame not displayed as available for use, the presser foot may strike the frame and possibly cause injury. Changing the Pattern Position Use to move the pattern in the direction shown by the arrow. Press to center the pattern. The pattern can also be moved by dragging it.
REVISING THE PATTERN Aligning the Pattern and the Needle Example: Aligning the lower left side of a pattern and the needle ABC 180 a Mark the embroidery start position on the fabric, as shown. b Press .
REVISING THE PATTERN c Press b . a a Start position → The needle position moves to the bottom left corner of the pattern (the embroidery frame moves so that the needle is positioned correctly). d Press e Use Select the direction in which to change the size. * Press to enlarge the pattern proportionately. * Press to shrink the pattern proportionately. * Press to stretch the pattern horizontally. * Press to compact the pattern horizontally. * Press to stretch the pattern vertically.
REVISING THE PATTERN Rotating the Pattern a b * Select the angle of rotation for the pattern. Press to rotate the pattern 90 degrees to the left. Press . * Press to rotate the pattern 90 degrees to the right. * Press to rotate the pattern 10 degrees to the left. * Press to rotate the pattern 10 degrees to the right. * Press to rotate the pattern 1 degree to the left. * Press to rotate the pattern 1 degree to the right. * Press to return the pattern to its original position.
REVISING THE PATTERN Creating a Horizontal Mirror Image Press so it appears as to create a horizontal mirror image of the selected pattern. Press again to return the pattern to normal. Changing the Density (Alphabet Character and Frame Patterns Only) The thread density for some alphabet character and frame patterns can be changed. A setting between 80% and 120% in 5% increments can be specified. a Press .
REVISING THE PATTERN b Change the density. * Press to make the pattern less dense. * Press to make the pattern more dense. Changing the Colors of Alphabet Character Patterns Combined alphabet character patterns can be sewn with each letter in a different color. If “MULTI COLOR” is set, the machine stops after each character is sewn so that the thread can be changed to a different color. a * c a → The pattern density changes each time you press a button.
USING THE MEMORY FUNCTION USING THE MEMORY FUNCTION Embroidery Data Precautions Observe the following precautions when using embroidery data other than that created and saved in this machine. CAUTION • When using embroidery data other than our original patterns, the thread or needle may break when sewing with a stitch density that is too fine or when sewing three or more overlapping stitches. In that case, use one of our original data design systems to edit the embroidery data.
USING THE MEMORY FUNCTION ■ Computers and Operating Systems with the Following Specifications can be Used • Compatible models: IBM PC with a USB port as standard equipment IBM PC-compatible computer equipped with a USB port as standard equipment • Compatible operating systems: Microsoft Windows 98SE/Me/2000/XP (Windows 98SE requires a driver. Download the driver from our Web site (www.babylock.com). In addition, only Windows 98 Second Edition can use the driver.
USING THE MEMORY FUNCTION Saving Embroidery Patterns in the Machine’s Memory b * Press . Press to return to the original screen without saving. You can save embroidery patterns that you have customized and will use often; for example, your name, patterns that have been rotated or had the size changed, patterns that have had the sewing position changed, etc. You can save up to 20 patterns. Note • Do not turn the main power to OFF while the “Saving” screen is displayed.
USING THE MEMORY FUNCTION b Select the pattern you want to delete. d * Press . If you decide not to delete the pattern, press . c Press . → The “Saving” screen displays. When the pattern is saved, the display returns to the original screen automatically. Note • Do not turn the main power to OFF while the “Saving” screen is displayed. You will lose the pattern you are saving.
USING THE MEMORY FUNCTION Saving Embroidery Patterns to USB Media (Commercially Available) b Insert the USB media into the USB port connector on the machine. When sending embroidery patterns from the machine to USB media, plug the USB media into the machine’s USB port. Depending on the type of USB media being used, either directly plug the USB device into the machine’s USB port or plug the USB Card Reader/Writer into the machine’s USB port. Memo Some USB media may not be usable with this machine.
USING THE MEMORY FUNCTION Saving Embroidery Patterns in the Computer b Press when the pattern you want to save is in the sewing screen. Using the included USB cable, the machine can be connected to your computer, and the embroidery patterns can be temporarily retrieved from and saved in your computer. Note • Do not turn the main power to OFF while the “Saving” screen is displayed. You will lose the pattern you are saving.
USING THE MEMORY FUNCTION Retrieving Patterns from the Machine’s Memory a Press c Press . . → The sewing screen is displayed. Recalling from USB Media → The machine displays the patterns currently in the memory. * Press to return to the original screen. a Insert the USB media into the USB port connector on the machine (see page 189). b Press 5 Embroidery Press the key of the pattern you want to b retrieve.
USING THE MEMORY FUNCTION c Press when there is a subfolder to sort two or more stitch patterns to USB media, the embroidery pattern in the subfolder is displayed. * Press e Press . to return to the original screen without recalling. c a → The sewing screen is displayed. b Recalling from the Computer a Plug the USB cable connector into the corresponding USB port connectors for the computer and for the machine (see page 190). b On the computer, open “My Computer” then go to “Removable Disk”.
USING THE MEMORY FUNCTION c Move/copy the pattern data to “Removable Disk”. e * Press the key of the pattern you want to recall. Press to return to the original screen. → Pattern data in “Removable Disk” is written to the machine. Note • While data is being written, do not disconnect the USB cable. d Press . f Press . 5 Embroidery → The patterns in the computer are displayed on the selection screen. → The sewing screen is displayed.
EMBROIDERY APPLICATIONS EMBROIDERY APPLICATIONS Using a Frame Pattern to Make an Appliqué (1) c Apply a thin layer of fabric glue or a temporary spray adhesive to the rear of the appliqué created in step a. Attach the appliqué to the base fabric matching the shapes. d Select the satin stitch frame pattern of the same shape as the appliqué. Embroider over the appliqué and base fabric from step c to create the appliqué. You can use framed patterns of the same size and shape to create an appliqué.
EMBROIDERY APPLICATIONS Using a Frame Pattern to Make an Appliqué (2) d Remove the embroidery frame from the embroidery unit, and cut around the outside of the stitches. This is a second method to make appliqué using embroidery patterns. You do not have to change the fabric in the embroidery frame using this method. Embroider one pattern with a straight stitch and one pattern with a satin stitch. a Select a straight stitch frame pattern, and embroider the pattern onto the base fabric.
BEFORE EMBROIDERING 196
6 Chapter 6 Embroidery Edit EXPLANATION OF FUNCTIONS.......................................................198 SELECTING PATTERNS TO EDIT .......................................................199 Selecting Embroidery Patterns/Floral Alphabet Patterns/Frame Patterns/ Baby Lock Exclusive Embroidery Designs ..............................................................200 Selecting Alphabet Character Patterns ..................................................................200 EDITING PATTERNS..........
EXPLANATION OF FUNCTIONS EXPLANATION OF FUNCTIONS With the Embroidery Edit functions, you can combine embroidery patterns and character patterns, change the size of patterns, rotate patterns, and perform many other editing functions. This machine can perform the 9 functions listed below. ■ Combine Patterns You can easily create combinations of embroidery patterns, frame patterns, character patterns, patterns from the machine’s memory, patterns from separately sold embroidery cards, and many other patterns.
SELECTING PATTERNS TO EDIT SELECTING PATTERNS TO EDIT Prepare the machine for embroidery according to the instructions on page 144, and press display the screen below.
SELECTING PATTERNS TO EDIT Selecting Embroidery Patterns/ Floral Alphabet Patterns/Frame Patterns/Baby Lock Exclusive Embroidery Designs a Select the category of the pattern. b Press the key of the pattern you want to edit. d Proceed to see “EDITING PATTERNS” on page 203 to edit the pattern. * See pages 151 and 153 for more information on selecting patterns. → The pattern is displayed in the top part of the screen. c Press .
SELECTING PATTERNS TO EDIT b * Select the font, then enter the characters. (Example: A B C D) d Select the layout. (Example: ) When selecting an arc, use and to change the degree of the arc. See page 152 for more information about selecting characters. * Press to make the arc flatter. * Press to make the arc rounder. Memo When selecting , and change to and . You can increase or decrease the incline. c Press to change the layout of the pattern.
SELECTING PATTERNS TO EDIT e Press to return to the original screen. f After you finish your selections, press . → The embroidery edit screen will appear. g 202 Proceed to see “EDITING PATTERNS” on page 203 to edit the pattern.
EDITING PATTERNS EDITING PATTERNS a b c a b c d e d e a b c d e Shows the size of the entire combined pattern. Shows the size of the pattern currently selected. Shows the distance from the center of the frame. Shows the number of colors in the pattern currently selected. Shows the degree of rotation for the pattern. Memo If a key display is light gray, you cannot use that function with the selected pattern.
EDITING PATTERNS ■ Key Functions c d e a i k b a 204 Display h j l n m No. f g o Explanation Page Arrow keys Key Name Press these keys to move the pattern in the direction indicated by the arrow on 205 ( the key. (Press Center key) to return the pattern to its original position.) b Border key Press this key to make a repeating pattern. 213 c Zoom key Press this key for precise design placement. You can zoom a pattern, 100% or 200%.
EDITING PATTERNS Moving the Pattern b * Press Press to return the pattern to the center. Press to rotate the pattern 90 degrees to the left. to move the pattern in the direction shown on the key. Select the angle by which the pattern is rotated. * Press to rotate the pattern 90 degrees to the right. * Press to rotate the pattern 10 degrees to the left. * Press to rotate the pattern 10 degrees to the right. * Press to rotate the pattern 1 degree to the left.
EDITING PATTERNS c Press to return to the original b Select the direction in which to change the size. screen. * Press to enlarge the pattern proportionately. * Press to shrink the pattern proportionately. * Press to stretch the pattern horizontally. * Press to compact the pattern horizontally. * Press to stretch the pattern vertically. * Press to compact the pattern vertically. * Press to return the pattern to its original appearance.
EDITING PATTERNS Deleting the Pattern b * Press to delete the pattern from the screen. Press the key of the layout you want to embroider. See page 201 for more information about layout types. → The display will show the selected layout. Changing the Configuration of Alphabet Character Patterns a Press . c Press . Changing Alphabet Character Spacing a Press .
EDITING PATTERNS b Use or to change the spacing. * Press to widen the character spacing. * Press to tighten the character spacing. * Press to return the pattern to its original appearance. c Press screen. 208 Reducing Character Spacing The spacing between characters can be reduced to 50% of the narrowest character in the group. Note • It is not recommended to edit data and transfer to other or older version machines. Same features do not apply in other machines, so problems may occur.
EDITING PATTERNS Changing the Color of Each Alphabet Character in a Pattern a Press so you can assign a thread color to each character. b * You can change the thread color by moving the color to be changed to the top of the sewing order and selecting a new color from the thread colors in the machine. a Change the thread to sew each character in a different color. Press Changing the Thread Color to change the colors in the sewing order (see page 209). Press .
EDITING PATTERNS c Press to choose a new Creating a Custom Thread Table color from the color palette. * To return to the original color, press . If * multiple colors have been changed, this command will return all colors to their original colors. You can select colors from the color palette by directly touching the color selection with the touch pen. You can create a custom thread table containing the thread colors that you most often use.
EDITING PATTERNS c Use to select one of the thread brands in the machine. d * Repeat the previous steps until all desired thread colors are specified. To delete a specified color from the palette, select the color and press Use to enter a color’s 4-digit number. * f If you make a mistake, press g Press . to return to the original screen. to erase the entered number, and then enter the correct number. a a Thread brand e Press .
EDITING PATTERNS d Press e Repeat the previous steps until all desired thread colors are specified. * b . Press or to put the color you want to change at the top of the sewing order. To delete a specified color from the palette, press . f Press screen. to return to the original Choosing a Color from the Custom Thread Table You can select a color from the up to 300 thread colors you have set in the custom thread table. a Press . c Press . a b → The thread color palette screen displays.
EDITING PATTERNS d Press to choose a new color from the custom thread table. * Use and to scroll through the custom thread table. * Press to return to the original color. * You can select colors from the custom thread table by directly touching the screen with the touch pen. Designing Repeated Patterns ■ Sewing Repeated Patterns Using the border function, you can create stitches using repeated patterns. You can also adjust the spacing of the patterns within a repeated pattern stitch.
EDITING PATTERNS c Select the direction in which the pattern will be repeated. a e Adjust the spacing of the repeated pattern. * To widen spacing, press . * To tighten spacing, press . b d c a b c d Vertical direction Horizontal direction Repeating and deleting keys Spacing keys Memo You can only adjust the spacing of patterns enclosed in the red frame. → The pattern direction indicator will change depending on the direction selected.
EDITING PATTERNS ■ Repeating One Element of a Repeated Pattern c Press . By using the Cut function, you can select one element of a repeated pattern and repeat only that single element. This function allows you to design complex repeated patterns. a Choose the direction in which the repeated pattern will be cut. * Press to cut horizontally. * Press to cut vertically. → The repeated pattern will be divided into separate elements. d Use and to select the element to repeat.
EDITING PATTERNS e Repeat the selected element. f Press to finish repeating. ■ Assigning Thread Marks By sewing thread marks, you can easily align patterns when sewing a series. When sewing is finished on a pattern, a thread mark in the shape of an arrow will be sewn using the final thread. When sewing a series of patterns, use the point of this arrow for positioning the following designs to be sewn.
EDITING PATTERNS c Press to select the thread mark to be sewn. After Editing a Press b If you want to sew the pattern immediately, . Memo • When there are two or more elements, use and or and to select a pattern that you want to assign a thread mark(s) to. d Press press to call up the sewing screen. . 6 Embroidery Edit * Press * To combine the pattern with other patterns, select the next pattern from this screen (see page 219). See page 165 for more information about sewing patterns.
EDITING PATTERNS ■ Color Sorting Repeated Patterns Press to automatically change the sewing order of colors in combined border embroidery patterns so that the same color can be continuously sewn. This allows you to continue sewing without repeatedly changing the upper thread or changing the sewing order manually. Memo • In combined stitch patterns that contain two or more border patterns or other patterns combined with border patterns, the sewing order of only the border patterns is changed.
COMBINING PATTERNS COMBINING PATTERNS Editing Combined Patterns b Use c Press to view P.4, then select . Example: Combining alphabet characters with an embroidery pattern and editing a Press to select an embroidery pattern. .
COMBINING PATTERNS d Press f . * Select and enter “Sewing”. After selecting , press to change the character size to M, then enter the remaining characters. e Press characters. to enter the alphabet → The characters you enter will be displayed in the center of the display. g Press . h Use to move the characters. * 220 With a USB mouse, your finger or the touch pen, drag the characters to move them.
COMBINING PATTERNS i Press to change the layout of the characters. Press * j k When all editing is finished, press . . See page 207 for more information about changing the layout. Press to change the color of the characters. * See page 209 for more information about changing the color. * Press to enlarge the preview of the embroidery pattern. 6 Embroidery Edit Use to view any part of the pattern that extends out of viewable display area.
COMBINING PATTERNS ■ Selecting combined embroidery patterns If multiple patterns have been combined, use to select the pattern to be edited. If a USB mouse is connected, the pattern can be selected by clicking it. Move the mouse to position the pointer over the desired pattern, and then click the left mouse button. In addition, patterns can be selected by directly touching the screen with your finger or touch pen.
USING THE MEMORY FUNCTION USING THE MEMORY FUNCTION In the same way as embroidery patterns in Chapter 5, you can save and retrieve edited embroidery patterns to and from the machine’s memory, a personal computer, or USB media. Refer to the relevant sections in Chapter 5 on saving and retrieving embroidery patterns and follow the same procedures in order to save and retrieve edited embroidery patterns. See page 185 for more information about the MEMORY FUNCTION.
USING THE MEMORY FUNCTION 224
8 Chapter 7 Appendix CARE AND MAINTENANCE ..............................................................226 Cleaning the LCD Screen ......................................................................................226 Cleaning the Machine Casing ................................................................................226 Cleaning the Race .................................................................................................226 Cleaning the Bobbin Case ..............................
CARE AND MAINTENANCE CARE AND MAINTENANCE CAUTION • Be sure to unplug the machine before cleaning it. Otherwise, electric shock or injury may result. Cleaning the LCD Screen f Grasp the bobbin case, and then pull it out. If the screen is dirty, gently wipe it with a soft, dry cloth. Do not use organic solvents or detergents. Cleaning the Machine Casing If the surface of the machine is dirty, lightly soak a cloth in a neutral detergent, squeeze it out firmly, and then wipe the surface.
CARE AND MAINTENANCE h Insert the bobbin case so that the projection on the bobbin case aligns with the spring. a Thread wax and dust easily collect around the notch in the tension spring on the bobbin case, resulting in an incorrect thread tension. Therefore, the bobbin case should be cleaned as necessary should tension problems arise.
ADJUSTING THE SCREEN ADJUSTING THE SCREEN Screen Visibility is Low If the screen is difficult to see when you turn on the power, follow the steps below. a Press your finger anywhere on the screen. Holding your finger on the screen, turn the main power switch to OFF and back to ON. Touch Panel is Malfunctioning If the screen does not respond correctly when you touch a key (the machine does not perform the operation or performs a different operation), follow the steps below to make the proper adjustments.
ADJUSTING THE SCREEN c * Using the included touch pen, lightly touch the center of each +, in order from 1 to 5. If the buzzer sounds one time after you press number 5, the operation is finished. If the buzzer sounds twice, there was an error. In this case, repeat the steps above. Note • Only use the included touch pen to touch the screen. Do not use a mechanical pencil, pin, or other sharp object. Do not press strongly on the screen. Otherwise, damage may result.
TROUBLESHOOTING TROUBLESHOOTING If you have a minor problem with your sewing machine, check the following solutions. If the solutions suggested do not correct the problem, contact your authorized retailer. You can also press for advice about minor sewing problems during sewing. Press the original screen. Problem Upper thread breaks Bobbin thread breaks Skipped stitches Cause at any time to return to Solution Machine is not threaded correctly (used the Rethread the machine correctly.
TROUBLESHOOTING Problem Cause Solution Page Cannot lower the presser foot with the presser foot lever Presser foot was raised using the “Presser Foot Press the “Presser Foot Lifter” button to lower Lifter” button. the presser foot. 3 Thread tension is incorrect Upper threading is incorrect. Check the steps for threading the machine and rethread the machine. 29 Bobbin is set incorrectly. Reset the bobbin.
TROUBLESHOOTING Problem Needle breaks Fabric does not feed through the machine Machine does not operate Cause Solution Needle is installed incorrectly. Reinstall the needle correctly. Needle clamp screw is not tightened. Tighten the needle clamp screw. 40 Needle is turned or bent. Replace the needle. 39 Using improper needle or thread for the selected fabric. Check the “Fabric/Thread/Needle Combination” chart. 41 39 Wrong presser foot was used. Use the recommended presser foot.
ERROR MESSAGES ERROR MESSAGES If the machine is not properly set and the “Start/Stop” button or the “Reverse/Reinforcement Stitch” button is pressed, or if the operation procedure is incorrect, the machine does not start. An alarm sounds and an error message is displayed on the LCD. If an error message displays, follow the instructions in the message. Below is an explanation of 55 error messages.
ERROR MESSAGES 234 This message is displayed when the patterns you are editing take up too much memory, or if you are editing too many patterns for the memory. This message is displayed when the embroidery unit is attached and the power is turned on with the needle in the down position. This message is displayed when the “Start/Stop” button is pushed to sew Utility stitches or Character/Decorative stitches while the foot controller is connected. (This message does not appear when embroidering.
ERROR MESSAGES This message is displayed when the machine is in embroidery mode and the small frame is attached, and the selected pattern does not fit in the small frame. This message is displayed when the bobbin is being wound, and the motor locks because the thread is tangled, etc. This message is displayed when, with the machine in embroidery mode and the small embroidery frame or medium embroidery frame attached, the selected pattern is larger than the embroidery area of the medium embroidery frame.
ERROR MESSAGES This message is displayed when, after selecting a pattern, , or , , This message is displayed when the foot controller is pressed while the embroidery unit is attached and machine is set up for embroidering. is pressed and the pattern is about to be deleted. This message is displayed when the speed control lever is set to control the zigzag stitch width, and the “Start/ Stop” button is pushed. Use the foot controller to operate the machine.
ERROR MESSAGES This message is displayed when the “Start/Stop” button is pushed and the machine is in embroidery mode, but the embroidery unit is not attached. This message is displayed while the USB media is transmitting. This message is displayed when you try to recall or save a pattern while no USB media is loaded. This message is displayed when the memory is full and a pattern must be deleted. This message is displayed when you try to use incompatible media.
ERROR MESSAGES This message is displayed when replacing the embroidering bobbin thread. This message is displayed when the automatic needle threading button is pushed while twin needle sewing is set. This message is displayed when rotating a saved combined pattern in the Embroidery screen. This confirmation message appears after the machine is turned on and the carriage of the embroidery unit has moved to its initial position. This message is displayed when you try to use incompatible USB media.
SPECIFICATIONS SPECIFICATIONS Item Sewing Machine Embroidery Unit Specification Dimensions 55.6 cm (W) × 30.5 cm (H) × 25.8 cm (D) (approx. 21-7/8 inches (W) × 12 inches (H) × 10-1/8 inches (D)) Case Dimensions 58.2 cm (W) × 31.9 cm (H) × 28.4 cm (D) (approx. 22-7/8 inches (W) × 12-1/2 inches (H) × 11-1/8 inches (D)) Weight 12 kg (27 lb.) (with case: 14.3 kg (32 lb.)) Sewing speed 70 to 1000 stitches per minute Needles Home sewing machine needles (HA × 130) Dimensions 45.8 cm (W) × 13.
UPGRADING YOUR MACHINE’S SOFTWARE UPGRADING YOUR MACHINE’S SOFTWARE You can use USB media or a computer to download software upgrades for your sewing machine. When an upgrade program is available on www.babylock.com, please download the files following the instructions on the web site and steps below. Memo • When the machine’s software is upgraded, saved combinations of character and decorative stitches are erased. • During the process of upgrading software, the buzzer will not sound when a key is pressed.
UPGRADING YOUR MACHINE’S SOFTWARE Upgrade Procedure Using Computer a e When the message disappears, press . While pressing the “Automatic Threading” button, turn the main power to ON. → The following screen will appear on the LCD. b Press . → The upgrade file is downloaded. Note If an error occurs, a red text error message will appear. If the download is performed successfully, an “Upgrade complete.” message will appear.
UPGRADING YOUR MACHINE’S SOFTWARE 242
STITCH SETTING CHART STITCH SETTING CHART The following chart shows information for each utility stitch concerning applications, stitch lengths, stitch widths, and whether or not the twin needle mode can be used. Presser foot Stitch Stitch name Applications Stitch width [mm (inch.)] Stitch length [mm (inch.)] Auto. Manual Auto. Manual Twin needle Straight stitch (Left) General sewing, gather, pintuck, etc. Reverse stitch is sewn while pressing “Reverse/Reinforcement Stitch” button. 0.0 (0) 0.
STITCH SETTING CHART Presser foot Stitch Stitch name Applications Stitch width [mm (inch.)] Auto. Overcasting stitch Reinforcing of light and medium weight fabrics Overcasting stitch Reinforcing of heavyweight fabric Overcasting stitch Reinforcing of medium, heavyweight and easily frayable fabrics or decorative stitching.
STITCH SETTING CHART Presser foot Stitch Stitch name Applications Stitch width [mm (inch.)] Auto.
STITCH SETTING CHART Presser foot Stitch Stitch name Decorative stitch Decorative stitching Serpentine stitch Decorative stitching and attaching elastic Decorative stitch Decorative stitching and appliqué Decorative stippling stitch Decorative stitching Hemstitching Decorative hems, triple straight at left Hemstitching Decorative hems, triple straight at center Hemstitching zigzag Decorative hems, top stitching Hemstitching Decorative hems, lace attaching pin stitch Hemstitching Hemstitc
STITCH SETTING CHART Presser foot Stitch Stitch name Hemstitching Hemstitching Hemstitching Hemstitching Applications Heirloom, decorative hems Heirloom, decorative hems Heirloom, decorative hems Decorative hems and bridging stitch Hemstitching Decorative hems. Fagoting, attaching ribbon Hemstitching Decorative hems, smocking Hemstitching Hemstitching Ladder stitch Stitch length [mm (inch.)] Twin needle Auto. Manual Auto. Manual 6.0 (15/ 64) 1.5 - 7.0 (1/16 - 1/4) 3.0 (1/8) 1.
STITCH SETTING CHART Presser foot Stitch Stitch name Squared buttonhole Heavy-duty buttonholes with vertical bar tacks Stretch buttonhole Buttonholes for stretch or woven fabrics Heirloom buttonhole Buttonholes for heirloom and stretch fabrics Bound buttonhole The first step in making bound buttonholes Keyhole buttonhole Buttonholes in heavyweight or thick fabrics for larger flat buttons Tapered keyhole buttonhole Buttonholes in medium to heavy weight fabrics for larger flat buttons Keyhole b
STITCH SETTING CHART Presser foot Stitch Stitch name Applications Stitch width [mm (inch.)] Stitch length [mm (inch.)] Twin needle Auto. Manual Auto.
Index Index A Accessories included accessories ................................................................... 4 options ....................................................................................... 7 Accessory compartment ................................................................. 4 Adjustments screen ..................................................................................... 228 screen brightness .............................................................
Index carriage .......................................................................................3 carrying case ...............................................................................4 release button .................................................................... 3, 148 Error messages ............................................................................233 Eyelet ..........................................................................................
Index utility stitches ............................................................................ 60 Scallop stitches ............................................................................. 92 Settings automatic reinforcement stitching ............................................. 51 automatic thread cutting ........................................................... 52 display language ....................................................................... 20 embroidery settings ...................
Index 253
English 882-S95 XE2542-001 Printed in Taiwan