
Instruction manual


USEFUL FUNCTIONS
54
a
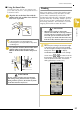
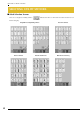
Select a stitch.
b
Press to select the pivot setting.
→ The key appears as .
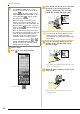
c
Place the fabric under the presser foot with
the needle at the starting point of the
stitching, and then press the “Start/Stop”
button. The machine will begin sewing.
d
Press the “Start/Stop” button to stop the
machine at the point where the sewing
direction changes.
→ The machine stops with the needle in the fabric, and
the presser foot is raised.
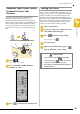
e
Rotate the fabric, and then press the “Start/
Stop” button.
→ The presser foot is automatically lowered, and
sewing continues.
Note
• The “NEEDLE POSITION” (P. 2 of the
settings screen) must be set in the down
position for the pivot function to be
used. When “NEEDLE POSITION” is set in
the raised position, appears as light
gray and cannot be used.
• When the setting is selected, the pivot
function can only be used with stitches
where presser foot J or N is indicated in the
upper-left corner of the screen. If any other
stitch is selected, appears as light gray
and is not available.
• Since the presser foot is fully raised when
the automatic thread cutting key is pressed,
press the “Presser Foot Lifter” button to
lower the presser foot, and then press the
“Start/Stop” button to continue sewing.
• If the pivot setting is selected, or
beside “PRESSER FOOT HEIGHT” in the
settings screen are not available and the
setting cannot be changed.
Memo
If you press the “Start/Stop” button to pause
sewing, then press it again to continue,
reverse stitches (or reinforcement stitches) will
not be sewn.