
Installation guide

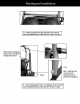


EyeProtection
RubberGloves
Thefollowing procedureisvery dangerousandshouldbe performedwith
theutmostcareandattention.Wearprotectiveeyewear,rubbergloves,and
havewateravailableshouldelectrolytecomeincontactwithskinoreyes.
KEEPALLCHILDRENAWAYFROMTHEAREAWHILETHISPROCEDUREIS
BEINGPERFORMED.
POISON- CAUSESSEVEREBURNS
Containssulfuricacid.
Avoidcontactwithskin,eyes,or clothing
Topreventaccidents,rinseemptycontainerwithwater.
Preparingthe battery:
Place batteryon levelsurface. Remove cap strip from top of battery.
(see figure 20)
Weareye protection and rubber glovesfor this step. Once battery
strip is removed, locateelectrolyte in bottle and place overthe six
openings. Pressfirmly down on bottle allowingthe battery to pierce
the six in-line openingsin bottle. Let electrolyte drain intobattery until
bottle iscompletely empty. (see figure 21)
Discardempty electrolyte container in a waste area that is inaccessible
to children and animals.
After filling let batterystand for at least 30 minutes before charging.
This allows the electrolyte to penetrate platesfor optimum performance
and ensures longerbattery life.
After 30 minutesthe batteryis ready for its initial charge. Place caps
loosely over battery cell holes (see figure 22)
How to InitiallyCharge the battery:
1. Connect the red positive (+) cableto the red positive (+) pole of the
battery.
(see figure 24)
2. Connect the black negative(-) cableto the black negative (-) pole of the
battery.(see figure 25)
Note: The red positive (+) cable has a larger diameter than the black
negativey cable.
.
Charging rate: Charge battery@ 0.7Amps for
5 ~ 10 hours.
• After chargingis complete, install securely all six batterycaps (see
figure 26)
m
\
Figure20
Figure21
Figure22
Figure24
Figure25
Figure26
-t-