Counter Top Fryers Models 616B & 616BT Operator’s Manual Belshaw Bros., Inc. 1750 22nd Avenue South Seattle, WA 98144 Phone: 206-322-5474 • Fax: 206-322-5425 Toll Free: 1-800-578-2547 E-mail: service@belshaw.com • http://www.belshaw.
To unpack the fryer and transport it to the workstation: If you accept the machine from the shipping company, you are, in effect, saying that the machine is in good condition, and you must pay for the machine. Belshaw cannot pay for shipping damage, because the freight company has accepted the machine from Belshaw in good condition, and is responsible for its safe delivery. For your protection, inspect the machine to see that no parts are bent, scratched, or otherwise damaged.
Contents Sections 1 Installation 1 Unpacking the Fryer Initial Cleaning Installing the Fryer Moving the Fryer 1 1 1 2 2 Operation 3 3 Cleaning 5 Cleaning the Exterior Surfaces Cleaning the Frying Screen Cleaning the Kettle Removing the Shortening Washing 5 5 5 5 6 4 7 Calibrating The Fryer Appendixes A Donut-Making Helps 8 Tips on Making Quality Cake Donuts Calculating Correct Water Temperature Ratios of Plunger Sizes to Donut Weights Temperature Conversion 8 9 9 9 B Electrical Compone
Preface The 616B and 616BT donut fryers have been designed and built using the finest materials and components available. It is the result of years of research and development. Designed into this unit are many features which will insure more quality in your products and reduce your operating cost. Attention to the instructions regarding installation, operation, and maintenance should result in years of troublefree service.
1 Installation Unpacking the Fryer 1. Use a fork lift to transport the shipping crate to the work station. WARNING Never let water and hot shortening come in contact with each other. Moisture causes hot shortening to spatter, which may cause serious injury. Prior to use, make sure the kettle and any other parts you have washed are dry. 2. Break down the shipping crate. 3. Remove all the packing materials from the fryer. These include foam, tape, brown paper, plastic, and white protective coating.
. The heater head assembly is equipped with a high temperature limit control. Push the reset button on the back of the heater head if power to the heater elements is cut off. 6. Level the fryer and connect it to the power source, as explained in “Installing the Fryer” above. 9. When heating shortening that has solidified, a pocket of shortening may overheat and cause the high temperature limit control to cut power to the elements. Push the reset button to resume heating.
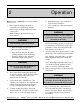
2 Operation Read each step completely before doing what it tells you to do. • Melt shortening in a pan on the stove and pour it into the kettle. 1. • Very carefully put solid shortening into the kettle. Put enough shortening in the kettle to completely cover the heating elements, thermocouple, and high-temperature limit control probe.
To fry yeast-raised donuts, place donuts on the fry screen and slowly lower the screen into the fryer. With the donut stick, turn the donuts over to fry the top side. Remove the fry screen and donuts when the donuts are completely fried by lifting up the fry screen with the donuts on top of it. Immediately place on or over a tray to catch dripping shortening. WARNING Hot shortening will drip off the fry screens, causing a slip hazard.
Cleaning For your safety, observe the following warnings throughout the entire cleaning process. 3 Cleaning the Frying Screen 1. In a sink or a dishwasher, wash the frying screen using warm water and mild detergent. Do not use an abrasive cleaner or scraper. 2. Rinse the frying screen in clear water. 3. Dry the frying screen thoroughly, using a soft cloth, before you use it again. WARNING Thoroughly clean and dry the floor if shortening, water, or other materials are spilled.
WARNING Do not use a plastic container. If the shortening is not cool enough, the container will melt, possibly causing you to be burned, and causing shortening spill. Washing 1. Wash the kettle carefully with detergent to remove all stains and burned shortening. 2. Scrub the inside of the kettle. Do not use any abrasive cleaners or scrapers. WARNING WARNING Do not allow the shortening to overflow the containers.
Calibrating The Fryer Calibration of 618-6 Temperature Indicator To check calibration, use the following steps. 4 To check calibration: 1. Important: Make sure that the fryer is filled with shortening. Read the warnings on the control panel about high temperatures. 1. Turn the dial of the thermostat to a medium temperature setting of approximately 350° F. 2. Use a good thermometer that reads temperatures up to 400°F/204°C. Place the thermometer in the shortening. 2.
Appendixes A Donut-Making Helps B Electrical Components C Parts Lists D Wiring Diagram E Limited Warranty Belshaw Bros., Inc. • 1750 22nd Ave. S.
A Donut-Making Helps Care, Maintenance and Cleaning Plungers, Cylinders and Hoppers Washing Plungers, Cylinders and Hoppers by Hand The plungers and cylinders of your donut machine are precision instruments built from alloy steels and aluminum. They should be handled with care to give continued satisfactory performance. 2. Use plenty of hot water When cleaning aluminum, selection of the right type of cleaner is your most important consideration.
If the floor time exceeds 30 minutes, the mix will gas off, the donuts will lose volume and shape and will absorb too much shortening. CAUTION Never immerse main cutter frame assemblies, cams, bearings, rollers or electrical components in water. • The correct shortening temperature for frying is 370°-380°F/188°-193°C. Special Instructions for the care of French Plungers The French plunger must be handled with great care.
Calculating Correct Water Temperature The following is an example of how to calculate the correct water temperature to use. You must use your own room temperature, dry mix temperature, desired batter temperature, and, if you are making yeast-raised donuts, estimated temperature increase during mixing. Cake Donuts Yeast-Raised Donuts °F 72 +70 142 °C 22.2 +21.1 43.3 °F 72 +70 142 °C 22.2 +21.1 43.3 Total B 75 x3 225 23.9 x3 71.7 80 x3 240 26.7 x3 80.1 Total B -Total A Desired water temp.
B Electrical Components This appendix explains how to test the continuity of electrical components in your fryer. These include the toggle switch and the thermostat. switch terminals The appendix also contains a document by the Robertshaw Controls Company, the maker of the thermostat we use in the 618L, 624, and 634. It explains how to check, adjust, and recalibrate the thermostat.
Testing the Continuity of the Thermostat WARNING To avoid the possibility of electric shock, disconnect the machine from the power source before testing. 1. Disconnect the machine from the power supply. 2. Disconnect the terminal wires from the thermostat. 3. Connect the continuity tester across the B terminals indicated in Figure B-2. This set of contacts should be closed whenever the thermostat is on. To test, start with the thermostat in the OFF position.
C Parts Lists The following pages contain lists of the parts that make up the 616B and 616BT Fryers. You can use the parts lists to order replacement parts. When you do, please provide electrical information about your fryer. Some of the part numbers vary according to the voltage, phase, and cycle of the machine. IMPORTANT The parts lists and assembly drawings are meant as guides.
FIGURE C-1. 616B/616BT FINAL ASSEMBLY. BILL OF MATERIAL ITEM QTY. PART NO. 1 1 --------------- 2 FASTENERS DESCRIPTION Heater Head Assembly ITEM QTY. PART NO. A 1 1/4-20 DESCRIPTION Hex Nut Hex Head Mch.
FIGURE C-2. 616B/616BT HEATER HEAD ASSEMBLY. BILL OF MATERIAL ITEM 1 2 QTY. 1 PART NO. ----------- FASTENERS DESCRIPTION Heater Head Case Assembly: ITEM A QTY. 5 PART NO. 10-24x3/8 DESCRIPTION Round Head Slotted Mch. Screw 1 616B-500 616B Fryer Only B 2 6-21x1/4 Pan Head Slotted Mch.
D Wiring Diagrams This section contains the wiring diagram for this machine. 616B-4000 (Domestic) Belshaw Bros., Inc. • 1750 22nd Ave. S.
Belshaw Bros., Inc. •1750 22nd Ave. S.
US/Canada/Mexico Limited Warranty and Return Policy Belshaw Brothers Inc. warrants parts of its manufacture and assembly of equipment to be free from defects in workmanship and material which would result in product failure under normal use and service. Belshaw’s entire liability under this Warranty is limited to either repairing or replacing at its factory or; on user’s premises, at Belshaw’s option, any equipment or parts thereof, which shall be determined by Belshaw to be defective.
Exclusions This warranty excludes from its coverage and does not apply to: (a) solenoid and relay coils; (b) lamps; (c) “O” rings; (d) belts; and (e) impellers. These items are excluded because (1) failure is usually due to causes beyond our control; (2) it is not practical to accurately determine the failure cause; and (3) the normal life of the parts is shorter than our warranty period. Procedure for Return: To speed up your credits for returned equipment, we have a return goods policy and procedure.
Donut Cutter Type N Operator’s Manual
If you accept the machine from the shipping company, you are, in effect, saying that the machine is in good condition, and you must pay for the machine. The freight company has accepted responsibility for the safe delivery of our machines. For your protection, inspect the machine to see that no parts are bent, scratched, or otherwise damaged. If any damage has occurred in shipping, file a freight claim with the shipping company immediately. IMPORTANT Keep this manual for reference purposes.
Contents 1 Installation 1 Wall Mount Fryer Mount Assembly 1 2 2 2 Operating 3 3 Cleaning 4 4 Maintenance 5 5 Appendix 6 Factory Parts & Repair Service Parts List French Plunger Drawing (N-1008) French Plunger Cleaning Instructions Cake Donut Plunger Chart Care, Maintenance & Cleaning Instructions for Plungers, Cylinders & Hoppers Tables & Formulas used in Donut Making Tips on Making Quality Cake Donuts Care and Cleaning of Belshaw Cutters and Dispensers Limited Warranty 7 8 10 11 12 14 15
Preface The Type N Variety Cutter is designed to cut cake donut products and deposit them in a variety of smaller fryers. It is designed to be mounted on a wall or on a fryer mount. During production, the operator must move the Cutter, holding the guide handle, to deposit donuts in the desired locations in the fryer. The operator must work safely at all times and read this manual and follow its instructions and warnings.
Installation This machine is designed to be used on either a wall mount or a fryer mount. This should be specified when the machine is ordered from the factory. If the mounting is not specified, the fryer mount will be shipped. Wall Mount consists of: Wall Plate #0004 Wall Arm Pin #0011 Set Collar #0121 Arm Bushing #0120 6 Lag Bolts, 5/16-1 ½” Fryer Mount consists of: Column, 1 1/8” Dia.
fryer. (B) The bottom of the cutter should be 1” to 1 ¼” from the surface of the shortening. Installation of Fryer Mount (NOTE: For mounting to 616A or 616”AT fryers, see instructions for Cut-N-Fry Combination). This equipment is designed as a universal unit, and can be mounted on the corner of most fryers. The mounting brackets should be mounted on the back corner on the opposite side of the drain tray. They can be fastened to the fryer case using ¼” bolts.
Operation Operation of this machine is very simple, but there are some details to which we would call your attention in order to get the best results, and keep your machine in perfect running condition. 1. See that all lock nuts are kept tight when running machine. 2. Rotate the crank while the machine is empty and see that it runs freely. 3. Set the pointer on the crank to the center of the dial.
Cleaning 3 To facilitate packaging, the Variety Cutter has been partially disassembled and before use it should be cleaned and properly assembled. 1. Wash plunger unit in hot water and detergent, rinse and wipe dry. The plunger should be lightly oiled with cooking oil. CAUTION: Never oil donut machine parts by dipping in hot fat, unless thoroughly dry. 2. Remove hopper base from hopper by rotating base approximately ¼ turn to release lock pin. Then pull down to remove from hopper.
Maintenance 4 Following are some maintenance and operating hints: DO NOT at any time use force to assemble or operate the machine. If machine sticks, disassemble to remove obstruction or check to determine cause and correct same. Once each week lubricate the operating cams by putting several drops of oil between trip arms when crank case is held with trip arms pointing up. When cleaning machine after use, do not wash or rinse crank case by immersing in water. Use damp cloth only.
Appendix 5 Factory Parts & Repair Service Parts List French Plunger Drawing (N-1008) French Plunger Cleaning Instructions Cake Donut Plunger Chart Care, Maintenance & Cleaning Instructions for Plungers, Cylinders & Hoppers Tables & Formulas used in Donut Making Tips on Making Quality Cake Donuts Care and Cleaning of Belshaw Cutters and Dispensers Limited Warranty Belshaw Bros., Inc. 1750 22nd Ave. S.
Factory Parts and Repair Service Replacement Part Orders (Include the following information with your order): 1. Model number of your machine 2. Serial number of your machine 3. Voltage, phase and hertz (if applicable) 4. Part number, part name, description, size, etc. (if applicable) 5. Quantity desired Factory Rebuild Service: If your machine becomes badly worn or seriously out of adjustment, we have a complete rebuild and repair service.
Belshaw Bros., Inc. 1750 22nd Ave. S.
Belshaw Bros., Inc. 1750 22nd Ave. S.
Belshaw Bros., Inc. 1750 22nd Ave. S.
Belshaw Bros., Inc. 1750 22nd Ave. S.
CARE, MAINTENANCE, and CLEANING INSTRUCTION for PLUNGERS and HOPPERS The plungers and hoppers of your Type K are precision instruments built from alloy steels and aluminum. They should be handled with care to insure continued satisfactory performance. When cleaning aluminum, selection of the right type cleaner is your most important consideration. Any household dish washing detergent which is safe for aluminum does a good job of cleaning and does not attack aluminum.
TABLES AND FORMULAS USED IN DONUT MAKING Calculating Correct Water Temperature The following is an example of how to calculate the correct water temperature to use. You must use your own room temperature, dry mix temperature, desired batter temperature, and, if you are making yeast-raised donuts, estimated temperature increase during mixing. Cake Donuts Yeast-Raised Donuts F 72 +70 142 C 22.2 +21.1 43.3 F 72 +70 142 C 22.2 +21.1 43.3 Total B 75 x3 225 23.9 x3 71.7 80 x3 240 26.7 x3 80.
330 335 165.6 168.3 375 380 volume. The donuts may also become dense inside. 190.6 193.3 Tips on Making Quality Cake Donuts If the shortening is too cold, the donuts will spread too rapidly, will form large rings, will tend to crack open, will be too light in appearance, and will absorb too much shortening. Use the correct batter temperature. In general, the correct batter temperature is 75 -80 F/24 -27 C. Check the mix manufacturer’s instructions, as the recommended temperature range may vary.
Care and Cleaning of Belshaw Cutters and Dispensers The most important thing when cleaning aluminum is the selection of the right type of cleaner. Strong alkali cleaners such as lye, soda ash, and tri-sodium phosphate discolor and corrode aluminum, even in weak solutions. A detergent which contains an inhibitor to prevent the attack on metals, such as those listed below, does a good job of cleaning and does not attack the aluminum. List of Approved Cleaners for Aluminum 1. 2. 3. 4. 5. 6. 7. 8. 9. 10.