
Manual


Requirements
To begin, make sure you have the following equipment:
• Bimba M12 cabled connectors CBL-PWR-M12- , CBL-IO-M12- , and CBL-EIP-M12-
• A personal computer running Microsoft Windows 98, 2000, ME, NT, XP, Vista,7 (32 and 64 bit), or 8.
• IQ
®
stepper software (available at www.bimba.com).
• For more detailed information, please download and read the ITM-23Q Hardware Manual available at www.bimba.com and refer
to section for ITM-23Q-M12
Step 1
Step 2
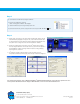
ITM-23Q-M12 IntelliMotor
®
Quick Start Guide
Quick Start Guide
Wire the IntelliMotor
®
to the 24 vdc or 48 vdc DC power source. Pin 1 (brown)
and Pin 3 (blue) connect to “V+” and Pin 2 (white) and Pin 4 connect to “V-” of
your power supply. (Do not apply power until all connections to the drive
have been made.)
Note, the ITM-23Q accepts DC voltages from 24-48 Vdc.
(Recommended power supply: Bimba P/N PWR-150A24 or PWR-320A48)
How to connect:
a) Connect the CBL-IO-M12- cable to the M12 connector marked
“I/O” on the IntelliMotor
®
. This is an A-coded female connector.
b) Connect the CBL-PWR-M12- cable to the M12 connector marked
“Power” on the IntelliMotor
®
. This is an A-coded male connector.
c) Connect the CBL-EIP-M12- cable to the M12 connector marked
“Ethernet/IP” on the IntelliMotor
®
. This is a D-coded female connector.
For help wiring the I/O connections, please refer to the Bimba ITM-23Q
User Manual. The wire color and signal definition for each terminal of all
three connectors are shown here.
If using an external fuse, we recommend the following:
ITM-23Q: 3AG, 4 amp (Littlefuse 313004P)
See Bimba ITM-23Q Hardware Manual for more information about
power supply and fuse selection.
ITM-23Q-2-EIP-E-M12
MATING CABLE
CBL-EIP-M12-
MATING CABLE
CBL-PWR-M12-
MATING CABLE
CBL-IO-M12-