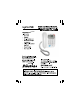
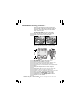
Lyris 710 Lyris 710 1
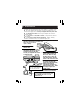
UP-DOWN (CDS) Buttons Ringer light - This flashes DEL (DELETE) Button when the phone is ringing - To access the caller - Press to delete individual for an incoming call. display records, and messages, memos, stored to scroll through lists numbers or Caller Display (MENU) Button records. and options. - Press to enter Options (PLAY/PAUSE) Button Menu to set the Date, Time,Screen Contrast, - Press to play back phone/TAM settings. messages and memos.
Phone You are connected to the telephone line - your Handset is ‘offhook’. Time Displays the time. Date/Month Caller Display Record Shows the total number of Caller Display records when the caller display is being received or when the call lists is being viewed. NEW The NEW icon only appears when viewing New Caller Display records. Message Appears only when viewing a Caller display entry with a recorded answering machine message.
2. Installation 1. Locating the Base unit The Base unit should be placed on a level surface, in a position where: the mains adapter plug will reach an easily accessible 230-V AC switch mains supply socket - never try to lengthen the mains power cable. the telephone line cable will reach your telephone line socket or extension socket. it is not close to a sink, bath or shower, or anywhere else where it might get wet.
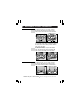
3. Desk/Wall mount installation Desk Mount To place the Lyris 710 on a desk, connect the stand to the bottom of the phone in the slots near the rear of the base as shown below. Insert the rigid clips of the stand into the slots on the bottom of the phone (nearer the centre of the base). Press down firmly until the flexible clips clicks into place. To remove the stand, (1) pinch the flexible clips, (2) pull back the stand, and then (3) slide up and forward (3) as shown below.
Desk/Wall mounting continue... Insert the rigid clips of the stand into the slots on the bottom of the phone (nearer the centre of the base). Press down firmly until the flexible clips clicks into place. To remove the stand, (1) pinch the flexible clips, (2) pull back the stand, and then (3) slide up and forward as shown below. 92 mm Mark two points on the wall that are 92 mm apart to lay the fixing centers as shown below. BE CAREFUL to check that there are no electrical wires hidden in the wall.
4. Setting up the Lyris 710 The following section details how to set up your telephone. Press the MENU button to enter the Options menu and then use the UP or DOWN buttons to cycle through the following options: SET LANGUAGE SET TIME/DATE SET FLASH TIME LCD CONTRAST MESSAGE LENGTH RINGS TO ANSWER REMOTE ACCESS TAM HD: ON/OFF ÖTo set the Answering Machine recording quality / total recording time.(ON gives up to 8 minutes of higher quality, OFF gives up to 20 minutes of lower quality.
Setting up continue... 4 Press UP or DOWN button to set the year. 5 Press MENU button to confirm. Ö The ‘month’ will be blinking. 6 Press UP or DOWN button to set the month. 7 Press MENU button to confirm. Ö The ‘date’ will be blinking. 8 Press UP or DOWN button to set the date. 9 Press MENU button to confirm. Ö The ‘hour’ will be blinking. 10 11 12 Press UP or DOWN button to set the hour. Ö When setting the 'hour' it is in 24 hour mode only. Press MENU button to confirm.
Setting up continue... LCD CONTRAST 5 Press MENU button to confirm. 6 Continue with programming, or press EXIT button to return to standby mode. 1 Press MENU button. . Ö The display shows OPTIONS MENU Press UP or DOWN button until the display shows LCD CONTRAST CONTRAST. 2 3 Press MENU button to confirm. 4 Press UP or DOWN button to select your comfortable display viewing level (1~5). The default setting is 3. Press MENU button to confirm.
Setting up continue... 2 Press UP or DOWN button until the display shows RINGS TO ANSWER ANSWER. 3 Press MENU button to confirm. 4 Press UP or DOWN button to select TOLL SAVER, 2, 3, 4, 5, 6, 7, 8, or 9 rings. The default setting is 5. Ö Use ‘TOLL SAVER’ when checking your Lyris 710 for messages from a remote location using long distance service or from a pay phone. The Answering machine responds after the 2nd ring only if you have a new message waiting.
Setting up continue... 8 9 10 TAM HD: ON/OFF setting 1 2 3 Press UP or DOWN button to set the third digit of the REMOTE ACCESS code. Press MENU button to confirm the REMOTE ACCESS setting. Press EXIT button to return to standby mode. Two different compression rates (ON and OFF) are provided for you to select the recording quality / total recording time of incoming messages. With the compression rate set to ON the recording quality will be higher, but it will only save up to 8 minutes of messages.
Telephone operation continue... 3 4 Dial the telephone number. If you make a mistake you can correct it by using the DEL button to delete digits and then adding the right ones. Lift the Handset or press the SPEAKERPHONE button on the Base unit to dial out the number. When the phone rings; Lift the handset or press the SPEAKERPHONE button on the Base unit. Ö The display shows the duration of the call in minutes and seconds.
One Touch Memory Operation Continue... 2 M2 M1 M3 1 Dial out Stored memory Number 2 M1 M2 M3 Press the M1,M2, or M3 button to store the number in the selected memory Press the M1,M2,M3 button ÖThe programmed memory number will be displayed. Lift the handset or Press the SPEAKERPHONE button. ÖThe phone automatically redials the number using handset or speakerphone mode selected. 7.
Outgoing call record continue... Storing an Outgoing call record into the Phonebook memory 4 Press the DELETE button again to confirm. Ö The display shows next record. 1 When viewing the Outgoing call records, press the UP or DOWN button to find the record you wish to store. When the record is displayed, press the PHONEBOOK button. Ö The display shows the cursor blinking on the first digit of the number.
Phonebook continue... 1 To add a new record into the Phonebook and the search will jump to the first entry in the Phonebook beginning with that letter. Press the UP or DOWN button to scroll through the other records. 2 Press the EXIT button repeatedly to return to standby mode or wait until the program times out. 1 Press the PHONEBOOK button. Ö The display shows SEARCH ADD ADD, with the ‘SEARCH’ option blinking. Press the UP or DOWN button to select ‘ ADD .
Phonebook continue... 7 Press the PHONEBOOK button to confirm. 8 Press the EXIT button repeatedly to return to standby mode or wait until the program times out. To make a 1 call from the Phonebook When viewing the Phonebook records, press the UP or DOWN button to find the record you wish to call. 2 Lift the handset or press the SPEAKERPHONE button. The phone automatically dials the displayed record using the handset or speakerphone mode selected.
Phonebook continue... To delete a record from memory 1 2 When viewing the Phonebook records, press the UP or DOWN button to find the record you wish to delete. When the record is displayed, press the DELETE button. Ö The display prompts DELETE? 3 Press the DELETE button again to confirm. Ö The display shows next Phonebook record. 4 OR press the EXIT button to cancel and return to the previous menu. 5 Press the EXIT button repeatedly to return to the standby mode or wait until the program times out.
Caller Display operation continue... WITHHELD will be displayed if the call is from someone who has withheld their number, for example by dialling 141. UNAVAILABLE will be displayed if the number of the caller is unavailable, for example from an international call. Withheld and Unavailable calls are saved in the calls list and show as missed calls. Caller Display list This phone automatically stores the last 99 calls received.
Caller Display operation continue... Storing an Incoming call record into the Phonebook memory 1 When viewing the Caller Display records, press UP or DOWN button to find the record you wish to store. 2 When the record is displayed, press the PHONEBOOK button. Ö The display shows the cursor blinking on the first digit of the number. Ö To modify the number, press the UP or DOWN button to move the cursor to the number you want to change then input the new one or press the DELETE button to delete.
10. Answering Machine system An OGM is the announcement callers will hear when the machine answers a call.The Lyris 710 has two pre-recorded announcements available if you choose not to record your own OGMs. OGM1 - this invites callers to leave a message after the tone. The default is “Please leave your message after the beep”. OGM2 - this informs callers to call later and does not give them the opportunity to leave a message. The default is,“Please call later.
Answering Machine System continue... To record OGM 2 After setting the OGM1, briefly press the EXIT/ ON-OFF button again. You will hear, “Announcement 2.” Press and hold the OGM button until you hear a 2 ‘beep.’ Ö The display shows OGM RECORDING and the message counter starts to count. Start recording your OGM2. Speak directly into the Base unit’s Microphone from a distance of about 15 cms. (6 inches). As soon as you have finished speaking, press 3 the EXIT/ ON-OFF button to stop recording.
Answering Machine System continue... To record a memo 1 2 3 You can record a memo directly into the machine. The length of the memo message recording depends on the MESSAGE LENGTH setting, see page 9. The memo message will be played back together with any messages from callers. With the Handset on hook, press and hold the MEMO button until you hear a ‘beep’. Ö The display shows MEMO RECORDING and the message counter starts to count. Start recording your memo.
Answering Machine System continue... Repeat/Rewind To repeat the current message from the beginning,press the OGM/REWIND button. To replay the previous message, press the OGM/REWIND button twice. Skip/Fast Forward To skip to the next message, press the MEMO/SKIP button. Stop playback To stop the message playback, press the EXIT/ON-OFF button. Volume Control Use the SPEAKERPHONE volume switch located on the right side of the Base unit to adjust the volume of the loudspeaker during playback.
Answering Machine System continue... To delete all 1 messages 2 3 To go back to the default OGM 1 2 3 After playing back all of your messages, press and hold the DELETE button. ALL?. Ö The display prompts DELETE ALL? Press the DELETE button again to confirm, the display shows "DELETE . . ." and after a short delay, you will hear, “All messages erased.” Ö The machine will not delete any messages that you haven’t yet listened to. The display automatically returns to standby mode.
Remote operation continue... To check your messages from a remote location 1 Using a tone dialing phone, dial your home phone number. Listen to or bypass the OGM (by pressing *). Enter your REMOTE ACCESS Code. A list of options will be heard. Press keypad “2” to playback your messages. Ö For other instructions, see the Remote Intruction code menu shown on the next page. 2 3 4 Notes: During remote operation, you must press a key within 10 seconds, otherwise the machine will cut off your call.
Remote operation continue... To repeat message, press “1” Ö To skip back to the previous message, press “1” twice To skip message, press “3” To play announcement, press “4” To record greeting, press “5” To stop function, press “6” To delete message, press “7” To set Answer OFF, press “8” To set Answer ON, press “9” Ö After setting to Answer ON, press “9” to switch between OGM1 and OGM2, To delete all messages, press “0” twice quickly.
12. Operational notes Electrical safety DON’T let the Base unit get wet. Electrical equipment can cause serious injury if used while you are wet or standing in water. If the Base unit ever falls into water, DON’T retrieve it until you have unplugged the power lead from the mains and the telephone line plug from the telephone socket; then pull it out by the unplugged cables.
13. Troubleshooting ! The Lyris 710 must be serviced by trained engineers. NEVER attempt any repairs or adjustments yourself - you could make the problem worse and invalidate the Guarantee. ALWAYS check first that: you have followed the steps listed in Section 2 to install and set up your Lyris 710. all connectors are firmly inserted in their sockets. mains power is switched on at the socket. Everyday use “I cannot make or Make sure you’re using the telephone line cable that answer calls.
Troubleshooting continue... Be sure to wait until the second ring before answering. Answering Machine “The machine won’t record any messages” The machine’s memory may be full. You need to delete enough recorded messages to free at least one minute recording time. Or you can delete all recorded messages to make room for new ones Make sure the machine is switched on - the MESSAGE light should be on. Make sure you have not selected OGM2 - with OGM2 selected, callers cannot leave messages (see page 20).
Troubleshooting continue... If the fault persists … Disconnect all other instruments connected to the same line as the Lyris 710 and see whether you can make a call. Disconnect the Base unit from the telephone line and plug a different phone into the master telephone socket. Try making a call. If this works, the line is OK. If the call does not work, and you are using a twoway socket adapter, remove it and plug a telephone directly into the socket. If the call now works, the adapter may be faulty.
14. Guarantee and Service The Binatone Lyris 710 is guaranteed for 12 months from the date of purchase shown on your sales receipt. The Guarantee does not cover damage by misuse or negligence, or by excessive voltages - for example, faults on the telephone line, or lightning. This does not affect your statutory rights. Please keep your sales (till) receipt - this is your guarantee. You should also keep the original packaging material.
BINATONE TELECOM PLC 1 Apsley Way London NW2 7HF,United Kingdom. Tel: +44(0) 20 8955 2700 Fax: +44(0) 20 8344 8877 e-mail: binatoneuk@binatonetelecom.co.uk ________________________________________ . EC Declaration of Conformity We the manufacturer / Importer : Binatone Telecom Plc 1 Apsley Way London NW2 7HF, United Kingdom.