
User`s guide


The only tool you’ll need to assemble your
vacuum cleaner is a Phillips screwdriver.
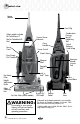
Attach handle to vacuum
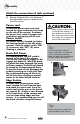
Some models may have a non-
Febreze® filter already installed in the
post-motor filter compartment. If you
want to use the Febreze® filter while
vacuuming, replace the non-Febreze
filter with the Febreze® one. See figure
A for the location on your vacuum.
1. Locate the carry handle. Remove the
screw packet taped to the carry handle.
2. There are three screws. Two screws
are used to attach the upper handle to
the vacuum body. One is for the hose
guide/tool caddy.
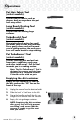
3. Stand the vacuum upright. From the back
of the vacuum, slide the base of the
handle firmly into the grooves at the top
of the vacuum body. Continue to push so
that there are no gaps and the front of the
handle is flush with the vacuum body.
4. Place carrying handle into place on to
the back of the upper handle and insert
two screws into the existing holes. Tighten
securely with a Phillips screwdriver.
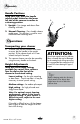
Attach the vacuum hose & tools
1. Attach the 3 hose/tool storage pieces to the
back of the unit.
a. Attach the TurboBrush
®
/Pet TurboEraser
™
holder to the back of the handle by
snapping the piece into the unit as
shown. Push piece straight in until it
snaps into place.
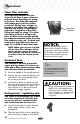
b. Attach the hose clip to the left side of the
back of the vacuum. Insert tab at a 45
degree angle and turn clockwise so it
snaps into place.
c. The hose guide/tool caddy should be
attached at the bottom of the back of
the vacuum. Slide into place and insert
screw into the existing hole. Tighten
securely with a Phillips screwdriver.
2. Line up the tabs of the Twist n’ Snap hose
with the corresponding notches and turn
clockwise. Slide the end of the hose into
the hose grip base. Hose wraps on back
of unit as shown on page 4.
www.bissell.com
Assembly
5
3.
a.
c.
A.
b.
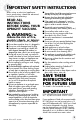
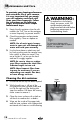
WARNING:
Plastic film can be dangerous.
To avoid danger or suffocation,
keep away from babies
and children.
4.
1.