
Full Product Manual


3
Before operating your laser projector, please read the “Before you Begin” and “Notice” sections
of this user guide.
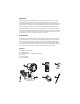
SETTING UP THE LASER PROJECTOR
1. Connect the light xture to the provided power supply and screw on the
attached water seal cap to the top of the power supply.
2. Connect the power supply into an available standard electrical outlet.
3. Attach the stake or stand to the xture head by twisting the xture clockwise. Remove
the stake or stand by twisting the xture counter-clockwise.
4. If using the stake, stake it into the desired location by holding the top of the stake and
gently pushing the stake into the ground. Do not push the xture into the ground by
pushing down on the lamp head.
5. Adjust the angle of the projected light by turning the thumbscrew attached to the side
of the xture.
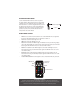
6. Use the included remote control to change the settings of the light output (pg 4).
7. To turn o the light, use the provided remote or remove the power plug from the
electrical outlet.
OPERATING THE LASER PROJECTOR
Once the laser projector is plugged in, it will enter the default mode with both the laser
and the LED on and the automatic timer set to 6-hour on and 18-hour o mode. Use the
included remote control to change these settings.
OPERATING THE TIMER
This light has a built-in timer that is designed to automatically shut o after 6 hours of
operation. It will go into sleep mode for 18 hours and repeat the same operation thereafter.
The timer will turn on once the light is plugged in. To disable the timer, press the timer
button on the remote. The laser will blink twice to signal that the timer is o and that the
laser will remain on. To turn the timer back on at the desired time, press the timer button
again. The laser will then blink three times to signal that the timer is on.