Electric Wall Oven User Manual Installation and Use and Care Information Part # 100135 — revision 1 bluestarcooking.
(800) 449-8691
Thank You and Welcome Thank you for your purchase and welcome to the BlueStar® family! BlueStar® appliances are designed for discerning home chefs who demand restaurant-quality results in their own kitchens. As the owner of a new BlueStar® appliance, you can look forward to years of precise and even cooking in your home kitchen. Here are a few tips to get started: 1. Review this User Manual, which includes instructions and tips for getting the most out of your new appliance. 2.
Contents Model Information .................................................................. 5 Care and Cleaning ................................................................. 51 Safety Information .................................................................. 6 Troubleshooting .................................................................... 53 Single Oven Site Preparation Warranty ...............................................................................
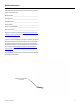
Model Information Please complete the information below for warranty purposes and for future reference: Model Number ______________________________________ Serial Number _______________________________________ Installation Date _____________________________________ Dealer’s Name _______________________________________ Dealer’s Phone Number _______________________________ Date of Purchase _____________________________________ Register your appliance online at www.bluestarcooking.
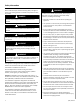
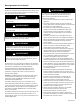
Safety Information Please read and comply with the following safety messages to ensure your cooking product is installed and operated as safely as possible: DANGER Will cause serious injury or death if instructions are not followed. WARNING Can cause serious injury or death if instructions are not followed. CAUTION Can cause minor injury or product damage if instructions are not followed.
Safety Information (continued) WARNING To reduce the risk of fire, electric shock, serious injury, or death when using your appliance, follow basic safety precautions, including the following: • To prevent damage, do not use the oven handles as lift points or for moving the product. • Do not climb or sit on any part of the appliance. • Do not use the oven door for stepping, leaning, or sitting on at any time, Damage to the appliance and/or personal injury can occur.
Renseignements sur la sécurité Veuillez lire et respecter les messages de sécurité suivants pour vous assurer que votre produit de cuisson est installé et utilisé de la façon la plus sécuritaire possible : DANGER Causera des blessures graves ou la mort si les instructions ne sont pas suivies. AVERTISSEMENT Peut causer des blessures graves ou la mort si les instructions ne sont pas suivies. MISE EN GARDE Peut causer des blessures mineures ou des dommages au produit si les instructions ne sont pas suivies.
Renseignements sur la sécurité (continued) WARNING AVERTISSEMENT Pour réduire le risque d’incendie, de choc électrique, de blessure grave ou de décès lors de l’utilisation de votre appareil, suivez les précautions de sécurité de base, notamment les suivantes : • Pour éviter les dommages, n’utilisez pas les poignées du four comme points de levage ou pour déplacer le produit. • Ne grimpez pas et ne vous asseyez sur aucune partie de l’appareil.
Single Oven Site Preparation — Specifications and Dimensions Oven Interior Front Dimensions 26 1/4” W x 20” D x 15” H (666.8 mm W x 508 mm D x 381 mm H) 30” (762 mm) Oven Elements Oven Broiler Element Rating: Oven Bake Element Rating: Oven Heat Assist Element: 5000 Watts 2500 Watts 1800 Watts Electrical Requirements The Electrical Appliance Rating: Recommended: 240V, 60Hz, 24 AMPS, 1PH 30 amp circuit 27” (685.
Single Oven Site Preparation — Specifications and Dimensions (continued) Side Dimensions 25 7/8” (657.2 mm) 5 3/8” (136.5 mm) 25 7/8” (657.2 mm) 3” (76.2 mm) 22 7/8” (581 mm) 3/8” (9.5 mm) French Doors 22 7/8” (581 mm) 3/8” (9.5 mm) 26 3/4” (679.5 mm) 3/8” (9.5 mm) Drop-Down Door 26 3/4” (679.5 mm) 3/8” (9.5 mm) Top Dimensions Important: You must allow at least 3/4” (19.1 mm) from the side of the wall oven to the cabinet drawer or door side for the french door to open correctly. 19 1/2” (495.
Single Oven Site Preparation — Cabinet Dimensions Cabinet Top Dimensions 29 5/8” (752.5 mm) 2 11/16” (68.3 mm) 24” (609.6 mm) Location of Electrical Inlet 22 3/4” (577.9 mm) Front Cabinet Front Dimensions 24” (609.6 mm) 27” (685.8 mm) 29 5/8” (753.7 mm) 2” (50.8 mm) or more 33” (838.
Double Oven Site Preparation — Specifications and Dimensions Oven Interior Back Dimensions 26 1/4” W x 20” D x 15” H (666.8 mm W x 508 mm D x 381 mm H) Front frames not shown Upper Oven Elements Oven Broiler Element Rating: Oven Bake Element Rating: Oven Heat Assist Element: 5000 Watts 2500 Watts 1800 Watts Lower Oven Elements Oven Broiler Element Rating: Oven Bake Element Rating: Oven Heat Assist Element: 2500 Watts 2500 Watts 1800 Watts 49” (1244.
Double Oven Site Preparation — Specifications and Dimensions (continued) Side Dimensions 5 3/8” (136.5 mm) 25 7/8” (657.2 mm) 22 7/8” (581 mm) 3 1/32” (77 mm) 3/8” (9.5 mm) French Door 26 5/32” (664.4 mm) 23 1/8” (587.4 mm) 3/8” (9.5 mm) Drop-Down Door 49” (1244.6 mm) 49” (1244.6 mm) Drop-Down Door 3/8” (9.5 mm) Drop-Down Door 3/8” (9.5 mm) Top Dimensions Important: You must allow at least 3/4” (19.
Double Oven Site Preparation — Cabinet Dimensions Cabinet Top Dimensions 29 5/8” (752.5 mm) 2 11/16” (68.3 mm) Cabinet Front Dimensions 24” (609.6 mm) Location of Electrical Inlet 22 3/4” (577.9 mm) 24” (609.6 mm) Front 29 5/8” (753.7 mm) 49 1/2” (1250.1 mm) 2” (50.8 mm) or more 33” (838.2 mm) Recommended cabinet width bluestarcooking.
Installation Instructions Tools and Materials • • • • Phillips and Flat blade screwdrivers 1/2” socket wrench and 1/2” open-end wrench 5/16” hex head socket Gloves and safety glasses WARNING Tip Over Hazard The wall oven is heavy and tips easily when not completely installed. Use two or more people to move and install the wall oven. Failure to follow these instructions can result in death or serious injury. 3.
Installation Instructions (continued) AVERTISSEMENT Cet appareil doit être mis à la terre. Ne coupez pas, n’enlevez pas ou ne négligez pas le fil de mise à la terre de cet appareil. Si l’appareil n’est pas mis à la terre, des risques de choc graves peuvent exister. 1. Complete the wiring connections in the handy box. 2. Insert the wall oven into the cabinet until the front frame of the wall oven is flush against the cabinet. 3. Level the wall oven using a carpenter-type level.
Single Oven 6 2 1 7 8 3 5 1 4 4 1 2 3 4 5 Cooking mode knob Touch screen Oven temperature control knob French doors Drop-down doors 3 2 5 18 1 2 3 4 5 6 7 8 Rack guide (both sides) Oven lights (two) Baking stone Full extension rack (one) Standard racks (two) Broil element Convection fan Temperature probe socket (800) 449-8691
Double Oven 8 1 2 3 7 1 2 3 6 4 1 2 3 Cooking mode knob Touch screen Temperature control knob Note: This illustration includes french doors on the upper oven and a drop-down door on the lower oven. For the upper oven, the french doors are interchangeable with a drop-down door. bluestarcooking.
Before Your First Use — Oven Burn-Off Procedure Important: Before you use the wall oven, it is essential that you complete the oven burn-off procedure. You should also do the baking stone pre dry procedure to condition the baking stone before use. This oven burn-off procedure uses the Clean Mode, can take about 90 minutes to complete, will heat up the appliance, and will remove all factory oils and residue from its internal parts.
Before Your First Use — Baking Stone Pre Dry Procedure This pre dry procedure will take six hours and you must follow these steps in exact order. You must pre dry your baking stone before you use it to prevent it from warping and to maximize its life. If the stone is not properly dried before its first use, it could crack or shatter. 3. Second Setting — 300° F (149° C) for One Hour 4. Important: Keep the oven door closed throughout the entire process, especially between settings.
Before Your First Use — Touch Screen Controls Note: For documentation purposes, touch screen control illustrations are for the double oven. Instructions apply to both single and double ovens unless otherwise noted. You can use the following controls as they appear on the touch screen control on either side or in the bottom row. Upper oven Lower oven Upper oven light Idle Display All oven functions are operated from the touch screen control.
Before Your First Use — Touch Screen Controls (continued) Kitchen Timers Split Screen You can use the timers on the bottom row of the touch screen control separate from the oven timer. Note: The following information applies to the double oven only. This does not apply to the single oven. 1. Tap either Timer 1 or Timer 2 in the bottom row. 2. On the Set Kitchen Timer screen, use the keypad to enter the hours, minutes, and seconds, then tap Start.
Before Your First Use — Touch Screen Controls (continued) Note: For documentation purposes, touch screen control illustrations are for the double oven. Instructions apply to both single and double ovens unless otherwise noted. Set Time 1. Tap the Settings icon in the bottom row. 2. Tap Set Time on the Settings screen. 3. 4. F° /C° (Temperature Scale) To switch between °F (Fahrenheit) and °C (Celsius): 1. Tap the Settings icon on the Main Screen. 2. Tap °F/°C on the Settings screen. 3.
Before Your First Use — Touch Screen Controls (continued) Note: For documentation purposes, touch screen control illustrations are for the double oven. Instructions apply to both single and double ovens unless otherwise noted. 4. Tap ON to operate the oven using Sabbath guidelines. 5. Tap Set to initiate the Sabbath mode. 6. Tap OFF to cancel the Sabbath mode. The oven will operate normally after Sabbath is cancelled.
Before Your First Use — Touch Screen Controls (continued) Note: For documentation purposes, touch screen control illustrations are for the double oven. Instructions apply to both single and double ovens unless otherwise noted. 4. Tap any of the options available. 5. Tap the Idle Display icon to see the change made. Idle Display When the touch screen control is not in use, you will see a clock on the touch screen. The clock displayed is available either as digital or as analog.
Before Your First Use — Touch Screen Controls (continued) Note: For documentation purposes, touch screen control illustrations are for the double oven. Instructions apply to both single and double ovens unless otherwise noted. Screen Lock When the screen is unlocked, you can use the oven normally until the control returns to the Idle Display screen, where the screen will lock again. This will happen each time the control returns to the Idle Display screen until you turn off the screen lock.
Before Your First Use — Touch Screen Controls (continued) Note: For documentation purposes, touch screen control illustrations are for the double oven. Instructions apply to both single and double ovens unless otherwise noted. Sound You can adjust the volume of the tone you hear when using the touch screen, from quiet to medium to loud. 1. Tap the Settings icon on the bottom row. 2. Tap Sound on the Settings screen. 3.
Cooking Modes Single Oven Cooking Modes Temperature Operating Ranges Your single oven has the following operating modes. Each mode has pre-set minimum and maximum temperature ranges. Important: Entering a temperature outside the range given for an applicable cooking mode will result in an error message. • Bake • Convection Bake • Roast • Convection Roast • Broil • StoneBake™ • Proof • Dehydrate The following cooking modes operate at temperatures between 95° F and 500° F (27° C and 260° C).
Cooking Modes — Bake Note: For documentation purposes, touch screen control illustrations are for the double oven. Instructions apply to both single and double ovens unless otherwise noted. Important: Do not put food in the oven before or during preheat as the bake element, the broiling element, and the convection fan are used to reach the set temperature. Important: Remove the temperature probe from the oven when not using it to avoid damage. 4.
Cooking Modes — Bake (continued) Set the Cooking Time Set the Delay Time 1. Important: If you want a delayed start, you should set the delay time before you tap Start on the Confirm Setting screen. 2. 3. 4. Tap the Bake (or Convect Bake) icon next to the temperature, tap Options on the Bake—Set Temp (or Convect Bake) screen, then tap Timed on the Select Bake Option screen. Use the keypad on the Set Cook Time screen to set the cooking time in hours and minutes, then tap Set.
Cooking Modes — Bake (continued) Set the Probe Temperature Important: You should set the probe temperature before you tap Start on the Confirm Setting screen. 1. Tap Probe on the Confirm Setting screen. 2. Use the keypad on the Set Probe Temp screen to set the temperature, then tap Set. 3. Tap Start to confirm the setting.
Cooking Modes — Roast Note: For documentation purposes, touch screen control illustrations are for the double oven. Instructions apply to both single and double ovens unless otherwise noted. Important: Do not put food in the oven before or during preheat as the bake element, the broiling element, and the convection fan are used to reach the set temperature. 4. Put your food in the oven, then do any of the following: • Go to Set the Cooking Time to set the cooking time.
Cooking Modes — Roast (continued) Set the Cooking Time Set the Delay Time 1. Important: If you want a delayed start, you should set the delay time before you tap Start on the Confirm Setting screen. 2. 3. 4. 34 Tap the Roast (or Convect Roast) icon next to the temperature, tap Options on the Roast—Set Temp (or Convect Roast) screen, then tap Timed on the Select Roast Option screen. Use the keypad on the Set Cook Time screen to set the cooking time in hours and minutes, then tap Set.
Cooking Modes — Broil Note: For documentation purposes, touch screen control illustrations are for the double oven. Instructions apply to both single and double ovens unless otherwise noted. Set Another Temperature Tap Other on the Select Temperature screen, use the keypad to set your temperature, then tap Start. Important: Do not leave food unattended when using the Broil mode This is an intensive high heat mode and foods can quickly burn or catch fire.
Cooking Modes — StoneBake™ Note: For documentation purposes, touch screen control illustrations are for the double oven. Instructions apply to both single and double ovens unless otherwise noted. Important: The baking stone weighs approximately 35 lbs (15.88 kg). Make sure the stone is cool and use extreme caution when removing it from the oven. Important: You must pre dry your baking stone before you use it to prevent warping and to maximize its life.
Cooking Modes — StoneBake™ (continued) Set the Cooking Time Tips 1. Tap the Stone icon next to the temperature, tap Options on the Set—Stone Temp screen, then tap Timed on the Select Stone Option screen. 2. Use the keypad on the Set Cook Time screen to set the cooking time in hours and minutes, then tap Set. During StoneBake™ mode, both the bottom bake element and the broiler turn on to maintain the oven cavity temperature.
Cooking Modes — Proof Note: For documentation purposes, touch screen control illustrations are for the double oven. Instructions apply to both single and double ovens unless otherwise noted. Important: Do not put food in the oven before or during preheat as the bake element and the convection fan are used to reach the set temperature. 4. Put your food in the oven, then do any of the following: • Go to Set the Cooking Time to set the cooking time.
Cooking Modes — Proof (continued) Set the Cooking Time Set the Delay Time 1. Tap the Proof icon next to the temperature, tap Options on the Proof—Set Temp screen, then tap Timed on the Select Proof Option screen. Important: If you want a delayed start, you should set the delay time before you tap Start on the Confirm Setting screen. 2. Use the keypad on the Set Cook Time screen to set the cooking time in hours and minutes, then tap Set. 3. 4.
Cooking Modes — Dehydrate Note: For documentation purposes, touch screen control illustrations are for the double oven. Instructions apply to both single and double ovens unless otherwise noted. Important: Foods must be dried to below 0.60 water activity or dry to the touch for safe storage with no danger of mold, yeasts, or bacteria growing. 4. Put your food in the oven, then do any of the following: • Go to Set the Cooking Time to set the cooking time.
Cooking Modes — Dehydrate (continued) Set Cooking Time Set the Delay Time 1. Tap the Dehyd icon next to the temperature, tap Options on the Dehydration—Set Temp screen, then tap Timed on the Select Dehydrate Option screen. Important: If you want a delayed start, you should set the delay time before you tap Start on the Confirm Setting screen. 2. Use the keypad on the Set Cook Time screen to set the cooking time in hours and minutes, then tap Set. 3. 4.
Cooking Modes — Clean Note: For documentation purposes, touch screen control illustrations are for the double oven. Instructions apply to both single and double ovens unless otherwise noted. 4. When the time is up, listen for a tone to indicate the Clean cycle is complete. The oven will still be hot at this point, but you will be able to use it. • Turn on the kitchen ventilation to remove any excess smoke or fumes that might occur.
Operation — Standard Oven Racks Note: Each oven comes equipped with two standard oven racks. Follow your recipe guidelines to determine the best rack position for your dish. Put the Standard Rack Back in the Oven 1. Hold both sides of the rack and align the rack onto the rack guide position you want to use. Take Out the Standard Rack Standard rack 1. Grasp both sides of the front of the rack. 2.
Operation — Full Extension Rack Note: Each oven comes equipped with an extension rack that you can pull out 100% from the oven to load or unload your larger baking dishes more easily. Follow your recipe guidelines to determine the best rack position for your dish. Important: The slides should be fully closed during this procedure. Important: Make sure your oven is level before your first use.
Operation — Temperature Probe and Baking Stone Temperature Probe Baking Stone The internal temperature probe monitors the core temperature of meat and poultry. In a double oven, the probe is only available in the upper oven. Operation is managed within all but the Broil and StoneBake™ cooking modes. DOUBLE OVENS ONLY: You can only use the baking stone in the upper oven. 1. Insert the long pointed end of the temperature probe into the thickest portion of the meat.
Cooking Guide and Tips — Convection Cooking Important: When preheating the oven, do not turn on the convection fan. Convection Cooking Convection cooking uses a fan inside the oven to circulate the heated air more evenly, resulting in better heat distribution and a more consistent temperature. In general, convection roasting takes less time at lower temperatures than traditional roasting. Convection Baking Convection ovens can handle larger loads than standard ovens with a high degree of consistency.
Cooking Guide and Tips — Food Handling Safe steps in food handling, cooking, and storage are essential in preventing food-borne illness. You can't see, smell, or taste harmful bacteria that may cause illness.
Cooking Guide and Tips — Recommended Cookware and Oven Use Recommended Cookware Cooking Solutions You will want cookware that has a combination of both stainless steel and an aluminum core for performance and durability. You will want something with oven compatibility of up to 500° F (260° C). Problem If the cake edge is too brown... Reduce the number of pans or lower the oven temperature.
Cooking Guide and Tips — Food Placement in the Ovens Moving your oven rack, especially when baking, can make or break a recipe. Bake a pizza on the top rack of your oven and you just won't get that crispy bottom crust. Bake a tray of cookies on the bottom rack, and it's pretty likely you'll have burnt bottoms. But move the rack to the right place, and your food will likely cook right.
Cooking Guide and Tips — Broiler • When cooking very large cuts of meat that require a sear, broil them until the outer portion is seared to your liking, then cook them in the oven until the center temperature is within 10° F (-12° C) of where you want it to be. Remove the meat from the oven and loosely tent in aluminum foil for ten minutes to allow the juices to distribute evenly. Cutting too soon will result in less juicy foods. Important: Always leave the oven doors closed when broiling.
Care and Cleaning Important: Make sure the appliance is cool before you clean. Part (Material) Cleaning Oven Exterior (Brushed Stainless Steel) • In extreme conditions, use a microfiber cloth soaked in hot water to sit on the soiled area to soften the residue so it can be safely cleaned off. • If necessary, you may use light scraping with a rubber or nylon spatula to finish lifting residue off. • Use a quality stainless steel cleaner or warm soapy water.
Care and Cleaning (continued) Part (Material) Cleaning Convection Fan Guard (Porcelain-coated) • Remove obstructions such as aluminum foil or other Standard Oven Racks • Make sure the oven is cool before you take out the NEED TO KNOW • Do not use steel wool, metal pads, or abrasive particles. cleaners as they may scratch and damage the coating. • Clean the oven fan guard periodically and make sure your room is well ventilated when you clean .
Troubleshooting Check these helpful tips for any problems with your oven. If additional help or service is needed, please call BlueStar® Customer Service at (800) 449-8691. You will need to have the model and serial numbers for your appliance ready before you contact them. See Model Information at the beginning of this manual for information on finding these numbers.
Warranty Prizer-Painter Stove Works, Inc. (“Prizer-Painter”) warrants your BlueStar® appliance (“product”) purchased in the U.S. and Canada and installed in residential properties for normal residential use. What Is Covered Subject to the specific conditions and limitations below, this warranty covers parts and/or labor necessary to repair or replace any part of the product that contains defects in materials and workmanship. Two Year Warranty.
bluestarcooking.