
Owners Manual
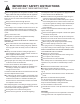


Table Of Contents
- _
- en-us
- Table of contents
- 1 IMPORTANT SAFETY INSTRUCTIONS
- 2 Preventing material damage
- 3 Environmental protection and energy-saving
- 4 Familiarizing yourself with your appliance
- 5 Accessories
- 6 Before using for the first time
- 7 Oven operation
- 7.1 Setting the heating mode and temperature
- 7.2 Turning the oven off
- 7.3 Temperature range by heating mode
- 7.4 Heating time limitation
- 7.5 Fast preheat
- 7.6 Meat probe
- 7.7 Turning the panel lock on or off
- 7.8 Kitchen timer
- 7.9 Oven timer
- 7.10 Sabbath mode
- 7.11 Basic settings
- 7.12 General tips for heating modes
- 7.12.1 How to use bake mode
- 7.12.2 How to use convection bake mode
- 7.12.3 How to use convection multi-rack/true convection mode
- 7.12.4 How to use pizza mode
- 7.12.5 How to use roast mode
- 7.12.6 How to use convection roast mode
- 7.12.7 How to use convection broil mode
- 7.12.8 How to use proof mode
- 7.12.9 How to use warm mode
- 7.13 Getting the best results
- 8 Cooktop operation
- 8.1 Turning the cooktop on
- 8.2 Turning the cooktop off
- 8.3 Cooking zone settings
- 8.4 Recommended cooking settings
- 8.5 FlexInduction™ cooking zone
- 8.5.1 Cookware recommendations for the flexible cooking zone
- 8.5.2 Using the flexible zone as two separate cooking zones
- 8.5.3 Activating the FlexInduction™ function
- 8.5.4 Changing the power level for the flexible cooking zone
- 8.5.5 Adding cookware to the flexible cooking zone
- 8.5.6 Deactivating the FlexInduction™ function
- 8.6 PowerMove® function
- 8.7 Kitchen timer
- 8.8 Count-up timer
- 8.9 SpeedBoost®
- 8.10 ShortBoost
- 8.11 Keep warm
- 8.12 AutoChef®
- 8.13 Panel lock
- 8.14 Wipe protection
- 8.15 Basic settings
- 8.16 Energy consumption display
- 8.17 PowerManager function
- 8.18 Induction cooking
- 9 Warming drawer operation
- 10 Cleaning and maintenance
- 11 Troubleshooting
- 12 Disposal
- 13 Customer service
- 14 STATEMENT OF LIMITED PRODUCT WARRANTY
- fr-ca
- Table des matières
- 1 IMPORTANTES CONSIGNES DE SÉCURITÉ
- 1.1 Définitions des termes de sécurité
- 1.2 Indications générales
- 1.3 Utilisation prévue
- 1.4 Restriction sur le groupe d'utilisateurs
- 1.5 Utilisation sécuritaire
- 1.6 Sécurité des enfants
- 1.7 Sécurité alimentaire
- 1.8 Fonction de nettoyage
- 1.9 Installation et entretien appropriés
- 1.10 Mises en garde conformément à la proposition 65 de l'État de Californie
- 2 Prévenir les bris matériels
- 3 Protection de l'environnement et économies
- 4 Description de l'appareil
- 5 Accessoires
- 6 Avant d'utiliser pour la première fois
- 7 Fonctionnement du four
- 7.1 Réglage du mode de chauffage et de la température
- 7.2 Éteindre le four
- 7.3 Plage de température par mode de chauffage
- 7.4 Limitation du temps de chauffage
- 7.5 Préchauffage rapide
- 7.6 Sonde thermométrique
- 7.7 Activer ou désactiver le verrouillage du panneau
- 7.8 Minuterie de cuisine
- 7.9 Minuterie du four
- 7.10 Mode sabbat
- 7.11 Réglages de base
- 7.12 Conseils généraux pour les modes de chauffage
- 7.12.1 Comment utiliser le mode de cuisson
- 7.12.2 Comment utiliser le mode de cuisson par convection
- 7.12.3 Comment utiliser le mode de convection multi-grille/vraie convection
- 7.12.4 Comment utiliser le mode pizza
- 7.12.5 Comment utiliser le mode de rôtissage
- 7.12.6 Comment utiliser le mode de rôtissage par convection
- 7.12.7 Comment utiliser le mode de cuisson au gril par convection
- 7.12.8 Comment utiliser le mode de fermentation
- 7.12.9 Comment utiliser le mode maintenir au chaud
- 7.13 Obtenir les meilleurs résultats
- 8 Fonctionnement de la table de cuisson
- 8.1 Mise en marche de la table de cuisson
- 8.2 Mise à l'arrêt de la table de cuisson
- 8.3 Paramètres de la zone de cuisson
- 8.4 Paramètres de cuisson recommandés
- 8.5 Zone de cuisson FlexInduction™
- 8.5.1 Recommandations de batterie de cuisine pour la zone de cuisson flexible
- 8.5.2 Utilisation de la zone flexible comme deux zones de cuisson séparées
- 8.5.3 Activer la fonction FlexInduction™
- 8.5.4 Modification du niveau de puissance de la zone de cuisson flexible
- 8.5.5 Ajout d'ustensiles de cuisine à la zone de cuisson flexible
- 8.5.6 Désactivation de la fonction FlexInduction™
- 8.6 PowerMove® fonction
- 8.7 Kitchen timer
- 8.8 Count-up timer
- 8.9 SpeedBoost®
- 8.10 ShortBoost
- 8.11 Garder au chaud
- 8.12 AutoChef®
- 8.13 Verrouillage du panneau
- 8.14 Protection essuyageProtection essuyage
- 8.15 Réglages de base
- 8.16 Affichage de la consommation énergétique
- 8.17 Fonction PowerManager
- 8.18 Cuisson par induction
- 9 Fonctionnement du tiroir réchaud
- 9.1 Niveaux du tiroir réchaud
- 9.2 Allumer le tiroir réchaud
- 9.3 Éteindre le tiroir réchaud
- 9.4 Utilisation du tiroir réchaud en mode Sabbat
- 9.5 Réchauffer des bols et des assiettes vides
- 9.6 Mettre croustillant des articles rassis
- 9.7 Conseils généraux pour le tiroir réchaud
- 9.8 Recommandations de température du tiroir réchaud
- 10 Nettoyage et entretien
- 11 Dépannage
- 12 Élimination
- 13 Service à la clientèle
- 14 ÉNONCÉ DE LA GARANTIE LIMITÉE DU PRODUIT

en-us
8
1.9 Proper installation and maintenance
WARNING
TIP OVER HAZARD! A child or adult can tip the range
over and be killed.
▶
Verify that the anti-tip bracket is securely installed. En-
sure the anti-tip bracket is engaged whenever the
range is moved to a new location.
▶
Do not operate the range without the anti-tip bracket in
place. Failure to follow the instructions in this manual
can result in death or serious burns to children and
adults.
▶
Check for proper installation and use of the anti-tip
bracket. Carefully tip the range forward pulling from the
back to ensure that the anti-tip bracket engages the
range leg and prevents tip-over. The range should not
move more than 1" (2.5cm).
▶
It is the home owner's responsibility to ensure the anti-
tip bracket is installed.
WARNING
In the event of a malfunction, it might become necessary
to turn off the power supply.
▶
Have the installer show you the circuit breaker or fuse.
Mark it for easy reference.
To avoid electrical shock hazard, before servicing the ap-
pliance, turn power off at the service panel and lock the
panel to prevent the power from being switched on acci-
dentally.
Proper Installation - Improper installation or grounding can
cause electric shock.
▶
This appliance must be properly installed and grounded
by a qualified technician.
▶
Connect only to properly grounded outlet.
▶
Refer to installation instructions for details.
User Servicing - Do not repair or replace any part of the
appliance unless specifically recommended in this man-
ual.
▶
All other servicing should be referred to an authorized
service provider.
Light socket is live when door is open if main power sup-
ply is not turned off.
▶
Turn off main power supply at the service panel before
changing the light bulbs.
WARNING
Make sure the appliance and lights are cool and power to
the appliance has been turned off before replacing the
light bulb(s). Failure to do so could result in electrical
shock or burns.
▶
The lenses must be in place when using the appliance.
▶
The lenses serve to protect the light bulb from breaking.
▶
The lenses are made of glass. Handle carefully to avoid
breaking. Broken glass can cause an injury.
Failure to follow these instructions when removing the
oven door may lead to personal injury or product damage.
▶
Make sure oven is cool and power to the oven has
been turned off before removing the door. Failure to do
so could result in electrical shock or burns.
▶
The oven door is heavy and parts of it are fragile. Use
both hands to remove the oven door.
▶
The door front is glass. Handle it carefully to avoid
breakage.
▶
Grasp only the side of the oven door. Do not grasp the
handle. It may swing in your hand and cause damage
or injury. Failure to grasp the oven door firmly and prop-
erly could result in personal injury or product damage.
▶
To avoid injury from hinge bracket snapping closed, be
sure both levers are securely in place before removing
the door.
▶
Do not force the door open or closed. The hinge could
be damaged and cause damage or injury.
▶
Do not lay the removed door on sharp or pointed ob-
jects as this could break the glass. Lay it on a flat,
smooth surface, positioned so that the door cannot fall
over.
WARNING
If the supply cord is damaged, it must be replaced by the
manufacturer, its authorized service provider or similar
qualified persons in order to avoid hazard.
WARNING
Grease and fat can ignite when heated.
▶
Keep the oven free from grease build up.
CAUTION
In the event of an error the display flashes and beeps con-
tinuously.
▶
Disconnect appliance from the power supply and call
an authorized service provider.
IMPORTANT SAFETY INSTRUCTIONS
READ AND SAVE THESE INSTRUCTIONS