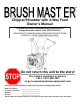
TM Chipper/Shredder with 2-Way Feed Owner’s Manual This manual contains important safety instructions for Chipper/Shredder models: CH6, CH8,CH10,CH11 READ SAFETY WARNINGS AND OPERATING INSTRUCTIONS CAREFULLY SAVE THESE INSTRUCTIONS. Do not return this unit to the store! For product questions or service, CALL 1-919-550-3221 or go to www.beastpowerequipment.
T Copyright© 2012 by GXi Outdoor Power, LLC. All rights reserved. No part of this publication can be reproduced or distributed without prior written permission of GXi Outdoor Power, LLC Clayton, NC 27520 USA.
BEAST Check out our other great products at www.beastpowerequipment.
T Contents Warnings .................................................................................... 1 Product Specifications ................................................................ 2 Component Identification ........................................................... 3 Missing Parts Order Form .......................................................... 4 Identification Component ........................................................... 5 Safety Information ...................................
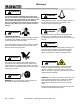
Warnings T WARNING This symbol indicates important safety instructions which, if not followed, could endanger personal safety and/or property. Read and follow all instructions in this manual before attempting to operate this machine. Failure to comply with these instructions may result in personal injury. When you see this symbol—heed its warning. WARNING Keep bystanders, helpers, pets, and children at least 75 feet from the machine while it is in operation. Stop machine if anyone enters the area.
Warnings T Training 1. Read, understand, and follow all instructions on the machine and in the manual before attempting to assemble and operate. Keep this manual in a safe place for future and regular reference and for ordering replacement parts. 2. Be familiar with all controls and their proper operation. Know how to stop the machine and disengage controls quickly. 3. Never allow children under 18 years old to operate this machine.
Component Identification T Leaf Funnel Discharge Chute Chipped materials are discharged through this opening. Use the Leaf funnel to feed leaves and branches no larger than 1/4” only. Fuel Tank Limb Chute Use the Limb chute to feed longer and/or thicker pieces of yard waste into the impeller for chipping. Depending on the model #, the chipper/shredder can cut up to a 2.25” or 3” or 5”×3.5“diameter piece of wood. Use regular unleaded fuel.
Missing Parts Request Form T Please indicate the part that you are missing: Name Address Date of purchase Model #: CH6 CH8 CH10 CH11 Phone Email Serial #: Comments: IMPORTANT: Please include your receipt. Without a receipt, your order will be delayed. You may also email us at: customerservice@gxioutdoorpower.com. If emailing, please scan in your proof of purchase. Refer to parts diagram and part list on page 5 and 6 for part numbers. This will expedite the process.
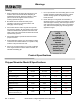
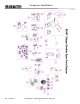
T Rev: 5 06/2016 Component Identification Brush Master™ Chipper/Shredder with 2-Way Feed 5
T Item GXi Part Num# ber 1 2 3 4 5 6 7 8 9 Component Identification Description CH6 CH8 CH10 CH11 LCSSP13-005 Chipper, plastic leaf funnel assembly kit with hardware and label for BEAST,2013 upgrade ● ● ● ● LCSSP11-002 Chipper, discharge deflector with hardware and label ● ● ● ● LCSSP11-028 Chipper, plastic discharge chute with discharge deflector and hardware, label for ● ● ● ● LCSSP11-022 Chipper, BEAST grey, limb chute, 2.
T 12 13 LCSSP16-080 Fuel tank assembly 457cc,BEAST,for Chipper models:CH10 CH11,includes the tank, Roll over valve, fuel cap, label and is ready to be connected to the carburetor.
Safety Information T Your Responsibility Restrict the use of this chipper/shredder to persons who read, understand and follow the warnings and instructions in this manual and on the machine. Note: Not all safety labels shown may apply to your chipper/shredder. Preparation i. 1. Thoroughly inspect the area where the chipper/ shredder is to be used. Remove all rocks, bottles, cans, or other foreign objects which could be picked up or thrown and cause personal injury or damage to the machine. 2.
Operating Guidelines T READ THESE OPERATING GUIDELINES BEFORE YOU PROCEED ANY FURTHER The side chute is for longer and/or thicker pieces of yard waste. Depending on your model, you may chip to your models capacity (page 2). 1. Do not put hands and feet near rotating parts or in the feeding chambers and discharge opening. Contact with the rotating impeller can amputate fingers, hands, and feet. 2.
Assembly T 1 2 7 3 8 4 5 Figure 1 6 IMPORTANT: This unit is shipped without gasoline or oil in the engine. Be certain to fill the engine with gasoline and oil as instructed before operating your machine. Required tools: Two 13mm wrenches NOTE: Both wrenches are supplied in the hardware bag. Approximate assembly time: 15 minutes 1. Remove the chipper from its carton Remove plastic banding and cut the tape on the top of the box. 2.
Assembly T 4. Verify all parts are in the hardware bag (Figure 2) Goggles (eye protection) Wrenches for assembly and blade maintenance Allen wrench for blade maintenance Oil funnel with flexible neck Spark plug wrench Owner’s Manual Hardware: eleven 20mm long bolts, two 30mm long bolts, two 45mm long bolts, 26 flat washers, 4 locking washers and 11 nylon locking nuts Bolt Identification: Place top of bolt head here Actual Size 20mm 30mm 45mm 5.
Assembly T 8. Attaching the chipper discharge chute (Figure 3) Place discharge chute over rectangular opening on the chipper body. The plastic discharge chute fits on the outside of the steel chipper body. The steel liner inside the plastic discharge chute also fits outside of the steel chipper body. Attach with four 20mm long bolts with lock washers and flat washers. No nuts required for these connections. Figure 3 9. Attaching the lower leaf funnel section.
Important Engine Information T NOTE: The chipper/shredder operates most efficiently at the factory set engine speed of 3600 RPM. The speed is controlled by the governor, and the throttle setting should not be adjusted. Do not attempt to adjust the speed of the engine. Emission Control System Information The U.S. and California Clean Air Acts EPA and California regulations require all manufacturers to furnish written instructions describing the operation and maintenance of emission control systems.
Operating Instructions T DANGER This machine was built to be operated according to the rules for safe operation in this manual. As with any type of power equipment, carelessness or error on the part of the operator can result in serious injury. WARNING Always wear hearing and eye protection while operating this machine or if you are within 75 feet of this machine. IMPORTANT: This unit is shipped without gasoline or oil in the engine.
Maintenance and Storage T Maintenance Schedule 20 hrs or Before each every 3 use months Item Check for loose fasteners (check) X Engine Oil (Check) X Engine Oil (Change) 50 hrs or every 3 months 100 hrs or every 6 months 300 hrs or every 1 year X Air Cleaner (Check) X Air Cleaner Wash X Fuel filter Cup (Clean) X Spark Plug (Clean) X Spark Plug (Change) X Check Chipper Blade X Fuel Tank and Filter (Clean) X WARNING Always stop engine, disconnect spark plug, and ground against engine
Maintenance and Storage T WARNING Always stop engine, disconnect spark plug, and ground against engine before cleaning, lubricating or doing any kind of maintenance on your machine. Removing and Sharpening the Limb Chute Blades The chipper was shipped with two blades attached spare blades are sold in sets from GXi (Part Number LCSSP11-018) 1. Disconnect the spark plug wire and ground against the engine. 2.
Maintenance and Storage T WARNING Always stop engine, disconnect spark plug, and ground against engine before cleaning, lubricating or doing any kind of maintenance on your machine. Removing and Sharpening the Leaf Funnel Blade 1. Disconnect the spark plug wire and ground against the engine. 2. Remove the lower section and upper section of the funnel as a subassembly. This is done by removing three bolts with the 13mm wrenches provided in the hardware bag. 3.
Maintenance and Storage T Optimizing Chipper Performance – Keep the Blade Sharp! During operation, if you notice any of the following symptoms, your chipper blade probably needs to be sharpened: 1. Chipper does not auto-feed 2. Chipper produces “chunks” or “sawdust” instead of “chips” 3. Chipper engine bogs down or labors 4. Smoke issues from the drive belt 5. Chipper jams or stops altogether To remove and/or replace the blade, please follow the instructions in the owner’s manual.
Troubleshooting T Problem Cause Remedy Engine fails to start 1. Spark plug wire disconnected. 2. Fuel tank empty or stale fuel. 3. Throttle control lever not in correct starting position. (If equipped) 4. Choke not in CHOKE position. (If equipped) 5. Engine not primed. 6. Blocked fuel line. 7. Faulty spark plug. 8. Low oil 1. Connect wire to spark plug. 2. Fill tank with clean, fresh gasoline. 3. Move throttle lever to FAST position. Engine runs erratic 1. Spark plug wire loose. 2.
Troubleshooting T Problem Cause Remedy Unit does not discharge 1. Discharge chute clogged. 1. Stop engine immediately and disconnect spark plug wire. Clean flail screen and inside of discharge opening. 2. Stop engine and disconnect spark plug wire. Remove lodged object. 3. Always run engine at full throttle. Call GXi Parts & Service (919)-550-3259 2. Foreign object lodged in carousel. 3. Low engine RPM. Rate of discharge slows 1. Low engine RPM. 2. Chipper blades are dull. 1.
T Limited Warranty & Service Length of Warranty: *(from the date of original retail Products Covered by this Warranty Engine purchase) Noncommercial /Nonrental 12 months Commercial 3 months Rental 3 months *Length of Warranty: Consumable parts such as oil, spark plugs, filters, blades, and belts are not covered by this warranty. W arranty repairs will be made without charge for parts and labor for the first 6 months.