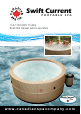
Swift Current PORTABLE SPA 110-115V 60Hz 15 Amp Read this manual before operation Swift Current PORTABLE Spa w p aa cc o om mp p aa nn yy .. cc o om m ww ww w ..
IMPORTANT SAFETY INSTRUCTIONS READ AND FOLLOW ALL SAFETY INSTRUCTIONS: Basic safety precautions should always be followed when installing and using this electrical equipment. WARNING: The spa has been supplied with a residual operating current not exceeding 30 mA. The GFCI must be tested before each use. WARNING: No part of the appliance is to be located above the spa during use.
Part 1 Part 2 PACKAGE LIST A G K D L H J F I B Take all the spa components out of the box and check your Instruction Manual that all the following key components are present: A) Foam Spa Walls x 8 (1 x Foam Panel with Connector holes, 1 x for Suction Line, 1 x Second Suction, 5 x Blank).
) Insert Spa Top Liner into the center of the tub. Feed the integrated Connecton Hoses and the Drain Hose through the holes in Foam Panel 1 and the Spa Base Liner (A). Loosen and remove clamp that comes on 2nd Intake Hose (B). Feed 2nd Intake Hose through the hole in Foam Panel 3. 2. Test GFCI & Inflate Lid a) Perform GFCI Test WARNING: RISK OF ELECTRIC SHOCK. The GFCI plug must be tested before each use. Do not use if GFCI test fails. 1. Insert the plug into the power outlet. 2.
. Install the Filter Cartridge Open the Filter Housing lid counter-clockwise. Put the new filter cartridge into the cartridge chamber and close the lid clockwise. Ensure black “O” ring is placed correctly inside housing. ‘O’Ring Gasket 6. Pre-Fill Check Ensure the drain outlet is extended for future draining/access (Fig. A), check that the washer is in the cap, then tighten. Check the stopper (Fig. B) on the bottom of the spa and the Drain Cap, ensure both are closed tight.
F. LED Display Part 6 : DRAIN & STORE Drain System Locate and remove the external threaded Drain Cap. Attach Drain Hose to Drain Outlet. Locate and remove the stopper on the spa floor to allow water to drain. A. Temperature Increase Button C. Blower/Jet massage Button G. Temperature Mode Button B. Temperature Decrease Button D. Filter Button E.
Part 8 : PORTABLE CONTROL UNIT ERROR MESSAGES CODE Causes Solutions E1/ E2 Temperature control sensor short circuit or open circuit 1. Unplug GFCI from outlet 2. Please contact for service CHECK 1 - Water Level Ensure water level meets fill lines on both interior sides of the spa. Check if this resolves the pump’s malfunctioning. CHECK 2 - Inside Connection Caps 1. Unplug the GFCI cable from the outlet 2. See Part 9: Spa Operation Check List for possible solutions 3.
Part 10 : FREQUENT PROBLEMS SOLUTION Accessories (0ptional) 3 Pack Filter (Buy 3 Get 1 Bonus) Problems Causes Solutions Spa Pump Does Not Operate • GFCI tripped • GFCI broken • Check power source • Power failure • Reset GFCI/check if the cable is rated 2kW / 15A • Call for service if it does not reset Spa Pump Does Not Heat Properly • Temperature set is too low • Filter Cartridge is dirty • Water level is too low • Heating element failed • Set to a higher temperature • Clean/replace the filter car
INFORMATION: For Product Support Visit: support.canadianspacompany.com North America Office: Canadian Spa Company 2-3620B Laird Road Mississauga, Ontario Canada, L5L 6A9 T: +1-877-347-7727 F: +1 (905) 825 2513 www.canadianspacompany.com UK Office: Canadian Spa Company Canada House Salbrook Road Salfords, Redhill Surrey, RH1 5GL, UK T: +44 1293 824094 F: +44 1293 824750 www.canadianspacompany.co.uk German Office: Lützerathstrasse 127 51107 Köln T:0049-221-94655344 F:0049-221-94655342 www.