
Full Product Manual


9
Cleaning / Replacing Filter Cartridge
WARNING: RISK OF ELECTRIC SHOCK. Unplug the PCU
before beginning spa maintenance.
Note: A dirty filter cartridge may contaminate the spa water and
cause damage to the heating function.
1. Carefully thread the three plastic caps onto the inlet/outlet ports on inner spa wall.
(Ensure the rubber gaskets are in place within the plastic caps)
2. Unscrew filter housing lid by turning it counter-clockwise, then remove the filter
cartridge.
3. Rinse off filter cartridge with water and reuse if possible. Replace filter
if the cartridge remains dirty after rinsing or is badly discoloured.
4. Put the cleaned filter back into the cartridge housing and close the lid by
turning it clockwise.
5. Remove caps from inlet/outlet ports on inner spa wall and allow water to
flow into pump. Tub is now ready for use.
Part 5 WATER MAINTENANCE
5. Install the Filter Cartridge
Open the Filter Housing lid counter-clockwise. Put the new filter cartridge into the cartridge
chamber and close the lid clockwise. Ensure black “O” ring is placed correctly inside housing.
6. Pre-Fill Check
Ensure the drain outlet is extended for future draining/access (Fig. A), check that the washer is
in the cap, then tighten. Check the stopper (Fig. B) on the bottom of the spa and the Drain Cap,
ensure both are closed tight. Fill the spa with water using a garden hose until reaching the
water level printed on both interior sides of the spa wall (Fig. C1 & C2). These lines are also used
as an indication of the levelness of the spa. PCU must be connected to the spa prior to filling.
7. Purge Air From Portable Control Unit
Turn on the PCU and select the filter function; the air in the pump must be released. Unscrew
the Air Valve counter-clockwise and release the air until the water is coming out, then screw
the air valve clockwise tightly. Use a towel to dry off the pump.
8. Thermal Blanket
Place Thermal Blanket on water surface for
more efficient heating and improved heat
retention.
The filter cartridge should be cleaned weekly and replaced on a monthly basis, or depending on
use. A reminder will appear to change the filter after 25 days (‘CHG FIL’). Hold the filter button for 5
seconds to clear the message. Change water once a month or depending on use and use
appropriate spa chemicals. Please pay attention to the chemicals used and dosage. Spa damage
resulting from misuse of chemicals is not covered by the warranty.
Water Balance: We recommend you maintain your water balance: PH value: 7.2 - 7.6; Free
Chlorine: 2ppm - 3ppm. Use test kit to test your spa water before each use of the spa, or at least
once per week.
Water Sanitation: We suggest using chlorine or bromine granules to disinfect the spa’s water.
Never add tablets freely to spa water; a floating dispenser is recommended.
Cleaning the Spa: Clean the spa with soap and water, then rinse. Leave it outside (away from
direct sunlight) to dry.
Repairs: Small holes or punctures can be repaired with the repair kit that comes with the spa (glue
not included)
(1.) (2.) (3.)
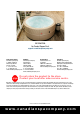
MAINTENANCE / TROUBLE SHOOTING :
PROBLEM
Cloudy water
Odour
Eye skin/irritation
POSSIBLE CAUSE
High pH (test to verify)
Poor filtration
High dissolved solids
High level of organic contaminants
Low pH and/or alkalinity
combined Chlorine due to organic
contamination
SOLUTION
Add pH down
Clean filter w/Filter Free
Empty spa and re-fill
Increase the amount of Chlorine
Add Alkalinity Booster
Increase the amount of Chlorine
Granules
Part 4 USAGE
(Fig. A)
Press the Temperature Setting Button to set an appropriate temperature. Press the
Heating Button to heat the water. Put on the lid while heating. Once the water reaches the
desired temperature you can enjoy your spa. Press the Jet Massage Button to activate
massage system. We suggest a temperature range between 98.6°F-102°F (37-39℃)
during the winter. The massage system will stop automatically after 30 minutes of
operation to reduce energy consumption. Re-activate the Jet Massage function by
pressing the Jet Massage Button again (See Part 7 for Control Functions).
Lock the Buckle
Push the square pad upwards to lock and downwards to unlock (Fig. A).
(Fig. A)
(Fig. C1) (Fig. C2)
(Fig. B)
‘O’Ring Gasket
8