
Owner's Manual
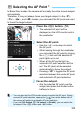
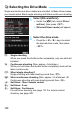


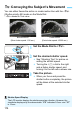
Table Of Contents
- Camera Quick Reference Guide
- Camera Basic Instruction Manual
- Introduction
- Compatible Memory Cards
- About Supplied Instruction Manuals
- Table of Contents
- Supplied Accessories
- Using This Manual
- Quick Start Guide
- Parts & Controls
- Getting Started
- Attaching the Strap
- Charging the Battery
- Installing and Removing the Battery and Card
- Turning On the Power
- Setting the Date, Time and Time Zone
- Selecting the Interface Language
- Attaching and Detaching a Lens
- Basic Operation
- Quick Control
- Menu Operations
- Formatting the Card
- Switching the LCD Monitor Display
- Feature Guide
- Using the Touch Screen
- Basic Shooting
- Fully Automatic Shooting
- Fully Automatic Techniques
- Disabling Flash
- Creative Auto Shooting
- Shooting Portraits
- Shooting Landscapes
- Shooting Close-ups
- Shooting Moving Subjects
- SCN: Special Scene Mode
- Shooting Children
- Shooting Food
- Shooting Candlelight Portraits
- Shooting Night Portraits
- Shooting Night Scenes
- Shooting Backlit Scenes
- Quick Control
- Shooting with the LCD Monitor (Live View Shooting)
- Shooting Movies
- Image Playback
- Viewing the CD-ROM Instruction Manuals / Downloading Images to Your Computer
- Camera Instruction Manual
- Introduction
- Table of Contents
- Supplied Accessories
- Parts & Controls
- Getting Started
- Attaching Camera Strap
- Charging the Battery
- Installing and Removing the Battery and Card
- Turning On the Power
- Setting the Date, Time, and Zone
- Selecting the Interface Language
- Attaching and Detaching a Lens
- Basic Operation
- Quick Control for Shooting Functions
- Menu Operations
- Formatting the Card
- Switching the LCD Monitor Display
- Feature Guide
- Using the Touch Screen
- Quick Reference Guide
- Basic Shooting and Playback
- Fully Automatic Shooting (Scene Intelligent Auto)
- Full Auto Techniques (Scene Intelligent Auto)
- Disabling Flash
- Creative Auto Shooting
- Shooting Portraits
- Shooting Landscapes
- Shooting Close-ups
- Shooting Moving Subjects
- Special Scene Mode
- Shooting Children
- Shooting Food
- Shooting Candlelight Portraits
- Shooting Night Portraits
- Shooting Night Scenes
- Shooting Backlit Scenes
- Quick Control
- Shoot by Ambience Selection
- Shoot by Lighting or Scene Type
- Image Playback
- Creative Shooting
- Advanced Shooting
- Conveying the Subject’s Movement
- Changing the Depth of Field
- Manual Exposure
- Changing the Metering Mode
- Setting Exposure Compensation
- Auto Exposure Bracketing
- Locking the Exposure
- Locking the Flash Exposure
- Auto Correction of Brightness and Contrast
- Setting Noise Reduction
- Lens Peripheral Illumination / Chromatic Aberration Correction
- Customizing Image Characteristics
- Registering Preferred Image Characteristics
- Matching the Light Source
- Adjusting the Color Tone for the Light Source
- Setting the Color Reproduction Range
- Mirror Lockup to Reduce Camera Shake
- Shooting with the LCD Monitor (Live View Shooting)
- Shooting Movies
- Handy Features
- Disabling the Beeper
- Card Reminder
- Setting the Image Review Time
- Setting the Auto Power-off Time
- Adjusting the LCD Monitor Brightness
- Creating and Selecting a Folder
- File Numbering Methods
- Setting Copyright Information
- Auto Rotation of Vertical Images
- INFO. Checking Camera Settings
- Reverting the Camera to the Default Settings
- Preventing the LCD Monitor from Turning Off Automatically
- Changing the Shooting Settings Screen Color
- Setting the Flash
- Automatic Sensor Cleaning
- Appending Dust Delete Data
- Manual Sensor Cleaning
- Image Playback
- Searching for Images Quickly
- Magnified View
- Playing Back with the Touch Screen
- Rotating the Image
- Setting Ratings
- Quick Control for Playback
- Enjoying Movies
- Playing Movies
- Editing a Movie’s First and Last Scenes
- Slide Show (Auto Playback)
- Viewing the Images on TV
- Protecting Images
- Erasing Images
- INFO. Shooting Information Display
- Post-Processing Images
- Printing Images
- Customizing the Camera
- Reference
- Viewing the CD-ROM Instruction Manuals / Downloading Images to Your Computer
- Troubleshooting
- Error Codes
- Specs
- Index
- EF-S18-55mm Lens Instructions
- Notes On Prolonged Use
- Scans of CD-ROMs
- Lens Warranty
- Camera Warranty

S Selecting the AF PointN
106
When shooting a portrait up close, use One-Shot AF and focus
the eyes.
If you focus the eyes first, you can then recompose and the face will
remain sharp.
If it is difficult to focus, select and use the center AF point.
The center AF point is the most sensitive among the nine AF points.
To make it easier to focus a moving subject, set the camera to
automatic AF point selection and AI Servo AF(p.104).
The center AF point will first be used to focus the subject. During
autofocusing, if the subject moves away from the center AF point,
focus tracking continues as long as the subject is covered by
another AF point.
Under low-light conditions, when you press the shutter button halfway,
the built-in flash may fire a brief burst of flashes. This illuminates the
subject to enable easier autofocusing.
Shooting Tips
AF-Assist Beam with the Built-in Flash
The AF-assist beam will not be fired from the built-in flash in the following
shooting modes: <7>, <3>, <5>, and <C>.
The AF-assist beam cannot be emitted with AI Servo AF operation.
The effective range of the AF-assist beam emitted by the built-in flash is
approx. 4 meters/13.1 feet.
In Creative Zone modes, when you raise the built-in flash with the <I>
button (p.111), the AF-assist beam will be emitted when necessary. Note
that depending on the setting for [4: AF-assist beam firing] under [54:
Custom Functions (C.Fn)], AF beam will not be emitted (p.302).
If you use an Extender (sold separately) and the f/number becomes higher
than f/5.6, AF shooting will not be possible (except in [u+Tracking],
[FlexiZone - Multi], and [FlexiZone - Single] during Live View shooting).
For details, refer to the Extender’s instruction manual.