
User guide


116
4
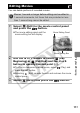
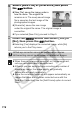
Select [New File] or [Overwrite] and press
the SET button.
z [New File]: saves the image under a
new file name. The original file
remains as is. The newly saved image
file is saved as the last image of the
photographed images.
z [Overwrite]: saves the new image
under the original file name. The original image is
overwritten.
z If you selected [New File], proceed to Step 5.
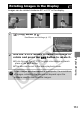
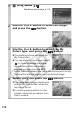
5
Press the MENU button and select [Yes] or
[No], then press the SET button.
z Selecting [Yes] displays the corrected image, while [No]
returns you to the Play menu.
z Red-eye correction cannot be performed on movies.
z Overwriting cannot be performed on protected images.
z When there is not enough space left on the memory card,
red-eye correction cannot be performed.
z Although you can apply red-eye correction any number of
times to an image, the image quality will gradually
deteriorate with each application.
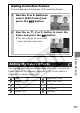
z Since the correction frame will not appear automatically on
images that have already been corrected once with the
[Red-Eye Correction], use the [Add Frame] option to correct
them.