Digital Camera Operating Steps and Reference Guides Your camera includes two manuals: the “EOS D30 Camera User’s Guide” and the “Software Starter Guide.
Thank you for purchasing this Canon product Before you use your EOS D30, be sure to read this user’s guide with your camera on hand. This will help you become more familiar with your camera, and learn how to operate it properly. * We strongly recommend that you use a Canon CF card. Test Shots and Warranty of Photographic Images Before taking important pictures, we would strongly recommend that you first shoot several trial images to make sure you are operating the camera correctly.
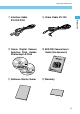
Check Your Accessories Before using your camera, make sure you have all the accessories shown on this and the following page. If any are missing, contact the store where you purchased your camera.
Check Your Accessories i Video Cable VC-100 o Canon Digital Camera Solution Disk, Adobe Photoshop LE Disk !0 EOS D30 Camera User’s Guide (this document) Introduction u Interface Cable IFC-200 PCU Camera User’s Gu ide Eng INSTRlish Edition UCTIO NS !1 Software Starter Guide !2 Warranty 5
Contents Introduction Digital Camera Operating Steps and Reference Guides .......................................2 Check Your Accessories.................................4 Precautions for Handling ..............................12 Quick Guide ..................................................14 Nomenclature................................................16 Conventions Used in This Manual ................22 1 Before You Begin .....................23 Replacing the Backup Battery......................
Contents FE Lock .....................................................94 Flash Exposure Compensation...........95 Flash Photography with the EOS-Dedicated 550EX Speedlite .............96 Full Auto Flash ..........................................97 Taking Flash Pictures in Each Shooting Mode ...........................................97 High-Speed Sync (FP Flash) ....................98 FEB (Flash Exposure Bracketing).............98 FE Lock .....................................................
EOS D30 This device complies with Part 15 of the FCC Rules. Operation is subject to the following two conditions: (1) This device may not cause harmful interference, and (2) this device must accept any interference received, including interference that may cause undesired operation. Note:This equipment has been tested and found to comply with the limits for class B digital devices, pursuant to Part 15 of the FCC Rules.
SAFETY PRECAUTIONS WARNINGS • Do not aim the camera directly into the sun or at other intense light sources that could injure your eyesight. • Do not trigger the flash in close proximity to human or animal eyes. Exposure to the intense light produced by the flash may injure eyesight. In particular, remain at least one meter (39 inches) away from infants when using the flash. • Store this equipment out of the reach of children and infants.
• Do not use substances containing alcohol, benzene, thinners or other flammable substances to clean or maintain the equipment. The use of these substances may lead to fire. • Do not cut, damage, alter or place heavy items on the power adapter cord. Any of these actions may cause an electrical short circuit, which may lead to fire or electrical shock. Replace a broken or damaged power adapter cord. • Do not handle the power cord if your hands are wet. Handling it with wet hands may lead to electrical shock.
CAUTIONS Preventing Malfunctions Avoid Strong Magnetic Fields Never place the camera in close proximity to electric motors or other equipment generating strong electromagnetic fields. Exposure to strong magnetic fields may cause malfunctions or corrupt image data. Avoid Condensation Related Problems Moving the equipment rapidly between hot and cold temperatures may cause condensation (water droplets) to form on its external and internal surfaces.
Precautions for Handling The Camera (1) This camera is a precision instrument. Do not drop it or expose it to physical shock. (2) The camera is not waterproof and should not be used in wet conditions or underwater. If the camera gets wet, take it to your nearest Canon dealer as soon as possible. If small amounts of water splash onto the camera, wipe it with a clean dry cloth. If the camera is exposed to salty air, wipe it thoroughly with a slightly damp cloth.
Precautions for Handling (4) By their nature, LCD displays react more slowly at low temperatures, and may appear dark at high temperatures. The display will return to normal at room temperature. Lithium Backup Battery CF Card (1) The CF card is a precision device. Do not drop CF cards or expose them to vibrations. Doing so could lose the images recorded on them.
Quick Guide See the page indicated (→ ■) for more information. Charge the battery pack 1 Connect the power cord to the adapter, then attach the battery. When the charge lamp stops blinking and stays lit, the battery is completely charged. A full battery charge takes approximately 90 minutes. (→25) 5 Mount the lens. Align the red dots on the lens and camera and turn the lens in the direction shown by the arrow in the diagram until it clicks into place. (→30) 9 Focus on the subject.
Quick Guide 3 7 11 Slide the cover in the direction shown by the arrow, then open it. (→31) Set the Main Switch to 〈ON〉. (→33) Check the image. The image is displayed for approximately 2 seconds after the shot. (→44) Introduction Open the CF card slot cover. Insert the CF card. 4 Insert the CF card, then close the cover. (→31) 8 Set the Mode Dial to 〈 (Full Auto). 〉 (→42) ● To check other images you have taken, see “Check the Image Immediately” (→44) and “Viewing Recorded Images” (→102).
Nomenclature 〈DRIVE〉 Drive mode button (→67) 〈 〉 Metering mode button/ Flash exposure compensation button (→65, 95) LCD panel (→18) 〈 AF 〉 AF mode/WB button (→58, 70) WB Lens mount index (→30) Built-in flash (→90) Hot shoe (→96) 〈 〉 Main dial (→34) 〈 Shutter button (→33) 〉 Flash button (→90) Mode dial (→20) Strap eyelet (→23) Expansion electronics cover (→116) Grip (Battery chamber) Lens release button (→30) DC coupler cord channel (→29) Remote control terminal Red-eye reduction lamp(→93) AF-assis
Nomenclature Diopter adjustment knob (→40) Eyecup (→86) Viewfinder (→19) Quick control dial switch (→35) Main switch (→33) 〉 AE lock button/FE lock button (→84, 94) 〈 〈INFO.
Nomenclature LCD Panel Shutter speed ( , Data processing ( ) Backup battery warning ( Cleaning warning ( ) Parameters ( ) ~ ISO Speed ( ) ~ CF full warning ( ) CF error warning ( ) Focusing point ( ) Error code ( ) Cleaning ( ) ) ) Aperture value ( - ) Drive mode One-shot Continuous Self-timer Possible images that can still be taken ( ) Self-timer countdown ( - ) Bulb exposure time ( ) ISO speed ( ) Quality Large/Fine Large/Normal Small/Fine Small/Normal RAW White balance mode Auto Daylight Cloudy Tun
Nomenclature Viewfinder Information Focusing points New laser matte screen In-focus indicator AE lock/FE lock indicator Flash-ready indicator FE lock underexposure warning Exposure level Exposure compensation amount AEB level Red-eye reduction lamp indicator High-speed sync indicator (FP flash) CF full warning ( CF error warning ( Shutter speed ( Data processing ( ) ) - , Focusing point indicator ) Aperture value ( - ) ) The above diagram shows the LCD panel with all icons and indicators
Nomenclature Mode Dial The Mode Dial is divided into two functional zones. Creat ive zon e Ea q Easy shooting zone ne ho sy s o ti ng w Creative zone ● All you do is press the shutter button. :Full Auto (→42) Lets you take fully automatic pictures— the camera makes all the settings. Image zone Lets you take fully automatic pictures in specific situations. : Portrait (→48) : Landscape (→49) : Close-up (→50) : Sports (→51) : Night Scene (→52) See the page indicated (→■) for more information.
Nomenclature Compact Power Adapter CA-PS400 Power cord (→25, 29) Power cord socket (→25, 29) Plug in power cord here. Charge lamp (→25) Back DC coupler socket (→29) Plug in cord for DC coupler here. DC coupler plug (→29) Plug into DC coupler socket of compact power adapter. DC Coupler DR-400 DC coupler cord (→29) 21 Introduction Battery pack connectors (→25) Attach battery packs for charging.
Conventions Used in This Manual ● All descriptions in this manual assume that the Main Switch is already set to 〈ON〉. Set it to 〈ON〉 before proceeding with any operation. ● In this manual, the 〈 ● In this manual the 〈 〉 icon indicates the Main Dial. 〉 icon indicates the Quick Control Dial. ● In this manual the 〈 〉 icon indicates the SET button, used to set menu functions and custom functions. ● In this manual, the [C.Fn] symbol indicates a brief explanation of the respective custom function.
Before You Begin 1 This chapter describes preparations and settings you need to make before you begin shooting, as well as how the shutter button operates. Attaching the Strap Eyepiece cover Pass the end of the strap through the strap eyelet from beneath, then back in and out of the strap clasp as shown. Pull the strap to make sure it does not slip out of the clasp. ● The eyepiece cover is attached to the strap.
Replacing the Backup Battery When the backup battery’s power level runs low, the message “ ” appears on the camera’s LCD panel. If this happens, you will need to purchase a replacement CR2025 battery and replace the backup battery in your camera as follows. If you replace the backup battery while the camera is connected to a battery pack with power remaining or to a DC coupler, the date, time, and other menu functions will retain their settings. 1 2 Set the Main Switch to 〈OFF〉.
Charging the Battery Pack 1 Connect the power cord. ● Connect the power cord to the compact power adapter. ● Insert the plug into a power outlet. 1 Battery charge Charge lamp 0–50% Blinks once per second 50–75% Blinks twice per second Over 75% Blinks three times per second 100% Stays on Remove the cover. 3 Place the battery in the adapter. 4 Charge the battery pack. ● Store the cover in a place where it will not be lost.
Charging the Battery Pack ● When the DC coupler is connected to the compact power adapter, the adapter cannot be used to charge battery packs. ● Do not charge any battery packs other than model BP-511. ● When the battery pack is in the camera, it discharges slightly over time even when the camera is not used. This reduces the battery pack’s operating time. When not using the camera, remove the battery pack and store it with its protective cover attached.
Inserting and Removing the Battery Pack Inserting the Battery Pack Load a fully charged BP-511 battery pack into the camera. 1 Open the battery chamber cover. ● Slide the lever in the direction shown by the arrow in the diagram, and open the cover as shown. 3 Close the cover. ● Make sure the battery pack is facing the right way, and insert it into the battery chamber. ● Insert the battery pack until it locks into place. ● Press the cover closed until it clicks shut.
Inserting and Removing the Battery Pack Number of Available Shots Temperature Normal (20°C/68°F) Low (0°C/32°F) Shooting conditions No flash use 50% flash use Approx. 680 Approx. 540 Approx. 480 Approx. 400 ● The above figures were obtained under Canon test conditions (fully charged battery, EF 50mm F1.4 USM lens, Review function [On], Review Time [2 sec.], Quality [Large ]). ● Playback on the LCD monitor is available for approximately 140 minutes at normal temperature (continuous auto playback).
Inserting and Removing the Battery Pack Using a Household Power Supply You can operate the EOS D30 from a household power outlet by using the DC coupler. This enables you to use the camera as long as you like without a battery. 2 Place the cord in the groove. 3 Insert the DC coupler into the camera. 4 ● Plug the DC coupler into the compact power adapter. ● Carefully insert the cord into the groove. ● Open the cover (→27) and lower the covering on the cord channel.
Mounting and Detaching a Lens Mounting a Lens Lens mount index 1 Remove the caps. 2 Attach the lens. 3 Set the focus mode switch on the lens to 〈AF〉. 4 Remove the front lens cap. ● Remove the rear lens cap and the body cap by turning them as shown by the arrows in the diagram. ● Align the red dots on the lens and camera and turn the lens as shown by the arrow in the diagram until it clicks in place.
Inserting a CF Card The EOS D30 stores pictures on a CompactFlash (CF) card. The camera can use either Type 1 or Type 2 CF cards. 1 Open the cover. ● Slide the cover in the direction shown by the arrow, and open it as shown in the diagram. 1 Insert the CF card. 3 Close the cover. 1 Open the cover. 2 Remove the CF card.
File Numbering System The pictures you take are automatically assigned file numbers from 0001 to 9900 and stored in folders of 100 images each. Each folder on the CF card is numbered from 100 to 998.
Basic Operation Main Switch The camera operates only after the Main Switch is set to 〈ON〉. 〈ON〉: Set to this position when the camera is in use. 〈OFF〉 : The camera does not operate. Set to this position when not using the camera. 1 Shutter Button The shutter button has two stages. You can press it down halfway or fully.
Basic Operation Using the Electronic Dials Basic Operations with the 〈 〉 Dial The 〈 〉 dial is used to make settings only when taking pictures. It can be used in two ways. (1) Press a button and turn the 〈 〉 dial. When you press a button, its function remains active while a timer ( 6 ) runs. During this time you can turn the 〈 〉 dial and view the settings on the LCD panel. When the timer runs out or you press the shutter button down halfway, the camera is ready to take a picture.
Basic Operation Basic Operations with the 〈 〉 dial. You can only use the 〈 〉 dial when the Quick Control Dial switch is set to 〈ON〉. Use the dial to select and set shooting mode operations and menu functions from the LCD monitor. When using the 〈 〉 dial to carry out basic operations, you can use it in two ways. (1) Press a button and turn the 〈 〉 dial. 1 Use the dial this way to select and set the white balance, drive mode and flash exposure compensation. (2) Just turn the 〈 〉 dial.
Basic Operation Menu Functions and Settings The Canon EOS D30 uses menu functions to set functions such as the quality, the date and time, and Custom Function settings. To use the menu functions, look at the LCD monitor and use the 〈MENU〉 button, 〈 〉 dial and 〈 〉 button as shown below. 〈MENU〉 button 〈 LCD monitor 〉 dial 〈 〉 button 1. Display the menu. Press the 〈MENU〉 button to display the menu. Press the button again to clear the screen. 2. Select the menu item.
Basic Operation Menu Selections and Default Settings On the Menu screen, items and settings are shown in different colors according to the functions they control. Selected items are enclosed in a frame. Menu item Setting indicated by color Color Red Blue Playback Setup Description Menu items related to taking pictures. Menu items related to playing back recorded images. Menu items related to basic camera functions.
Setting the Date and Time Set the date and time as shown. The date and time are recorded with the image data for each photographed image. 1 From the Menu, select [Date/Time]. 2 Press the 〈 3 Set the date and time. 4 Select the order for the display. ● Press the 〈MENU〉 button. ● Turn the 〈 〉 dial to select [Date/Time]. 〉 button. The Date/Time setting screen appears. ● Turn the 〈 〉 dial to adjust the date and time values, then press the 〈 〉 button.
Setting the Date and Time 5 Press the 〈 〉 button. The date and time are set, and the display returns to the menu. ● Press the 〈MENU〉 button to clear the screen and exit the menu. 1 Before You Begin ● Each photographed image is recorded with the date and time it was taken. If the date and time are not set, they cannot be recorded correctly. Make sure you set the date and time correctly. ● The date and time are stored using the backup battery.
Dioptric Adjustment in the Viewfinder Use the dioptric adjustment in the viewfinder to best suit your vision. This adjustment can enable eyeglass wearers to see through the viewfinder clearly, even without their eyeglasses. The camera’s adjustable dioptric range is –3 to +1 dpt. Turn the Dioptric Adjustment Knob ● Turn the knob right or left until the focusing point or the center spot metering circle appears sharply defined in the viewfinder.
Simple Picture Taking 2 This chapter describes how to use the Mode Dial’s Easy Shooting zone 〈 〉, 〈 〉, 〈 〉, 〈 〉, 〈 〉, 〈 〉 for simple picture taking. In this zone, anyone can take pictures easily by simply pressing the shutter button. In addition, to help prevent mistakes caused by operating Easy Shooting zone the camera improperly, the 〈 〈 〉, 〈 〉, and 〈 〉 dial, and the 〈 〉 buttons do not operate so there is no need to worry about accidental errors.
Fully Automatic Picture Taking You can easily and confidently take pictures of any subject, with no need to do anything but press the shutter button. The Canon EOS D30 can capture subjects at any of three focusing points, so that anybody can take great pictures easily. 1 Set the Mode Dial to 〈 2 Place one of the focusing points on the subject. 3 Set the focus. 4 Check the display. 5 Take the picture. Focusing point 42 〉.
Fully Automatic Picture Taking ● If the CF card becomes full, the CF Full message “ ” appears on the LCD panel and in the viewfinder, and the camera will not take any more pictures. Replace the CF card with another CF card that has capacity available. ● When the in-focus indicator 〈●〉 is blinking, the camera will not take pictures. (→63, 139) ● The focus and exposure are locked when AF focusing is complete.
Check the Image Immediately You can view the images you take immediately, on the LCD monitor on the back of the camera. 1 Take the picture. After the picture is taken, the image as it was shot appears on the LCD monitor. ● The image is shown for approximately 2 seconds. ● You can turn the Review function on or off, as well as display the image information display. (→45) ● You can change the length of time the image is displayed. (→46) ● You can change the brightness of the LCD monitor.
Check the Image Immediately Checking the Image After it is Taken You can set the camera to display each image on the LCD monitor as soon as it is taken. You can do this two ways: Select [On] to display the image by itself, or select [On (Info)](→104) to display the image with its recording information. Select [Off] if you do not want to display the image. The default setting is [On]. 1 ● Press the 〈MENU〉 button. ● Turn the 〈 press the 〈 〉 dial to select [Review], then 〉 button.
Check the Image Immediately Time Images Are Displayed for Checking You can control how long images are displayed by setting the review time to [2 sec.], [4 sec.], [8 sec.], or [Hold] which keeps the image on the monitor screen. The default setting is [2 sec.]. 1 From the Menu, select [Review time]. 2 Set the review time. ● Press the 〈MENU〉 button. ● Turn the 〈 〉 dial to select [Review time], then press the 〈 〉 button. ● Turn the 〈 〉 dial to select the review time you want, then press the 〈 〉 button.
Erasing a Recorded Image (Single Image Erase) 1 Set the camera to Play mode. 2 Select the image you want to erase. 3 Open the Erase menu. 4 Erase the image. ● Press the 〈 〉 button to enter Play mode. The most recent image appears. ● Press the 〈 〉 button. The Erase menu appears at the bottom of the LCD monitor. ● Turn the 〈 press the 〈 〉 dial to select [Erase], then 〉 button. The access lamp blinks and the image is erased. You cannot recover an image once you have erased it.
Portrait Mode This mode blurs the background to make the subject stand out. Set the Mode Dial to 〈 〉. ● The way you take pictures is the same as in 〈 〉 (Full Auto) mode. (→42) The AF mode is automatically set to 〈ONE SHOT〉, the drive mode to 〈 〉, and the metering mode to 〈 〉. The Quality setting is automatically set to Large/Fine (2160 × 1440). ● Head-and-shoulder shots give the best background blur effect.
Landscape Mode This mode is for sweeping scenery, sunsets, etc. Set the Mode Dial to 〈 〉. If the shutter speed indicator blinks, the shutter speed may be too slow to keep the picture from being blurred by camera shake. We recommend you use a tripod when taking landscape pictures. (The shutter speed indicator still blinks if you use a tripod, but camera shake will not be a problem.) The built-in flash does not fire in Landscape mode, even if it is raised.
Close-Up Mode This mode is for taking close-up shots of flowers, insects, or other small subjects. Set the Mode Dial to 〈 〉. ● The way you take pictures is the same as in 〈 〉 (Full Auto) mode. (→42) The AF mode is automatically set to (ONE SHOT), the drive mode to 〈 〉 (Single shot), and the metering mode to 〈 〉. The Quality setting is automatically set to Large/Fine (2160 × 1440). ● Close-up mode is most effective when the subject is at the minimum focusing distance of the lens.
Sports Mode This mode is used for sports photography and capturing fast-moving subjects. Set the Mode Dial to 〈 〉. If the shutter speed indicator blinks, the shutter speed may be too slow to keep the picture from being blurred by camera shake. Be careful to hold the camera steady and press the shutter button smoothly, or use a tripod. (The shutter speed indicator still blinks if you use a tripod, but camera shake will not be a problem.
Night Scene Mode This mode is for taking pictures of people at sunset or at night. It uses flash to illuminate the subject and a slow shutter speed to expose the background, resulting in a natural-looking exposure. Set the Mode Dial to 〈 〉. ● The way you take pictures is the same as in 〈 〉 (Full Auto) mode. (→42) The AF mode is automatically set to 〈ONE SHOT〉, the drive mode to 〈 〉 (Single shot), and the metering mode to 〈 〉. The Quality setting is automatically set to Large/Fine (2160 × 1440).
Advanced Operations Creative zone 3 The Creative zone features shooting modes that let you select the shutter speed or aperture value and change the exposure yourself, providing you with more flexibility to set up the camera for a variety of shooting styles. This chapter describes how to make effective use of each of these functions. ● The 〈 〉 icon represents the Main Dial, and the 〈 〉 icon represents the Quick Control Dial.
Quality Selection Use the Menu function to choose from five Quality settings: Recording Compression Icon Recording method ratio size Large/Fine Low 2160 × 1440 Large/Normal High JPEG Small/Fine Low 1440 × 960 Small/Normal High 2160 × 1440 RAW RAW – Quality Size of one image 1.3 Mbyte 0.7 Mbyte 0.7 Mbyte 0.4 Mbyte 3.4 Mbyte Recording capacity Approx. 10 shots Approx. 21 shots Approx. 22 shots Approx. 40 shots Approx. 3 shots ● Based on Canon testing standards (ISO 100 setting).
About ISO Speed ISO speed is an index number representing the photosensitivity of silver-halide film. Digital cameras do not use film, but their photosensitivity is commonly described in terms of “ISO equivalent” speed settings. (→132) The higher the number, the greater the sensitivity. Higher speeds are better for taking pictures of moving subjects or in dim light, but the pictures will also contain more noise and so will be less sharp.
Selecting Parameters In addition to the standard parameters automatically applied by the camera for processing images recorded, you can register up to three sets of your own parameters. Parameter settings are made using a computer and the software supplied with your EOS D30 camera, and stored in the camera by connecting the computer and camera with the proper interface cable provided with the camera.
Selecting Parameters Parameters The camera can store up to three sets of parameters, each a combination of settings for Contrast, Sharpness, and Color Saturation. For details, see the Software Starter Guide. Up to 3 sets of parameters can be stored. Set the contrast in three levels. 3 Set the sharpness in three levels.
AF Mode Selection The AF mode setting controls how the autofocus functions operate. The camera has two AF modes: One-shot AF for still subjects, and AI Servo AF for moving subjects. AF mode selection is available in all Creative zone settings except for 〈 〉. 1 Set the lens focus mode switch to 〈AF〉. 2 3 Set the Mode Dial to a Creative zone setting other than 〈 〉. 4 Select the AF mode. Press the 〈 AF 〉 button. ( 6 ) WB ● Turn the 〈 〉 dial to make the selection.
AF Mode Selection One-Shot AF for Still Subjects 3 Press the shutter button down halfway to activate AF operation and focus once. When the camera has focused, the focusing point indicator and the in-focus indicator 〈●〉 in the viewfinder light at the same time. ● When using evaluative metering, the exposure setting is determined when focus is achieved. The exposure setting and focus remain locked as long as the shutter button is pressed down halfway.
AF Mode Selection AI Servo AF for Moving Subjects Press and hold the shutter button down halfway, and the camera focuses continuously. ● This mode is suited for moving subjects when the focusing distance keeps changing. ● With its predictive AF function, the camera can also track a subject that is steadily approaching or retreating from the camera. ● The exposure settings are determined immediately before the picture is taken.
Focusing Point Selection The focusing point is the frame in which the subject is focused. The focusing point can be selected automatically or manually. In the Easy Shooting zone and in 〈 〉 mode, the selection is automatic, but in 〈 〉, 〈 〉, 〈 〉, and 〈 〉 modes you can switch between automatic and manual focusing point selection. Automatic selection AF: The camera selects the focusing point automatically according to conditions. Manual selection AF: You can select any of the three focusing points manually.
Focusing On an Off-Center Subject To focus on a subject not covered by one of the three focusing points, follow the procedure below. This technique is called Focus Lock. Focus lock is valid when the AF mode is set to One-shot AF. 1 2 Select a focusing point. 3 Hold the shutter button down halfway and recompose the picture. 4 Take the picture. (→61) Focus on the subject. ● Place the focusing point over the subject and press the shutter button down halfway.
Problem Subjects for Autofocusing The EOS D30 has a precision AF system that can focus on most subjects.
INFO. Checking Camera Settings When the camera is ready to shoot, press the 〈INFO.〉 button to view the current camera settings on the LCD monitor. Camera Setting Information The following information is shown on the LCD monitor: Auto power off time (→33, 121) Review (→45), Review time (→46) Parameters (→56) (not displayed unless parameters have been stored) C.
Selecting a Metering Mode 1 Press the 〈 2 Select a metering mode. 〉 button. ( 6) Look at the LCD panel as you turn the 〈 dial. 〉 :Evaluative 3 :Partial ● Press the shutter button down halfway to return to ready-to-shoot mode. Turn the 〈 〉 dial to set the flash exposure compensation for the built-in/optional flash (→95).
Metering Modes The EOS D30 uses three methods for metering: evaluative, partial, and center-weighted averaging. The Easy Shooting zone uses evaluative metering. In the Creative zone, any of the three modes can be selected. : Evaluative Metering This is an all-around metering mode suited even for backlit subjects. The viewfinder field is divided into 35 metering zones to which the three focusing points are linked for evaluative metering.
Selecting a Drive Mode You can set the EOS D30’s drive mode to single-image shooting, continuous shooting or selftimer operation. Single-image shooting 〈 〉: Press the shutter button to take one image. Continuous shooting 〈 〉: You can use the continuous shooting mode by pressing and holding the shutter button. The maximum number of images that can be taken for each quality setting is shown in the table below. Self-timer operation: You can set the self-timer to take a picture after 10 seconds.
Selecting a Drive Mode ● Images taken with continuous shooting are first stored in the camera’s internal memory, then on the CF card. When the internal memory is full, the “ ” message appears on the LCD panel and in the viewfinder, and no more images can be taken. Once this happens, images are written onto the CF card until there is enough memory available for another image. The “ ” message then disappears, and the camera can take the next shot.
White Balance Settings In light from any source, the proportion of the primary colors (red, green, blue) in the light varies according to the color temperature. Higher color temperatures contain a greater proportion of blue, and lower color temperatures contain a greater proportion of red. Moving from low to high, the progression is red → orange → yellow → white → blue-white.
Custom White Balance Setting Custom white balance lets you set the white balance yourself by photographing a white subject to use as the basis for the camera’s white balance, and then selecting that picture for use as white balance data. 1 Photograph a white subject. 2 From the menu, select [Custom WB]. 3 Select the image. 4 Press the 〈 AF 〉 button. WB Partial metering zone 70 ● Take a picture of a white subject, just as you would take a normal picture.
Custom White Balance Setting 5 Select the white balance. ● Turn the 〈 〉 dial to select [ ]. The custom white balance is entered. 3 Advanced Operations ● For best results, use subjects such as plain white paper for white balance basis. ● White balance data is loaded from the partial metering zone (→19).
Program AE Like 〈 〉 (Full Auto) mode, this is a general-purpose picture-taking mode. The camera automatically sets the shutter speed and aperture value to suit the scene’s brightness. This is called Program AE. stands for Program * * AE stands for Auto Exposure 72 1 Set the Mode Dial to 〈 2 Focus on the subject. 3 Check the display. 4 Take the picture. 〉. ● Press the shutter button down halfway.
Program AE Differences Between Program AE Mode 〈 Mode 〈 〉 〉 and Full Auto ● 〈 〉 (Program AE) and 〈 〉 (Full Auto) mode are alike in that both automatically determine the shutter speed and aperture values. ● The following functions can be used in 〈 〉 mode but not in 〈 〉 mode.
Shutter Speed-Priority AE In this mode, you set the shutter speed, and the camera automatically sets the aperture value to suit the brightness of the subject. This is called Shutter Speed-Priority AE. A fast shutter speed can freeze the motion of a fast-moving subject, and a slow shutter speed can blur the subject to give the impression of motion. * stands for “time value.” Slow shutter speed Fast shutter speed 74 1 Set the Mode Dial to 〈 2 Set the shutter speed. 3 Focus on the subject.
Shutter Speed Priority AE ● At shutter speeds slower than one second, the release time lag (between the time the shutter button is pressed completely and the start of the exposure) is approximately 1 second. The release time will be a little longer when the drive mode is continuous shooting, even if the shutter speed is faster than one second. In this case, hold the shutter button down until the pictures have been taken.
Aperture-Priority AE In this mode, you set the aperture value, and the camera automatically sets the shutter speed to suit the brightness of the scene. This is called Aperture-Priority AE. By setting a smaller aperture value (larger aperture), you can blur the background to make the subject stand out as in a portrait. Or, by setting a larger aperture value (smaller aperture), you can increase the depth of field to make both the foreground and background look sharp. * stands for “aperture value.
Aperture-Priority AE ● If the 30” shutter speed blinks, the scene is too dark. Turn the 〈 〉 dial to reduce the aperture value (larger aperture). ● If the 4000 shutter speed blinks, the scene is too bright. Turn the 〈 〉 dial to increase the aperture value (smaller aperture). Aperture Value Display You can set the aperture in half stops as shown below. The higher the aperture value, the smaller the aperture opening. The range of aperture settings displayed depends on the lens mounted on the camera. 1.0 1.
Manual Exposure In this mode you set the shutter speed and aperture value yourself. The camera makes no settings automatically. You can determine the correct combination of shutter speed and aperture value by checking the exposure level displayed in the camera. * stands for manual. 1 2 Set the Mode Dial to 〈 〉. Set the shutter speed. ● Turn the 〈 〉 dial. 3 Set the aperture value. 4 Focus on the subject. ● Set the Quick Control Dial switch to 〈ON〉, then turn the 〈 〉 dial.
Manual Exposure 5 Standard exposure Underexposure Overexposure Determine the exposure. ● Set the shutter speed or aperture value manually. : This is the standard reference point for a correct exposure. : Decrease the shutter speed or reduce the aperture value. : Increase the shutter speed or increase the aperture value. 6 Take the picture. ● Compose the picture, then press the shutter button down fully.
Automatic Depth-of-Field AE When taking pictures of large groups or landscapes, the EOS D30 can automatically achieve a sharp focus over a wide depth of field. All the subjects covered by the focusing points, from those close to the camera to those far away from the camera, can be taken clearly. ● In 〈 〉 mode, the shutter speed and aperture value cannot be changed freely. If the camera selects a slow shutter speed, the use of a tripod is recommended.
Setting Exposure Compensation Exposure compensation is used to alter the camera’s standard exposure setting to make the picture brighter (overexposure) or darker (underexposure). Exposure compensation can be set up to ±2 stops, in 1/2-stop increments. 1 2 Set the Quick Control Dial switch to 〈ON〉. 3 Select the exposure. Focus on the subject, then check the exposure level. ● Press the shutter button down halfway and check the display.
Autoexposure Bracketing When using autoexposure bracketing, the camera automatically changes the exposure level within the set range (up to ±2 stops in 1/2-stop increments) for three successive frames. This is called AEB (Auto Exposure Bracketing). The three bracketed shots are exposed in the selected drive mode (→67) in the following order: correct exposure, underexposure, and overexposure. Correct exposure (0) Underexposure (-1.
Autoexposure Bracketing ● Neither flash nor bulb exposures can be used in AEB mode. ● If you set mirror lockup with C.Fn-3-1 and then use AEB, single-frame shooting takes effect even if the drive mode is set to continuous shooting. ● To indicate that AEB is in progress, the 〈 〉 AEB icon on the LCD panel and the 〈 〉 indicator in the viewfinder blink until all three bracketed shots have been taken. ● During continuous shooting, no viewfinder information is displayed.
AE Lock AE lock enables you to lock the exposure at a place other than the point of focus. After locking the exposure, you can recompose the shot while maintaining the exposure level. This feature is useful for backlit and spotlighted subjects. ● The effects of the AE lock depend on the focusing point and metering method selected. (→135) 1 2 3 Focus on the point on which you want to lock the exposure reading. The exposure value is displayed in the viewfinder. Press the 〈 〉 button.
Self-timer Operation The self-timer is convenient for group photographs. You can use it in any Easy Shooting mode or Creative mode. We recommend using a tripod when you use the self-timer. Select the self-timer. 2 Focus on the subject. 3 Take the picture. ● Press the 〈DRIVE〉 button ( the 〈 〉 dial to select 〈 〉. 6 ), and turn 3 ● Make sure the in-focus indicator 〈●〉 and the exposure setting are displayed. ● Press the shutter button down fully.
Self-timer Operation Using the Eyepiece Cover If you take a picture using the self-timer or remote switch (sold separately) without looking through the viewfinder, stray light can enter the eyepiece and affect the exposure. To prevent this, attach the eyepiece cover to the viewfinder eyepiece before taking the picture. 86 1 Remove the eyecup. 2 Slip the eyepiece cover over the eyepiece. ● Grasp both sides of the eyecup and lift it up and away from the camera.
Bulb Exposures In a bulb exposure, the shutter remains open as long as you hold the shutter button down, and closes when you release it. Bulb exposures are useful for the long exposures required for night scenes, fireworks, etc. 1 2 Set the Mode Dial to 〈 〉. Set the shutter speed to [ ]. ● Look at the LCD panel and turn the 〈 〉 dial to select [ ]. ● The next setting after [ ] is [ ]. 3 4 Take the picture. ● Turn the 〈 Advanced Operations 3 Set the aperture value. 〉 dial.
Mirror Lockup Mirror lock is enabled with C.Fn-3-1 (→124). This function raises the mirror and exposes the picture, in separate operations. It is useful for close-up shots or when using a super telephoto lens, where the mirror shock could affect the picture. ● When using mirror lockup, we recommend you use the Remote Switch RS-80N3 (sold separately). 1 Press the shutter button down fully. The mirror is raised.
Flash Photography 4 The EOS D30 can take easy, natural-looking flash pictures with correct subject illumination using E-TTL autoflash (preflash evaluative metering in memory) and either the camera’s built-in flash or any EOS-dedicated EXseries Speedlite. The procedure is as easy as a normal AE shot. This chapter describes how to take flash pictures with the built-in flash, with the EOS-dedicated 550EX Speedlite, or other types of external flash.
Using the Built-in Flash The built-in flash lets you take the following kinds of flash pictures with the ease of a normal AE shot. ● E-TTL autoflash E-TTL autoflash (preflash evaluative metering in memory) supplies the correct level of flash for the subject in the focusing point selected by AF. ● FE (Flash Exposure) lock (→94) FE (flash exposure) lock sets the correct flash exposure for a selected part of the subject. The FE lock functions as an AE lock with flash.
Using the Built-in Flash Built-in Flash Range (using EF24-85mm F3.5-4.5 USM lens) ISO Speed 100 200 400 800 1600 Wide-angle: 24 mm Approx. 1-3.4 m (3.3-11.2 ft) Approx. 1-4.8 m (3.3-15.7 ft) Approx. 1-6.8 m (3.3-22.3 ft) Approx. 1-9.6 m (3.3-31.5 ft) Approx. 1-13.7 m (3.3-44.9 ft) Telephoto: 85 mm Approx. 1-2.6 m (3.3-8.5 ft) Approx. 1-3.7 m (3.3-12.1 ft) Approx. 1-5.3 m (3.3-17.4 ft) Approx. 1-7.5 m (3.3-24.6 ft) Approx. 1-10.6 m (3.3-34.
Using the Built-in Flash ● When using an EX-series Speedlite (→96), press the built-in flash back into the camera before mounting the external flash. ● When using the built-in flash, keep at least 1 m/3.3 ft away from the subject. Otherwise the lens barrel may partially obstruct the flash and cause part of the photo to look dark. ● When using the built-in flash, detach any hood from the lens to keep it from obstructing flash coverage.
Using the Built-in Flash Red-eye Reduction When you use flash in low-light conditions, it can reflect off your subject’s pupils and make their eyes look red in the photograph. This effect is called “red-eye,” and is caused by the light of the flash reflecting off the retina of the eye. The Red-eye reduction function uses the camera’s redeye reduction lamp, which gently shines into the subject’s eyes to constrict the pupils and thereby reduces the likelihood that red-eye will occur.
Using the Built-in Flash FE Lock FE (flash exposure) Lock obtains and locks the correct flash exposure reading for any part of a subject. FE Lock is a function in the Creative zone. 1 Make sure the 〈 〉 icon in the viewfinder is on. 2 Focus on the subject. 3 Place the center focusing point over the subject, and press the 〈 〉 button. ( 16 ) ● In the Creative zone, press the 〈 to pop up the built-in flash. 〉 button ● Focus on the subject you want to lock the flash exposure on.
Using the Built-in Flash Flash Exposure Compensation The EOS D30 camera can adjust the level of the built-in flash or any EX-series Speedlite. The compensation amount can be up to ±2 stops in 1/2-stop increments. You cannot use flash exposure compensation in the Easy Shooting zone. 1 Press the 〈 〉 button. ( 6 ) 2 Set the exposure compensation amount. Negative compensation Positive compensation ● Once set, the exposure compensation amount remains in memory after the Main Switch is set to 〈OFF〉.
Flash Photography with the EOS-Dedicated 550EX Speedlite The Canon 550EX Speedlite allows you to take high-quality flash pictures easily, in the same way as you would with a built-in flash. ● E-TTL Autoflash E-TTL autoflash (preflash evaluative metering in memory) supplies the correct level of flash for the subject in the focusing point selected by AF.
Flash Photography with the EOS-Dedicated 550EX Speedlite Full Auto Flash This section describes how to use Full Auto E-TTL flash with 〈 〉 (Program AE) mode. For instructions for operating the 550EX Speedlite, see the 550EX User’s Guide. MODE PILOT SELEC H 1 Set the Mode Dial to 〈 〉. 2 3 Make sure the 550EX Speedlite’s pilot lamp is on. Focus the subject, and take the picture.
Flash Photography with the EOS-Dedicated 550EX Speedlite High-Speed Sync (FP Flash) When the 550EX Speedlite is set to high-speed sync 〈 〉 mode, it can automatically synchronize at any shutter speed of 1/200 second or faster, thus providing high-speed sync (FP) flash operation. When high-speed sync is On, the 〈 〉 icon appears in the viewfinder.
Flash Photography with the EOS-Dedicated 550EX Speedlite FE Lock Taking FE Lock pictures with the 550EX Speedlite is the same as described in “FE Lock” (→94) for the built-in flash. In step 1, be sure the 550EX Speedlite pilot lamp is on. The flash mode may be either normal flash or high-speed sync. The FE lock operates with either mode. Flash Exposure Compensation For flash pictures with flash exposure compensation, see “Flash Exposure Compensation” for the built-in flash.
Using Non-Canon Flash Units Sync Speed The EOS D30 can synchronize with compact, non-Canon flash units at shutter speeds of 1/200 second or slower. With larger studio flash units, the flash speed is 1/60 second or slower. Be sure to test the flash you are using beforehand, to make sure it synchronizes properly with the camera. PC Terminal We recommend you use a flash with sync cable connected to the PC contacts. The PC terminal has a locking thread to prevent accidental disconnection.
Playing and Erasing Recorded Images 5 This section explains how to view the images you have recorded with the EOS D30, how to erase images, and how to make settings for Digital Print Order Format (DPOF) digital printers or photo lab printing services. This section also describes how to connect the EOS D30 to a television and how to set the date and time.
Viewing Recorded Images The EOS D30 can display recorded images on its LCD monitor. You can view these images in single-image format, index format, or enlarged format. Press the 〈 〉 button to switch formats. Viewing a Single Image 1 Check the image. 2 Change the displayed image. ● Press the 〈 〉 button. The most recent single image taken by the camera appears. ● Press the 〈 〉 button again to clear the LCD monitor and exit PLAY.
Viewing Recorded Images Viewing Enlarged Images Recorded images can be enlarged approximately 3×. 1 2 Select the image you want to enlarge from a single-image or index display. (→102) 3 Change the display area. Part to be enlarged Enlarge the image. ● Press the 〈 〉 button twice from a singleimage display, or once from an index display. The selected image is enlarged approximately 3×. The central part of the image is displayed first.
Viewing Recorded Images INFO. Turning the Information Display On and Off When an image is displayed on the LCD monitor, you can press the 〈INFO.〉 button to view information about that image. Image information is available only for single-image displays.
Viewing Recorded Images Automated Playback of Recorded Images (Auto playback) This function automatically and continuously displays all images recorded on the CF card. Each image is displayed for approximately 3 seconds. 1 From the menu, select [Auto playback]. 2 Start auto playback. ● Press the 〈MENU〉 button. ● Turn the 〈 〉 dial to select [Auto playback]. ● Press the 〈 〉 button.
Viewing Recorded Images Rotating an Image The Rotate function can rotate a picture 90° clockwise or counterclockwise. This allows you to play images with the correct orientation. Rotate pictures taken with the camera grip on the bottom 90° clockwise 1 From the menu, select [Rotate]. 2 Go to Rotate mode. 3 Rotate the image. ● Press the 〈MENU〉 button. ● Turn the 〈 〉 dial to select [Rotate]. ● Press the 〈 〉 button. The display goes to Rotate mode.
Protecting an Image This function lets you protect an image file to keep it from being accidentally deleted from the CF card. You can press the 〈 〉 button to switch between single-image and index display in order to protect individual pictures. 1 From the menu, select [Protect]. 2 Open the Protect Settings screen. 3 Protect the image. ● Press the 〈MENU〉 button. ● Turn the 〈 〉 dial to select [Protect]. ● Press the 〈 〉 button. The display goes to the Protect Settings screen.
Erasing Images (All Image Erase) You can erase images one image at a time, or you can erase all images on the CF card at once. This section describes how to erase all the images recorded on a CF card in one operation. To erase images one at a time, see “Erasing a Recorded Image (Single Image Erase)”. (→47) 1 Set the camera to PLAY. (→102) 2 Press the 3 Turn the 〈 〉 dial to select [All…], then press the 〈 〉 button. 4 Turn the 〈 〉 dial to select [OK], then press the 〈 〉 button.
Formatting the CF Card The CF card must be formatted before it is used in the EOS D30 camera. Also, if you see the message “ ” (CF card error) on the LCD panel when you load a CF card, the CF card may need to be formatted before it can be used. 1 From the Menu, select [Format]. 2 Press the 〈 3 Turn the 〈 〉 dial to select [OK], then press the 〈 〉 button. ● Press the 〈MENU〉 button. ● Turn the 〈 〉 dial to select [Format]. 〉 button.
Print Order You can mark the images on a CF card for printing, as well as specify the number of prints, print type, and the image data (date and file no.). The print specifications for the Canon EOS D30 camera conform to the Digital Print Order Format (DPOF) standard. DPOF DPOF (Digital Print Order Format) is a standard used to record (on the CF card or other recording media) the image number, number of prints, etc. of images taken by digital cameras.
Print Order Selecting Images for Printing There are two ways to select images for printing. You can select images one at a time, or select all images. Selecting a Single Image 1 From the menu, select [Print Order]. 2 Press the 〈 3 Press the 〈 〉 button. The Print Order screen appears. [Order] is selected. 5 〉 button. The Select Image screen appears. ● If you press the 〈 〉 button, 3 images are displayed on the “Select Image” screen. Press the 〈 〉 button again to enlarge the “Select Image” screen.
Print Order Number of prints of the selected image 5 Select the print quantity. ● If the Print Type (→113) is [Index], you do not need to specify the print quantity. ● Turn the 〈 〉 dial to select the quantity, then press the 〈 〉 button. The quantity appears next to the 〈 〉 icon. ● To cancel the selection, set the quantity to [0]. ● To select another image, repeat steps 4 and 5. ● Press the 〈MENU〉 button to return to the Select Image screen.
Print Order Print Type You can specify the following print types. Standard: Prints one image to each page. Index: Prints an index of the images in reduced size, on one page. Both: Prints the individual images and an index sheet. 1 Follow steps 1 and 2 of the Selecting a Single Image procedure (→111), to display the Print Order screen. 2 Turn the 〈 〉 dial to select [Set up], then press the 〈 〉 button. 3 Turn the 〈 〉 dial to select [Print Type], then press the 〈 〉 button. 4 Select the print type.
Print Order Specifying Date Printing You can specify printing of the date and time on each image. 1 Follow steps 1 and 2 of the Selecting a Single Image procedure (→111), to display the Print Order screen. 2 Turn the 〈 〉 dial to select [Set up], then press the 〈 〉 button. 3 Turn the 〈 〉 dial to select [Date], then press the 〈 〉 button. 4 Specify date printing. The Print Order Setting screen appears. ● Turn the 〈 〉 dial to select [On] or [Off], then press the 〈 〉 button.
Print Order Specifying File Number Printing You can specify printing of file number information on each image. 1 Follow steps 1 and 2 of the Selecting a Single Image procedure (→111), to display the Print Order screen. 2 Turn the 〈 〉 dial to select [Set up], then press the 〈 〉 button. 3 Turn the 〈 〉 dial to select [File No.], then press the 〈 〉 button. The Print Order Setting screen appears. 5 Specify file number printing. ● Turn the 〈 〉 dial to select [On] or [Off], then press the 〈 〉 button.
Connecting to a TV You can connect the EOS D30 to a television (using the video cable provided with your camera) to display your recorded images. Always turn off the camera and the television before connecting or disconnecting them. Video input terminal 1 Open the cover. 2 Connect the cable. 3 Turn the TV on, and set the input switch to Video In. 4 Set the Main Switch to 〈ON〉. 5 Press the ● Connect the cable to the VIDEO OUT terminal on the camera and to the video input terminal on the TV.
Cleaning the CMOS Imaging Element The imaging element corresponds to the film in a film camera. If dirt or foreign matter gets on this imaging element, black spots may be recorded on the corresponding part of the image. If this happens, use the procedure below to clean the imaging element. Because the imaging element is very sensitive, we strongly recommend that you have the cleaning done by Canon service representatives.
Cleaning the CMOS Imaging Element 5 Select [1: Enable]. ● Turn the 〈 〉 dial to select [1: Enable], then press the 〈 〉 button. The message “ LCD panel. ” appears on the ● If “ ” is blinking on the LCD panel, set the Main Switch to 〈OFF〉 and remove the battery pack. Then repeat the procedure from Step1. 6 Press the shutter button down fully. 7 Clean the imaging element. 8 Finish cleaning. ● The reflex mirror of the camera then flips up, and the shutter opens.
Menu Function Settings 6 You can make a variety of settings from the EOS D30’s menu. The menu includes special settings called Custom Functions that are related to camera operation. This booklet indicates these settings with the mark, and provides basic descriptions. This chapter lists the EOS D30’s menu functions and describes the use of the Custom Function settings. For Menu operations and default settings, see “Menu Functions and Settings” (→36, 37).
List of Menu Functions Item Quality Screen Description See page Sets the size in pixels of the 54 picture as recorded on the CF card, as well as the compression ratio. Select Large 〈 〉, Large 〈 〉, Small 〈 〉, Small 〈 〉, or RAW. Red-eye reduction function Turns on/off a function for reducing the “red-eye” look caused by using a flash to photograph people at night or in dark settings. 93 AEB to automatically change exposure level Sets the increment steps for underexposure and overexposure in AEB shots.
List of Menu Functions Item Parameters Screen Description See page Allows the user to set up to 56 three sets of parameters with the included software for processing recorded images, in addition to the standard parameters automatically stored in the camera. Protect Allows the user to protect image files against accidental erasure. 107 Rotate Rotates the image display 90° clockwise or counterclockwise. 106 Print Order Lets you order prints of your photos for printing on DPOFcompatible devices.
List of Menu Functions Item Review Description Determines whether images appear on the LCD monitor after they are taken. Select On, On (Info), or Off. The display time is set by the Review time setting (below). See page 45 Review time When the Review function has been set to On or On (Info), this determines the time that images are displayed. Select 2, 4, or 8 seconds, or Hold. 46 LCD brightness Sets the LCD brightness. Select normal or bright.
List of Menu Functions Item Video system Screen Description Determines the video system format. Select NTSC or PAL. See page 116 Format CF card Formats the CF card in the camera. 109 Custom functions Sets custom functions that can adjust many of the camera functions to meet individual requirements.
List of Menu Functions Custom Function Settings You can adjust many of the Canon EOS D30’s functions to meet your particular requirements using the Custom Function settings. To change Custom Functions, select [C.Fn] from the menu. Func. No. Item Screen Select no.
List of Menu Functions See Page Effective for reducing noise occurring in time exposure or bulb shots longer than one second. However, this requires processing time after the shot approximately equivalent to the exposure time. During processing, the message “ ” appears on the LCD panel and in the viewfinder, and no exposures can be made. 87 Effective for determining focus and exposure separately.
List of Menu Functions Func. No. Item 06 Shutter speed in Av mode with flash 0 1 Automatic setting Fixed at 1/200 second (when using flash) 07 AEB sequence /auto cancellaton when Main Switch is Off 0 0 → – → +/Enabled 1 0 → – → +/Disabled 2 – → 0 → +/Enabled 3 0 – → 0 → +/Disabled 1st-curtain sync. Flash fires immediately after the shutter reaches full-open position. 1 2nd-curtain sync. Flash fires immediately before 2nd curtain closes. Lens AF stop button Fn.
List of Menu Functions Effects, remarks See Page Effective for using flash at night or in dark locations. 77 97 Effective when you continue to take AEB shots with the first frame set at the correct exposure. 83 Lets you take AEB shots from the lowest exposure first. 83 Effective when you continue to take AEB shots from the lowest exposure first. 83 Effective at filling in shadows at slow shutter speeds. 92 Camera AF does not operate while this button is pressed.
List of Menu Functions Func. No. 11 12 13 Item Menu button return position SET button func. when shooting Sensor cleaning Screen Select no. Setting or change 0 Always show first menu item. 1 Show the most recently set menu item. (Set the Main Switch to Off to cancel, or On to show the first menu item.) 2 0 Show the most recently set menu item. (Retain in memory when the main switch is Set to Off.) Not assigned. 1 Change quality. 2 Change ISO speed. 3 0 1 Select parameters.
List of Menu Functions Effects, remarks See Page Enables prompt menu selection for items that are frequently changed. Enables prompt menu selection for items that are frequently changed. Convenient when you want to retain function settings, regardless of whether the power is On or Off. Lets you change quality quickly when you are taking photographs. 54 Lets you change ISO speed quickly when you are taking photographs. 55 Lets you change parameters quickly when you are taking photographs.
REFERENCE Basic Terminology for Digital Cameras and Digital Photography AE Auto Exposure is a function that calculates the exposure automatically. The camera has a builtin exposure meter that automatically determines the correct exposure (the combination of shutter speed and aperture value). AF Auto Focus is a function that focuses the camera automatically. Aperture value The lens aperture opens and closes to control the amount of light that reaches the imaging element.
REFERENCE Depth of field Point of optimum focus 1 Aperture value set to f/22 2 Aperture value set to f/2 DPOF Digital Print Order Format is a standard format for ordering prints of digital camera images from photo lab printing services, as well as printing from household printers. The Canon EOS D30 is DPOF-compatible. You can specify printing from the camera itself and store the order information on the CF card.
REFERENCE Format Formatting a CF card is the process of preparing the CF card to store image data. Be careful when formatting a CF card, because the formatting process erases all data stored on the card. ISO Speed An index number representing the photosensitivity of silver-halide photo film. This sensitivity standard is determined by the International Standards Organization (ISO), and is normally written as “ISO 100”, etc. The higher the ISO speed, the greater the sensitivity to light.
REFERENCE Function Availability Table AF ONE SHOT AI SERVO AI FOCUS Built-in flash Auto Manual : Selection possible Focusing point selection Mode Dial Mode Dial : Automatic setting Red-eye reduction Auto Manual White balance Auto Manual Drive Single Continuous Evaluative Image size Large Metering mode Small Partial Centerweighted averaging Compression RAW 7 Drive mode Single Continuous ONE SHOT AF Shutter cannot be released until focus is achieved.
REFERENCE Exposure Warnings Mode Blinking warning Description Remarks Subject is too dark. Use flash. Subject is too bright. Use a neutral density filter. Picture will be underexposed. Turn the 〈 〉 dial to a slower shutter speed. Picture will be overexposed. Turn the 〈 〉 dial to a faster shutter speed. Picture will be underexposed. Turn the 〈 〉 dial to a smaller aperture value. Picture will be overexposed. Turn the 〈 〉 dial to a larger aperture value.
REFERENCE Program Line 〈 〉 The following program line applies when the camera is in Program AE 〈 〉 mode. Lens 0 10 20 0 0 40 16 00 80 IS O 0 EF50mm F1.4 USM EF24–85mm F3.5–4.5 USM WIDE24mm EF24–85mm F3.5–4.5 USM TELE85mm 6 5 7 8 9 10 11 12 13 14 15 16 17 18 19 20 21 22 32 4 16 2 11 1 8 0 5.6 –1 4 –2 2.8 –3 2 –4 Aperture value (f-no.) 22 3 1.4 –5 EV 30 15 8 4 2 1 2 4 8 15 30 1.
REFERENCE Shutter Speed and Aperture Value Readouts Shutter speed readout The shutter speed is normally displayed in 1/2-stop increments. Numbers from 4000 to 4 denote the denominator of the shutter speed fraction: for example, 125 is 1/125 seconds. In addition, 0"3 is 0.3 seconds, and 15" is 15 seconds. Aperture value readout The aperture value is normally displayed in 1/2-stop increments. The larger the number, the smaller the aperture opening.
Error Codes When a camera error occurs, an error code (Err xx) appears on the LCD panel. When this happens, set the Main Switch to 〈OFF〉 and then set it to 〈ON〉 again. If an error code is displayed frequently, this indicates that a malfunction has occurred. Make a note of the error code and contact your nearest Canon Service Center (see back cover). If an error code is displayed after you take a picture, the picture may not have been recorded. Press the play button and review the image.
REFERENCE Troubleshooting If you have a problem with your camera, first refer to this Troubleshooting Guide as you check the camera. Power Unable to charge battery pack. An incorrect battery pack is being used. Use a Canon BP-511 battery pack. (→4) Battery pack is not correctly attached to the compact power adapter. Attach the battery pack correctly. (→25) The DC coupler is connected to the compact power adapter. Remove the DC coupler plug from the compact power adapter.
REFERENCE Shooting Unable to shoot or record images CF card is not loaded correctly. Load the CF card correctly. (→31) CF card is full. Change to a new CF card, or erase unwanted images. (→31, 47, 108) The battery pack is out of power. Charge the battery pack. (→25) Image out of focus (In-focus light in the viewfinder blinks). Press the shutter button down halfway to focus again. If this fails, focus manually.
REFERENCE Major Accessories (Sold Separately) Battery Pack BP-511 This is a powerful lithium ion secondary battery pack. The rated voltage is 7.4V. You can use the Compact Power Adapter CA-PS400 to charge the BP-511 battery pack, and when fully charged it has enough power for you to take approximately 540 pictures (Normal, with 50% flash use). Charging takes about 90 minutes. Battery Grip BG-ED3 This is a battery grip that holds two BP-511 battery packs.
REFERENCE Timer Remote Controller TC-80N3 The remote controller attaches with an 80-cm cord and includes built-in (1) self timer, (2) interval timer, (3) longexposure timer, and (4) shutter release count-setting function. You can set the time from 1 second to 99 hours, 59 minutes, 59 seconds, in 1-second increments. Includes a one-touch locking plug for connecting to the EOS D30.
REFERENCE System Map Eyecup Eb ST-E2 220EX 420EX 550EX Rubber Frame Eb E-series Dioptric Adjustment Lenses Macro Ring Lite MR-14EX Items included with the Camera CF Card FC-16M Eyepiece Extender EP-EX15 Strap Angle Finder C Eyepiece Cover Lithium Backup Battery CR2025 type DC Coupler DR-400 Compact Power Adapter CA-PS400 Battery Pack BP-511 Battery Pack BP-511 142 Battery Grip BG-ED3 Timer Remote Controller TC-80N3 EF Lens Remote Switch RS-80N3 Wireless Controller LC-4
REFERENCE CF Cards CF Card Reader • Canon Digital Camera Solution Disk • Adobe Photoshop LE Disk PC Card Adapter PC Card Slot Printer or Modem Port DIN-8 Pin Connector USB Port Interface Cable IFC-200 PCU Macintosh Computer PC Card Slot Parallel Port 7 USB Port REFERENCE PC/AT Compatible Computer Video Cable VC-100 TV/Video 143
REFERENCE Major Specifications Type Type ....................................Single-lens reflex AE-AF digital camera with built-in flash and focal plane shutter (vertical travel), 36-bit full color (RGB each 12-bit), single-shot CMOS direct imaging sensor Picture size..........................22.7 × 15.1 mm (0.89 × 0.59 in) Compatible lenses ..............Canon EF lens group Lens mount .........................Canon EF mount Lens focal length ................Approx. 1.
REFERENCE Focusing modes .................q One-shot AF: AF locks when focus is achieved. Shutter can be released only when focus is achieved. w AI servo AF: Tracks subject movement until the actual start of metering; includes predictive function; shutter can be released anytime regardless of focus (predictive drive has priority in continuous shooting), indicator blinks at 8 Hz if focus fails. e AI focus AF: Automatically switches between One-shot AF mode and AI Servo AF.
REFERENCE Exposure compensation .....q AEB: ±2 stops in 1/2- or 1/3-stop increments, Correct exposure, underexposure, overexposure w Manual compensation: ±2 stops in 1/2- or 1/3-stop increments AE Lock...............................q Auto AE lock, w Press AE Lock button: Center partial metering and AE lock Shutter Type ....................................Vertical-travel focal-plane shutter with all speeds controlled electronically Shutter speeds....................1/4000 to 30 sec.
REFERENCE Camera Body Flash contacts.....................q Accessory shoe: X-sync contacts w Sync terminal (with locking thread) on lower corner of camera body External flash system compatibility......................Compatible with E-TTL auto sync Red-eye reduction function...Built-in flash illumination type Interfaces ............................USB/CF card slot (Type 1, 2)/Video output (NTSC/PAL) Remote jack ........................N3 type Dimensions (W × H × D) .....149.5 × 106.5 × 75 mm (5.89 × 4.
Index 4-second timer function ................................22 6-second timer function ................................22 16-second timer function ..............................22 A Accessories ............................................4, 140 AE................................................................130 AEB (Autoexposure bracketing) ...................82 Canceling AEB..........................................82 AE lock ..........................................................84 AF.............
Index F FEB (Flash Exposure Bracketing) .................98 FE lock ....................................................94, 99 File numbers .......................................115, 131 Flash exposure compensation................95, 99 Flash photography ..................................43, 89 Automatic flash .........................................43 Built-in flash ........................................89, 90 EX-series Speedlite.............................89, 95 Flash shooting in each mode..........
Index P Parameter selection ......................................56 Partial metering .............................................66 PC Card Adapter ........................................141 PC terminal..................................................100 Portrait Mode.................................................48 Portrait position .....................................40, 106 Print order selection ....................................110 Date printing ...........................................
Memo 7 REFERENCE 151