MG3500 series Online Manual Read Me First Useful Functions Available on the Machine Overview of the Machine English
Contents Read Me First. . . . . . . . . . . . . . . . . . . . . . . . . . . . . . . . . . . . . . . . . . . . . . . . . . . . 6 Symbols Used in This Document. . . . . . . . . . . . . . . . . . . . . . . . . . . . . . . . . . . . . 7 Trademarks and Licenses. . . . . . . . . . . . . . . . . . . . . . . . . . . . . . . . . . . . . . . . . . . 8 Search Tips. . . . . . . . . . . . . . . . . . . . . . . . . . . . . . . . . . . . . . . . . . . . . . . . . . . . . . 9 Window Used in Operation Explanation. . . . .
Notice for Unplugging the Power Cord. . . . . . . . . . . . . . . . . . . . . . . . . . . . . . . . . . . . . . . . . . . . . . 63 Loading Paper / Originals. . . . . . . . . . . . . . . . . . . . . . . . . . . . . . . . . . . . . . . . . . . . . . . . . . 64 Loading Paper. . . . . . . . . . . . . . . . . . . . . . . . . . . . . . . . . . . . . . . . . . . . . . . . . . . . . . . . . . . . . . . . . . . . . 65 Loading Plain Paper / Photo Paper. . . . . . . . . . . . . . . . . . . . . . . . . . . . . . . .
Aligning the Print Head Position Automatically from Your Computer. . . . . . . . . . . . . . . . . . . . . . 116 Cleaning the Machine. . . . . . . . . . . . . . . . . . . . . . . . . . . . . . . . . . . . . . . . . . . . . . . . . . . . . . . . . . . . . . 117 Cleaning the Exterior of the Machine. . . . . . . . . . . . . . . . . . . . . . . . . . . . . . . . . . . . . . . . . . . . . . . 118 Cleaning the Platen Glass and Document Cover. . . . . . . . . . . . . . . . . . . . . . . . . . . . . . . . . . . .
Viewing the Modified Settings. . . . . . . . . . . . . . . . . . . . . . . . . . . . . . . . . . . . . . . . . . . . . . . . . . . . 166 Appendix for Network Communication. . . . . . . . . . . . . . . . . . . . . . . . . . . . . . . . . . . . . . . . . . . . . . . . . . 167 Using the Card Slot over a Network. . . . . . . . . . . . . . . . . . . . . . . . . . . . . . . . . . . . . . . . . . . . . . . 168 About Technical Terms. . . . . . . . . . . . . . . . . . . . . . . . . . . . . . . . . . . . . . . . .
Read Me First Notes on Online Manual Usage How to Print Notes on Online Manual Usage • Reproduction, diversion or copying of any text, photo or image published in the Online Manual (hereinafter referred to as "this guide"), in whole or in part, is prohibited. • In principle, Canon shall change or delete the contents of this guide without prior notice to customers. In addition, Canon may suspend or stop the disclosure of this guide due to unavoidable reasons.
Symbols Used in This Document Warning Instructions that, if ignored, could result in death or serious personal injury caused by incorrect operation of the equipment. These must be observed for safe operation. Caution Instructions that, if ignored, could result in personal injury or material damage caused by incorrect operation of the equipment. These must be observed for safe operation. Important Instructions including important information.
Trademarks and Licenses • Microsoft is a registered trademark of Microsoft Corporation. • Windows is a trademark or registered trademark of Microsoft Corporation in the U.S. and/or other countries. • Windows Vista is a trademark or registered trademark of Microsoft Corporation in the U.S. and/or other countries. • Internet Explorer is a trademark or registered trademark of Microsoft Corporation in the U.S. and/or other countries.
Enter keywords in the search window and click (Search). You can search for target pages in this guide. Entry example: "(your product's model name) load paper", "(your product's model name) 1000" Search Tips You can search for target pages by entering keywords in the search window. Note • The displayed screen may vary. • Searching for Functions You can find target pages easily by entering your product's model name and a keyword for the function you want to learn about.
Note • The displayed screen varies depending on your product. • Searching for Application Functions You can find target pages easily by entering your application's name and a keyword for the function you want to learn about. Example: When you want to learn how to print collages with My Image Garden Enter "My Image Garden collage" in the search window and perform a search • Searching for Reference Pages You can search for reference pages described in this guide by entering your model name and a page title.
Window Used in Operation Explanation In this guide, most of the operations are described based on the windows displayed when Mac OS X v10.8 is used.
Useful Functions Available on the Machine The following useful functions are available on the machine. Enjoy pleasant photography experience by utilizing various functions. Useful Functions Available from Applications and the Main Unit You can create items such as collages easily or download delightful printing materials, and print them. Helpful Functions Available Through the Network You can print more conveniently through integration with smartphones and other devices or with services on the web.
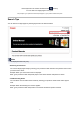
Useful Functions Available from Applications and the Main Unit On the machine, the following useful functions are available from applications and the main unit. • Print Photos Easily • Download Content Materials Print Photos Easily Using an Application Organize Images Easily In My Image Garden, you can register the names of people and events to photos. You can organize photos easily as you can display them not only by folder but also by calendar, event, and person.
If there is an item you like, you can easily print it in just two steps. 1. In Image Display of Quick Menu, select the item you want to print. 2. Print the item with My Image Garden. Place Photos Automatically Delightful items are created easily as the selected photos are placed automatically according to the theme. Other Various Functions My Image Garden has many other useful functions. Refer to "What You Can Do with My Image Garden" for details.
Note • The designs of PREMIUM Contents provided in this page are subject to change without prior notice.
Helpful Functions Available Through the Network The following useful functions are available on the machine. Enjoy even more pleasant photography experience by utilizing various functions. Important • Some functions may not be available in certain countries or regions.
• Online Album Photo Print You can access photo-sharing services on the web from the machine and directly print photos in online albums (such as Picasa Web Albums) while checking them on the printer screen. • Web Template Form Print Canon offers various template forms including seasonal stationery and calendars on the web. You can download and print the template forms you want anytime, as much as you need, by operating the machine only.
Use the Canon printing plugin Canon Print Service is a printing plug-in for Android 4.4 available for free on Google Play. Installing and activating the plug-in enables your Android smartphone or tablet to print wirelessly to a Canon printer. Printing via Mopria You can print wirelessly to a Canon printer from a Mopria compatible Android smartphone or tablet. See the Mopria homepage (http://www.mopria.org) for details including supported devices.
You can also receive scanned data (PDF or JPEG) directly on a smartphone without using a computer. PIXMA Printing Solutions can be downloaded from App Store and Google Play. Printing with Windows RT When you use Windows RT, printing is easy because you simply connect this machine to the network. For information about connecting to the network, see here. When the connection is complete, the Canon Inkjet Print Utility software, which allows you to specify detailed print settings, is downloaded automatically.
Online Storage Integration Function The machine can integrate with online storage services such as Evernote. Integration with Online Notetaking Service "Evernote" If an Evernote client application is installed on your computer, you can import scanned images into the application and upload them to the Evernote server. The uploaded images can be browsed from other computers, smartphones, etc. To use Evernote, you need to create an account. See the "CREATE ACCOUNT" page of Evernote for account creation.
Printing with Google Cloud Print The machine is compatible with Google Cloud Print™ (Google Cloud Print is a service provided by Google Inc.). By using Google Cloud Print, you can print from anywhere with applications or services supporting Google Cloud Print. 1. Preparations for Printing with Google Cloud Print 2.
Preparations for Printing with Google Cloud Print To print with Google Cloud Print, you need to get Google account and register the machine with Google Cloud Print in advance. Getting Google Account If you already have Google account, register the machine. Registering the Machine with Google Cloud Print Getting Google Account First, get your Google account in order to register the machine with Google Cloud Print.
3. Select Web service setup -> Connection setup -> Google Cloud Print setup (GoogleCloudPrint) -> Register with Google Cloud Print (Register w/ service) Note • If you have already registered the machine with Google Cloud Print, the confirmation message to re-register the machine is displayed. 4. When the confirmation screen to register the machine is displayed, select Yes 5.
5. In the print setup for Google Cloud Print, select the display language, and then select Authentication 6. When the registration completion message appears, select OK Deleting the Machine from Google Cloud Print If the machine's owner changes or if you want to re-register the machine, delete the machine from Google Cloud Print by following the steps below. 1. Make sure that the machine is turned on If your printer has a LCD monitor 2.
Printing from Computer or Smartphone with Google Cloud Print When you send print data with Google Cloud Print, the machine receives the print data and prints it automatically if the machine is turned on. When printing from a computer, smartphone, or other external device with Google Cloud Print, load paper into the machine in advance. Sending the Print Data with Google Cloud Print 1.
• If you select plain paper as media type or if you select B5/A5-size as paper size, the print data is printed with border even when you select the borderless print setting. • The print results may differ from the print image depending on the print data. • Depending on the device sending the print data, you may not select the print settings when sending the print data with Google Cloud Print.
Using Remote UI This service allows you to check printer information and execute utility functions from your computer or smartphone. You can also use the convenient web services presented by Canon. Checking the printer IP address To use this service, first check the IP address of this machine from the operation panel of the machine.
If your printer does not have a LCD monitor 2. Load one sheet of A4 size or Letter size plain paper 3. Hold down the Stop button until the Alarm lamp flashes 15 times 4. Release the button Printing of the network setup information starts. Remote UI startup In the Web browser, directly enter the IPv4 address that you checked from the LCD monitor of the machine. The Remote UI starts. 1.
Printer status This function displays printer information such as the remaining ink amount, the status, and detailed error information. You can also connect to the ink purchase site or support page, and use Web Services. Utilities This function allows you to set and execute the machine utility functions such as cleaning. AirPrint settings This function allows you to specify the Apple AirPrint settings, such as position information.
Printing from AirPrint Compliant Device This document explains how to use AirPrint to print wirelessly from your iPad, iPhone and iPod touch to a Canon printer. AirPrint enables you to print photos, email, Web pages and documents from your Apple device directly to your printer without installing a driver. Checking Your Environment First, check your environment.
3. From the menu options, tap Print. 4. From Printer Options, select the model that you are using. Important ■ Because some application software does not support AirPrint, Printer Options may not be displayed. If an application software does not let you use printer options, you cannot print from that application software. Note ■ The printer options differ depending on the application software and model you are using.
• Duplex Printing: If the model supports duplex printing, you can select On or Off. • Range: The page range can be used only with specific application software and file types (such as PDF files). 5. For 1 Copy, click + or - to set the number of required copies. 6. For Duplex Printing, click On to enable duplex printing or click Off to disable the function. 7.
Deleting a Print Job To delete a print job with AirPrint, use one of the following two methods: • From the machine: Use the operation panel of the machine to cancel the print job. • From an Apple device: Press the Home button on the Apple device twice. Tap the Print icon and display the print job list. Tap the print job to be canceled, and then tap Cancel Print. AirPrint Troubleshooting If the document does not print, check the following: 1. Check that the machine power is on.
How to Use Print from E-mail Print from E-mail allows you to print attachment files easily. You only attach a picture or a document from your computer or smartphone and send the e-mail with the attached file. You can print simply from outside like a travel destination. Also, your family or friends can print by registering beforehand. You can use Print from E-mail on any Canon printer that supports the service. Checking Your Environment First, check your environment.
1. Print the printer registration page's URL and the PIN code 2. Access the URL and enter the owner's e-mail address and other required information 3. Check if an e-mail has been sent to the e-mail address you entered 4. Access the URL provided in the e-mail and complete the printer registration process Note • The e-mail address that appears on the screen when you have finished registering is the e-mail address that will be used just for the Print from E-mail function.
• From the operation panel of this machine, display the home window and select Setup -> Web service setup -> Web service connection setup -> Print from E-mail setup -> Check address for printing. • From the operation panel of this machine, select Web service -> Web service setup -> Cloud settings -> Print from E-mail setup -> Check address for printing. Important • You will not be able to use the service during periods when the service is undergoing maintenance.
the document can be printed normally on the printer. If the document cannot be printed, refer to the on-screen manual (operating instructions) that comes with the printer. • Check that the file attached to the e-mail is a Adobe PDF file or an JPEG file. • Check whether the e-mail address of the send destination is correct.
• If the Print from E-mail information stored on this printer could not be deleted even though the registration information on the service was deleted, delete the registration information from Deregistration of Registered Printer(s) by performing one of the following operations: ◦ From the operation panel of this machine, display the home window and select Setup -> Web service setup -> Web service connection setup -> Print from E-mail setup -> Deregistration of Registered Printer(s).
Preparing to Use Print from E-mail To use this service to print a photo or document, you need to follow the procedure provided below and register the machine. Print the Printer Registration Page's URL and the PIN Code First, print the printer registration page's URL and the PIN code. Check that there is sufficient amount of ink in the machine, and then print using the machine's operation panel. 1.
Important • If you do not select Agree in the use agreement window, you will not able to register as the printer owner. 3. Enter the printer owner's e-mail address, and click Next Important • An e-mail is sent with the required information for completing the registration to the e-mail address entered for the printer's owner. • If domain-specific reception is set, change the setting so that mail can be received from "info@mp.c-ij.
Enter any name that will allow you to identify the printer. Important • The maximum number of characters that can be entered is 30. 6. In the Confirm Owner Registration window, check the registration information, and then click Register A temporary password will be displayed. Important • The temporary password that appears is not included in the notification e-mail. Be sure to write down the temporary password before closing the screen.
Timezone List (UTC-12:00) International Date Line West (UTC-11:00) Midway Island (UTC-10:00) Hawaii (UTC-09:00) Alaska (UTC-08:00) Tijuana, Baja California, Pacific Time (US & Canada) (UTC-07:00) Arizona, Chihuahua, La Paz, Mazatlan, Mountain Time (US & Canada) (UTC-06:00) Guadalajara, Mexico City, Monterrey, Saskatchewan, Central America, Central Time (US & Canada) (UTC-05:00) Indiana (East), Bogota, Lima, Quito, Eastern Time (US & Canada), Caracas (UTC-04:00) Asuncion, Santiago, Georgetown, La Paz, San Ju
List of Function for Each Model MG series MX series E series P series iP series iX series MG series Model name Print from E-mail Google Cloud Print Canon Inkjet Cloud Printing Center MG7100 ✓ ✓ ✓ MG6500 ✓ ✓ ✓ MG6400 ✓ ✓ ✓ MG5500 ✓ ✓ ✓ MG3500 – ✓ – MG2500 – – – MG2400 – – – MX series Model name Print from E-mail Google Cloud Print Canon Inkjet Cloud Printing Center MX920 ✓ ✓ – MX720 ✓ ✓ – MX530 – ✓ ✓ MX520 – ✓ – MX470 – ✓ – MX450 – – – MX390 – – – E se
iP series Model name Print from E-mail Google Cloud Print Canon Inkjet Cloud Printing Center iP8700 – ✓ – iP2800 – – – iX series Model name Print from E-mail Google Cloud Print Canon Inkjet Cloud Printing Center iX6800 – ✓ – iX6700 – – – 44
Overview of the Machine Safety Guide Safety Precautions Regulatory and Safety Information Main Components and Basic Operations Main Components About the Power Supply of the Machine Loading Paper / Originals Loading Paper Loading Originals Replacing a FINE Cartridge Replacing a FINE Cartridge Checking the Ink Status Maintenance When Printing Becomes Faint or Colors Are Incorrect Performing Maintenance from a Computer Cleaning the Machine Changing the Machine Settings Changing Machine Settings from Your Compu
Safety Guide Safety Precautions Regulatory and Safety Information 46
Safety Precautions Choosing a location Do not install the machine in a location that is unstable or subject to excessive vibration. Do not install the machine in locations that are very humid or dusty, in direct sunlight, outdoors, or close to a heating source. To avoid the risk of fire or electric shocks, use the machine under the operating environment specified in the On-screen Manual. Do not place the machine on a thick rug or carpet. Do not place the machine with its back attached to the wall.
Regulatory and Safety Information International ENERGY STAR® Program As an ENERGY STAR Partner, Canon Inc. has determined that this product meets the ENERGY STAR guidelines for efficiency. About the disposal of the battery (For models containing lithium battery) Dispose of used batteries according to the local regulations. Users in the U.S.A. FCC Notice (U.S.A.
Canon U.S.A., Inc. One Canon Park Melville, New York 11747 1-800-652-2666 Users in Canada This device complies with Industry Canada license-exempt RSS standard(s). Operation is subject to the following two conditions: (1) this device may not cause interference, and (2) this device must accept any interference, including interference that may cause undesired operation of the device.
impact on the environment and human health due to potentially hazardous substances that are generally associated with EEE. At the same time, your cooperation in the correct disposal of this product will contribute to the effective usage of natural resources. For more information regarding return and recycling of WEEE products, please visit http:// www.canon.co.in/environment/.
Main Components and Basic Operations Main Components About the Power Supply of the Machine 51
Main Components Front View Rear View Inside View Operation Panel 52
Front View (1) paper output support Extend to support ejected paper. (2) paper output tray Printed paper is ejected. (3) paper output cover Open to replace the FINE cartridge or remove jammed paper inside the machine. (4) document cover Open to load an original on the platen glass. (5) paper guides Slide to align with both sides of the paper stack. (6) front tray Load various sizes or types of paper which you can use on the machine.
(10) operation panel Use to change the settings of the machine or to operate it. Operation Panel (11) platen glass Load an original to copy or scan.
Rear View (1) transport unit Open to remove jammed paper. (2) power cord connector Plug in the supplied power cord. (3) USB port Plug in the USB cable to connect the machine with a computer. Important Do not touch the metal casing. Do not plug in or unplug the USB cable while the machine is printing or scanning originals with the computer.
Inside View (1) ink cartridge lock lever Locks the FINE cartridge into place. (2) FINE cartridge (ink cartridges) A replaceable cartridge that integrates print head and ink tank. (3) FINE cartridge holder Install the FINE cartridge. The color FINE cartridge should be installed into the left slot and the black FINE cartridge should be installed into the right slot. (4) head cover Opens to enable replacement of the FINE cartridge.
Operation Panel * The Wi-Fi and Alarm lamps are shown lit in the illustration below for explanatory purposes. (1) ON lamp Lights green after flashing when the power is turned on. Note ON and Alarm lamps You can check the status of the machine by the ON and Alarm lamps. – ON lamp is off: The power is off. – ON lamp lights green: The machine is ready to print. – ON lamp flashes green: The machine is getting ready to print, or printing is in progress.
Light or flash orange when ink runs out, etc. The left lamp indicates the color FINE cartridge status, the right lamp the black FINE cartridge status. (6) Paper button Selects the page size and media type. (7) Paper lamp Lights to indicate the page size and media type selected with the Paper button. (8) Stop button Cancels operations. You can press this button to cancel a print, copy, or scan job in progress. Holding this button down lets you select maintenance options or machine settings.
About the Power Supply of the Machine Confirming that the Power Is On Turning the Machine On and Off Notice for the Power Plug/Power Cord Notice for Unplugging the Power Cord 59
Confirming that the Power Is On The ON lamp is lit green when the machine is turned on. Note It may take a while for the machine to start printing immediately after you turn on the machine.
Turning the Machine On and Off Turning on the machine 1. Press the ON button to turn on the machine. The ON lamp flashes and then remains lit green. Confirming that the Power Is On Note It may take a while for the machine to start printing immediately after you turn on the machine. If the Alarm lamp lights up or flashes orange, see If an Error Occurs.
Notice for the Power Plug/Power Cord Unplug the power cord once a month to confirm that the power plug/power cord does not have anything unusual described below. The power plug/power cord is hot. The power plug/power cord is rusty. The power plug/power cord is bent. The power plug/power cord is worn. The power plug/power cord is split. Caution If you find anything unusual with the power plug/power cord described above, unplug the power cord and call for service.
Notice for Unplugging the Power Cord To unplug the power cord, follow the procedure below. Important When you unplug the power cord, press the ON button, then confirm that the ON lamp is off. Unplugging the power cord while the ON lamp is lit or flashing may cause drying or clogging of the print head and print quality may be reduced. 1. Press the ON button to turn the machine off. 2. Confirm that the ON lamp is off. 3. Unplug the power cord.
Loading Paper / Originals Loading Paper Loading Originals 64
Loading Paper Loading Plain Paper / Photo Paper Loading Envelopes Media Types You Can Use Media Types You Cannot Use Printing Area 65
Loading Plain Paper / Photo Paper You can load plain paper or photo paper. Important If you cut plain paper into small size such as 4" x 6" (10 x 15 cm) or 5" x 7" (13 x 18 cm) to perform trial print, it can cause paper jams. Note We recommend Canon genuine photo paper for printing photos. For details on the Canon genuine paper, see Media Types You Can Use. You can use general copy paper. For the page size and paper weight you can use for this machine, see Media Types You Can Use. 1. Prepare paper.
Push the paper stack all the way to the back of the front tray. (4) Slide the right paper guide (A) to align the paper guides with both sides of the paper stack. Do not slide the paper guides too hard against the paper. The paper may not be fed properly. Important Always load paper in the portrait orientation (B). Loading paper in the landscape orientation (C) can cause paper jams. Note Do not overload paper by stacking until the top of the stack touches the paper guides.
(5) Open the output tray extension. 3. Open the paper output tray. (1) Open the paper output tray gently, and extend the paper output support. Important Be sure to open the paper output tray when printing. If not open, the machine cannot start printing. Note After loading paper Select the size and type of the loaded paper on the print settings screen of the operation panel or printer driver.
Loading Envelopes You can load Envelope DL and Envelope Com 10. The address is automatically rotated and printed according to the envelope's direction by specifying with the printer driver properly. Important Printing of envelopes from the operation panel is not supported. Do not use the following envelopes. They could jam in the machine or cause the machine to malfunction.
(2) Use the right paper guide (A) to slide both paper guides all the way out. (3) Load the envelopes in the center of the front tray WITH THE ADDRESS SIDE FACING DOWN. The folded flap of the envelope will be faced up on the left side. (B) Rear side (C) Address side Push the envelopes all the way to the back of the front tray. Up to 5 envelopes can be loaded at once. (4) Slide the right paper guide (A) to align the paper guides with both sides of the envelopes.
Note Do not overload envelopes by stacking until the top of the stack touches the paper guides. (5) Open the output tray extension. 3. Open the paper output tray. (1) Open the paper output tray gently, and extend the paper output support. Important Be sure to open the paper output tray when printing. If not open, the machine cannot start printing. Note After loading envelopes Select the size and type of the loaded envelopes on the print settings screen of the printer driver.
Media Types You Can Use Choose paper suitable for printing, for the best print results. Canon provides you various types of paper to enhance the fun of printing, such as stickers as well as papers for photo or document. We recommend the use of Canon genuine paper for printing your important photos. Media Types Commercially available papers Plain Paper (including recycled paper)*1 *2 Envelopes Canon genuine papers The Model Number of Canon genuine paper is shown in brackets.
Note Only the following sizes may be printed from the operation panel. - A4, Letter, and 4" x 6" (10 x 15 cm) Standard sizes: Letter A5 B5 5" x 7" (13 x 18 cm) Envelope DL Legal A4 4" x 6" (10 x 15 cm) 8" x 10" (20 x 25 cm) Envelope Com 10 Non-standard sizes: You can print on non-standard size paper within the following ranges. Minimum size: 3.50 x 5.00 inches (89.0 x 127.0 mm) Maximum size: 8.50 x 26.61 inches (215.9 x 676.0 mm) Paper Weight You can use paper in the following weight range.
Paper Load Limit Commercially Available Papers Media Name Front Tray Paper Output Tray Plain Paper (including recycled paper)*1 Approx. 100 sheets Approx. 50 sheets Envelopes 5 envelopes *2 Canon Genuine Papers Note We recommend that you remove the previously printed sheet from the paper output tray before continuously printing to avoid blurs and discoloration (except for High Resolution Paper ). Paper for printing photos: Media Name
*3 When loading paper in stacks, the print side may become marked as it is fed or paper may not feed properly. In this case, load one sheet at a time.
Media Types You Cannot Use Do not use the following types of paper. Using such paper will cause not only unsatisfactory results, but also the machine to jam or malfunction.
Printing Area Printing Area Other Sizes than Letter, Legal, Envelopes Letter, Legal Envelopes 77
Printing Area To ensure the best print quality, the machine allows a margin along each edge of media. The actual printable area will be the area inside these margins. : Canon recommends that you print within this area. Recommended printing area Printable area : The area where it is possible to print. However, printing in this area can affect the print quality or the paper feed precision. Note With performing Automatic Duplex Printing, the printable area will be 0.08 inches (2 mm) smaller at the top margin.
Other Sizes than Letter, Legal, Envelopes Size Printable Area (width x height) A5 5.56 x 7.95 inches (141.2 x 202.0 mm) A4 8.00 x 11.38 inches (203.2 x 289.0 mm) B5 6.90 x 9.80 inches (175.2 x 249.0 mm) 4" x 6" (10 x 15 cm) 3.73 x 5.69 inches (94.8 x 144.4 mm) 5" x 7" (13 x 18 cm) 4.73 x 6.69 inches (120.2 x 169.8 mm) 8" x 10" (20 x 25 cm) 7.73 x 9.69 inches (196.4 x 246.0 mm) Recommended printing area (A) 1.28 inches (32.5 mm) (B) 1.32 inches (33.5 mm) Printable area (C) 0.12 inches (3.
Letter, Legal Size Printable Area (width x height) Letter 8.00 x 10.69 inches (203.2 x 271.4 mm) Legal 8.00 x 13.69 inches (203.2 x 347.6 mm) Recommended printing area (A) 1.28 inches (32.5 mm) (B) 1.32 inches (33.5 mm) Printable area (C) 0.12 inches (3.0 mm) (D) 0.20 inches (5.0 mm) (E) 0.25 inches (6.4 mm) (F) 0.25 inches (6.
Envelopes Size Recommended Printing Area (width x height) Envelope DL 3.88 x 7.06 inches (98.8 x 179.5 mm) Envelope Com 10 3.68 x 7.90 inches (93.5 x 200.8 mm) Recommended printing area (A) 0.31 inches (8.0 mm) (B) 1.28 inches (32.5 mm) (C) 0.22 inches (5.6 mm) (D) 0.22 inches (5.
Loading Originals Loading Originals on the Platen Glass Originals You Can Load How to Detach / Attach the Document Cover 82
Loading Originals on the Platen Glass You can load originals to copy or scan on the platen glass. 1. Load an original on the platen glass. (1) Open the document cover. (2) Load the original WITH THE SIDE TO SCAN FACING DOWN on the platen glass. Originals You Can Load Align the corner of the original with the alignment mark . Important Be sure to observe the following when loading the original on the platen glass. - Do not place any objects weighing 4.4 lb (2.0 kg) or more on the platen glass.
Important After loading the original on the platen glass, be sure to close the document cover before starting to copy or scan.
Originals You Can Load The originals you can load on the platen glass are as follows. Item Types of originals Size (width x height) Details - Text document, magazine, or newspaper - Printed photo, postcard, business card, or disc (BD/DVD/CD, etc.) Max. 8.5 x 11.7 inches (216 x 297 mm) Note When loading a thick original such as a book on the platen glass, you can load it by removing the document cover from the machine.
How to Detach / Attach the Document Cover Detaching the document cover: Hold up the document cover vertically and then pull it up. Attaching the document cover: Fit both hinges (A) of the document cover into the holder (B) and insert both hinges of the document cover vertically as illustrated below.
Replacing a FINE Cartridge Replacing a FINE Cartridge Checking the Ink Status 87
Replacing a FINE Cartridge When remaining ink cautions or errors occur, the ink lamps and the Alarm lamp will flash orange to inform you of the error. Count the number of flashes and take appropriate action. If an Error Occurs Note For information on the compatible FINE cartridge, refer to the printed manual: Safety and Important Information. Replacing Procedure When you need to replace a FINE cartridge, follow the procedure below.
2. Open the paper output cover (E). When the FINE cartridge holder moves to the replacement position, the head cover (F) OPENS AUTOMATICALLY. Caution Do not hold the FINE cartridge holder to stop or move it forcibly. Do not touch the FINE cartridge holder until it stops completely. Important The head cover will open automatically after you open the paper output cover. If you have closed the head cover while replacing a FINE cartridge, close the paper output cover, then open it again.
(2) Remove the FINE cartridge. Important Handle the FINE cartridge carefully to avoid staining of clothing or the surrounding area. Discard the empty FINE cartridge according to the local laws and regulations regarding disposal of consumables. 4. Prepare a new FINE cartridge. (1) Take a new FINE cartridge out of its package and remove the protective tape (G) gently.
Important If you shake a FINE cartridge, ink may spill out and stain your hands and the surrounding area. Handle a FINE cartridge carefully. Be careful not to stain your hands and the surrounding area with ink on the removed protective tape. Do not reattach the protective tape once you have removed it. Discard it according to the local laws and regulations regarding disposal of consumables. Do not touch the electrical contacts or print head nozzle on a FINE cartridge.
Important Check if the FINE cartridge is installed correctly. The machine cannot print unless both the color FINE cartridge and black FINE cartridge are installed. Be sure to install both cartridges. 6. Close the paper output cover (H). Note If the Alarm lamp lights or flashes orange after the paper output cover is closed, take appropriate action. If an Error Occurs When you start printing after replacing the FINE cartridge, the machine starts cleaning the print head automatically.
Checking the Ink Status Checking the Ink Status with the Ink Lamps on the Operation Panel You can also check the ink status on the computer screen.
Checking the Ink Status with the Ink Lamps on the Operation Panel Note The ink level detector is mounted on the machine to detect the remaining ink level. The machine considers as ink is full when a new FINE cartridge is installed, and then starts to detect a remaining ink level. If you install a used FINE cartridge, the indicated ink level of it may not be correct. In such case, refer to the ink level information only as a guide.
Maintenance When Printing Becomes Faint or Colors Are Incorrect Performing Maintenance from a Computer Cleaning the Machine 95
When Printing Becomes Faint or Colors Are Incorrect Maintenance Procedure Printing the Nozzle Check Pattern Examining the Nozzle Check Pattern Cleaning the Print Head Cleaning the Print Head Deeply Aligning the Print Head 96
Maintenance Procedure If print results are blurred or colors are not printed correctly, the print head nozzle (FINE cartridge) is probably clogged. Follow the procedure below to print the nozzle check pattern, check the print head nozzle condition, then clean the print head. If printed ruled lines are misaligned or print results are otherwise unsatisfactory, aligning the print head may improve print quality. Important Do not rinse or wipe the FINE cartridge. This can cause trouble with the FINE cartridge.
If the problem is not resolved after cleaning the print head twice: Step 3 Clean the print head deeply. From the machine Cleaning the Print Head Deeply From the computer Cleaning the Print Heads from Your Computer If the problem is not resolved, turn off the power and clean the print head deeply again after 24 hours. If the problem is still not resolved: Step 4 Replace a FINE cartridge.
Printing the Nozzle Check Pattern Print the nozzle check pattern to determine whether the ink ejects properly from the print head nozzle. Watch the movie Note If the remaining ink level is low, the nozzle check pattern will not be printed correctly. Replace the FINE cartridge whose ink is low. Replacing a FINE Cartridge You need to prepare: a sheet of A4 or Letter-sized plain paper 1. Make sure that the power is turned on. 2. Load a sheet of A4 or Letter-sized plain paper in the front tray. 3.
Examining the Nozzle Check Pattern Examine the nozzle check pattern, and clean the print head if necessary. 1. Check if there are missing lines in the pattern (A) or horizontal white streaks in the pattern (B). (C) Number of sheets printed so far If there are missing lines in the pattern (A): Cleaning the print head is required. Cleaning the Print Head (D) Good (E) Bad (lines are missing) If there are horizontal white streaks in the pattern (B): Cleaning the print head is required.
Cleaning the Print Head Clean the print head if lines are missing or if horizontal white streaks are present in the printed nozzle check pattern. Cleaning unclogs the nozzles and restores the print head condition. Cleaning the print head consumes ink, so clean the print head only when necessary. 1. Make sure that the power is turned on. 2. Hold down the Stop button until the Alarm lamp flashes orange twice, then release it immediately. The machine starts cleaning the print head.
Cleaning the Print Head Deeply If print quality does not improve by the standard cleaning of the print head, clean the print head deeply. Cleaning the print head deeply consumes more ink than the standard cleaning of the print head, so clean the print head deeply only when necessary. 1. Make sure that the power is turned on. 2. Hold down the Stop button until the Alarm lamp flashes orange three times, then release it immediately. The machine starts cleaning the print head deeply.
Aligning the Print Head If printed ruled lines are misaligned or print results are otherwise unsatisfactory, adjust the print head position. Note If the remaining ink level is low, the print head alignment sheet will not be printed correctly. Replace the FINE cartridge whose ink is low. Replacing a FINE Cartridge You need to prepare: a sheet of A4 or Letter-sized plain paper (including recycled paper)* * Be sure to use paper that is white and clean on both sides. 1. Make sure that the power is turned on.
If the print head alignment sheet was not printed correctly, press the Stop button, then redo this procedure from the beginning. 5. Scan the print head alignment sheet to adjust the print head position. (1) Load the print head alignment sheet on the platen glass. Load the print head alignment sheet WITH THE PRINTED SIDE FACING DOWN and align the mark bottom right corner of the sheet with the alignment mark on the . (2) Close the document cover gently, then press the Color button or the Black button.
Performing Maintenance from a Computer Cleaning the Print Heads from Your Computer Cleaning Inside the Machine Cleaning the Paper Feed Rollers from Your Computer Use Your Computer to Print a Nozzle Check Pattern Aligning the Print Head Aligning the Print Head Position Automatically from Your Computer Aligning the Print Head Position from Your Computer Checking the Ink Status from Your Computer 105
Cleaning the Print Heads from Your Computer The print head cleaning function allows you to clear up clogged print head nozzle. Perform print head cleaning if printing is faint or a specific color fails to print, even though there is enough ink. The procedure for cleaning the print head is as follows: Cleaning 1. Select Cleaning from the pop-up menu on the Canon IJ Printer Utility 2. Click the Cleaning icon When the dialog opens, select the ink group for which cleaning is to be performed.
Make sure that the machine is on and then click OK. Click OK when the confirmation message appears. Print head deep cleaning starts. 4. Complete deep cleaning The Nozzle Check dialog opens after the confirmation message. 5. Check the results To check whether the print quality has improved, click Print Check Pattern. To cancel the check process, click Cancel. Important ■ Deep Cleaning consumes a larger amount of ink than Cleaning.
Cleaning Inside the Machine Perform bottom plate cleaning before you execute duplex printing to prevent smudges on the back side of the paper. Also perform bottom plate cleaning if ink smudges caused by something other than print data appear on the printed page. The procedure for performing bottom plate cleaning is as follows: Bottom Plate Cleaning 1. Select Cleaning from the pop-up menu on the Canon IJ Printer Utility 2. Click the Bottom Plate Cleaning icon The dialog opens. 3.
Cleaning the Paper Feed Rollers from Your Computer Cleans the paper feed rollers. Perform feed roller cleaning when there are paper particles sticking to the paper feed rollers and paper is not fed properly. The procedure for performing the feed roller cleaning is as follows: Roller Cleaning 1. Prepare the machine Remove all sheets of paper from the front tray. 2. Select Cleaning from the pop-up menu on the Canon IJ Printer Utility 3. Click the Roller Cleaning icon The confirmation message appears. 4.
Use Your Computer to Print a Nozzle Check Pattern The nozzle check function allows you to check whether the print head is working properly by printing a nozzle check pattern. Print the pattern if printing becomes faint, or if a specific color fails to print. The procedure for printing a nozzle check pattern is as follows: Nozzle Check 1. Select Test Print from the pop-up menu on the Canon IJ Printer Utility 2. Click the Nozzle Check icon The confirmation message appears.
Aligning the Print Head When you perform head position adjustment, errors in the print head adjustment position are corrected and conditions such as color and line streaking are improved. If the print results appear uneven because of line shifts or other conditions, adjust the position of the print head. On this machine, you can adjust the print head either automatically or manually.
Aligning the Print Head Position from Your Computer Print head alignment corrects the installation positions of the print head and improves deviated colors and lines. This machine supports two head alignment methods: automatic head alignment and manual head alignment. The procedure for performing manual print head alignment is as follows: Print Head Alignment 1. Select Custom Settings from the pop-up menu on the Canon IJ Printer Utility 2.
Note ■ If it is difficult to pick the best pattern, pick the setting that produces the least noticeable vertical streaks. (A) Least noticeable vertical streaks (B) Most noticeable vertical streaks ■ If it is difficult to pick the best pattern, pick the setting that produces the least noticeable horizontal streaks. (A) Least noticeable horizontal streaks (B) Most noticeable horizontal streaks 9. Confirm the displayed message and click OK The second pattern is printed. 10.
Note ■ If it is difficult to pick the best pattern, pick the setting that produces the least noticeable vertical streaks. (A) Least noticeable vertical streaks (B) Most noticeable vertical streaks 11. Confirm the displayed message and click OK The third pattern is printed. 12. Check the printed pattern Enter the numbers of the patterns with the least noticeable horizontal stripes in the associated boxes, and click OK.
Note ■ If it is difficult to pick the best pattern, pick the setting that produces the least noticeable horizontal stripes. (A) Least noticeable horizontal stripes (B) Most noticeable horizontal stripes Note ■ After head alignment is completed, you can print and check the current setting. To do so, click the Print Head Alignment icon and when the message is displayed, click Print Alignment Value.
Aligning the Print Head Position Automatically from Your Computer Print head alignment corrects the installation positions of the print head and improves deviated colors and lines. This machine supports two head alignment methods: automatic head alignment and manual head alignment. Normally, the machine is set for automatic head alignment. If the printing results of automatic print head alignment are not satisfactory, perform manual head alignment.
Cleaning the Machine Cleaning the Exterior of the Machine Cleaning the Platen Glass and Document Cover Cleaning the Paper Feed Roller Cleaning the Inside of the Machine (Bottom Plate Cleaning) Cleaning the Protrusions inside the Machine 117
Cleaning the Exterior of the Machine Be sure to use a soft and dry cloth such as eyeglasses cleaning cloth and wipe off dirt on the surface gently. Smooth out wrinkles on the cloth if necessary before cleaning. Important Be sure to turn off the power and disconnect the power plug before cleaning the machine. Do not use tissue paper, paper towels, rough-textured cloth, or similar materials for cleaning so as not to scratch the surface. Be sure to use a soft and dry cloth.
Cleaning the Platen Glass and Document Cover Important Be sure to turn off the power and disconnect the power plug before cleaning the machine. Do not use tissue paper, paper towels, rough-textured cloth, or similar materials for cleaning so as not to scratch the surface. Be sure to use a soft and dry cloth. Never use volatile liquids such as thinners, benzene, acetone, or any other chemical cleaner to clean the machine, as this may cause a malfunction or damage the surface of the machine.
Cleaning the Paper Feed Roller If the paper feed roller is dirty or paper powder is attached to it, paper may not be fed properly. In this case, clean the paper feed roller. Cleaning will wear out the paper feed roller, so perform this only when necessary. You need to prepare: a sheet of A4 or Letter-sized plain paper or commercially available cleaning sheet 1. Make sure that the power is turned on and remove any paper from the front tray. 2. Clean the paper feed roller without paper.
Cleaning the Inside of the Machine (Bottom Plate Cleaning) Remove stains from the inside of the machine. If the inside of the machine becomes dirty, printed paper may get dirty, so we recommend performing cleaning regularly. You need to prepare: a sheet of A4 or Letter-sized plain paper* * Be sure to use a new piece of paper. 1. Make sure that the power is turned on and remove any paper from the front tray. 2. Prepare paper.
Note When performing Bottom Plate Cleaning again, be sure to use a new piece of paper.
Cleaning the Protrusions inside the Machine Important Be sure to turn off the power and disconnect the power plug before cleaning the machine. You need to prepare: cotton swab If the protrusions inside the machine are stained, wipe off any ink from the protrusions using a cotton swab or the like.
Changing the Machine Settings Changing Machine Settings from Your Computer Changing the Machine Settings Using the Operation Panel 124
Changing Machine Settings from Your Computer Checking the Ink Status from Your Computer Registering a Changed Printing Profile Setting the Ink Cartridge to be Used Managing the Machine Power Reducing the Machine Noise Changing the Machine Operation Mode 125
Checking the Ink Status from Your Computer You can check the remaining ink level and the FINE cartridge types for your model. 1. Select Ink Level Information from the pop-up menu on the Canon IJ Printer Utility An illustration of the ink types and their status are displayed. If a warning or error related to the remaining ink level occurs, the print driver displays an icon to let you know. In such cases, take the appropriate action as described on the screen. 2.
Registering a Changed Printing Profile You can name and register the printing profile you made in the Print Dialog. The registered printing profile can be called up from Presets to be used. You can also delete the unnecessary printing profile. The procedure for registering a printing profile is as follows: Registering a Printing Profile 1. In the Print dialog, set the necessary items 2. Select Save Current Settings as Preset... (Save As...) from the Presets 3.
Deleting Unnecessary Printing Profile 1. Select the printing profile to be deleted • If you are using Mac OS X v10.8 or Mac OS X v10.7 In the print dialog, select Show Presets... in the Presets section. Then in the dialog that appears, select the name of the printing profile to be deleted. • If you are using Mac OS X v10.6.8 On Presets in the Print dialog, select the name of printing profile you want to delete. 2. Delete the printing profile • If you are using Mac OS X v10.8 or Mac OS X v10.
Setting the Ink Cartridge to be Used This feature enables you to specify the most appropriate FINE cartridge among installed cartridges according to an intended use. When one of the FINE cartridges becomes empty and cannot be replaced immediately by a new one, you can specify the other FINE cartridge that still has ink and continue printing. The procedure for specifying the FINE cartridge is as follows: 1. Select Ink Cartridge Settings from the pop-up menu on the Canon IJ Printer Utility 2.
Managing the Machine Power This function allows you to manage the machine power from the printer driver. The procedure for managing the machine power is as follows: Power Off The Power Off function turns off the machine. When you use this function, you will not be able to turn the machine on from the printer driver. 1. Select Power Settings from the pop-up menu on the Canon IJ Printer Utility 2. Execute power off Click Power Off, and when the confirmation message appears, click OK.
Important ■ If you connect this machine to a network and use it, you can set Auto Power Off but the power will not switch off automatically.
Reducing the Machine Noise The silent function allows you to reduce the operating noise of this machine. Select when you wish to reduce the operating noise of the printer at night, etc. Using this function may lower the print speed. The procedure for using the quiet mode is as follows: 1.
3. Apply the settings Make sure that the machine is on and click Apply. Click OK when the confirmation message appears. The settings are enabled hereafter. Note ■ The effects of the quiet mode may be less depending on the print quality settings.
Changing the Machine Operation Mode If necessary, switch between various modes of machine operation. The procedure for configuring Custom Settings is as follows: 1. Make sure that the machine is on, and then select Custom Settings from the pop-up menu on the Canon IJ Printer Utility Note ■ If the computer is unable to communicate with the machine, a message may be displayed because the computer cannot access the function information that was set on the machine.
Important ■ Using this function slows down the print speed. Align heads manually Usually, the Print Head Alignment function of Test Print on the pop-up menu in the Canon IJ Printer Utility is set to automatic head alignment, but you can change it to manual head alignment. If the printing results are unsatisfactory even after you execute automatic head alignment, execute manual head alignment. Check this check box to perform the manual head alignment.
Changing the Machine Settings Using the Operation Panel About Quiet setting Turning on/off the Machine Automatically 136
About Quiet setting Enables this function on the machine if you want to reduce the operating noise, such as when printing at night. Follow the procedure below to perform setting. 1. Make sure that the machine is turned on. 2. Press and hold the Stop button until the Alarm lamp flashes 9 times. 3. Release the Stop button. 4. Press the Color button. To disable the function, press the Black button in step 4. Important • Operating speed may be reduced compared to when the quiet mode is not selected.
Turning on/off the Machine Automatically You can enable the machine to turn on/off automatically considering the environment Turning on the Machine Automatically Turning off the Machine Automatically Turning on the Machine Automatically You can enable the machine to turn on automatically when a scanning command from a computer or printing data is sent to the machine. 1. Make sure that the machine is turned on. 2. Press and hold the Stop button until the Alarm lamp flashes 14 times. 3.
Information about Network Connection Useful Information about Network Connection 139
Useful Information about Network Connection Initial Values Set at Factory (Network) Connecting the Machine to the Computer Using a USB Cable When Detecting the Printers Have the Same Name Connecting to Other Computer with LAN/Changing the Connection Method from USB to LAN Printing Out Network Setting Information 140
Initial Values Set at Factory (Network) Item Initial Values Enable/disable Wireless LAN Enable SSID BJNPSETUP Communication mode Infrastructure Wireless LAN security Disable IPv4 IP address Auto setup IPv6 IP address Auto setup Set printer name XXXXXX000000 Enable/disable IPv6 Enable Enable/disable WSD (WSD settings) Enable Timeout setting (WSD settings) 1 minute Enable/disable Bonjour (Bonjour settings) Enable Service name (Bonjour settings) Canon MG3500 series LPR protocol setting
Connecting the Machine to the Computer Using a USB Cable Connect the machine and the computer using a USB cable as the illustration below. The USB port is located on the rear of the machine.
When Detecting the Printers Have the Same Name When the printer is detected, you may see multiple printers of the same name on the detection result screen. The MAC address or the printer name specified by Bonjour is displayed at the end of the printer name on the detection result screen. Select a printer with checking the MAC address or the printer name specified by Bonjour set to the printer against the printer name on detection result screen.
Connecting to Other Computer with LAN/Changing the Connection Method from USB to LAN To add the computer connecting the printer with LAN or to change the connection method between the printer and the computer from USB to LAN, perform setup according to the instructions on our website. Connecting to Other Computer with LAN To add the computer connecting the printer with LAN, perform setup according to the instructions on our website.
Printing Out Network Setting Information You can print out the network settings of the machine such as its IP address and SSID. Important • This print out contains valuable information about your computer. Handle it with care. 1. Make sure that the machine is turned on. 2. Load a sheet of A4 or Letter-sized plain paper. 3. Press and hold the Stop button until the Alarm lamp flashes 15 times. 4. Release the Stop button. The machine starts printing the network setting information.
Subnet Prefix Length*1 Subnet Prefix Length XXX IPsec*2 IPsec setting Active Security Protocol*2 Method of the Security Protocol ESP/ESP & AH/AH WPS PIN CODE WPS PIN code XXXXXXXX Wireless LAN DRX Discontinuous reception (wireless LAN) Enable/Disable Other Settings Other settings - Printer Name Printer name Printer name (Up to 15 characters) WSD WSD setting Enable/Disable WSD Timeout Timeout 1/5/10/15/20 [min] LPR Protocol LPR protocol setting Enable/Disable Bonjour Bonjour se
About Network Communication Changing and Confirming Network Settings Appendix for Network Communication 147
Changing and Confirming Network Settings IJ Network Tool Canon IJ Network Tool Screen Canon IJ Network Tool Menus Changing the Settings in the Wireless LAN Sheet Changing the WEP Detailed Settings Changing the WPA or WPA2 Detailed Settings Changing the Settings in the Wired LAN Sheet Changing the Settings in the Admin Password Sheet Monitoring Wireless Network Status Initializing the Network Settings of the Machine Viewing the Modified Settings 148
IJ Network Tool IJ Network Tool is a utility that enables you to display and modify the machine network settings. It is installed when the machine is set up. Important • To use the machine over LAN, make sure you have the equipment necessary for the connection type, such as an access point or a LAN cable. • Do not start up IJ Network Tool while printing. • Do not print when IJ Network Tool is running.
Canon IJ Network Tool Screen This section describes the items displayed on the Canon IJ Network Tool screen. 1. Utilities Modifies the settings of the machine. Select to change the network name (SSID) settings. Setup Sets up the machine. If you setup the machine from scratch, connect your computer and the machine with a USB cable. 2. Printers: Printer name, type, and connection destination are displayed. The selected printer can be set up or be modified. 3. Update Performs printer detection again.
4. Configuration... Enabled when Utilities is selected. Click to display the Configuration screen to configure settings of the selected printer. Note • This item has the same function as Configuration... in the Settings menu.
Canon IJ Network Tool Menus This section describes the menus in Canon IJ Network Tool. 1. Canon IJ Network Tool menu About Canon IJ Network Tool Displays the version of this application. Quit Canon IJ Network Tool Exits IJ Network Tool. 2. View menu Status Displays the Status screen to confirm the printer connection status and wireless communication status. Refresh Updates and displays the contents of Printers: to the latest information.
Changing the Settings in the Wireless LAN Sheet To change the wireless network settings of the printer, connect the printer and the computer with a USB cable temporarily. If you modify the wireless network settings of the computer over wireless connection without USB connection, your computer may not be able to communicate with the machine after modifying the settings. Note • This screen is not available depending on the printer you are using.
The network name (SSID) of the wireless LAN is displayed. Note • Enter the same SSID that the access point is configured to use. The SSID is case-sensitive. 3. Search... The Access Points screen is displayed to select an access point to connect to. Access Points Screen Note • When IJ Network Tool runs over a LAN, the button is grayed out and cannot be selected. Connect the printer and the computer with a USB cable temporarily to change the settings. 4.
Sets the IP address of the printer to be used over the LAN. Set a value appropriate for your network environment. Get IP address automatically Select this option to use an IP address automatically assigned by a DHCP server. DHCP server functionality must be enabled on your wireless LAN router or access point. Use following IP address If no DHCP server functionality is available in your setup where you use the printer or you want to use a particular IP address, select this option to use a fixed IP address.
If the target access point is set to a closed network (the stealth mode), click Cancel to return to the previous screen and enter the network name (SSID) in Network (SSID). Note • Make sure that the access point is turned on. 3. Set Click to set the network name (SSID) in Network (SSID): on the Wireless LAN sheet. Note • The WEP Details screen, the WPA Details screen, or the WPA2 Details screen appears if the selected access point is encrypted.
Changing the WEP Detailed Settings Note • This screen is not available depending on the printer you are using. To change the wireless network settings of the printer, connect the printer and the computer with a USB cable temporarily. If you modify the wireless network settings of the computer over wireless connection without USB connection, your computer may not be able to communicate with the machine after modifying the settings. 1. Start up IJ Network Tool. 2. Select the printer in Printers:.
Hexadecimal (Hex) 10 digits 26 digits 2. Key Length: Select either 64 bit or 128 bit. 3. Key Format: Select either ASCII or Hex. 4. Key ID: Select the Key ID (index) set to the access point. Note • When the printer is connected to an AirPort Base Station via a LAN: When the printer is connected to an AirPort Base Station via a LAN, confirm the settings in Wireless Security of AirPort Utility. • Select 64 bit if WEP 40 bit is selected for the key length in the AirPort Base Station. • Select 1 for Key ID:.
Changing the WPA or WPA2 Detailed Settings Note • This screen is not available depending on the printer you are using. To change the wireless network settings of the printer, connect the printer and the computer with a USB cable temporarily. If you modify the wireless network settings of the computer over wireless connection without USB connection, your computer may not be able to communicate with the machine after modifying the settings.
Note • This machine supports WPA-PSK (WPA-Personal) and WPA2-PSK (WPA2-Personal).
Changing the Settings in the Wired LAN Sheet Note • This screen is not available depending on the printer you are using. • Activate the wired LAN setting of the printer to change the settings in the Wired LAN sheet. 1. Start up IJ Network Tool. 2. Select the printer in Printers:. 3. Click the Configuration... button. 4. Click the Wired LAN button. 5. Change the settings or confirm. Click OK after changing configuration.
Changing the Settings in the Admin Password Sheet 1. Start up IJ Network Tool. 2. Select the printer in Printers:. 3. Click the Configuration... button. 4. Click the Admin Password button. The Admin Password sheet is displayed. 5. Change the settings or confirm. 1. Use admin password Set a password for the administrator with privileges to set up and change detailed options. To use this feature, select this check box and enter a password.
Monitoring Wireless Network Status Note • This screen is not available depending on the printer you are using. • When using the machine over the wired LAN, you cannot monitor network status. 1. Start up IJ Network Tool. 2. Select the printer in Printers:. 3. Select Status from the View menu. The Status screen is displayed and you can check the printer status and connection performance. 1. Signal Level: Indicates the strength of the signal received by the printer, ranging from 0% to 100%. 2.
The wireless connection may use the same frequency band as microwave ovens and other sources of radio interference. Try to keep the printer and the access point away from such sources. • Check if the radio channel of the access point is close to that of other access points nearby. If the radio channel of the access point is close to that of other access points nearby, the connection performance may become unstable. Be sure to use a radio channel that does not interfere with other access points.
Initializing the Network Settings of the Machine Important • Note that initialization erases all network settings on the machine, and printing or scanning operation from a computer over network may become impossible. To use the machine over network, perform setup according to the instructions on our website. 1. Start up IJ Network Tool. 2. Select the printer in Printers:. 3. Select Maintenance from the Settings menu. 1.
Viewing the Modified Settings The Confirmation screen is displayed when you modified the printer settings on the Configuration screen. When you click OK on the Confirmation screen, the following screen is displayed for confirming the modified settings. 1. Settings: A list of changes made in the Configuration screen is displayed.
Appendix for Network Communication Using the Card Slot over a Network About Technical Terms Restrictions 167
Using the Card Slot over a Network Note • This screen is not available depending on the printer you are using. Mounting the Card Slot as the Network Drive Restrictions on Card Slot Use over a Network Mounting the Card Slot as the Network Drive The card slot must be mounted to use it over a network. To mount the card slot as the network drive, follow the procedure below. 1. Insert a memory card into the card slot of the machine. 2. Check the current printer name.
• The card slot can be shared by multiple computers, if the machine is connected to a network. Multiple computers can read files from a memory card in the card slot at the same time. • If your computer joins a domain, the card slot may not be mounted as the network drive. • If you use the memory card stored the large size files or many files, a large amount of card access may be generated. In this case, the operation in the memory card may be impossible or slow.
About Technical Terms In this section, technical terms used in the manual are explained. A B C D F I K L M N P R S T U W A • Access Point A wireless transceiver or base station that receives information from wireless clients/the machine and rebroadcasts it. Required in an infrastructure network. • Ad-hoc Client computer and machine setting where wireless communication occurs on a peer-to-peer basis, i.e., all clients in with the same SSID/network name communicate directly with each other.
• Authentication Method The method that an access point uses to authenticate a printer through a wireless LAN. The methods are agreeable each other. When using WEP as an encryption method, the authentication method is able to fix to Open System or Shared Key. For WPA/WPA2, authentication method is PSK. ◦ Auto The printer automatically changes its authentication method to match the access point.
F • Firewall It is a system that prevents an unlawful computer access in the network. To prevent, you can use the firewall function of a broadband router, the security software installed in the computer, or operation system for computer. I • IEEE 802.11b International standard for wireless LAN using the 2.4 GHz frequency range with a throughput of up to 11 Mbps. • IEEE 802.11g International standard for wireless LAN using the 2.4 GHz frequency range with a throughput of up to 54 Mbps. Compatible with 802.
• Key Length Length of the WEP key. Select either 64 bits or 128 bits. Longer key length allows you to set a more complex WEP key. L • Link Quality The status of connection between the access point and the printer excluding noise (interference) is indicated with a value from 0 to 100%. • LPR A platform-independent printing protocol used in TCP/IP networks. It is not supported bidirectional communication. M • MAC Address (AirPort ID) Also known as the physical address.
• PSK An encryption method employed by WPA/WPA2. R • Router A relay device to connect to another network. S • Signal Level The strength of the signal received by the printer from the access point is indicated with a value from 0 to 100%. • SSID Unique label for wireless LAN. It is often represented such as a network name or an access point name. SSID distinguishes one wireless LAN from another to prevent interference.
U • USB Serial interface designed to enable you to "hot-swap" devices, i.e., by plugging and unplugging them without turning off the power. W • WEP/WEP Key An encryption method employed by IEEE 802.11. Shared security key used to encrypt and decrypt data sent over wireless networks. This printer supports key length of 64 bits or 128 bits, key format of ASCII code or Hexadecimal, and key number of 1 to 4.
• WPS (Wi-Fi Protected Setup) WPS is a standard for easy and secure establishment of a wireless network. There are 2 primary methods used in the Wi-Fi Protected Setup: PIN entry: a mandatory method of setup for all WPS certified devices Push button configuration (PBC): an actual push button on the hardware or through a simulated push button in the software.
Restrictions If you use a printer over the wireless LAN, the printer may recognize nearby wireless systems, you should set a network key (WEP, WPA, or WPA2) to the access point to encrypt wireless transmission. Wireless communication with a product that does not comply with the Wi-Fi standard cannot be guaranteed. Connecting with too many computers may affect the printer performance, such as printing speed.
Tips for Ensuring Optimal Printing Quality Useful Information about Ink Key Points to Successful Printing Be Sure to Make Paper Settings after Loading Paper Canceling a Print Job Key to Enjoying Consistent Printing Quality Precautions for Safe Transport of the Machine 178
Useful Information about Ink How is ink used for various purposes other than printing? Ink may be used for purposes other than printing. Ink is not only used for printing, but also for cleaning the print head to maintain the optimal printing quality. The machine has the function to automatically clean the ink jet nozzles to prevent clogging. In the cleaning procedure, ink is pumped out from the nozzles. Used ink for nozzle cleaning is limited to a small amount.
Key Points to Successful Printing Check the machine status before printing! Is the print head OK? If a print head nozzle is clogged, print will be faint and papers will be wasted. Print the nozzle check pattern to check the print head. Maintenance Procedure Is the inside of the machine smeared with ink? After printing large quantities of paper or performing borderless printing, the area where papers go through may get smeared with ink. Clean the inside of your machine with Bottom Plate Cleaning.
Be Sure to Make Paper Settings after Loading Paper If the media type setting is not the one for the loaded paper, printing results may not be satisfactory. After loading paper, be sure to select the appropriate media type setting for the loaded paper. Print Results Not Satisfactory There are various types of paper: paper with special coating on the surface for printing photos with optimal quality and paper suitable for documents.
Canceling a Print Job Never press the ON button! If you press the ON button while printing is in progress, the print data sent from the computer queues in the machine and you may not be able to continue to print. Press the Stop button to cancel printing.
Key to Enjoying Consistent Printing Quality The key to printing with the optimal printing quality is to prevent the print head from drying or clogging. Always observe the following rules for optimal printing quality. Never disconnect the power plug until the power is turned off! If you press the ON button to turn off the power, the machine caps the print head (nozzles) automatically to prevent from drying.
Precautions for Safe Transport of the Machine When relocating the machine, make sure of the following. Important When sending the machine for repair Pack the machine in a sturdy box so that it is placed with its bottom facing down, using sufficient protective material to ensure safe transport. With the FINE cartridge left installed in the machine, press the ON button to turn off the power. This allows the machine to automatically cap the print head, thus preventing it from drying.
Legal Limitations on Use of Your Product and Use of Images It may be unlawful to make copies of, scan, print, or use reproductions of the following documents. The list provided is non-exhaustive. When in doubt, check with a legal representative in your jurisdiction.
Specifications General Specifications Printing resolution (dpi) 4800* (horizontal) x 1200 (vertical) * Ink droplets can be placed with a pitch of 1/4800 inch at minimum. USB Port: Hi-Speed USB *1 LAN Port: Wireless LAN: IEEE802.11n/IEEE802.11g/IEEE802.11b *2 Interface *1 A computer that complies with Hi-Speed USB standard is required. Since the HiSpeed USB interface is fully upwardly compatible with USB 1.1, it can be used at USB 1.1.
Network Specifications Communication protocol TCP/IP Supported Standards: IEEE802.11n/IEEE802.11g/IEEE802.11b Frequency bandwidth: 2.4 GHz Channel: 1-11 or 1-13 * Frequency bandwidth and available channels differ depending on country or region. Transfer speed (Standard value): IEEE802.11n: max. 150 Mbps IEEE802.11g: max. 54 Mbps IEEE802.11b: max.
Other Supported OS Some functions may not be available with each OS. Refer to the manual or the Canon web site for details on operation with iOS, Android, and Windows RT. Mobile Printing Capability Apple AirPrint Google Cloud Print An internet connection is required to view the Online Manual. Windows: Operation can only be guaranteed on a computer with Windows 8, Windows 7, Windows Vista or Windows XP pre-installed. Windows: A CD-ROM Drive or internet connection is required during software installation.