EA-200 User’s Guide E http://world.casio.
GUIDELINES LAID DOWN BY FCC RULES FOR USE OF THE UNIT IN THE U.S.A. (not applicable to other areas). NOTICE This equipment has been tested and found to comply with the limits for a Class B digital device, pursuant to Part 15 of the FCC Rules. These limits are designed to provide reasonable protection against harmful interference in a residential installation.
0-1 English Contents –– English –– Handling Precautions ............................................................................ 0-2 Natural Frequency and Sound .......................................................... 2-6-1 Unpacking ............................................................................................. 0-3 Column of Air Resonance and the Velocity of Sound ....................... 2-7-1 About the EA-200 ........................................................................
0-2 English • Never allow foreign objects to get into connector holes. Doing so can result in malfunction. Handling Precautions • The EA-200 is made up of precision components. Never try to take it apart. • Always make sure to connect probes only to their correct terminals. Never force the plug of a probe into a wrong terminal connector. • Avoid dropping the EA-200 and subjecting it to strong impact. • Be sure to turn the EA-200 off before connecting or disconnecting probes.
0-3 English Unpacking EA-200 About the EA-200 Soft case The EA-200 is a digital device that makes it possible for you to sample data connected with everyday natural phenomena. Data communication cable (SB-62) Data You Can Sample with the EA-200 Temperature probe Optical probe Various different sensors can be used with the EA-200 to sample temperatures, light, voltage, distance, and other data. The EA-200 supports sampling of up to 120,000 points, and simultaneous sampling over five channels.
0-4 English Auto Power Off (APO) AC Adaptor Warning! To extend battery life, power automatically turns off if you do not perform any operation for about 30 minutes. APO is disabled automatically whenever the EA-200 is standing by for sampling (ready state), or while sampling is in progress. • Make sure the voltage of the power supply you are connecting to matches that of the rating marked on the EA-200. Do not overload extension cords and wall outlets.
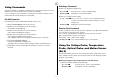
1-1 English Chapter 1 Key Functions and Indicator Lamps Key Functions General Guide Analog Channels × 3 (Analog output for CH3 only) CH3 CH2 CH1 Digital input/output port Press this key: Start a sampling operation from the ready state [START/STOP] Stop an ongoing sampling operation [START/STOP] Use Auto Setup (See “Auto Setup” on page 1-5.
1-2 English Supported Calculator Models Supported Probes Connection to a supported scientific calculator is essential if you want to get the most out of your EA-200. A connected Graphic Scientific Calculator sends commands that control the EA-200 during transfer of sampled data and other operations. Transferred data can be graphed on the calculator. For details about commands, see “Using Commands” on page 1-3, and “Command Tables” on page α-1-1.
1-3 English Sending a Command Using Commands Example 1: To initialize the EA-200 setup Basically, the EA-200 is controlled by commands from the connected calculator. This section explains how to send commands from the calculator to the EA-200. To use a command, you store parameters as List data on the calculator, and then use the Send command to send the parameters to the EA-200. _ {0} → List 1_ Stores {0} to List 1. 0 is the command number. _ Send (List 1)_ Sending List 1 executes Command 0.
1-4 English (2) Send Command 1 to configure channel settings. • Voltage Probe (that is connected to CH1.) _ {1, 1, 2} → List 1_ _ Send (List 1)_ The first 1 is the command number, the second 1 is the channel number, and the 2 indicates use of the voltage probe. Using the Built-in Microphone To take 255 samples at 50µs intervals (1) Send Command 0 to initialize the EA-200 setup. _ {0} → List 1_ _ Send (List 1)_ Stores {0} to List 1. 0 is the command number. Sending List 1 executes Command 0.
1-5 English Using the Built-in Speaker Status Request To output sound recorded by the built-in microphone This function can be used to fetch the current status of the EA-200. (1) Send Command 0 to initialize the EA-200 setup. To use Status Request _ {0} → List 1_ Stores {0} to List 1. 0 is the command number. _ {7} → List 1_ _ Send (List 1)_ Sending List 1 executes Command 0. _ Send (List 1)_ _ Receive (List 1)_ (2) Send Command 1 to specify microphone as the channel.
1-6 English 4. Press the EA-200 [START/STOP] key to start sampling. Example Operation The example below shows how a teacher can use the EA-200 Group Link function to distribute a sampling program and sampled data. • The Sampling lamp flashes as sampling is performed. 5. Press the [START/STOP] key again to stop sampling. 1. Students are divided into multiple groups, and each group has its own EA-200. The teacher uses his or her EA-200 to distribute a sampling program to each of the group leaders. 6.
Chapter 2 Examples Uniformly Accelerated Motion Period of Pendular Movement Conservation of Momentum Charles’ Law Polarization of Light Natural Frequency and Sound Column of Air Resonance and the Velocity of Sound Construction of the Musical Scale Direct Current and Transient Phenomena AC Circuit Dilute Solution Properties Exothermic Reaction Electromotive Force of a Battery Sunlight and Solar Cells Topographic Conditions and Climate Program Library
2-1-1 Uniformly Accelerated Motion English Activity: Setup 쐽 Equipment This activity observes the movement of a cart down an incline and investigates uniformly acceleration motion caused by gravity. Cart Ramp Stand Protractor Distance Measurement Setup (EA-200, graphic scientific calculator, data communication cable, optional EA-2*1) Theory 쐽 Setting Up A cart placed on an inclined ramp starts to move straight down the ramp.
2-1-2 English Measurement Activity: Operating the Equipment 쐽 Measuring Data 쐽 Calculator Operation u Prepare the Distance Measurement Setup. Immediately after starting the measurement operation, let the cart go. u Find the applicable program in the Program Library (P.2-16-1), input it into your calculator, and then run it. u Display graphs for the distance traveled, velocity, and acceleration of the cart.
2-2-1 Period of Pendular Movement English Activity: Setup 쐽 Equipment In this activity, we create a simple pendulum and then visually check the periodicity of its movement, while determining its period.
2-2-2 English Measurement Activity: Operating the Equipment 쐽 Measuring Data 쐽 Calculator Operation u Prepare the Optical Measurement Setup. u Perform the following operation to prepare for light measurement using the optical probe. u Taking care not to allow the string to go slack, move the weight as shown in the illustration and then gently let it go. Using E-CON m“E-CON”w1(SETUP)b(Wizard)w u After the weight swings back and forward a few times, start the measurement operation on the EA-200.
2-3-1 Conservation of Momentum English Activity: Setup 쐽 Equipment The purpose of this activity is to investigate the law of conservation of momentum through the collision of two carts.
2-3-2 English Measurement Activity: Operating the Equipment 쐽 Measuring Data 쐽 Calculator Operation u Prepare the Distance Measurement Setup. Immediately after starting the measurement operation, allow the weight to drop. u Find the applicable program in the Program Library (P.2-16-1), input it into your calculator, and then run it. u Display graphs for the distance traveled, velocity, and acceleration of Cart 1.
2-4-1 Charles’ Law English Activity: Setup 쐽 Equipment This activity is designed to confirm Charles’ law through an actual experiment. Syringe (with scale markings) Plastic Container Rubber Tube Rubber Gasket Clip Mixing Stick Warm Water, Cold Water, Ice Temperature Measurement Setup (EA-200, graphic scientific calculator, data communication cable, temperature probe) Theory Increasing the temperature of a gas causes the molecules that make up the gas move faster.
2-4-2 English Measurement Activity: Operating the Equipment 쐽 Measuring Data 쐽 Calculator Operation u The water temperature is displayed on the calculator. u Use the Temperature Measurement Setup to measure the temperature and then display it. u Read the volume of the gas using the markings on the syringe and read temperature at that time, which is displayed on the calculator. u Find the applicable program in the Program Library (P.2-16-1), input it into your calculator, and then run it.
2-5-1 Polarization of Light English Activity: Setup 쐽 Equipment This activity investigates the relationship between reflection, refraction, and polarization of light. Polarizers (2) Thick Paper Wood Penlight Glass Screen Protractor Optical Measurement Setup (EA-200, graphic scientific calculator, data communication cable, optical probe) Theory Light is electromagnetic radiation that has the properties of transverse waves. Sunlight includes transverse waves that oscillate in various directions.
2-5-2 English Measurement Activity: Operating the Equipment 쐽 Measuring the Angle of Polarization and the Light Intensity 쐽 Calculator Operation u Position the optical probe so it is pointing at the penlight and picking up the maximum light intensity. u Prepare for measurement of light intensity using the optical probe, which will let you determine the angle of polarization. u Prepare the Optical Measurement Setup and start the measurement.
2-6-1 Natural Frequency and Sound English Activity: Setup 쐽 Equipment This activity investigates sounds produced in accordance with the natural frequencies of objects we use in everyday life. It also studies the characteristics of frequencies.
2-6-2 English Measurement Activity: Operating the Equipment 쐽 Measuring the Sound Frequency 쐽 Calculator Operation u Position the two wood blocks so there is about 40cm between them, and then lightly pluck the center of the string to produce a sound. u Prepare the Audio Measurement Setup for recording. u Find the applicable program in the Program Library (P.2-16-2), input it into your calculator, and then run it.
2-7-1 Column of Air Resonance and the Velocity of Sound English Activity: Setup 쐽 Equipment Glass Resonance Tube (Uniform Inside Diameter, With Scale Markings) Rubber Tube Reservoir Stand Low Frequency Generator (or Tuning Fork) Audio Measurement Setup (EA-200, graphic scientific calculator, data communication cable) Temperature Measurement Setup (EA-200, graphic scientific calculator, data communication cable, temperature probe) This activity uses the resonance of a column of air to measure the velocit
2-7-2 English Measurement Activity: Operating the Equipment 쐽 Measuring the Resonance Points 쐽 Calculator Operation u Record the sound on the Audio Measurement Setup, display the waveform, and observe the amplitude. u Use the Audio Measurement Setup to record the sound and display the waveform. u Find the applicable program in the Program Library (P.2-16-2), input it into your calculator, and then run it. u Lower the water level, and find the point of maximum amplitude.
2-8-1 Construction of the Musical Scale English Activity: Setup 쐽 Equipment The purpose of this activity is to investigate the scale that is most commonly used for Western-style music, and to listen to some of the consonance it can produce.
2-8-2 English Measurement Activity: Operating the Equipment 쐽 Analyzing Do-Re-Mi 쐽 Calculator Operation u Record the notes Do, Re, and Mi, and then record the peaks of their frequency distributions. These are called “frequency components.” u Record the sound on the EA-200, perform FFT analysis, and view the frequency. u Find the applicable program in the Program Library (P.2-16-2), input it into your calculator, and then run it.
2-9-1 Direct Current and Transient Phenomena English Activity: Setup 쐽 Equipment This activity investigates transient phenomena when direct current flows through a capacitor and coil. Battery (D.C. Power Supply) Resistor Capacitor Coil Switch Voltage Measurement Setup (EA-200, graphic scientific calculator, data communication cable, voltage probe) Theory Generally speaking, electrical current is the movement of free electrons within metal.
2-9-2 English Measurement Activity: Operating the Equipment 쐽 Measuring Data 쐽 Calculator Operation u Prepare the Voltage Measurement Setup. At the same time you start the measurement operation, move the switch to “ON” to connect the power supply. u Perform the following operation to prepare for voltage measurement using the voltage probe. u Wait until the circuit achieves a steady state. Using E-CON m“E-CON”w1(SETUP)b(Wizard)w 1 Switch 1(CASIO)b(Volt) 0.
2-10-1 English AC Circuit Activity: Setup 쐽 Equipment This activity investigates the characteristics of a resistor, capacitor, coil (RCL) series circuit, which is connected to an AC power supply.
2-10-2 English Measurement Activity: Operating the Equipment 쐽 Measuring Data 쐽 Calculator Operation u Check the values of the AC power supply, resistor, coil, and capacitor, and then switch on the power supply. u Perform the following operation to prepare for voltage measurement using the voltage probe. u Prepare the Voltage Measurement Setup and measure voltage. Using E-CON u Display and compare the change of voltage across each component.
2-11-1 Dilute Solution Properties English Activity: Setup 쐽 Equipment Stand Heater Reflux Condenser Desiccant Auto Stirrer Beaker Round Bottom Flask (2) Mixing Stick Ice Water Benzene Naphthalene Temperature Measurement Setup (EA-200, graphic scientific calculator, data communication cable, temperature probe) This activity investigates boiling point elevation and freezing point depression of a dilute solution.
2-11-2 English Measurement Activity: Operating the Equipment 쐽 Measuring Data 쐽 Calculator Operation u u u u u Perform the following operation to prepare for temperature measurement using the Temperature Measurement Setup. Measure the mass of the beaker used for creating the solution. Slowly pour the benzene into the beaker so it flows down the inside surface of the beaker. Measure the mass of the small amount of naphthalene being used.
2-12-1 Exothermic Reaction English Activity: Setup 쐽 Equipment This activity uses the neutralization of hydrochloric acid and sodium hydroxide to study heat that is given off or absorbed by chemical reactions.
2-12-2 English Measurement Activity: Operating the Equipment 쐽 Reaction Path 1 Measurement 쐽 Calculator Operation u Turn on the auto stirrer and start a measurement operation with the calculator. u Little-by-little, add sodium hydroxide (s) to the distilled water, and observe how the temperature changes. u After all the sodium hydroxide (s) is dissolved and the temperature rise stabilizes, determine the heat of dissolution.
2-13-1 Electromotive Force of a Battery English Activity: Setup 쐽 Equipment This activity investigates the changes in the electromotive force of a voltaic battery over time.
2-13-2 English Measurement Activity: Operating the Equipment 쐽 Measuring Data 쐽 Calculator Operation u The voltage is displayed on the calculator. u The voltage is measured and displayed using the Voltage Measurement Setup. u Lower the arm of the stand so the metal plates are submersed in the dilute sulfuric acid solution, without coming into contact with the cistern. u Find the applicable program in the Program Library (P.2-16-4), input it into your calculator, and then run it.
2-14-1 Sunlight and Solar Cells English Activity: Setup 쐽 Equipment This activity studies how change in the amount of sunlight available per day affects the electromotive force of a solar cell, with a view to understanding the characteristics of power generation by a solar cell. Solar Cell Panel (Operating Voltage: 5V max.
2-14-2 English Measurement Activity: Operating the Equipment 쐽 Performing Preliminary Measurements 쐽 Calculator Operation u Display the light intensity (or voltage) measurement result on the calculator. u Use the optical probe (or voltage probe) to measure light intensity (or voltage) and display the results on the calculator. u Keeping the angle of the solar cell panel and optical probe fixed, turn around until you find the direction where the displayed value is at its maximum.
2-15-1 Topographic Conditions and Climate English Activity: Setup 쐽 Equipment The difference in the specific heat of landmasses and seawater causes differences between the climate of coastal areas and inland areas, even when they are located at the same latitude. This simple activity investigates these differences.
2-15-2 English Measurement Activity: Operating the Equipment 쐽 Measuring Data 쐽 Calculator Operation u Prepare the Temperature Measurement Setup and start temperature measurement. u Perform the following operation to prepare for temperature measurement using the temperature probe. u Cover the system with the rain cover. Using E-CON u Remembering that the mass of each of the substances is different, observe the measured change in temperature and its relationship with the specific heat.
2-16-1 English Program Library You can download the programs used in the activities at the CASIO Website: http://world.casio.com/edu_e/ Uniformly Accelerated Motion Conservation of Momentum Period of Pendular Movement Charles’ Law * This program cannot be run on an fx-7400 Series calculator.
2-16-2 English Polarization of Light Natural Ferquency and Sound Column of Air Resonance and the Velocity of Sound Light Multi Meter * This program cannot be run on an fx-7400 Series calculator.
2-16-3 English Direct Current and Transient Phenomena Dilute Solution Properties Exothermic Reaction AC Circuit 20020601
2-16-4 English Electromotive Force of a Battery Sunlight and Solar Cells Topographic Conditions and Climate * Run the following program after sampling is complete. * Run the following program after sampling is complete.
α-1-1 Appendix A Command Tables English Command 1 - Channel Setup *: parameter value marked with asterisk are initial defaults. Channel { 1, Channel, Operation, Post-Processing, FFT Samples } Operation 0 *1 2 3 4 Clear all channels Channel 1 Channel 2 Channel 3 SONIC Channel 5 DIG IN Port 6 DIG OUT Port 10 Microphone 11 Analog Out CH 3 1pin ±3Vout 12 Speaker Post-Processing ––– 0 Clear the selected channel.
α-1-2 English Command 3 - Sample and Trigger Setup { 3, Sample Interval, Number of Samples, Record Time, Trigger Source, Trigger Threshold, Trigger Edge, Clock Source } Sample Interval 0.00002 to 16000 (*0.1) Number of seconds Trigger Souce 1 2 or 5 3 or 6 4 or 7 8 9 Number of Samples [START/STOP] key CH 1 CH 2 CH 3 DIG IN Clock DIG IN 8bit data 1 to 120000 (*100) Number of samples Trigger Threshold ––– Sampled Values • Corrected values when Command 4 ––– 0-255 (D7-D0) (*1) Sampled Values ±1.
α-1-3 English Command 4 – Conversion Equation Setup { 4, Equation Number, Equation Type, Number Format, Constants } Equation Number *0 1 2 3 4 Clear All equations. Equation 1 (Channel 1) Equation 2 (Channel 2) Equation 3 (Channel 3) Equation 4 (SONIC channel) Equation Type *0 1 2 3 4 5 6 7 8 9 10 11 12 *0 1 Number Format Clear equation selected by the equation number parameter. Polynomial K0 + K1X + K2X2 +...+ KnXn *1 Mixed polynomial KmX–m + ...+ K–1X–1 + KO + K1X +...
α-1-4 English Command 6 - System Setup Command 10 - Sensor Warmup { 6, Command, Auto Power Off Time } Command 0 or 2 3 4 10 Abort Sampling ( *0) Turns sound off Turns sound on APO (Auto Power Off) { 10, Warmup Time (sec) } Warmup Time (sec) APO Time(sec) 0.1 to 360 ––– *0 1 2 0 –1 –2 1800 10 360 Warmup time (sec) ( *0.
α-2-1 English Appendix B Specifications Model: ............................... CASIO EA-200 Power Supply: ................... Four AA-size alkaline batteries (LR6 (AM3)) or AC adaptor (AD-A60024) Power Consumption: ......... 1.5W Battery Life: ....................... LR6 (AM3): Approximately 50 hours (when is left with power on) / Approximately one year (when is left with power off) Battery life is also affected by the type of probes that are connected, sampling program setup, etc. Auto Power Off: ........
MEMO English 20020601
MEMO English 20020601
CASIO COMPUTER CO., LTD. 6-2, Hon-machi 1-chome Shibuya-ku, Tokyo 151-8543, Japan Printed on recycled paper.