Cover EN CT- S1000V USER’S GUIDE Getting Ready to Play Preparing a Power Supply Connecting Headphones (Option) Connecting a Pedal (Option) Playing Lyric Tones (Vocal Synthesis) Linking with a Smart Device and Using Lyric Creator Selecting a Musical Instrument Tone Changing the Pitch in Semitone Units (Transpose) Fine Tuning (Tuning) Sustaining Notes After Keyboard Keys Are Released Saving and Recalling a Setup (MY SETUP) Playing a Song Linking with a Smart Device and Using CASIO MUSIC SPACE
Included and Optional Accessories Use only accessories that are specified for use with this Digital Keyboard. Use of unauthorized accessories creates the risk of fire, electric shock, and personal injury. • You can get information about accessories that are sold separately for this product from the CASIO catalog available from your retailer, and from the CASIO website. https://support.casio.
Contents General Guide EN-6 Getting Ready to Play EN-8 Preparing a Power Supply . . . . . . . . . . . . . . . . . . . . . . . . . . . . . . . . . . . . . . . . . . . . . . . . . . . EN-8 Preparing the Music Stand . . . . . . . . . . . . . . . . . . . . . . . . . . . . . . . . . . . . . . . . . . . . . . . . . . EN-14 Connecting the Wireless MIDI & audio adaptor . . . . . . . . . . . . . . . . . . . . . . . . . . . . . . . . . . EN-14 Connecting Headphones (Option). . . . . . . . . . . . . . . . . . . .
Contents Controlling the Sound of a Performance EN-68 Selecting a Musical Instrument Tone . . . . . . . . . . . . . . . . . . . . . . . . . . . . . . . . . . . . . . . . . . EN-68 Playing with Touch Response. . . . . . . . . . . . . . . . . . . . . . . . . . . . . . . . . . . . . . . . . . . . . . . . EN-70 Using a Pedal . . . . . . . . . . . . . . . . . . . . . . . . . . . . . . . . . . . . . . . . . . . . . . . . . . . . . . . . . . . . EN-72 Sustaining Notes After Keyboard Keys Are Released . . . . .
Contents Configuring Rhythm Play to Stop Automatically when Chord Play is Stopped (Synchro Stop) . . . . . . . . . . . . . . . . . . . . . . . . . . . . . . . . . . . . . . . . . . . . . . . . . . . . . . . . . EN-164 Changing the Rhythm Pattern and the Fill-in Operation Type . . . . . . . . . . . . . . . . . . . . . . EN-165 Disabling Automatic Setting of the Tempo and Pattern when a Rhythm is Selected . . . . . EN-168 Increasing the Number of Rhythms (User Rhythms) . . . . . . . . . . . . . . . . . . . .
Contents Configuring Settings EN-230 Setting Operation . . . . . . . . . . . . . . . . . . . . . . . . . . . . . . . . . . . . . . . . . . . . . . . . . . . . . . . . EN-230 Setting Item List . . . . . . . . . . . . . . . . . . . . . . . . . . . . . . . . . . . . . . . . . . . . . . . . . . . . . . . . . EN-231 Using the MIDI Controller EN-235 To change the pitch of NOTE message notes in octave units . . . . . . . . . . . . . . . . . . . . . .
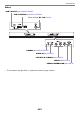
General Guide ■ Front Panel P(Power) button ☞EN-26 REGISTRATION button ☞EN-171 RHYTHM button ☞EN-149 VOLUME knob ☞EN-28 TONE button ☞EN-68 K1 knob ☞EN-91 K2 knob ☞EN-91 Dial ☞EN-21 LCD 5 buttons ☞EN-19 a button ☞EN-183 INSTRUMENT button ☞EN-68 TEMPO button ☞EN-31 LYRICS button ☞EN-37 RECORD button ☞EN-191 MENU button ☞EN-22 HOME button ☞EN-19 K3 knob ☞EN-91 Speakers Chord root names PITCH BEND wheel ☞EN-89 • The numbers to the right of the ☞ symbol are reference page numbers.
General Guide ■ Back USB TO HOST port ☞EN-263, EN-265 USB TO DEVICE port ☞EN-14, EN-248 Power terminal (DC 12V) ☞EN-8 PHONES jack ☞EN-15, EN-270 AUDIO IN jack ☞EN-272 LINE OUT R, L/MONO jack ☞EN-272 PEDAL1 jack ☞EN-16 PEDAL2/EXPRESSION jack ☞EN-16 • The numbers to the right of the ☞ symbol are reference page numbers.
Getting Ready to Play Preparing a Power Supply Though either an AC adaptor or batteries can be used for power, use of AC adaptor power is normally recommended. Using the AC Adaptor Use only the AC adaptor (JEITA Standard with unified polarity plug) specified for this Digital Keyboard. Use of a different type of AC adaptor can cause malfunction.
Getting Ready to Play • Never insert metal, pencils, or any other objects into the product’s DC12V terminal. Doing so creates the risk of accident. • Do not try to use the power cord that comes with the product with another device. • Use the AC adaptor so its label surface is pointed downwards. The AC adaptor becomes prone to emitting electromagnetic waves when the label surface is facing upwards. • Plug the AC adaptor into a power outlet that is close to the Digital Keyboard.
Getting Ready to Play Using Batteries for Power • Be sure to turn off power before loading batteries. • Use commercially available AA-size alkaline batteries or AA-size rechargeable nickel metal hydride batteries. • Low battery power can cause abnormal operation. If this happens, replace batteries with new ones. If you are using rechargeable batteries, charge them. • Actual continuous operation time may be shorter due to battery type, performance type, and usage environment.
Getting Ready to Play 3. Insert the tabs of the battery cover into the holes, and close the cover. • Configure the setting below to specify the type of batteries you loaded. Tab ■ Specifying the Battery Type 1. Turn on the Digital Keyboard. • See “Turning Power On or Off” (page EN-26). 2. Press MENU. This displays the menu screen. 3. Use U and I to select the 5 buttons menu (page EN-19) that includes SETTING. 4. Press SETTING. This displays the setting screen.
Getting Ready to Play 5. Use U and I to select “Battery”. 6. Rotate the dial or use – and + to select “Alkaline” (alkaline batteries) or “Ni-MH” (nickel-metal hydride batteries). 7. To exit the setting operation, press EXIT.
Getting Ready to Play ■ Low Battery Indication A battery icon appears on the display to let you know when battery power is getting low. Declining Battery Power Black battery icon (not flashing) Battery Replacement Required White battery icon (flashing) • Low battery power may cause notes to become distorted, or other problems. • You can conserve battery power by using headphones and by reducing the volume level. • Continued use with low batteries may cause power to turn off suddenly.
Getting Ready to Play Preparing the Music Stand Insert the music stand legs into the back of the Digital Keyboard. Music stand Connecting the Wireless MIDI & audio adaptor To pair this Digital Keyboard with a Bluetooth® capable external device, you need to plug the Wireless MIDI & audio adaptor into the product’s USB TO DEVICE port. Wireless MIDI & audio adaptor USB TO DEVICE port • Turn off the Digital Keyboard before disconnecting the Wireless MIDI & audio adaptor.
Getting Ready to Play Connecting Headphones (Option) Plugging in headphones cuts off output from the built-in speakers, which means you can practice playing even late at night without disturbing others. • Be sure to turn down the volume level before connecting headphones. Stereo mini plug PHONES jack (3.5mm stereo mini jack) • Headphones do not come with this Digital Keyboard. • Use the optional (CP-16) or a commercially available headphones.
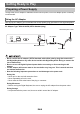
Getting Ready to Play Connecting a Pedal (Option) To use a pedal, connect it to the PEDAL1 or PEDAL2/EXPRESSION jack on the back of the Digital Keyboard. The jack you should use depends on the operation you want the pedal to perform. Pedal (option) PEDAL1 jack (6.3mm standard jack) PEDAL2/EXPRESSION jack (6.3mm standard jack) • This Digital Keyboard does not come with a pedal unit. • You can use the PEDAL1 jack to connect an optional (SP-3, SP-20) sustain pedal.
Getting Ready to Play Attaching a Strap (Commercially Available) 1. Attach a strap (commercially available) to the left and right strap pins on the bottom of the Digital Keyboard. 2. Cover the strap pins with the strap locks. Strap (commercially available) Strap lock Strap pin • After attaching the strap, check to make sure that the strap is securely attached to the Digital Keyboard. • Do not pick up the Digital Keyboard by the strap alone.
Operations Common to All Modes Display Screen Contents (1 (2 (3 (4 Setting name Battery icon Recording status Tempo Setting Measure/Beat Sub-display Status 5 buttons menu items Part Sub-title Setting item Setting • Display contents may become difficult to read at certain viewing angles. • For information about how to adjust display contrast, see “Configuring Settings” (page EN-230).
Operations Common to All Modes Home Screen Pressing HOME causes [LYRICS/RHY] or [INST/RHYTHM] to appear, which indicates the tone selection screen. This is the home screen. You can use the home screen to select the lyrics and instrument tone you want to use, and to configure various settings. • You can customize the home screen to suit your specific needs. For details, see “Customizing the Home Screen (Home Customization)” (page EN-226).
Operations Common to All Modes ■ Setting Screen (SETTING) 5 buttons menu 5 buttons • Long-pressing – or + when selecting a number or value scrolls through settings at high speed. • To return a number or value to its initial default or recommended setting, press – and + at the same time. • Long-pressing U or I when changing to another item or page scrolls through items or pages at high speed. Changing the Button Long-press Time You can specify the required button long-press time.
Operations Common to All Modes 4. Use U and I to select “Button Long Press Time”. 5. Rotate the dial or use – and + to change the button long-press time value. Setting Display Name Short Short Normal Normal Long Long 6. To exit the setting operation, press EXIT. Dial Operations Rotate the dial to change a number (tone number, etc.) or value (tempo value, etc.
Operations Common to All Modes Selecting a Function from a Menu You can use the menu screen to select from a variety of different functions. 1. Press MENU. This displays the menu screen. 2. Use U and I to select the 5 buttons menu that includes the function you want to select. • To return to the previous screen or exit the setting operation, press EXIT.
Operations Common to All Modes 3. Press the button of the function you want to select. • This displays the screen of the function you select. • To exit the menu screen, press MENU, or press EXIT on the first page of the menu screen. Inputting Characters Use the procedures below to edit MY SETUP data names and USB flash drive file names (user data names). Cursor (flashing) • USB flash drive (page EN-253) file names can be up to 231 characters long.
Operations Common to All Modes Replacing a Character with a Different One 1. Use U and I to move the cursor to the character you want to replace. 2. Rotate the dial to change the character. This displays the –/+ screen. • • • • After you rotate the dial once to select a character, you can change the selection further using – and +. To go back to the previous screen, press BACK. Repeat steps 1 and 2 as required. The characters shown in the table below are supported for USB flash drive file names.
Operations Common to All Modes • The characters shown in the table below are supported for user data (MY SETUP) names. : G T a n { ! " # $ % & ' ( ) * + , . / 0 1 2 3 4 5 6 7 8 9 ; < > = ? @ A B C D E F H I J K L M N O P Q R S U V W X Y Z [ ] \ ^ _ ` b c d e f g h i j k l m o p q r s t u v w x y z } | (First cell in the above table is blank.) Deleting a Character 1. Use U and I to move the cursor to the character you want to delete. 2. Press DELETE.
Playing on the Keyboard Turning Power On or Off 1. Press P (Power) to turn on Digital Keyboard power. “Casiotone” is displayed while startup is in progress. • Your Digital Keyboard is ready to use when the home screen appears on the display after startup is complete. • Depending on the user lyric tone addition status, the usage status of samples and other data, it may take some time for the Digital Keyboard to become ready for use. 2. To turn off power, long-press P (Power) until the display goes blank.
Playing on the Keyboard Auto Power Off While Auto Power Off is enabled, power turns off automatically after about 30 minutes of non-operation. • Auto Power Off is disabled while a song is playing and while the APP function is being used. ■ Disabling Auto Power Off You can disable Auto Power Off to ensure that power does not turn off automatically during a concert, etc. 1. Press MENU. This displays the menu screen. 2. Use U and I to select the 5 buttons menu that includes SETTING. 3. Press SETTING.
Playing on the Keyboard 4. Use U and I to select “Auto Power Off”. 5. Rotate the dial or use – and + to select “Off”. 6. To exit the setting operation, press EXIT. Adjusting the Volume Level 1. Rotate the VOLUME knob. This changes the volume level. TONE Button Pressing TONE button displays a screen for selecting tones. This is the “tone screen”.
Playing on the Keyboard Using the Metronome The metronome lets you play and practice along with a steady beat to help keep you on tempo. You can also set a tempo that is suitable for your practice. Start/Stop 1. Press MENU. This displays the menu screen. 2. Use U and I to select the 5 buttons menu that includes METRONOME. 3. Press METRONOME. This displays the metronome screen.
Playing on the Keyboard 4. Press START. This starts the metronome, and displays measure and beat numbers. 5. To stop the metronome, press STOP. • If you are using the rhythm function or SONG function, pressing a does not start the metronome. If you want the metronome to start when you press a, long-press TONE to quit the rhythm function or SONG function. • The metronome is disabled while a song is playing.
Playing on the Keyboard Changing the Metronome Tempo Use the procedure below to change the tempo of the metronome. 1. Press TEMPO. This displays the tempo screen. 2. Rotate the dial or use – and + to change the tempo value. • You can specify a tempo value in the range of 20 to 255. • To return to the recommended setting, press – and + at the same time. 3. To exit the setting operation, press EXIT.
Playing on the Keyboard Specifying the Metronome Beats Per Measure You can use the procedure below to configure a setting that sounds a chime on the first beat of each measure, and a click for the remaining beats. • Available settings are Off, or a value of 1 to 16 beats. 1. Press MENU. This displays the menu screen. 2. Use U and I to select the 5 buttons menu that includes METRONOME. 3. Press METRONOME. This displays the metronome screen. 4. Rotate the dial to change the beat value.
Playing on the Keyboard Changing the Metronome Sound Volume Level 1. Press MENU. This displays the menu screen. 2. Use U and I to select the 5 buttons menu that includes METRONOME. 3. Press METRONOME. This displays the metronome screen. 4. Press VOLUME. This displays the metronome volume level setting screen. 5. Rotate the dial to adjust the volume level. • • • • • You can specify a volume level value from 0 to 127.
Playing on the Keyboard Listening to Demo Play 1. Press HOME. This displays the home screen. 2. Press DEMO. This displays the demo screen and starts demo song play. • After playback of one song finishes, playback of the next song starts automatically. Playback returns to the first song after playback of the final song is complete. • The LYRICS LED flashes while demo play is in progress. This indicates that some of the demo songs are sounding with lyrics tones.
Playing Lyric Tones (Vocal Synthesis) This digital keyboard has a Vocal Synthesis function that lets you play a singing voice on the keyboard. You can create various singing voices by selecting the lyrics to be sung and adjusting the voice quality. You can also configure various performance settings, such as how the performance advances through the lyrics when playing on the keyboard.
Playing Lyric Tones (Vocal Synthesis) Vocal Synthesis Sound Source Block Diagram Machine-learning acoustic model Lyrics (lyric tone) Lyric Creator app (English, Japanese) Singing voice parameter generation (Vocalist) Vocal cord/vocal tract simulation Control knob (age, gender, etc.
Playing Lyric Tones (Vocal Synthesis) Selecting and Playing with a Lyric Tone You can produce a singing voice by selecting the lyric tone you want and playing notes on the keyboard. 1. Press LYRICS. The LYRICS LED of the TONE MODE SELECT buttons lights, and the lyric tone screen appears on the display. • The ADVANCED LED of the TONE button will be lit while the digital keyboard is in the Lyric Tone Mode. • Knob and pedal functions change in accordance with Lyric Tone Mode settings. 2.
Playing Lyric Tones (Vocal Synthesis) 3. Play something on the keyboard. Lyrics advance and sound, and the corresponding lyrics appear on the display while keyboard keys are held down. • The speed at which lyrics advance depends on the tempo setting. For information about setting the tempo, see “Changing the Metronome Tempo” (page EN-31). • If the lyric tone performance mode is NOTE mode, the lyric advance speed does not depend on the tempo setting.
Playing Lyric Tones (Vocal Synthesis) Changing the Voice Use to Sound Lyrics (Vocalist) You can change the type of voice (Vocalist) used to sound your lyrics to perform them in various ways. 1. Press LYRICS. The LYRICS LED of the TONE MODE SELECT buttons lights, and the lyric tone screen appears on the display. 2. Press VOCALIST. This displays the vocalist selection screen. 3. Rotate the dial or use – and + to change the voice to use for the lyric tone. • The setting range is 1 to 23.
Playing Lyric Tones (Vocal Synthesis) Adjusting the Voice Used to Sound Lyrics You can make fine adjustments to a singing voice by changing the vocalist’s gender, age, and other parameters. Changing the Gender Setting 1. Press LYRICS. The LYRICS LED of the TONE MODE SELECT buttons lights, and the lyric tone screen appears on the display. 2. Press VOCALIST. This displays the vocalist selection screen. 3. Press PARAMETER. This displays the vocalist setting screen, with the gender item displayed. 4.
Playing Lyric Tones (Vocal Synthesis) Changing the Age Setting 1. Press LYRICS. The LYRICS LED of the TONE MODE SELECT buttons lights, and the lyric tone screen appears on the display. 2. Press VOCALIST. This displays the vocalist selection screen. 3. Press PARAMETER. This displays the vocalist setting screen, with the gender item displayed. 4. Use the U and I to select Age. This displays the age setting screen. 5. Rotate the dial or use – and + to change the age setting.
Playing Lyric Tones (Vocal Synthesis) Setting Other Vocalist Parameters 1. Press LYRICS. The LYRICS LED of the TONE MODE SELECT buttons lights, and the lyric tone screen appears on the display. 2. Press VOCALIST. This displays the vocalist selection screen. 3. Press PARAMETER. This displays the vocalist setting screen, with the gender item displayed. 4. Use the U and I to select the item whose setting you want to change.
Playing Lyric Tones (Vocal Synthesis) 5. Rotate the dial or use – and + to change the setting.
Playing Lyric Tones (Vocal Synthesis) Changing the Functions of the Knobs in the Lyric Tone Mode When playing lyric tones, you can use the knobs to change vocalist parameters. You can also change the functions assigned to the knob. 1. Press LYRICS. The LYRICS LED of the TONE MODE SELECT buttons lights, and the lyric tone screen appears on the display. • The ADVANCED LED of the TONE button will be lit while the digital keyboard is in the Lyric Tone Mode.
Playing Lyric Tones (Vocal Synthesis) • If you assign a function dedicated to the lyric tone mode to a knob, the knob affects only the UPPER1 part. • If you change the Gender and Age of a knob function from 0 to 127, the gender setting changes from 0 to 50. The age setting is 0 when the Gender and Age setting is 64. The age setting decreases from 50 to 0 and increases from 0 to 50.
Playing Lyric Tones (Vocal Synthesis) Using the Recommended Lyric Tone Settings You can recall recommended vocalists and performance settings for each lyric tone. 1. Press LYRICS. The LYRICS LED of the TONE MODE SELECT buttons lights, and the lyric tone screen appears on the display. 2. Rotate the dial to select the lyric tone you want. 3. Long-press LYRICS. This momentarily displays “RECOMMENDED” and changes the settings to those recommended for the lyric tone.
Playing Lyric Tones (Vocal Synthesis) Changing How Lyric Advancement is Performed When a Keyboard Key is Pressed The way the lyrics progress when you press a key depends on your current lyric tone performance mode setting. In the PHRASE mode, lyrics continue to advance as long as a keyboard key is depressed, while the NOTE mode causes lyrics to advance syllable by syllable each time you press a keyboard key. 1. Press LYRICS.
Playing Lyric Tones (Vocal Synthesis) • The functions below are disabled while PHRASE is selected as the play mode. – Lyric tone speed – Lyric syllable attack balancer – Syllable chord control function – Random syllable sequence – Syllable stay notes • Under initial default settings, if you hold down the highest note keyboard key and hold down three or more keys, the lyrics will not advance even if you press a keyboard key that is lower than the highest note.
Playing Lyric Tones (Vocal Synthesis) Controlling a Lyric Tone with the Keyboard (Lyric Tone Controller) You can use part of the keyboard as switches for specifying the syllable position of a lyric tone and for controlling various functions. 1. Press LYRICS. The LYRICS LED of the TONE MODE SELECT buttons lights, and the lyric tone screen appears on the display. 2. Press KEY CTRL. This causes “KC” to appear on the display and enables the lyric tone controller keyboard.
Playing Lyric Tones (Vocal Synthesis) 3. Play your performance on the keyboard in combination with the lyric tone controller keyboard. Function Syllable Location Specification Keyboard Note Name Syllable 1 C2 Syllable 2 D2 Syllable 3 E2 Syllable 4 F2 Syllable 5 G2 Syllable 6 A2 Syllable 7 B2 Syllable 8 C3 Syllable 9 D3 Description Settings You can specify the syllable position to be played next. Sounding is from the specified syllable position while a keyboard key is depressed.
Playing Lyric Tones (Vocal Synthesis) Function Keyboard Note Name Description Settings Retrigger Hold C{3 When retrigger is enabled, retrigger continues to operate even if you release the keyboard keys you are playing. Pressing this key causes “RETRIGGER HOLD ON” or “RETRIGGER HOLD OFF” to appear on the display momentarily. Off, On (Default: Off) Change knob functions E}3 You can change the functions of the K1 and K2 knobs while playing lyric tones.
Playing Lyric Tones (Vocal Synthesis) Adjusting the Timing When Lyrics are Sounded Lyric tones have the elements of “sounding speed (Lyric Tone Speed)” and “sound attack speed (Lyric Tone Attack Balancer/Lyric Tone Attack)”. You can adjust these elements if the lyric tone performance mode is NOTE mode. The lyric tone attack element can also be adjusted in the PHRASE mode.
Playing Lyric Tones (Vocal Synthesis) Making the Timing When Lyrics Sound Easier to Play on the Keyboard (Lyric Tone Attack Balancer) When playing lyrics that include consonants with the lyric tone, it may take some time for the vowels to be pronounced and the sound may seem delayed because consonants start to be pronounced after the keyboard key is pressed.
Playing Lyric Tones (Vocal Synthesis) Specifying the Timing of Lyric Sounding (Lyric Tone Attack) By changing the lyric tone attack setting, you can adjust the timing when lyrics sound by uniformly shortening the beginning of the sounding of the lyric tone. 1. Press LYRICS. The LYRICS LED of the TONE MODE SELECT buttons lights, and the lyric tone screen appears on the display. 2. Long-press KEY CTRL. This displays the lyric tone setting screen. 3. Press ATTACK. This displays lyric attack setting items.
Playing Lyric Tones (Vocal Synthesis) Changing the Syllable Advancement Control Setting in NOTE Mode When the lyric tone performance mode is NOTE mode, you can randomly advance the lyrics by playing on the keyboard and by changing the low side note of chord performance, and you can change the number of chords that advance the lyrics. Making Lyrics Sound Randomly (Random Syllable Sequence) 1. Press LYRICS.
Playing Lyric Tones (Vocal Synthesis) 6. Press RANDOM. This displays “RANDOM” and causes the next played syllable position to be selected randomly. • You can also use the lyric tone controller to enable this function. For details, refer to “Random syllable sequence” under “Controlling a Lyric Tone with the Keyboard (Lyric Tone Controller)” (page EN-49). 7. Press RANDOM again to disable the random syllable sequence. “RANDOM” disappears from the display. 8.
Playing Lyric Tones (Vocal Synthesis) 5. Press SYLLABLE. This displays the syllable progress setting screen. 6. Press CHORD CTRL. This displays “CHD”. • Lyrics are advanced with a change in the chord being played on the low-end keyboard. • You can also use the lyric tone controller to enable this function. For details, refer to “Syllable chord control function” under “Controlling a Lyric Tone with the Keyboard (Lyric Tone Controller)” (page EN-49).
Playing Lyric Tones (Vocal Synthesis) 3. Long-press KEY CTRL. This displays the lyric tone setting screen. 4. Press I to select the 5 buttons menu that includes SYLLABLE. 5. Press SYLLABLE. This displays the syllable progress setting screen. 6. Rotate the dial to change the number of chord component notes. This displays the –/+ screen. • You can change the ease of advancement of the lyrics by changing the number of chord component notes. • The setting range is 1 to 5.
Playing Lyric Tones (Vocal Synthesis) Making the Lyrics Advance Even if You Hold Down Keyboard Keys (Retrigger) With this method, the singing voice sounds as if you are repeatedly pressing keys at preset intervals, even if you hold down keyboard keys. 1. Press LYRICS. The LYRICS LED of the TONE MODE SELECT buttons lights, and the lyric tone screen appears on the display. 2. Long-press KEY CTRL. This displays the lyric tone setting screen. 3. Press I to select the 5 buttons menu that includes RETRIG. 4.
Playing Lyric Tones (Vocal Synthesis) 5. Press RTG. This displays “RTG” and causes the lyric tone to sound automatically at a fixed interval, as if keyboard keys are being pressed again. • You can also use the lyric tone controller to enable this function. For details, see “Retrigger” under “Controlling a Lyric Tone with the Keyboard (Lyric Tone Controller)” (page EN-49). • While this function is enabled, “RTG” is shown on the lyric tone screen. 6. Press RTG again to disable retriggering.
Playing Lyric Tones (Vocal Synthesis) Selecting the Note Value Cycle Unit 1. Press LYRICS. The LYRICS LED of the TONE MODE SELECT buttons lights, and the lyric tone screen appears on the display. 2. Long-press KEY CTRL. This displays the lyric tone setting screen. 3. Press I to select the 5 buttons menu that includes RETRIG. 4. Press RETRIG. This displays the retrigger setting screen. 5. Rotate the dial to select the note value to be used for the retrigger cycle unit. This displays the –/+ screen.
Playing Lyric Tones (Vocal Synthesis) Selecting the Note Value Count 1. Press LYRICS. The LYRICS LED of the TONE MODE SELECT buttons lights, and the lyric tone screen appears on the display. 2. Long-press KEY CTRL. This displays the lyric tone setting screen. 3. Press I to select the 5 buttons menu that includes RETRIG. 4. Press RETRIG. This displays the retrigger setting screen. 5. Press TIMES. This displays a screen for setting the note value count.
Playing Lyric Tones (Vocal Synthesis) 6. Rotate the dial to select the number of unit note values. This displays the –/+ screen. • The setting range is 1 to 9. • After you rotate the dial to select a setting, you can adjust it further using – and +. • To go back to the previous screen, press BACK. 7. To return to the setting screen of the note value, which is the unit of the cycle, press the UNIT. 8. To exit the retrigger setting screen, press BACK.
Playing Lyric Tones (Vocal Synthesis) Making the Retrigger Function Notes Continue to Sound When Keyboard Keys are Released 1. Press LYRICS. The LYRICS LED of the TONE MODE SELECT buttons lights, and the lyric tone screen appears on the display. 2. Long-press KEY CTRL. This displays the lyric tone setting screen. 3. Press I to select the 5 buttons menu that includes RETRIG. 4. Press RETRIG. This displays the retrigger setting screen. 5. Press RTG to turn on the retrigger function.
Playing Lyric Tones (Vocal Synthesis) 6. Press HOLD. This displays “HOLD” and enables retrigger hold. • You can also use the lyric tone controller to enable this function. For details, refer to “Retrigger Hold” under “Controlling a Lyric Tone with the Keyboard (Lyric Tone Controller)” (page EN-49). 7. Press and release a keyboard key. • Even after you release the key, the retrigger function causes notes to continue to play. 8. To disable retrigger hold, press HOLD again.
Playing Lyric Tones (Vocal Synthesis) Changing the Function of a Pedal in the Lyric Tone Mode You can change the pedal function to a lyric tone function. For example, lyric tone change, resetting the syllable position, etc. 1. Press LYRICS. The LYRICS LED of the TONE MODE SELECT buttons lights, and the lyric tone screen appears on the display. • The ADVANCED LED of the TONE button will be lit while the digital keyboard is in the Lyric Tone Mode.
Playing Lyric Tones (Vocal Synthesis) 5. Change the pedal function. • For information about how to change a pedal function, see “To change the switch pedal function” (page EN-72). • If you assign a function dedicated to the lyric tone mode to a pedal, the pedal affects only the UPPER1 part.
Controlling the Sound of a Performance Selecting a Musical Instrument Tone Your Digital Keyboard lets you select tones for a wide variety of musical instrument sounds, including violin, flute, and more. The same song can sound completely different when played with a different instrument type. Selecting a Tone 1. Press INSTRUMENT. The INSTRUMENT LED of the TONE MODE SELECT buttons lights, and the instrument tone screen appears on the display. • The tone number and tone name appear on the display.
Controlling the Sound of a Performance ■ Advanced Tones A tone that causes the ADVANCED LED to light is called an “advanced tone”. Advanced tones provide enhanced sound source control, and enable advanced expressive techniques, tone expression, and more.
Controlling the Sound of a Performance Playing with Touch Response Touch Response alters tone volume in accordance with keyboard pressure (press velocity). This provides you some of the same expression capabilities you get on an acoustic piano. Changing Touch Response Sensitivity 1. Press INSTRUMENT. This displays the instrument tone screen. 2. Press TOUCH and then select the Touch Response setting you want. Touch Response settings are described in the table below.
Controlling the Sound of a Performance ■ Adjusting Volume When Touch Response is Disabled (Touch off Velocity) 1. Press INSTRUMENT. This displays the instrument tone screen. 2. Long-press TOUCH. This displays the setting screen, which shows setting items for touch off velocity. 3. Rotate the dial or use – and + to change the setting. • You can specify a value from 1 to 127. 4. To exit the setting operation, press EXIT.
Controlling the Sound of a Performance Using a Pedal Connecting a pedal lets you perform pedal operations that add various effects during your performances. The PEDAL1 jack is compatible with switch pedals that pedal release, and the PEDAL2/EXPRESSION jack is compatible with both volume pedals and switch pedals that detect the amount of depression. This Digital Keyboard does not come with a pedal unit. Purchase one separately. • You can also use a pedal to change the registration setup.
Controlling the Sound of a Performance 3. Press PEDAL. This displays the pedal screen. 4. Press the button for the pedal jack whose function you want to change. This displays the pedal setting screen. • If SWITCH appears when you press PEDAL2, it means that the pedal type setting is switch pedal. If the pedal type setting is not switch pedal, refer to “Using a Pedal” (page EN-72) and change the setting.
Controlling the Sound of a Performance 5. Rotate the dial to change the pedal function. The table below shows the available pedal function settings. Setting (Display Text) Description Pedal Sustain (Pedal Sustain) Playing notes while the pedal is depressed causes the notes to be sustained, even if the keyboard keys are released. Sostenuto (Sostenuto) Playing notes and then pressing the pedal before the keyboard keys are released causes the notes to be sustained.
Controlling the Sound of a Performance Using Volume Pedal 1. Connect a volume pedal to the PEDAL2/EXPRESSION jack. • When connecting a commercially available expression pedal, refer to “Connectable Expression Pedals” (page EN-16). 2. Press MENU. This displays the menu screen. 3. Use U and I to select the 5 buttons menu that includes PEDAL. 4. Press PEDAL. This displays the pedal screen. 5. Press PEDAL2. This displays the PEDAL2 pedal setting screen.
Controlling the Sound of a Performance ■ When connecting for the first time, use the procedure below to specify the pedal type and to calibrate the pedal. (1) Press TYPE. This displays the PEDAL2 pedal type setting screen. (2) Press VOL TYPE1 or VOL TYPE2 according to the polarity of the volume pedal. VOL TYPE1 button Select this setting when connecting a Polarity Type 1 expression pedal. VOL TYPE2 button Select this setting when connecting a Polarity Type 2 expression pedal.
Controlling the Sound of a Performance (3) Press CALIBRATE. This displays “Sure?”. (4) Press YES. (5) Depress the toe end of the volume pedal, and then press YES. (6) Depress the heel end of the volume pedal and then press YES.
Controlling the Sound of a Performance (7) Press OK. This displays the PEDAL2 pedal type setting screen. (8) Press BACK.
Controlling the Sound of a Performance 6. Rotate the dial to change the pedal function. The table below shows the available pedal function settings. Setting (Display Text) Description Expression (Expression) Adjusts the volume level independently of the part volume. Part Volume (Part Volume) Adjusts the part volume level. Rhythm Volume (Rhythm Volume) Adjusts the rhythm volume level. Master Volume (Master Volume) Adjusts the overall volume of the Digital Keyboard independent of the volume knob.
Controlling the Sound of a Performance 5. Press UPPER1. “U1” disappears from the display, indicating that the pedal effect is no longer applied to the UPPER 1 part. 6. To apply the pedal effect to the UPPER1 part, press UPPER1 again. • In the same way, you can stop the pedal effect from being applied to the note by pressing UPPER2 and to the LOWER part by pressing LOWER. Pressing UPPER2 causes “U2” to disappear from the display, while pressing LOWER causes “L” to disappear. 7.
Controlling the Sound of a Performance Sustaining Notes After Keyboard Keys Are Released While sustain is enabled, notes are sustained longer when keyboard keys are released. 1. Press INSTRUMENT. This displays the instrument tone screen. 2. Press SUS. This displays “SUS”. • If the UPPER PORT button is displayed, switch it to the SUS button (page EN-84). 3. Press and release keyboard keys. The notes are sustained for a relatively long time. 4. To disable sustain, press SUS again.
Controlling the Sound of a Performance ■ Adjusting the Note Sustain Time Use the procedure below to change the sustain time when sustain is enabled. 1. Press INSTRUMENT. This displays the instrument tone screen. 2. Long-press SUS. This displays the sustain screen, which shows setting items for the UPPER1 part sustain time. 3. If required, press UPPER1, UPPER2, and LOWER to select the part whose setting you want to configure. 4. Rotate the dial to change the setting.
Controlling the Sound of a Performance 5. To exit the setting operation, press EXIT. • You can also display the sustain screen by pressing MENU and then SUSTAIN. • For details about parts, see “Layering and Splitting Tones” (page EN-123).
Controlling the Sound of a Performance Switching From the SUS (Sustain) Button to the UPPER PORT (Upper Portamento) Button A single button is used to control sustain (page EN-81) and upper portamento (page EN-85). 1. Press MENU. This displays the menu screen. 2. Use U and I to select the 5 buttons menu that includes SETTING. 3. Press SETTING. This displays the setting screen. 4. Use U and I to select “SUS/UPPER PORT Button”. 5. Rotate the dial or use – and + to change the button function.
Controlling the Sound of a Performance Transitioning Smoothly Between Upper Part Notes (Upper Portamento) Portamento makes it possible to slide smoothly between notes, as is done with string and woodwind instruments. 1. Press INSTRUMENT. This displays the instrument tone screen. 2. Press UPPER PORT. This displays “PORT”. • If the SUS button is displayed, switch it to the UPPER PORT button (page EN-84). 3. After pressing upper keyboard keys, press other upper keyboard keys.
Controlling the Sound of a Performance ■ Configuring Portamento Settings for Each Part (Part Portamento) 1. Press INSTRUMENT. This displays the instrument tone screen. 2. Long-press UPPER PORT. This displays the portamento screen. 3. Press PART PORT. This displays the part portamento screen. 4. Use UPPER1, UPPER2, and LOWER to select the part whose setting you want to configure.
Controlling the Sound of a Performance 5. Press BACK to return to the portamento screen. 6. To exit the setting operation, press EXIT. • You can also display the portamento screen by pressing MENU and then PORTAMENTO. • The part portamento settings for a part whose instrument tone or vocalist has been changed will be the recommended settings for that instrument tone or vocalist. • For information about parts, see “Layering and Splitting Tones” (page EN-123). • Effects are not applied to drum tones.
Controlling the Sound of a Performance 5. Rotate the dial to change the setting. • You can specify a value from 0 to 127. • After you rotate the dial once to select a setting, you can change the selection further using – and +. • To return the setting to its initial default, press – and + at the same time. • To go back to the previous screen, press BACK. 6. Press BACK to return to the portamento screen. 7. To exit the setting operation, press EXIT.
Controlling the Sound of a Performance Using the Pitch Bend Wheel You can use the pitch bend wheel to smoothly slide the pitch of notes you are playing upwards and downwards. 1. While playing a note on the keyboard with your right hand, rotate the PITCH BEND wheel upwards or downwards with your left hand. The amount the note bends depends on how much you rotate the pitch bend wheel.
Controlling the Sound of a Performance 4. If required, press UPPER1, UPPER2, or LOWER to select the part whose setting you want to configure. 5. Rotate the dial to change the setting. • • • • • You can specify a pitch bend in the range of 0 to 24. After you rotate the dial once to select a value, you can change the value further using – and +. To return the setting to its initial default, press – and + at the same time. To go back to the previous screen, press BACK.
Controlling the Sound of a Performance Using the Knobs to Change the Sound You can use the Digital Keyboard’s three knobs to change the keyboard sound and add more expressiveness to your performances. The example below shows how to change the instrument tone. For instrument tones, default settings are Cutoff for the K1 knob, Resonance for the K2 knob, and Modulation for the K3 knob. 1. Rotate a knob.
Controlling the Sound of a Performance 4. Press YES. This resets the knob effect. • To cancel, press NO. 5. When “Complete” appears on the display, press OK. 6. To exit the setting operation, press EXIT. • You can also display the knob screen by pressing MENU and then KNOB. • KNOB may not be displayed on the home screen due to the Home Customization setting.
Controlling the Sound of a Performance To change the knob function 1. Press HOME. This displays the home screen. 2. Press KNOB. This displays the knob screen. 3. Press the button of the knob whose function you want to change. This displays the knob setting screen. • Under initial default settings, changing the function of either Knob 1 or Knob 2 will change the other knob to the corresponding recommended function and turn on Knob K1-K2 linking.
Controlling the Sound of a Performance 4. Rotate the dial to change the function. Function settings you can select are shown in the table below. Setting Indicator Description Cutoff Cutoff Adjusts timbre by attenuating the components of a note’s frequency characteristics that are higher than a certain frequency (cutoff frequency). A larger value specifies a brighter, harder sound, while a lower value specifies a mellower, softer sound.
Controlling the Sound of a Performance Setting Vibrato Rate Indicator Vibrato Rate Description Adjusts the speed of vibrato of a tone. Vibrato Depth Vibrato Depth Specifies the depth of vibrato of a tone. Vibrato Delay Vibrato Delay Adjusts the time until the vibrato of the tone starts after a note is sounded. Part Volume Part Volume Adjusts the volume level of a part. Pan Pan Adjusts the stereo center of the sound.
Controlling the Sound of a Performance • Even if you change the function of a knob, the effect applied by the previous knob function remains in effect. To apply the effects of multiple functions and return the effects to their initial default settings, see “To reset the knob effect” (page EN-91). • The effect of the following functions will be the recommended value of the tone when the tone of the corresponding part is changed.
Controlling the Sound of a Performance Disabling the Knob Effect for Individual Parts 1. Press HOME. This displays the home screen. 2. Press KNOB. This displays the knob screen. 3. Press the button of the knob whose effect you want to disable. This displays the knob setting screen. 4. Press UPPER1. • “U1” disappears from the display, indicating that the Knob effect is no longer applied to the UPPER 1 part. 5. Pressing UPPER1 again applies the knob effect to the UPPER1 part.
Controlling the Sound of a Performance Applying the Effect You Want to a Tone (Active DSP) ■ Active DSP A DSP (Digital Signal Processor) is a type of effect connected between the sound source and output. DSP types are equalizer, tremolo, limiter, wah, etc. Many of the built-in tones of your Digital Keyboard are preset with DSPs that are suited for each tone. Such tones are called “DSP tones”. Your Digital Keyboard is equipped with Active DSP, which allows you to change DSP settings.
Controlling the Sound of a Performance 3. Press ACTV DSP. This enables Active DSP and displays the Active DSP screen. • Keyboard tone effects and knob functions are switched to dedicated Active DSP settings. 4. Use CHG PART to select the part whose effect you want to change. This causes the selected part’s indicator (“U1”, “U2”, “L”) to appear in the upper left of the display. • Each press of CHG PART cycles between parts whose effect will be changed.
Controlling the Sound of a Performance 6. Active DSP is also turned off if you press HOME or if you exit the Active DSP screen some other way. • The effects and knob functions applied to keyboard tones return to the settings in effect before Active DSP was turned on. • You can use other functions with Active DSP left turned on. See “To use other functions with Active DSP turned on” (page EN-106). • Changing the effect causes the knob functions to change to the parameters recommended for the effect.
Controlling the Sound of a Performance ■ To change the part where the effect is applied 1. Press MENU. This displays the menu screen. 2. Use U and I to select the 5 buttons menu that includes ACTV DSP. 1 3. Press ACTV DSP. This turns on Active DSP and displays the Active DSP screen. 4. Press ACT PART. This displays the Active DSP part setting screen.
Controlling the Sound of a Performance 5. Press UPPER1, UPPER2, or LOWER to select the parts to which you want to apply the effect. This causes the selected part indicators (“U1”, “U2”, “L”) to appear in the lower right of the display. • Effects can be applied to up to two parts at the same time. 6. Press UPPER1, UPPER2, or LOWER to select the part for which you want to disable application of the effect.
Controlling the Sound of a Performance ■ To change effect parameter settings 1. Press MENU. This displays the menu screen. 2. Use U and I to select the 5 buttons menu that includes ACTV DSP. 1 3. Press ACTV DSP. This enables Active DSP and displays the Active DSP screen. 4. Press PARAMETER. This displays the module selection screen. • You can rotate the dial to change the part effect while this screen is displayed.
Controlling the Sound of a Performance 5. Press the button of the module whose parameters you want to change. This displays the module parameter setting screen. 6. Use U and I to select the parameter you want to change. 7. Rotate the dial or use – and + to change the setting 8. Press BACK to return to the module selection screen. 9. To exit the setting operation, press BACK. • Bypass is a special parameter. Enabling it stops the effect from being applied to the module.
Controlling the Sound of a Performance 3. Press ACTV DSP. This enables Active DSP and displays the Active DSP screen. 4. Press KNOB. This displays the knob screen. • While Active DSP is turned on, you can configure effect parameter settings in addition to the functions assigned to the knobs. 5. Change the knob function. • For information about to do this, see “To change the knob function” (page EN-93).
Controlling the Sound of a Performance ■ To use other functions with Active DSP turned on 1. Press MENU. This displays the menu screen. 2. Use U and I to select the 5 buttons menu that includes ACTV DSP. 1 3. Press ACTV DSP. This enables Active DSP and displays the Active DSP screen. 4. Press HOLD. This displays “HOLD”, which indicates you can configure the settings of other functions while keeping Active DSP on. 5. Press HOLD again to return to the DSP screen and turn off Active DSP.
Controlling the Sound of a Performance Playing with Reverb You can use the procedure below to add reverb to the notes you play. 1. Press MENU. This displays the menu screen. 2. Use U and I to select the 5 buttons menu that includes SYS FX. 3. Press SYS FX. This displays the system effect screen.
Controlling the Sound of a Performance 4. Rotate the dial to select the reverb type. The following shows the available reverb type settings.
Controlling the Sound of a Performance Changing the Relationship of Keyboard and Song Reverb Effects You can use this procedure to sync the reverb effect of keyboard play and built-in song playback so they do not clash with each other. 1. Press MENU. This displays the menu screen. 2. Use U and I to select the 5 buttons menu that includes SYS FX. 3. Press SYS FX. This displays the system effect screen. 4. Press SONG REV to change the setting. Available settings are shown in the table below.
Controlling the Sound of a Performance Adding the Chorus Effect to a Tone Chorus is a function that adds depth and breadth to notes. 1. Press MENU. This displays the menu screen. 2. Use U and I to select the 5 buttons menu that includes SYS FX. 3. Press SYS FX. This displays the system effect screen. 4. Press CHORUS.
Controlling the Sound of a Performance 5. Rotate the dial to select the chorus type. Available chorus type settings are shown in the table below. Setting Display Name Chorus setting recommended for each tone Tone Chorus 1 to 4 Chorus 1 to 4 Feedback Chorus Feedback Chorus Deep Chorus Deep Chorus Flanger 1 to 4 Flanger 1 to 4 Short Delay 1, 2 Short Delay 1, 2 • After you rotate the dial once to select a chorus type, you can change the selection further using – and +.
Controlling the Sound of a Performance Delaying Notes (Delay) Delay stores a sound and repeats it periodically with a slight delay before each repeat, which creates an echo effect. Delay is different from reverb, which creates a reverberation effect. 1. Press MENU. This displays the menu screen. 2. Use U and I to select the 5 buttons menu that includes SYS FX. 3. Press SYS FX. This displays the system effect screen. 4. Press DELAY.
Controlling the Sound of a Performance 5. Rotate the dial to select the delay type. Delay types are shown in the table below.
Controlling the Sound of a Performance Playing with a More Expanded Sound (Surround) Enabling surround creates a virtual surround effect. 1. Press MENU. This displays the menu screen. 2. Use U and I to select the 5 buttons menu that includes SETTING. 3. Press SETTING. This displays the setting screen. 4. Use U and I to select “Surround”. 5. Rotate the dial or use – and + to select “On”. 6. To exit the setting operation, press EXIT.
Controlling the Sound of a Performance Sounding Arpeggio Phrases Automatically (Arpeggiator) With the arpeggiator, you can play various arpeggios and other phrases automatically by simply pressing keys on the keyboard. You can select from several different arpeggio options, including playing arpeggios from a chord, playing various phrases automatically, and more. 1. Press INSTRUMENT. This displays the instrument tone screen. 2. Press ARP. This displays “ARP” and enables the arpeggiator.
Controlling the Sound of a Performance 4. Rotate the dial to select the arpeggiator type. • You can specify an arpeggiator type within the range of 1 to 150. See “Arpeggiator List” (page EN-313). • After you rotate the dial once to select a type, you can change the selection further using – and +. • To go back to the previous screen, press BACK. 5. Hold down a key of the accompaniment keyboard. The arpeggiator starts to play in accordance with the keys you press. 6.
Controlling the Sound of a Performance ■ Configuring Recommended Arpeggiator Settings 1. Press INSTRUMENT. This displays the instrument tone screen. 2. Press ARP. This displays “ARP” and enables the arpeggiator. 3. Long-press ARP. This displays the arpeggiator screen. 4. Long-press ARP. This momentarily displays “RECOMMENDED” and changes the tone to its recommended arpeggiator type setting.
Controlling the Sound of a Performance ■ Configuring Settings so the Arpeggiator Pattern Keeps Playing After You Release Keyboard Keys 1. Press INSTRUMENT. This displays the instrument tone screen. 2. Press ARP. This displays “ARP”, which indicates the arpeggiator is enabled. 3. Long-press ARP. This displays the arpeggiator screen. 4. Press HOLD. This displays “HOLD”, which indicates arpeggiator hold is enabled. 5. Press and release a keyboard key.
Controlling the Sound of a Performance ■ Changing the Part that Sound Arpeggiator Play 1. Press INSTRUMENT. This displays the instrument tone screen. 2. Press ARP. This displays “ARP”, which indicates the arpeggiator is enabled. 3. Long-press ARP. This displays the arpeggiator screen. 4. Press PART and then select the part you want to sound with the arpeggiator. Parts you can select are shown in the table below.
Controlling the Sound of a Performance Switching the Button Function from ARP (Arpeggiator) to AH (Auto Harmonize) A single button is used to control the arpeggiator (page EN-115) and auto harmonize (page EN-121). 1. Press MENU. This displays the menu screen. 2. Use U and I to select the 5 buttons menu that includes SETTING. 3. Press SETTING. This displays the setting screen. 4. Use U and I to select “ARP/AH Button”. 5. Rotate the dial or use – and + to toggle between button functions.
Controlling the Sound of a Performance Adding Harmony to Melody Notes (Auto Harmonize) This function adds harmony to the melody sound when a chord is specified, such as when a chord is input by the rhythm function. 1. Press RHYTHM. This displays the currently selected rhythm number and name. 2. Press ACCMP. This enables chord play. 3. Press INSTRUMENT. This displays the instrument tone screen. 4. Press AH. This displays “AH”, which indicates auto harmonize is enabled.
Controlling the Sound of a Performance 5. Long-press AH. This displays the auto harmonize screen. 6. Rotate the dial or use – and + to select an auto harmonize type. • You can specify an auto harmonize type from 1 to 12. Type (displayed) Description 1: Duet 1 Adds closed (separated by 2 to 4 degrees) 1-note harmony below the melody note. 2: Duet 2 Adds open (separated by more than 4 to 6 degrees) 1-note harmony below the melody note. 3: Country Adds country style harmony.
Controlling the Sound of a Performance Layering and Splitting Tones You can configure the keyboard to play two different tones at the same time (Layer) or to play different tones in the left and right ranges (Split). You can even use Layer and Split in combination with each other and play three different tones at the same time. The part that is used when playing a single tone is called the UPPER1 part. If you layer two parts, the layered part is the UPPER2 part.
Controlling the Sound of a Performance • Splitting the keyboard into two ranges (left, right), and assigning two layered tones to the right side and a single tone to the left side (pages EN-125, EN-126) With this configuration, the UPPER1, UPPER2, and LOWER parts are all used (Layer: On, Split: On). UPPER1 LOWER UPPER2 • Changing the tone setting affects the UPPER2 part when layer is turned on, and the LOWER part when split is turned on.
Controlling the Sound of a Performance Layering Two Tones 1. Press TONE. This displays the tone screen. 2. Press LAYER. This displays “U2” to the left of the tone number and “LY” below it. “U2” is short for the UPPER2 part. 3. Rotate the dial to select the layer tone. • For tone information, see the “Tone List” (page EN-288). • After you rotate the dial once to select a tone, you can change the selection further using – and +.
Controlling the Sound of a Performance Splitting the Keyboard Between Two Different Tones 1. Press TONE. This displays the tone screen. 2. Press SPLIT. This displays “L” to the left of the tone number and “SP” below it. “L” indicates the LOWER part. 3. Rotate the dial to select the tone to be assigned to the low range keyboard. • For tone information, see the “Tone List” (page EN-288). • After you rotate the dial once to select a tone, you can change the selection further using – and +.
Controlling the Sound of a Performance ■ Changing the Split Point 1. Press TONE. This displays the tone screen. 2. Long-press SPLIT. This displays the setting screen, which shows setting items for the split point. F{3 Split point LOWER UPPER1 3. Rotate the dial or use – and + to specify the split point. 4. To exit the setting operation, press EXIT.
Controlling the Sound of a Performance Changing the Volume Balance Between Keyboard Play and Rhythm Play (Balance) 1. Press HOME. This displays the home screen. 2. Press BALANCE. This displays the balance screen, which shows volume level setting items for the UPPER1 part. 3. Press UPPER1, UPPER2, LOWER, or RHYTHM as required to select the item whose volume level you want to adjust. 4. Rotate the dial to change the setting value. This displays the –/+ screen.
Controlling the Sound of a Performance Changing the Pitch in Octave Units (Octave Shift) You can use the procedure below to raise or lower pitch in octave units. Shifting the Pitch of the UPPER Tone in Octave Units (Upper Octave Shift) You can use the procedure below to raise or lower the pitch of the UPPER part in octave units. 1. Press TONE. This displays the tone screen. 2. Long-press LAYER. This displays the octave shift screen, which shows setting items for the upper octave shift. 3.
Controlling the Sound of a Performance Changing the Pitch of Each Part in Octave Units (Part Octave Shift) 1. Press TONE. This displays the tone screen. 2. Long-press LAYER. This displays the octave shift screen. 3. Press the button that corresponds to the part whose pitch you want to change. 4. Rotate the dial to change the shift amount. • You can specify a value in the range of –3 to +3 octaves.
Controlling the Sound of a Performance Changing the Pitch in Semitone Units (Transpose) You can use the procedure below to raise the overall pitch in semitone steps. You can use this feature to raise or lower the key of the keyboard to make it easier to play a piece written in a difficult key, or to adjust to a key that better matches a vocalist, or another musical instrument. 1. Press MENU. This displays the menu screen. 2. Use U and I to select the 5 buttons menu that includes SETTING. 3.
Controlling the Sound of a Performance Fine Tuning (Tuning) You can use the procedure below to adjust the overall pitch by changing the frequency of A4. (0.1Hz units) A4 1. Press MENU. This displays the menu screen. 2. Use U and I to select the 5 buttons menu that includes SETTING. 3. Press SETTING. This displays the setting screen. 4. Use U and I to select “Tuning”. 5. Rotate the dial or use – and + to adjust the tuning. • You can specify a frequency in the range of 415.5 to 465.9 Hz.
Controlling the Sound of a Performance Changing the Keyboard Scale Tuning You can change the scale tuning of the keyboard from the standard equal temperament to another tuning that is more suitable for playing Indian music, Arabic music, classical music, etc. You can select from among 17 preset scale tunings. ■ Changing the Scale Tuning 1. Press MENU. This displays the menu screen. 2. Use U and I to select the 5 buttons menu that includes SCALE. 3. Press SCALE. This displays the scale tuning screen.
Controlling the Sound of a Performance 4. Rotate the dial to select the scale. Scale settings you can select are shown in the table below.
Controlling the Sound of a Performance ■ Specifying the Base Note of the Scale Tuning 1. Press MENU. This displays the menu screen. 2. Use U and I to select the 5 buttons menu that includes SCALE. 3. Press SCALE. This displays the scale tuning screen. 4. Press ROOT. 5. Rotate the dial to change the setting. • You can specify a base note in the range of C to B. • After you rotate the dial once to select a setting, you can change the selection further using – and +.
Controlling the Sound of a Performance ■ Reflecting the Scale Setting in the Rhythm Accompaniment as Well 1. Press MENU. This displays the menu screen. 2. Use U and I to select the 5 buttons menu that includes SCALE. 3. Press SCALE. This displays the scale tuning screen. 4. Press AC SCALE. This displays “AC SCALE”, and reflects the scale setting in rhythm accompaniment as well. 5. To cancel the scale setting for rhythm accompaniment, press AC SCALE again.
Controlling the Sound of a Performance ■ Disabling Piano Stretch Tuning Stretch tuning makes high notes relatively higher and low notes relatively lower than equal temperament tuning for a wider frequency differential between high and low notes. 1. Press MENU. This displays the menu screen. 2. Use U and I to select the 5 buttons menu that includes SCALE. 3. Press SCALE. This displays the scale tuning screen. 4. Press PIANO STRCH.
Controlling the Sound of a Performance Using the Equalizer You can use the equalizer to configure settings that boost or cut specific frequency components. 1. Press MENU. This displays the menu screen. 2. Use U and I to select the 5 buttons menu that includes EQ. 3. Press EQ. This displays the equalizer screen. 4. Rotate the dial or use – and + to change the setting. The table below shows available equalizer settings.
Controlling the Sound of a Performance 5. To exit the setting operation, press EXIT. Configuring Your Own Equalizer Settings (User Equalizer) 1. Press MENU. This displays the menu screen. 2. Use U and I to select the 5 buttons menu that includes EQ. 3. Press EQ. This displays the equalizer screen. 4. Rotate the dial or use – and + to change the user setting. 5. Press PARAMETER. This displays the user equalizer setting screen. 6. Use U and I to select the item. 7.
Saving and Recalling a Setup (MY SETUP) You can up to four setups (tone, rhythm, and other settings) of the Digital Keyboard. You can recall a saved setup when you need it to perform a particular song, etc. • Four setups are pre-stored in MY SETUP by default. If you store setups, they replace the pre-stored setups. Saving to MY SETUP 1. Press MENU. This displays the menu screen. 2. Press MY SETUP. This displays the MY SETUP screen. • You can also display the MY SETUP screen from the home screen.
Saving and Recalling a Setup (MY SETUP) 4. Press SAVE. This displays “Sure?”. The name of the main setting (TONE, RHYTHM, SONG, Registration) you are using also appears. 5. Press YES. This saves the current setup to MY SETUP. • To cancel, press NO. This returns to the MY SETUP screen at the beginning of the procedure. 6. When “Complete” appears on the display, press OK. This exits the save operation. Savable Settings The settings listed below can be saved with MY SETUP.
Saving and Recalling a Setup (MY SETUP) • • • • • • • • • • • • • • • • • • • • • • • • • • • • • • • • • • • • • • • Knob Effect Part (UPPER1, UPPER2, and LOWER for each of the knobs: K1, K2, K3) Knob K1-K2 Link Layer Split Split point Balance (UPPER1, UPPER2, LOWER, Rhythm) Upper octave shift Part Octave Shift (UPPER1, UPPER2, LOWER) Transpose SUS/UPPER PORT button Surround Reverb Song Reverb Delay Chorus Equalizer (Type, User Equalizer settings) Scale tuning type Scale tuning base note Accompaniment sc
Saving and Recalling a Setup (MY SETUP) Recalling a MY SETUP 1. Press MENU. This displays the menu screen. 2. Press MY SETUP. This displays the MY SETUP screen. 3. Rotate the dial to select the setup number you want to recall. • If you rotated the dial, press BACK. 4. Press LOAD. This displays “Sure?” and the main setting’s name (TONE, RHYTHM, SONG, REGISTRATION) saved to the setup. 5. Press YES. This recalls the saved settings. • To cancel, press NO.
Saving and Recalling a Setup (MY SETUP) Enabling MY SETUP Power On Recall Use the procedure below to enable MY SETUP power on recall, which causes MY SETUP settings to be recalled whenever power is turned on. 1. Press MENU. This displays the menu screen. 2. Press MY SETUP. This displays the MY SETUP screen. 3. Rotate the dial to select the setup number you want to recall at startup. • If you rotated the dial, press BACK. 4. Press AT PW-ON.
Saving and Recalling a Setup (MY SETUP) Renaming a MY SETUP 1. Press MENU. This displays the menu screen. 2. Press MY SETUP. This displays the MY SETUP screen. 3. Rotate the dial to select the setup number you want to rename. • If you rotated the dial, press BACK. 4. Use I to select the 5 buttons menu that includes RENAME. 5. Press RENAME. 6. Edit the data name. • For information about viewing and editing text, see “Inputting Characters” (page EN-23). 7. To confirm the data name, press CONFIRM.
Saving and Recalling a Setup (MY SETUP) 9. When “Complete” appears on the display, press OK. This exits the rename operation. • A MY SETUP name can have up to 12 characters.
Saving and Recalling a Setup (MY SETUP) Deleting a MY SETUP 1. Press MENU. This displays the menu screen. 2. Press MY SETUP. This displays the MY SETUP screen. 3. Rotate the dial to select the setup number you want to delete. • If you rotated the dial, press BACK. 4. Use I to select the 5 buttons menu that includes CLEAR. 5. Press CLEAR. This displays “Sure?”. • You can also delete a MY SETUP by long-pressing MENU. 6. Press YES. This deletes the currently selected MY SETUP. • To cancel, press NO.
Playing with a Rhythm Backing You can use the procedures in this section to select the rhythm you want, and then automatically play accompaniments to suit it simply by playing chords with your left hand. It’s like having a personal backup group along with you wherever you go. • Auto Accompaniments are made up of the parts (instruments) below.
Playing with a Rhythm Backing Playing a Rhythm 1. Press RHYTHM. This displays the currently selected rhythm number and name. 2. Rotate the dial to select a rhythm. This displays the category name of the selected rhythm. • For information about rhythm types, see the “Rhythm List” (page EN-310). • After you rotate the dial once to select an option, you can change the selection further using – and +. • If you want to select a category, use CAT–/CAT+. • To go back to the previous screen, press BACK. 3.
Playing with a Rhythm Backing Changing the Tempo Use the procedure below to change tempo to a speed that suits you. 1. Press RHYTHM. This displays the currently selected rhythm number and name. 2. Rotate the dial to select the name of the rhythm whose tempo you want to change. 3. Press TEMPO. This displays the tempo screen. 4. Rotate the dial or use – and + to change the tempo value. • You can specify a tempo value in the range of 20 to 255.
Playing with a Rhythm Backing Changing the Volume Level of a Rhythm Use the procedure below to adjust the balance between the volume levels of keyboard play and the rhythm. 1. Press MENU. This displays the menu screen. 2. Use U and I to select the 5 buttons menu that includes SETTING. 3. Press SETTING. This displays the setting screen. 4. Use U and I to select “Rhythm Volume”. 5. Rotate the dial or use – and + to change the rhythm volume level. • You can specify a volume value from 0 to 127. 6.
Playing with a Rhythm Backing Changing the Keyboard Tone While a Rhythm is Playing 1. While a rhythm is playing, press TONE. This displays the currently selected tone number and name. 2. Rotate the dial to select a tone. • For tone information, see the “Lyric Tone List” (page EN-307) and the “Tone List” (page EN-288). • After you rotate the dial once to select an option, you can change the selection further using – and +. • To return the setting to its initial default, press – and + at the same time.
Playing with a Rhythm Backing Using Recommended Rhythm Settings (One Touch Presets) You can use the procedure below to configure tone and tempo settings that are most suitable for a particular rhythm pattern. 1. Press RHYTHM. This displays the currently selected rhythm number and name. 2. Rotate the dial to select the name of the rhythm whose setting you want to configure. 3. Long-press RHYTHM. This momentarily displays “RECOMMENDED”, which indicates the recommended rhythm settings are configured.
Playing with a Rhythm Backing Sounding Rhythm as You Use Tap Tempo 1. Press RHYTHM. This displays the currently selected rhythm number and name. 2. Rotate the dial to select the name of the rhythm whose setting you want to configure. 3. Press TEMPO. This displays TAP START above one of the 5 buttons. 4. Press TAP START. This displays “TAP START”. 5. Tap the TAP TEMPO button at least twice at a steady pace that matches the rhythm beat. The rhythm starts playing from the first beat of the next measure.
Playing with a Rhythm Backing Changing the Rhythm Pattern You can use the procedure below to add liveliness to your rhythm pattern. Use the procedure below to play intro and ending patterns, to play fill-in patterns, and to play variations of basic rhythm patterns. Switching Between the Basic Pattern and Variation Pattern Each rhythm number has a basic pattern (V1) and a variation pattern (V2). You can switch to the variation pattern to add a bit of variation to your performances. 1. Press RHYTHM.
Playing with a Rhythm Backing Inserting an Intro The intro you insert at the beginning of a song is followed by the basic pattern (V1) or variation pattern (V2). 1. Press RHYTHM. This displays the currently selected rhythm number and name. 2. Rotate the dial to select the name of the rhythm whose setting you want to configure. • If you rotated the dial, press BACK. 3. Press INTRO. This displays “I >V1”. • “I >V1” indicates that “V1” starts to play following the introduction.
Playing with a Rhythm Backing Inserting an Ending Inserting an ending causes it to play for the final measures of a song. 1. While a rhythm is playing, press ENDING. This displays “E”. The ending plays from the next measure and then the rhythm stops. • Pressing VARIATION while an ending is playing interrupts the ending play up to the current measure and then plays the current rhythm pattern (V1 or V2).
Playing with a Rhythm Backing Inserting a Fill-in Phrase A “fill-in” is a short phrase played where you want to change the mood of a song. A fill-in pattern can be used to create a link between two melodies or as an accent. 1. While a rhythm is playing, press VARIATION and then select a rhythm pattern (V1 or V2). 2. Press FILL-IN. This inserts a fill-in phrase that matches the current rhythm pattern (V1 or V2).
Playing with a Rhythm Backing Fingering a Chord to Play a Rhythm Accompaniment Playing a chord with your left hand automatically adds bass and harmony accompaniment parts to the currently selected rhythm. It is just like having a personal back up group on call. 1. Press RHYTHM. This displays the currently selected rhythm number and name. 2. Rotate the dial to select the name of the rhythm whose chords you want to input. • If you rotated the dial, press BACK. 3. Press ACCMP.
Playing with a Rhythm Backing Selecting a Chord Fingering Mode You can select from among the six chord fingering modes below. • CASIO CHORD • FINGERED 1 • FINGERED 2 • FINGERED ON BASS • FINGERED ASSIST • FULL RANGE CHORD 1. Press MENU. This displays the menu screen. 2. Use U and I to select the 5 buttons menu that includes SETTING. 3. Press SETTING. This displays the setting screen. 4. Use U and I to select “Chord Mode”. 5. Rotate the dial or use – and + to select the chord fingering mode. 6.
Playing with a Rhythm Backing ■ CASIO CHORD With CASIO CHORD, you can use simplified fingerings to play the four types of chords described below Accompaniment keyboard Chord Type Example C (C Major) Major Chords Letters below the accompaniment keyboard indicate the name of the chord assigned to each key. Accompaniment keyboard keys marked with the same chord name play exactly the same chord.
Playing with a Rhythm Backing ■ FINGERED With this chord fingering mode, you play chords on the accompaniment keyboard using their normal chord fingerings. Note that some chords can also be formed using abbreviated fingerings of one or two keys. For information about the types of chords you can finger and their fingerings, see the “Fingering Guide” (page EN-345). Accompaniment keyboard ● FINGERED 1 Play the component notes of the chord on the keyboard.
Playing with a Rhythm Backing Starting Rhythm Play when a Chord is Played (Synchro Start) Synchro Start automatically starts the rhythm when something is played on the keyboard. 1. Press RHYTHM. This displays the currently selected rhythm number and name. 2. Rotate the dial to select the name of the rhythm you want to synchro start with. • If you rotated the dial, press BACK. 3. Press SYNC START. This enters the synchro start standby state, with “SYN.
Playing with a Rhythm Backing Configuring Rhythm Play to Stop Automatically when Chord Play is Stopped (Synchro Stop) Releasing the accompaniment keyboard keys stops rhythm play and automatically enables Synchro Start. 1. Press RHYTHM. This displays the currently selected rhythm number and name. 2. Rotate the dial to select the name of the rhythm you want to synchro stop with. • If you rotated the dial, press BACK. 3. Long-press ACCMP. This displays “SYN.SP”, which indicates Synchro Stop is enabled. 4.
Playing with a Rhythm Backing Changing the Rhythm Pattern and the Fill-in Operation Type You can use the procedure below to change the rhythm pattern change operation method and fill-in operation method. ■ Changing the rhythm operation type to Type 2 1. Press MENU. This displays the menu screen. 2. Use U and I to select the 5 buttons menu that includes SETTING. 3. Press SETTING. This displays the setting screen. 4. Use U and I to select “Rhythm Controller Type”. 5.
Playing with a Rhythm Backing • Changing the rhythm operation type to Type 2 causes the 5 buttons menu on the rhythm screen to appear as shown below. • Changing the rhythm operation type can cause the rhythm to stop and/or the rhythm to be reset to its initial default setting. • In the case of rhythm operation Type 2, the rhythm pattern is not set when a rhythm is selected, even if rhythm auto setting (page EN-168) is enabled. ■ Switching Between the Basic Pattern and Variation Pattern 1.
Playing with a Rhythm Backing ■ Intro 1. While rhythm play is stopped, press INTRO. This displays “I” and plays the intro. • Pressing VAR1 while an intro is playing displays “I >V1”. Pressing VAR2 displays “I >V2”. • If “I” is left on the display without changing it, “V1” starts to play following the introduction.
Playing with a Rhythm Backing Disabling Automatic Setting of the Tempo and Pattern when a Rhythm is Selected Selecting a rhythm causes its recommended tempo and pattern to be automatically applied. You can disable auto setting, if you want. 1. Press MENU. This displays the menu screen. 2. Use U and I to select the 5 buttons menu that includes SETTING. 3. Press SETTING. This displays the setting screen. 4. Use U and I to select “Rhythm Auto Set”. 5. Rotate the dial or use – and + to select “Off”.
Playing with a Rhythm Backing Increasing the Number of Rhythms (User Rhythms) A USB flash drive song can be loaded as a user rhythm. (Rhythm number: 244 to 293) The file name extensions for loaded rhythms are AC7, CKF, and Z00. – For information about loading a USB flash drive rhythm data as a user rhythm, see “USB Flash Drive Operations” on page EN-253. Deleting User Rhythm Data Stored in Digital Keyboard Memory 1. Press RHYTHM. This displays the currently selected rhythm number and name. 2.
Saving and Recalling Setups (Registration) Registration memory lets you store keyboard setups (tone, rhythm, etc.) for instant recall whenever you need them. When recalling a setup, you can specify items that you do not want to include in the recall (Freeze). Registration memory simplifies performance of complex pieces that require successive tone and rhythm changes.
Saving and Recalling Setups (Registration) Saving a Setup Setup registrations are stored in a memory location that is divided into 16 banks. Each bank has four storage areas, which means you can register up to 64 (16 banks × 4 areas) setups. 1. Set up the Digital Keyboard with the tone, rhythm and other settings you want to save to the setup. 2. Press REGISTRATION. This displays the registration screen. 3. Use I to select the 5 buttons menu that includes STORE. 4. Press STORE.
Saving and Recalling Setups (Registration) 8. When “Complete” appears on the display, press OK. 9. To exit the setting operation, press REGISTRATION. • During any type of playback, the display shows the current measure and beat numbers. Measure, Beat • Note that registration operation memory operations are not supported while the SONG function is being used. Pressing REGISTRATION in this case causes the message “CANNOT USE” to appear momentarily.
Saving and Recalling Setups (Registration) Recalling a Saved Setup 1. Press REGISTRATION. This displays the registration screen. 2. Rotate the dial to select a bank number. 3. Use buttons 1 through 4 to select an area. This causes the bank number and area number to appear momentarily. • If the last recalled bank number is selected, the area number will be displayed at the bottom of the LCD.
Saving and Recalling Setups (Registration) Disabling Recall of Specific Settings (Freeze) Recalling a setup normally causes all settings that can be modified by a recall to be replaced by the recalled settings. With the Freeze Function, you can disable overwriting of specific setting items whenever setup data is recalled. 1. Press REGISTRATION. This displays the registration screen. 2. Use I to select the 5 buttons menu that includes FREEZE. 3. Press FREEZE.
Saving and Recalling Setups (Registration) 6. Rotate the dial to the right or press ON. This displays “On”, which indicates the displayed item is not recalled and applied to the setup. • If an item’s status is currently FRZ ITEM ON (not recalled), you can change it back to FRZ ITEM OFF (recalled) by rotating the dial to the left or by pressing OFF. This displays “Off” for the setting. 7. To disable freeze, return to the registration screen and then press FREEZE.
Saving and Recalling Setups (Registration) Enabling Auto Exit of the Registration Screen when a Setup is Recalled 1. Press REGISTRATION. This displays the registration screen. 2. Use I to select the 5 buttons menu that includes AUTO EXIT. 3. Press AUTO EXIT. This displays “AUTO EXIT”, which indicates the registration screen will be exited automatically when you recall a setup. 4. To disable auto exit, press AUTO EXIT again.
Saving and Recalling Setups (Registration) Using the Pedal to Recall the Settings Sequentially (Registration Sequence) Each press of the pedal cycles through the currently selected bank’s registrations (setups) in area number sequence. 1. Press REGISTRATION. This displays the registration screen. 2. Use I to select the 5 buttons menu that includes AUTO EXIT. 3. Long-press AUTO EXIT. This causes “SEQ” to appear on the display and makes the Pedal 1 function the registration sequence function. 4.
Playing a Song Songs Normally, the word “song” means a musical piece with lyrics. Your Digital Keyboard uses the term “song” (SONG) to mean a set of song data. With this unit, you can play back and listen to songs stored on a USB flash drive and songs imported into Digital Keyboard memory. In addition to playing songs for your listening pleasure, you can also practice along with song playback. Using the SONG Function 1. Press MENU. This displays the menu screen. 2.
Playing a Song Selecting a Song on a USB Flash Drive You can use the same operations as those for built-in songs to play back MIDI files* stored in the “MUSICDAT” folder on a USB flash drive. For information about the procedure for saving a MIDI file to a USB flash drive, see “Saving Digital Keyboard Data to a USB Flash Drive” (page EN-254). * Standard MIDI files (SMF format 0/1) and CASIO MIDI files (CMF format) 1. Insert the USB flash drive into the Digital Keyboard’s USB TO DEVICE port.
Playing a Song 5. Rotate the dial to select a song. • Song numbers are assigned automatically in sequence to MIDI files on the USB flash drive. The files are sorted in file name sequence. The first MIDI file (file name sequence) is assigned song number 18. • Certain songs can take time to load. During a load operation, the message “LOADING” is displayed along with a progress percentage. • Only numbers that are allocated to the USB flash drive can be selected.
Playing a Song Increasing the Selection of Songs (User Songs) Song data transferred to the Digital Keyboard from a USB flash drive or the APP function can be recalled and played as Song Bank user songs (numbers 1 to 10). For details, see “Loading Data From a USB Flash Drive to Digital Keyboard Memory” (page EN-256), and “Connecting with External Devices” (page EN-262). CMF (CASIO MIDI files) and SMF (standard MIDI files) can be imported into Digital Keyboard memory.
Playing a Song Deleting a User Song 1. Press MENU. This displays the menu screen. 2. Use U and I to select the 5 buttons menu that includes SONG. 3. Press SONG. This displays the song screen. 4. Rotate the dial to select the user song you want to delete. 5. Long-press MENU. This displays “Sure?”. 6. Press YES. This deletes the user song. • To cancel, press NO. 7. When “Complete” appears on the display, press OK. This exits the user song delete operation.
Playing a Song Playing Songs Starting or Stopping Song Play 1. Press MENU. This displays the menu screen. 2. Use U and I to select the 5 buttons menu that includes SONG. 3. Press SONG. This displays the song screen. 4. Rotate the dial to select a song. This displays the –/+ screen. No.
Playing a Song • Starting to use the SONG function while the metronome is sounding stops the metronome. Or you can sound a count in time with a song. See “Sounding a Count in Time with a Song” (page EN-189). • To make the keyboard reverb have the same effect as the song reverb during song playback, select “SYNC” for the reverb setting. See “Changing the Relationship of Keyboard and Song Reverb Effects” (page EN-109).
Playing a Song Changing a Song’s Tempo (Speed) 1. Press MENU. This displays the menu screen. 2. Use U and I to select the 5 buttons menu that includes SONG. This displays the song screen. 3. Press SONG. 4. Rotate the dial to select the song whose tempo you want to change. 5. Press TEMPO. This displays the tempo screen. 6. Rotate the dial or use – and + to change the tempo value. • You can specify a tempo value in the range of 20 to 255.
Playing a Song Adjusting the Song Volume Level Use the procedure below to adjust the balance between the volume levels of song play and what you play on the keyboard. 1. Press MENU. This displays the menu screen. 2. Use U and I to select the 5 buttons menu that includes SETTING. 3. Press SETTING. This displays the setting screen. 4. Use U and I to select “Song Volume”. 5. Rotate the dial or use – and + to change the SONG volume level. • You can specify a volume value from 0 to 127.
Playing a Song Changing the Keyboard Tone While a Song Playing 1. While a song is playing, press TONE. The selected tone number and instrument name appears on the display. 2. Rotate the dial to select a tone. • For tone information, see the “Lyric Tone List” (page EN-307) and the “Tone List” (page EN-288). • After you rotate the dial once to select an option, you can change the selection further using – and +. • To return to the first tone in the Tone List, press – and + at the same time.
Playing a Song Practicing a Song Part (Part Off) You can turn off the right-hand part or the left-hand part of a song you are playing and practice along with the remaining part. Use this when you feel that a song is initially too difficult for you to play with both hands at the same time. 1. While a song is playing or stopped, press PART. Each press of PART cycles between the lesson parts.
Playing a Song Sounding a Count in Time with a Song You can configure count settings to sound a count in time with a song and to sound a pre-count before a song starts. If pre-count is enabled, a pre-count sounds to help you determine when to start playing along. 1. While the song stopped, press COUNT. This displays a count setting item. Each press of COUNT changes the setting. Setting (Displayed Setting Name) Description Off Count does not sound.
Recording Your Keyboard Play You can use the procedures in this section to record your keyboard play for later playback. There are two ways to record: Easy Recording, which simplifies recording of your performances, and Multi-track Recording, which lets you overdub record performances. Your recordings can be saved to Song Bank locations 11 through 17 (Tone Recordings: 11, Rhythm Recording: 12, Multi-track Recording: 13 to 17).
Recording Your Keyboard Play Easy Keyboard Play Recording Use the procedure below to record a performance using tone and rhythm functions. 1. Press TONE or RHYTHM. • To record as a tone recording, press and hold TONE to exit the rhythm function. • If you are using the SONG function, exit the function. 2. Rotate the dial to select a tone or rhythm. 3. Press RECORD. This displays “(REC)” and enters record standby. • With Tone Recording, the initial default beat setting is the metronome beat setting.
Recording Your Keyboard Play 6. To start playback of what you recorded, press a. Each press of a starts and stops playback. • The maximum size of a single song recording is approximately 40,000 notes or 999 measures. “(REC)” appears on the display when there are 100 or fewer notes or 32 or fewer measures of free space remaining in memory. “(REC)” disappears from the display, and recording stops automatically when memory becomes full.
Recording Your Keyboard Play Changing the Beat Setting for Recording 1. Press TONE or RHYTHM. • To record as a tone recording, press and hold TONE to exit the rhythm function. • If you are using the SONG function, exit the function. 2. Rotate the dial to select a tone or rhythm. 3. Press RECORD. This displays “(REC)” and enters record standby. 4. Long-press RECORD. This displays a record settings screen. 5. Rotate the dial to change the beat value.
Recording Your Keyboard Play Sounding a Count While Recording 1. Press TONE or RHYTHM. • To record as a tone recording, press and hold TONE to exit the rhythm function. • If you are using the SONG function, exit the function. 2. Rotate the dial to select a tone or rhythm. 3. Press RECORD. This displays “(REC)” and enters record standby. 4. Long-press RECORD. This displays a record settings screen. 5. Press COUNT and then select a count operation. Each press of COUNT changes the setting.
Recording Your Keyboard Play Deleting an Easy Recording 1. Press MENU. This displays the menu screen. 2. Use U and I to select the 5 buttons menu that includes SONG. 3. Press SONG. This displays the song screen. 4. Rotate the dial to select the Easy Recording you want to delete. • If you rotated the dial, press BACK. 5. Press CLEAR. This displays “Sure?”. • You can also delete an Easy Recording by long-pressing MENU. 6. Press YES. This deletes the Easy Recording. • To cancel, press NO. 7.
Recording Your Keyboard Play Overdub Recording (Multi-track Recording) 1. Long-press RECORD. 2. Rotate the dial to select the Multi-track Recording you want to overdub. 3. Press RECORD. This enters record standby. 4. Long-press RECORD. This displays a record settings screen. 5. Press REC TRACK. 6. Rotate the dial to select the record destination track. • After you rotate the dial once to select a record destination track, you can change the selection further using – and +.
Recording Your Keyboard Play 7. Press REC START. Recording starts from the first measure, which is a preparation measure. Playback of the recorded track starts simultaneously. Now you can play along with the playback. • If you want to record your performance from the beginning without a preparation measure, start playing without pressing REC START. 8. Press RECORD to exit the recording operation.
Recording Your Keyboard Play Copying a Tone Recording or Rhythm Recording as a Multi-track Recording 1. Press MENU. This displays the menu screen. 2. Use U and I to select the 5 buttons menu that includes SONG. 3. Press SONG. This displays the song screen. 4. Rotate the dial to select the Tone Recording or Rhythm Recording you want to copy as a multi-track recording. • If you rotated the dial, press BACK. 5. Press MTR COPY. This displays “Sure?”. 6. Press YES.
Recording Your Keyboard Play Muting a Multi-track Recording Track 1. Press MENU. This displays the menu screen. 2. Use U and I to select the 5 buttons menu that includes SONG. 3. Press SONG. This displays the song screen. 4. Rotate the dial to select the Multi-track Recording you want to mute. • If you rotated the dial, press BACK. 5. Press TRACK MUTE. This displays the track mute setting screen. 6. Use U and I to select the 5 buttons menu that includes the number of the track you want to mute.
Recording Your Keyboard Play 7. Press the button for the number of the track you want to mute. The track that corresponds to the button you press is muted, which is indicated by a broken line under its track number. • To unmute a track, press its track number button again. 8. Press BACK to exit the setting operation.
Recording Your Keyboard Play Adjusting the Volume Level and Pan of Each Track of a Multi-track Recording (Mixing) 1. Press MENU. This displays the menu screen. 2. Use U and I to select the 5 buttons menu that includes SONG. 3. Press SONG. This displays the song screen. 4. Rotate the dial to select the Multi-track Recording you want to adjust. • If you rotated the dial, press BACK. 5. Press MIX. This displays the parameter selection screen. 6. To adjust the volume level, press VOLUME.
Recording Your Keyboard Play 9. Rotate the dial to adjust. • The original (pre-adjusted) track is retained until you save your adjustments in steps 12 and 13 below. If you want to discard your adjustments and revert to the original (pre-adjusted) track, select press NO in step 13. • Recorded volume values range from 0 to 127, and pan values range from –64 to +63. You can adjust the volume and pan values relative to this value in the range –127 to +127.
Recording Your Keyboard Play 14.When “Complete” appears on the display, press OK. This displays the parameter selection screen.
Recording Your Keyboard Play Copying a Multi-track Recording 1. Press MENU. This displays the menu screen. 2. Use U and I to select the 5 buttons menu that includes SONG. 3. Press SONG. This displays the song screen. 4. Rotate the dial to select the Multi-track Recording you want to copy. • If you rotated the dial, press BACK. 5. Press MANAGE. This displays the Multi-track Recording management screen. 6. Press SONG COPY. This displays the multi-track copy destination selection screen. 7.
Recording Your Keyboard Play 10.When “Complete” appears on the display, press OK. This completes the multi-track copy operation.
Recording Your Keyboard Play Deleting One or More of the Multi-track Recordings in Memory 1. Press MENU. This displays the menu screen. 2. Use U and I to select the 5 buttons menu that includes SONG. 3. Press SONG. This displays the song screen. 4. Rotate the dial to select the Multi-track Recording you want to delete. • If you rotated the dial, press BACK. 5. Press MANAGE. This displays the Multi-track Recording management screen. 6. Press SONG CLEAR. This displays “Sure?”. 7. Press YES.
Recording Your Keyboard Play Copying the Solo Track of a Multi-track Recording 1. Press MENU. This displays the menu screen. 2. Use U and I to select the 5 buttons menu that includes SONG. 3. Press SONG. This displays the song screen. 4. Rotate the dial to select the Multi-track Recording whose solo track you want to copy. • If you rotated the dial, press BACK. 5. Press MANAGE. This displays the Multi-track Recording management screen. 6. Press TRACK COPY.
Recording Your Keyboard Play 10.Press SELECT. This displays “Sure?”. 11.Press YES. This copies the solo track. • To cancel, press NO. 12.When “Complete” appears on the display, press OK. This exits the solo track copy operation.
Recording Your Keyboard Play Deleting a Multi-track Recording Track 1. Press MENU. This displays the menu screen. 2. Use U and I to select the 5 buttons menu that includes SONG. 3. Press SONG. This displays the song screen. 4. Rotate the dial to select the Multi-track Recording whose track you want to delete. • If you rotated the dial, press BACK. 5. Press MANAGE. This displays the Multi-track Recording management screen. 6. Press TRACK CLEAR. This displays the track delete selection screen. 7.
Recording Your Keyboard Play 10.When “Complete” appears on the display, press OK. This exits the track delete operation.
Recording and Playing the Sounds You Want (Sampling) Capturing Sounds as Tones Your Digital Keyboard lets you record any sounds you like from a portable audio player or smart device, and play them on the keyboard. For example, if you record the bark of a dog, you will be able to play an entire melody of dog barks. The sampling feature is a great way to create new sounds that are highly creative.
Recording and Playing the Sounds You Want (Sampling) 4. Press the button that corresponds to the melody sampling tone type. This displays a sampling tone setting screen. • When you display each sampling tone setting screen, the upper octave shift, upper 1 part octave shift, layer, and split settings are reset to their initial default settings. • You cannot use octave shift while the sampling screen is displayed.
Recording and Playing the Sounds You Want (Sampling) To sample sound from an external device connected to the AUDIO IN jack 1. Press MENU. This displays the menu screen. 2. Use U and I to select the 5 buttons menu that includes SAMPLING. 3. Press SAMPLING. This displays the sampling screen. 4. Press the button that corresponds to the melody sample tone type. This displays a sampling tone setting screen. • If there are no sampled sounds, “NOT EXIST” appears on the display. 5.
Recording and Playing the Sounds You Want (Sampling) 7. Press AUDIO IN. “Input” appears on the display, indicating that the Digital Keyboard is in the sampling standby mode. • For sampled drum tones, the maximum number of sounds that can be sampled is 16. 8. On the external device, produce the sound you want to capture. “Sampling” appears on the display, indicating that sampling has started. • Sampling may not start if the volume of the external device is low. 9.
Recording and Playing the Sounds You Want (Sampling) To import WAV files from a USB flash drive 1. Insert the USB flash drive where the WAV file you want to import is stored into the USB TO DEVICE port of the Digital Keyboard. • For information about USB flash drives, see “Using a USB Flash Drive” (page EN-248). 2. Press MENU. This displays the menu screen. 3. Use U and I to select the 5 buttons menu that includes SAMPLING. 4. Press SAMPLING. This displays the sampling screen. 5.
Recording and Playing the Sounds You Want (Sampling) 9. Press SELECT. This displays “Sure?”. • “Replace?” appears if data already exists in the destination. 10.Press YES. This imports the file. • To cancel, press NO. 11.When “Complete” appears on the display, press OK. This completes the file import operation. • When importing a WAV file, it takes up to about 10 seconds for a sampled melody tone and about 3 seconds for a sampled drum tone.
Recording and Playing the Sounds You Want (Sampling) To select a built-in drum tone as a base for the sampled drum tone 1. Press MENU. This displays the menu screen. 2. Use U and I to select the 5 buttons menu that includes SAMPLING. 3. Press SAMPLING. This displays the sampling screen. 4. Press DRUM. This displays the sampled drum tone setting screen. 5. Press BASE DRUM. This displays the bass built-in drum tone selection screen. 6.
Recording and Playing the Sounds You Want (Sampling) To configure the keyboard setting so the sound stops playing when you release the keyboard key 1. Press MENU. This displays the menu screen. 2. Use U and I to select the 5 buttons menu that includes SAMPLING. 3. Press SAMPLING. This displays the sampling screen. 4. Press DRUM. This displays the sampled drum tone setting screen. 5. Press SETTING. This displays the keyboard operation setting screen. 6. Press NOTE OFF.
Recording and Playing the Sounds You Want (Sampling) 7. Press and release a keyboard key. The sound will stop when you release the keyboard key. 8. Press NOTE OFF again to return the keyboard setting to continue producing sound when keyboard keys are released. This causes “NOTE OFF” to disappear from the display. • The sound also stops when you release the keyboard key in the case of a looped sound (page EN-220).
Recording and Playing the Sounds You Want (Sampling) Sounding a Looped Sound 1. Press MENU. This displays the menu screen. 2. Use U and I to select the 5 buttons menu that includes SAMPLING. 3. Press SAMPLING. This displays the sampling screen. 4. Press the button that corresponds to the melody sample tone type. This displays a sample tone setting screen. 5. Press SETTING. This displays the keyboard operation setting screen.
Recording and Playing the Sounds You Want (Sampling) 6. Press TYPE. This displays “LOOP”, which means that the sound will loop. • In the case of a looped sound, the loop time is determined according to the note value used as the unit and the number of loops. 7. Rotate the dial to select the note value. This displays the –/+ screen. • After you rotate the dial once to select a note value, you can change the selection further using – and +. • To go back to the previous screen, press BACK. 8. Press TIMES.
Recording and Playing the Sounds You Want (Sampling) 9. Rotate the dial to select the unit note value loops. This displays the –/+ screen. • After you rotate the dial once to select a number of loops, you can change the selection further using – and +. • To go back to the previous screen, press BACK. 10.Press a keyboard key. • For sampled melody tones, the sound loops as long as the keyboard key is depressed. • For sampled drum tones, the sampled sound is played as a loop when you press a keyboard key.
Recording and Playing the Sounds You Want (Sampling) To delete sampled data 1. Press MENU. This displays the menu screen. 2. Use U and I to select the 5 buttons menu that includes SAMPLING. 3. Press SAMPLING. This displays the sampling screen. 4. Press the button that corresponds to the melody sample tone type. This displays a sample tone setting screen. 5. If you sampled a drum tone, rotate the dial or press the applicable keyboard key to select the sampled data you want to delete. 6.
Recording and Playing the Sounds You Want (Sampling) 8. When “Complete” appears on the display, press OK. This exits the sample data delete operation.
Recording and Playing the Sounds You Want (Sampling) To delete a sampled tone 1. Press INSTRUMENT. This displays the instrument tone screen. 2. Rotate the dial to select a sampled tone. 3. Long-press MENU. This displays “Sure?”. 4. Press YES. This deletes the sample data. • To cancel, press NO. 5. When “Complete” appears on the display, press OK. This exits the sample data delete operation.
Customizing the Home Screen (Home Customization) You can change the Home Screen’s Base Display and/or the 5 buttons to customize the screen as you like. You can also configure a setting so various type of playback do not stop when you press HOME. Base display 5 buttons menu items • Saving Customize contents in MY SETUP keeps them from being deleted when the Digital Keyboard is turned off.
Customizing the Home Screen (Home Customization) 4. Rotate the dial to change the Base Display. Screens you can select are shown in the table below. Setting Display Name Tone screen Tone Rhythm screen Rhythm Tone/rhythm screen Tone/Rhythm • After you rotate the dial once to select a setting, you can change the setting further using – and +. • To go back to the previous screen, press BACK. 5. To exit the setting operation, press EXIT.
Customizing the Home Screen (Home Customization) Changing the Function of Each 5 buttons 1. Press MENU. This displays the menu screen. 2. Use U and I to select the 5 buttons menu that includes HOME CSTM. 3. Press HOME CSTM. This displays the Home Customization screen, which shows Base Display items. 4. Press 5 BTN (5 buttons). This displays the 5 buttons (5 BTN) setting screen. 5. Use U and I to select the button whose function you want to change. 6.
Customizing the Home Screen (Home Customization) Stopping All Types of Playback when HOME is Pressed (PANIC function) Pressing the HOME normally stops all types of playback. This is the “PANIC function”. This lets you stop playback instantly, even if you do not know how to stop a particular type of playback. 1. Press MENU. This displays the menu screen. 2. Use U and I to select the 5 buttons menu that includes HOME CSTM. 3. Press HOME CSTM.
Configuring Settings Setting Operation Use the procedure below to configure settings. 1. Press MENU. This displays the menu screen. 2. Use U and I to select the 5 buttons menu that includes SETTING. 3. Press SETTING. This displays the setting screen. 4. Use U and I to select a setting item. 5. Rotate the dial or use – and + to change the setting. 6. To exit the setting operation, press EXIT.
Configuring Settings Setting Item List Function Name Description Display Name Setting Transpose Can be used to raise the overall Transpose pitch in semitone steps to make it easier to play a piece written in a difficult key, or to adjust to a key that better matches a vocalist, another musical instrument, etc. Touch off velocity Can be used to specify the velocity value when Touch Response is disabled.
Configuring Settings Function Name Description Display Name Setting Tuning Can be used to fine tune the overall pitch by changing the frequency of A4 in 0.1Hz units. Tuning 415.5Hz to 440.0Hz to 465.9Hz (Initial Default: 440.0) Surround Can be used to create a more expansive sound. Surround Off, On (Initial Default: Off) AUDIO IN center cancel Can be used to cancel the center part of audio input using the AUDIO IN jack or Bluetooth audio.
Configuring Settings Function Name Description Display Name Initialize Can be used to return settings to Setting Initialize their initial factory defaults. Initialize All Can be used to return the entire Digital Keyboard to its initial factory default state. All Initialize Version Information Can be used to view version information. Version Setting • Some settings are retained even when the Digital Keyboard is turned off. See “Turning Power On or Off” (page EN-26).
Configuring Settings Returning Settings to Their Initial Factory Defaults 1. Press MENU. This displays the menu screen. 2. Use U and I to select the 5 buttons menu that includes SETTING. 3. Press SETTING. This displays the setting screen. 4. Use U and I to select “All Initialize”. 5. Press ENTER. This displays “Sure?”. 6. Press YES. After initialization is complete, the message “Complete” appears for a few seconds, and then the Digital Keyboard restarts. • To cancel, press NO.
Using the MIDI Controller ■ MIDI Controllers Your Digital Keyboard has a MIDI controller function that allows you to connect to an external device such as a personal computer and send a variety of performance information (MIDI data) to the composition software of the computer. You can also output performance information and other data that is not output during normal performance of this Digital Keyboard by operating knobs and buttons.
Using the MIDI Controller To change the pitch of NOTE message notes in octave units 1. Press MENU. This displays the menu screen. 2. Use U and I to select the 5 buttons menu that includes MIDI CTRL. 3. Press MIDI CTRL. This displays the MIDI controller screen. 4. Use OCT– and OCT+ to change the shift amount. The displayed “OCT” value changes in accordance with your setting and the NOTE message note pitch changes in octave units. • You can specify a value in the range of –3 to +3 octaves.
Using the MIDI Controller To adjust the velocity of the NOTE ON message in accordance with key press intensity 1. Press MENU. This displays the menu screen. 2. Use U and I to select the 5 buttons menu that includes MIDI CTRL. 3. Press MIDI CTRL. This displays the MIDI controller screen. 4. Press TOUCH and then select the setting you want. This displays the setting on the screen. Each press of TOUCH changes the setting.
Using the MIDI Controller 5. If you selected Off for the setting, rotate the dial to adjust the velocity of the NOTE ON message. • After you rotate the dial once to select a value, you can change the velocity setting further using – and +. • To return the setting to its initial default, press – and + at the same time. • To go back to the previous screen, press BACK.
Using the MIDI Controller Using the Arpeggiator 1. Press MENU. This displays the menu screen. 2. Use U and I to select the 5 buttons menu that includes MIDI CTRL. 3. Press MIDI CTRL. This displays the MIDI controller screen. 4. Press ARP. This displays “ARP”, which indicates the arpeggiator is turned on. 5. Long-press ARP. This displays the arpeggiator screen. • For information about arpeggiator operations, see “Sounding Arpeggio Phrases Automatically (Arpeggiator)” (page EN-115).
Using the MIDI Controller Changing the Channel Message Channel 1. Press MENU. 2. Use U and I to select the 5 buttons menu that includes MIDI CTRL. 3. Press MIDI CTRL. This displays the MIDI controller screen. 4. Press SETTING. This displays the MIDI controller setting screen. 5. Rotate the dial to change the channel message channel. This displays the –/+ screen. • Select a channel within the range of 1 to 16.
Using the MIDI Controller Sending a Program Change Message 1. Press MENU. This displays the menu screen. 2. Use U and I to select the 5 buttons menu that includes MIDI CTRL. 3. Press MIDI CTRL. This displays the MIDI controller screen. 4. Press SETTING. This displays the MIDI controller setting screen. 5. Press PROGRAM. This displays the program change send screen. 6. Rotate the dial or use – and + to select a program change number. 7. Press SEND. This sends the program change message.
Using the MIDI Controller Sending a Control Change Message ■ To use a knob for continuous send 1. Press MENU. This displays the menu screen. 2. Use U and I to select the 5 buttons menu that includes MIDI CTRL. 3. Press MIDI CTRL. This displays the MIDI controller screen. 4. Press SETTING. This displays the MIDI controller setting screen. 5. Press the button that corresponds to the knob where you want to assign the Control Change. This displays the knob setting screen.
Using the MIDI Controller 6. Rotate the dial to select a control change number. This displays the –/+ screen. • You can select a control change number in the range of 0 to 127. • After you rotate the dial once to select a control change number, you can change the selection further using – and +. • To go back to the previous screen, press BACK. 7. Rotate a knob. This displays the send value and continually sends the control change message. ■ To use a button operation to send 1. Press MENU.
Using the MIDI Controller 5. Press the button that corresponds to the knob where you want to assign the Control Change. This displays the knob setting screen. 6. Press DATA. This displays the data send screen. 7. Rotate a knob or the dial, or use – and + to select the data you want. • Rotating a knob while the data transmission screen is displayed does not send a control change message. 8. Press SEND. This sends a control change message.
Using the MIDI Controller To switch between the control change MSB and LSB 1. Press MENU. This displays the menu screen. 2. Use U and I to select the 5 buttons menu that includes MIDI CTRL. 3. Press MIDI CTRL. This displays the MIDI controller screen. 4. Press SETTING. This displays the MIDI controller setting screen. 5. Press the button that corresponds to the knob where you want to assign the Control Change. This displays the knob setting screen. 6. Select the Control Change MSB or LSB.
Using the MIDI Controller 7. Press LSB or MSB. This selects the corresponding control change LSB or MSB. • This displays the LSB or MSB button, so you can switch between them if you like.
Using the MIDI Controller To send a system real-time message start/stop 1. Press MENU. This displays the menu screen. 2. Use U and I to select the 5 buttons menu that includes MIDI CTRL. 3. Press MIDI CTRL. This displays the MIDI controller screen. 4. Press a. This displays “PLAYING” and sends a system real-time message start. 5. Press a again. This causes “PLAYING” to disappear from the display and sends a system real-time message stop.
Using a USB Flash Drive Your Digital Keyboard supports the use of a commercially available USB flash drive to perform the operations below. • Formatting USB flash drives. • Saving of Digital Keyboard MY SETUP, recorded song, and other data to a USB flash drive. • Importing of MY SETUP, recorded song, and other data from a USB flash drive to Digital Keyboard memory. • Using the Digital Keyboard to play back general song data (MIDI file audio file) copied to a USB flash drive using a computer.
Using a USB Flash Drive Inserting and Removing a USB Flash Drive on the Digital Keyboard Supported USB Flash Drives Your Digital Keyboard supports USB flash drives formatted to FAT (FAT32 or exFAT). If your USB flash drive is formatted to a different file system, use the Windows format function on a computer to reformat it to FAT (FAT32 or exFAT). Do not use quick format. • Never insert anything besides a CASIO specified device or a USB flash drive into the USB TO DEVICE port.
Using a USB Flash Drive Mounting a USB Flash Drive on the Digital Keyboard 1. As shown in the illustration below, insert a USB flash drive into the Digital Keyboard’s USB TO DEVICE port. • Carefully push the USB flash drive in as far as it goes. Do not use undue force when inserting the USB flash drive. USB TO DEVICE port USB flash drive Removing a USB Flash Drive From the Digital Keyboard 1.
Using a USB Flash Drive USB Flash Drive Formatting • Be sure to format a USB flash drive on the Digital Keyboard before using it for the first time. • Formatting a USB flash drive deletes all data currently stored on it. Before formatting a USB flash drive, make sure it does not have any valuable data stored on it. • The format operation performed by this Digital Keyboard is a “quick format”.
Using a USB Flash Drive 8. When “Complete” appears on the display, press OK. This exits the formatting operation. • Formatting a USB flash drive on the Digital Keyboard creates a folder named “MUSICDAT” in its root directory. Use this folder when exchanging data between the Digital Keyboard and USB flash drive.
Using a USB Flash Drive USB Flash Drive Operations The section provides information about the operations below. • Saving Digital Keyboard data to a USB flash drive • Importing Data (Files) from a USB Flash Drive to Digital Keyboard Memory • Deleting Digital Keyboard Importable Data (Files) on a USB Flash Drive • Renaming Digital Keyboard Importable Data (Files) on a USB Flash Drive ■ Data Types Data types supported by your Digital Keyboard are those shown in the table below.
Using a USB Flash Drive Saving Digital Keyboard Data to a USB Flash Drive 1. Insert the USB flash drive into the Digital Keyboard’s USB TO DEVICE port. 2. Press MENU. This displays the menu screen. 3. Use U and I to select the 5 buttons menu that includes MEDIA. 4. Press MEDIA. This displays the media screen. 5. Press SAVE. 6. Press the button that corresponds to the data type you want to save. • If you select ALL DATA as the data type, steps 7 and 8 are not necessary. Proceed to step 9.
Using a USB Flash Drive 11.Press YES to save the file. This saves the file to the USB flash drive. • To cancel, press NO. • If you are saving ALL DATA, the save operation can take several minutes. 12.When “Complete” appears on the display, press OK. • When saving Multi-track Recording data as a standard MIDI file (SMF), only the system track data is saved if the system track contains data. If the system track does not contain any data, only the solo track data is saved.
Using a USB Flash Drive Loading Data From a USB Flash Drive to Digital Keyboard Memory 1. Insert the USB flash drive into the Digital Keyboard’s USB TO DEVICE port. 2. Press MENU. This displays the menu screen. 3. Use U and I to select the 5 buttons menu that includes MEDIA. 4. Press MEDIA. This displays the media screen. 5. Press LOAD. 6. Press the button that corresponds to the type of data you want to load.
Using a USB Flash Drive 11.Press YES. This loads the file. • To cancel, press NO. • If you are saving ALL DATA, the save operation can take several minutes. 12.When “Complete” appears on the display, press OK. • Connecting a smart device running the Lyric Creator app to this Digital Keyboard and loading ALL DATA will not synchronize the list of lyric tones. Reconnect the smart device with this Digital Keyboard. This reflects the correct information.
Using a USB Flash Drive Deleting a USB Flash Drive File 1. Insert the USB flash drive into the Digital Keyboard’s USB TO DEVICE port. 2. Press MENU. This displays the menu screen. 3. Use U and I to select the 5 buttons menu that includes MEDIA. 4. Press MEDIA. This displays the media screen. 5. Press DELETE. 6. Touch the data type of the data you want to delete. • If you pressed SONG, press the button that corresponds to the song type you want to delete.
Using a USB Flash Drive 10.When “Complete” appears on the display, press OK.
Using a USB Flash Drive Renaming a File on a USB Flash Drive 1. Insert the USB flash drive into the Digital Keyboard’s USB TO DEVICE port. 2. Press MENU. This displays the menu screen. 3. Use U and I to select the 5 buttons menu that includes MEDIA. 4. Press MEDIA. This displays the media screen. 5. Use U and I to select the 5 buttons menu that includes RENAME. 6. Press RENAME. 7. Press the button that corresponds to the data type you want to rename.
Using a USB Flash Drive 12.Press YES. This renames the file. • To cancel, press NO. 13.When “Complete” appears on the display, press OK. • Changing the letters in a file name from upper case to lower case or vice versa does not count as a name change. Change the file name to something else.
Connecting with External Devices This Digital Keyboard can be connected to various types of external devices. You can enhance your enjoyment by connecting with a smart device (APP function) or a computer. Linking with a Smart Device and Using Lyric Creator After using a cable to connect this Digital Keyboard with a smartphone, tablet or other smart device, you can use the Lyric Creator app to perform the operations below.
Connecting with External Devices Connecting with a Smart Device Use a commercially available USB cable for connection. • You cannot use Bluetooth to connect with a Smart Device. ■ Using a Cable to Connect the Digital Keyboard with a Smart Device For information about the requirements for a cable used for connection, visit the website below. https://web.casio.com/app/en/lyric_creator/support/connect.
Connecting with External Devices Linking with a Smart Device and Using CASIO MUSIC SPACE After connecting this Digital Keyboard to a smartphone, tablet, or other smart device, you can use the CASIO MUSIC SPACE app to perform the operations below.
Connecting with External Devices Connecting with a Smart Device There are two ways to connect with a smart device: Bluetooth and a commercially available USB cable. ■ Using Bluetooth to Connect the Digital Keyboard with a Smart Device You can use the Wireless MIDI & audio adaptor for Bluetooth connection. 1. Referring to “Downloading the Smart Device App” (page EN-264), install the app on the smart device. 2. Plug the Wireless MIDI & audio adaptor into the USB TO DEVICE port (page EN-14).
Connecting with External Devices ■ Using a Cable to Connect the Digital Keyboard with a Smart Device For information about cables required for connection, refer to the connection settings of the CASIO MUSIC SPACE app. 1. Referring to “Downloading the Smart Device App” (page EN-264), install the app on the smart device. 2. Use a commercially available USB cable to connect the smart device port to the Digital Keyboard’s USB TO HOST port.
Connecting with External Devices Connecting to a Computer and Using MIDI You can connect the Digital Keyboard to a computer and exchange MIDI data between them. You can record your performance using computer music software, and use the Digital Keyboard to play data sent from a computer. ■ Minimum Computer System Requirements The following shows the minimum computer system requirements for sending and receiving MIDI data. Be sure to check your computer system setup before trying to install the driver.
Connecting with External Devices ■ Connecting to a Computer • Incorrect connections can make data exchange impossible. Be sure to follow the steps of the procedure below. 1. Turn off the Digital Keyboard and then start up your computer. • Do not start up the music software on your computer yet! 2. Use a commercially available USB cable to connect your computer to the Digital Keyboard’s USB TO HOST port. • Use a USB 2.0 or 1.1 A-micro-B connector type USB cable that supports data communication. 3.
Connecting with External Devices ■ MIDI Sync Mode Entering the MIDI sync mode lets you synchronize the tempo with an external MIDI device or music software running on your computer. There are two modes: a master mode that syncs to the tempo of this Digital Keyboard, and a slave mode that syncs to the tempo of an external MIDI device or music software running on your computer.
Connecting with External Devices Using a Cable to Connect with an Audio Device You can connect this Digital Keyboard to a commercially available playback device or amplifier, or to a recording device. You can also use this Digital Keyboard to sound output from a portable audio player or another device, and use that as backing for your keyboard play.
Connecting with External Devices ● To connect an external device to the LINE OUT jack You can use a commercially available connecting cable for connection. Audio amplifier AUX IN jacks, etc. Pin plugs RIGHT (Red) LEFT (White) LINE OUT R jacks (Standard jack (6.3mm)) LINE OUT L/MONO jacks (Standard jack (6.3mm)) Guitar amplifier Keyboard amplifier, etc. INPUT 1 INPUT 2 Standard plug (6.
Connecting with External Devices ■ Sounding Input From an External Device on This Digital Keyboard Connection requires commercially available connecting cords, supplied by you. The connecting cord should have a stereo mini plug on one end for connection to this Digital Keyboard and a plug that matches the configuration of the output jack of external device on the other end. When sounding input from an external device with this Digital Keyboard, use the external device controls to adjust the volume level.
Connecting with External Devices Sounding a Bluetooth Audio Capable Device (Bluetooth Audio Pairing) You can use a Wireless MIDI & audio adaptor (WU-BT10) to pair this Digital Keyboard with an external Bluetooth audio capable audio device and then playback from the external device through this Digital Keyboard’s speakers. • Before performing the pairing operation, turn down the volume levels of this Digital Keyboard and the external device.
Connecting with External Devices 5. Press PAIRING. This displays the Bluetooth audio pairing screen with “Pairing” shown, indicating Bluetooth audio pairing. • A broken line is under the Bluetooth icon while the Digital Keyboard is Bluetooth audio paired with another device. • To stop Bluetooth audio pairing, press CANCEL. 6. Use the setting screen of the Bluetooth-capable audio device to select “WU-BT10 AUDIO” to pair with this Digital Keyboard.
Connecting with External Devices Deleting Bluetooth Audio Capable Device Pairing Registration • Performing the procedure below will delete the pairing registration between this Digital Keyboard and it’s currently paired Bluetooth audio capable device. If you are experiencing connectivity problems with a Bluetooth audio capable device, perform the procedure below and then perform the procedure under “Sounding a Bluetooth Audio Capable Device (Bluetooth Audio Pairing)” (page EN-273).
Connecting with External Devices 7. When “Complete” appears on the display, press OK. This exits the Bluetooth audio-capable pairing registration delete operation. • You can also display the wireless screen by pressing MENU and then WIRELESS. • The WIRELESS may not be displayed on the home screen due to the Home Customization setting.
Connecting with External Devices Connection with a Bluetooth Low Energy MIDI Device You can use the Wireless MIDI & audio adaptor to connect the Digital Keyboard with a Bluetooth Low Energy MIDI device. 1. Long-press P (Power) to turn off the Digital Keyboard. 2. Plug the Wireless MIDI & audio adaptor into the USB TO DEVICE port (page EN-14). 3. Press P (Power) to turn on the Digital Keyboard. 4.
Connecting with External Devices Disabling Wireless Functions You can disable the Digital Keyboard’s wireless function when you are not using the Wireless MIDI & audio adaptor for Bluetooth connection. 1. Press HOME. This displays the home screen. 2. Press WIRELESS. This displays the wireless screen. 3. Press ADAPTOR. The Bluetooth icon disappears from the display, indicating that wireless is turned off. Bluetooth icon (not displayed) 4. To enable the wireless function, press ADAPTOR again.
Reference Troubleshooting Symptom Required Action Included Accessories I can’t find included items during unpacking. Carefully check inside all of the packing materials. Power Requirements Power does not turn on. • Check the AC adaptor or make sure that the batteries are facing correctly (page EN-8). • Replace the batteries with new ones. Or use AC adaptor power (page EN-8). Press P (Power) to turn power back on. When P (Power) is pressed, the display appears momentarily, but power does not turn on.
Reference Symptom Required Action Nothing happens when I start an Auto Accompaniment. • With rhythms 234 to 243, nothing sounds if you do not play a chord on the keyboard. Try playing a chord (page EN-160). • Check and adjust the rhythm volume level (page EN-151). • If you have not saved user rhythms to rhythm numbers 244 to 293, nothing will sound if you select one of these rhythms and press a (page EN-169). • Turn the Digital Keyboard off and then back on (page EN-26). This will initialize settings.
Reference Symptom Required Action The pitch of the notes does not match other accompanying instruments or notes sound strange when played along with other instruments. • Check and adjust the transpose setting (page EN-131) and tuning setting (page EN-132). • Turn the Digital Keyboard off and then back on (page EN-26). This will initialize settings. Settings are not initialized if MY SETUP power on recall is enabled. The reverb of notes seems to change suddenly.
Reference Error Indicators Display Name Cause Action Measure Limit You are attempting to record more than 1,000 measures. Make your recordings up to 999 measures long. Memory Full You are attempting a recording that exceeds the allowable per-song size limit. Keep song recordings with the allowable per-song size limit Data Full You are attempting to copy a Tone Recording and Rhythm Recording as a Multi-track Recording when there is no empty Multi-track Recording number.
Reference Display Name Cause Action Version Not Supported The USB flash drive file version is not supported by the Digital Keyboard. Use a version that is supported by the Digital Keyboard. Unformatted The USB flash drive format is not compatible with the Digital Keyboard. Use a computer to format the USB flash drive to a format that is compatible with the Digital Keyboard. The USB flash drive is corrupted. Use a different USB flash drive.
Reference Product Specifications Model CT-S1000V Keyboard 61 keys Touch Response 3 types, Off Maximum Polyphony 64 notes Tones Preset Tones Other 900 preset tones (including 100 lyric tones) Layer, Split, Sustain, Portamento Vocal Synthesis Language (Japanese, English); Vocalist (22 types); User vocalist; Vocalist parameters (gender, age, voice); Lyric tone performance modes (PHRASE Mode, NOTE Mode); Syllable control; Lyric Tone retrigger; Lyric Tone sequence; Up to 150 user lyric tones Effects
Reference MIDI Recorder Real-time recording, playback Tone Recording 1 song Rhythm Recording 1 song Multi-track Recording 5 songs, 6 tracks (1 system track, 5 solo tracks) Capacity Sampling Sampling Frequencies 1 song, approximately 40,000 notes Sampled melody × 1, sampled drum set × 1 (16 notes) 44.1 kHz Sampling Channels Stereo Sampling Bits 16 Other loop function Other Functions Transpose ±1 octave (–12 to 0 to +12 semitones) Octave Shift –3 to 0 to +3 octaves Tuning A4 = 415.
Reference Power Requirements 2-Way Power Batteries 6 AA-size alkaline batteries or AA-size rechargeable nickel-metal hydride batteries Continuous Operation Approximately 3 hours (alkaline batteries), approximately 3 hours (rechargeable nickel-metal hydride batteries)*3 Actual continuous operation time may be shorter due to battery type, performance type, and usage environment.
Reference AC Adaptor Handling Precautions Model: AD-A12150LW 1. Read these instructions. 2. Keep these instructions on hand. 3. Heed all warnings. 4. Follow all instructions. 5. Do not use this product near water. 6. Clean only with a dry cloth. 7. Do not install near radiators, heat registers, stoves, or any other source of heat (including amplifiers). 8. Use only attachments and accessories specified by the manufacturer. 9. Refer all servicing to qualified service personnel.
Reference Tone List No.
Reference Program Change Bank Select MSB Bank Select LSB *1 42 DYNAMIC EP 4 32 0/64 43 ELEC.PIANO 1 4 1 0/64 44 ELEC.PIANO 2 4 2 0/64 45 ELEC.PIANO 3 4 3 0/64 No. Tone Name 46 ELEC.PIANO 4 4 4 0/64 47 ELEC.PIANO 5 5 34 0/64 DSP Tone Advanced Tone Advanced Part Layer Octave Tone *2 Shift 48 ELEC.PIANO 6 4 5 0/64 49 TREM 60'S E.PIANO 4 25 0/64 50 60'S E.PIANO 4 6 0/64 51 AMP E.PIANO 1 4 36 0/64 52 AMP E.PIANO 2 4 37 0/64 53 PAN E.
Reference No. Tone Name Program Change Bank Select MSB Bank Select LSB *1 DSP Tone 86 TUBULAR BELL 14 32 0/64 87 CHURCH BELLS 14 33 0/64 Advanced Tone ELEC.ORGAN 88 JS ORGAN 17 32 0/64 89 AMP ORGAN 1 16 24 0/64 90 ROCK ORGAN 1 18 24 0/64 91 HARD ROCK ORGAN 18 25 0/64 92 GOSPEL ORGAN 1 20 24 0/64 93 VELO.
Reference No.
Reference Program Change Bank Select MSB Bank Select LSB *1 173 CLEAN GUITAR 6 27 33 0/64 174 CLEAN GUITAR 7 27 7 0/64 175 CHORUS CLEAN GUITAR 1 27 5 0/64 176 CHORUS CLEAN GUITAR 2 27 6 0/64 177 WAH CLEAN GUITAR 27 34 0/64 178 CRUNCH ELEC.GUITAR 1 29 3 0/64 179 CRUNCH ELEC.GUITAR 2 29 32 0/64 180 CRUNCH ELEC.
Reference Program Change Bank Select MSB Bank Select LSB *1 217 FINGERED BASS VELO.SLAP 1 33 33 0/64 218 FINGERED BASS VELO.SLAP 2 33 32 0/64 –1 219 SLAP BASS 1 36 1 0/64 –1 220 FINGER SLAP BASS 1 36 5 0/64 221 CHORUS FINGERED BASS 1 33 39 0/64 –1 222 PHASER FINGERED BASS 33 40 0/64 –1 No.
Reference Program Change Bank Select MSB 262 SOLO VIOLIN 40 32 0/64 263 VIOLIN 40 33 0/64 No.
Reference Program Change Bank Select MSB Bank Select LSB *1 305 SYMPHONIC BRASS 61 40 0/64 306 STEREO BRASS 61 1 0/64 307 BRASS 61 2 0/64 308 BRASS SECTION 1 61 3 0/64 309 BRASS SECTION 2 61 4 0/64 310 BRASS SECTION 3 61 37 0/64 311 AMBIENT BRASS 61 38 0/64 312 BIG BAND BRASS 61 32 0/64 No.
Reference No. Tone Name Program Change Bank Select MSB Bank Select LSB *1 DSP Tone 348 BARITONE SAX 67 1 0/64 349 AMBIENT SAX 1 65 38 0/64 350 AMBIENT SAX 2 67 33 0/64 351 HARD ALTO SAX 65 2 0/64 0/64 352 TENOR SAXYS 66 4 353 SAX SECTION 1 65 40 0/64 354 SAX SECTION 2 65 41 0/64 355 SOLO OBOE 68 32 0/64 356 SOLO BASSOON 70 32 0/64 357 CLARINET 71 32 0/64 Advanced Tone Advanced Part Layer Octave Tone *2 Shift Mono Mode –1 –1 REED 358 VELO.
Reference Program Change Bank Select MSB Bank Select LSB *1 391 HOUSE CHORD SYNTH 81 44 0/64 392 POPULAR PLUCK 1 81 19 0/64 393 POPULAR PLUCK 2 81 20 0/64 394 VOCAL CHOP SYNTH 1 85 16 0/64 395 VOCAL CHOP SYNTH 2 85 17 0/64 396 DSP MODULATED SYNTH 1 81 45 0/64 397 DSP MODULATED SYNTH 2 81 46 0/64 398 DSP MODULATED SYNTH 3 81 47 0/64 399 X SYNTH LEAD 1 81 7 0/64 400 X SYNTH LEAD 2 80 36 0/64 401 X SYNTH LEAD 3 81 32 0/64 402 X SYNTH LEAD 4 80 37
Reference Program Change Bank Select MSB Bank Select LSB *1 437 DSP MODULATED LEAD 1 81 48 0/64 438 DSP MODULATED LEAD 2 81 49 0/64 439 DSP MODULATED LEAD 3 81 50 0/64 440 VENT LEAD 82 32 0/64 441 CHURCH LEAD 85 32 0/64 442 DOUBLE VOICE LEAD 85 34 0/64 443 SYNTH-VOICE LEAD 85 1 0/64 444 FIFTH LEAD 86 32 0/64 No.
Reference Program Change Bank Select MSB Bank Select LSB *1 482 80'S SYNTH-STR.2 50 34 0/64 483 DIGITAL SYNTH-STR.1 51 33 0/64 484 DIGITAL SYNTH-STR.2 50 4 0/64 485 FAST SYNTH-STRINGS 50 5 0/64 No.
Reference No.
Reference Program Change Bank Select MSB Bank Select LSB *1 570 SAROD 1 105 10 0/64 571 SAROD 2 105 41 0/64 572 SARANGI 1 110 8 0/64 573 SARANGI 2 110 43 0/64 574 VEENA 1 104 36 0/64 575 VEENA 2 104 37 0/64 576 SHANAI 111 1 0/64 577 BANSURI 72 9 0/64 578 PUNGI 111 8 0/64 579 TABLA 116 41 0/64 No. Tone Name DSP Tone Advanced Tone Advanced Part Layer Octave Tone *2 Shift INDONESIAN 580 ANGKLUNG TREM.
Reference No.
Reference Program Change Bank Select MSB Bank Select LSB *1 656 GM PIPE ORGAN 19 0 0 657 GM REED ORGAN 20 0 0 658 GM ACCORDION 21 0 0 659 GM HARMONICA 22 0 0 660 GM BANDONEON 23 0 0 661 GM NYLON STR.GUITAR 24 0 0 662 GM STEEL STR.GUITAR 25 0 0 663 GM JAZZ GUITAR 26 0 0 No.
Reference No.
Reference Program Change Bank Select MSB Bank Select LSB *1 748 GM SHANAI 111 0 0 749 GM TINKLE BELL 112 0 0 750 GM AGOGO 113 0 0 751 GM STEEL DRUMS 114 0 0 752 GM WOOD BLOCK 115 0 0 No.
Reference Program Change Bank Select MSB Bank Select LSB *1 793 CHINESE SET 51 120 0 794 SFX SET 1 60 120 0 Drum 795 SFX SET 2 61 120 0 Drum 796 SNARE SET 1 64 120 0 Drum 797 SNARE SET 2 65 120 0 Drum No.
Reference Lyric Tone List No.
Reference No.
Reference VOCALIST List No.
Reference Rhythm List No.
Reference No.
Reference No.
Reference Arpeggiator List No.
Reference No.
Reference Drum Assignment List Key C-1 C{-1 D-1 E-1 F-1 E}-1 F{-1 G-1 A}-1 A-1 B-1 C0 B}-1 C{0 D0 E0 F0 E}0 F{0 G0 A}0 A0 B0 C1 B}0 C{1 D1 E1 F1 E}1 F{1 G1 A}1 A1 B1 C2 B}1 C{2 D2 E2 F2 E}2 F{2 G2 A}2 A2 B2 C3 B}2 C{3 D3 E3 F3 E}3 F{3 G3 A}3 A3 B}3 B3 C4 C{4 D4 E}4 E4 F4 G4 A4 F{4 A}4 B}4 B4 C5 D5 C{5 E}5 E5 F5 F{5 G5 A}5 A5 B5 C6 B}5 C{6 D6 E}6 E6 F6 F{6 G6 A}6 A6 B6 C7 B}6 C{7 D7 E}7 E7 F7 F{7 G7 A}7 A7 B}7 B7 C8 C{8 D8 E}8 E8 F8 G8 F{8 A}8 A8 B}8 B8 C9 C{9 D9 E}
Reference Key C-1 C{-1 D-1 E-1 F-1 E}-1 F{-1 G-1 A}-1 A-1 B-1 C0 B}-1 C{0 D0 E0 F0 E}0 F{0 G0 A}0 A0 B0 C1 B}0 C{1 D1 E1 F1 E}1 F{1 G1 A}1 A1 B1 C2 B}1 C{2 D2 E2 F2 E}2 F{2 G2 A}2 A2 B2 C3 B}2 C{3 D3 E3 F3 E}3 F{3 G3 A}3 A3 B}3 B3 C4 C{4 D4 E}4 E4 F4 G4 A4 F{4 A}4 B}4 B4 C5 D5 C{5 E}5 E5 F5 F{5 G5 A}5 A5 B5 C6 B}5 C{6 D6 E}6 E6 F6 F{6 G6 A}6 A6 B6 C7 B}6 C{7 D7 E}7 E7 F7 F{7 G7 A}7 A7 B}7 B7 C8 C{8 D8 E}8 E8 F8 G8 F{8 A}8 A8 B}8 B8 C9 C{9 D9 E}9 E9 F9 G9 F{9 Note
Reference Key C-1 C{-1 D-1 E-1 F-1 E}-1 F{-1 G-1 A}-1 A-1 B-1 C0 B}-1 C{0 D0 E0 F0 E}0 F{0 G0 A}0 A0 B0 C1 B}0 C{1 D1 E1 F1 E}1 F{1 G1 A}1 A1 B1 C2 B}1 C{2 D2 E2 F2 E}2 F{2 G2 A}2 A2 B2 C3 B}2 C{3 D3 E3 F3 E}3 F{3 G3 A}3 A3 B}3 B3 C4 C{4 D4 E}4 E4 F4 G4 A4 F{4 A}4 B}4 B4 C5 D5 C{5 E}5 E5 F5 F{5 G5 A}5 A5 B5 C6 B}5 C{6 D6 E}6 E6 F6 F{6 G6 A}6 A6 B6 C7 B}6 C{7 D7 E}7 E7 F7 F{7 G7 A}7 A7 B}7 B7 C8 C{8 D8 E}8 E8 F8 G8 F{8 A}8 A8 B}8 B8 C9 C{9 D9 E}9 E9 F9 G9 F{9 Note
Reference Key C-1 C{-1 D-1 E-1 F-1 E}-1 F{-1 G-1 A}-1 A-1 B-1 C0 B}-1 C{0 D0 E0 F0 E}0 F{0 G0 A}0 A0 B0 C1 B}0 C{1 D1 E1 F1 E}1 F{1 G1 A}1 A1 B1 C2 B}1 C{2 D2 E2 F2 E}2 F{2 G2 A}2 A2 B2 C3 B}2 C{3 D3 E3 F3 E}3 F{3 G3 A}3 A3 B}3 B3 C4 C{4 D4 E}4 E4 F4 G4 A4 F{4 A}4 B}4 B4 C5 D5 C{5 E}5 E5 F5 F{5 G5 A}5 A5 B5 C6 B}5 C{6 D6 E}6 E6 F6 F{6 G6 A}6 A6 B6 C7 B}6 C{7 D7 E}7 E7 F7 F{7 G7 A}7 A7 B}7 B7 C8 C{8 D8 E}8 E8 F8 G8 F{8 A}8 A8 B}8 B8 C9 C{9 D9 E}9 E9 F9 G9 F{9 Note
Reference Key C-1 C{-1 D-1 E-1 F-1 E}-1 F{-1 G-1 A}-1 A-1 B-1 C0 B}-1 C{0 D0 E0 F0 E}0 F{0 G0 A}0 A0 B0 C1 B}0 C{1 D1 E1 F1 E}1 F{1 G1 A}1 A1 B1 C2 B}1 C{2 D2 E2 F2 E}2 F{2 G2 A}2 A2 B2 C3 B}2 C{3 D3 E3 F3 E}3 F{3 G3 A}3 A3 B}3 B3 C4 C{4 D4 E}4 E4 F4 G4 A4 F{4 A}4 B}4 B4 C5 D5 C{5 E}5 E5 F5 F{5 G5 A}5 A5 B5 C6 B}5 C{6 D6 E}6 E6 F6 F{6 G6 A}6 A6 B6 C7 B}6 C{7 D7 E}7 E7 F7 F{7 G7 A}7 A7 B}7 B7 C8 C{8 D8 E}8 E8 F8 G8 F{8 A}8 A8 B}8 B8 C9 C{9 D9 E}9 E9 F9 G9 F{9 Note
Reference Key C-1 C{-1 D-1 E-1 F-1 E}-1 F{-1 G-1 A}-1 A-1 B-1 C0 B}-1 C{0 D0 E0 F0 E}0 F{0 G0 A}0 A0 B0 C1 B}0 C{1 D1 E1 F1 E}1 F{1 G1 A}1 A1 B1 C2 B}1 C{2 D2 E2 F2 E}2 F{2 G2 A}2 A2 B2 C3 B}2 C{3 D3 E3 F3 E}3 F{3 G3 A}3 A3 B}3 B3 C4 C{4 D4 E}4 E4 F4 G4 A4 F{4 A}4 B}4 B4 C5 D5 C{5 E}5 E5 F5 F{5 G5 A}5 A5 B5 C6 B}5 C{6 D6 E}6 E6 F6 F{6 G6 A}6 A6 B6 C7 B}6 C{7 D7 E}7 E7 F7 F{7 G7 A}7 A7 B}7 B7 C8 C{8 D8 E}8 E8 F8 G8 F{8 A}8 A8 B}8 B8 C9 C{9 D9 E}9 E9 F9 G9 F{9 DRUM
Reference Versatile Tone Map Key Velocity Sound 155 VERSATILE NYLON GUITAR 1-30 Normal mp 31-60 Normal mf 61-75 Ghost Note 76-90 Mute C1 - B6 91-105 Hammering 106-120 Glissando 121-127 Open Harmonics C7 1-127 Strum 1 C{7 1-127 Strum 2 D7 1-127 Strum 3 E}7 1-127 Strum 4 E7 1-127 Strum 5 F7 1-127 Strum 6 F{7 1-127 Strum 7 G7 1-127 Strum 8 A}7 1-127 Strum 9 A7 1-127 Strum 10 B}7 1-127 Strum 11 B7 1-127 Strings Slap 1 C8 1-127 Strings Slap 2 C{8 1-127 Strings Slap 3 D8 1-127 Strings Slap 4 E}8 1-127 Strings Sl
Reference Key Velocity Sound B}7 1-127 Strum 11 B7 1-127 Strum 12 C8 1-127 Strum 13 C{8 1-127 Strum 14 D8 1-127 Low Ghost Note 1 E}8 1-127 Low Ghost Note 2 E8 1-127 Low Ghost Note 3 F8 1-127 Low Ghost Note 4 F{8 1-127 Low Ghost Note 5 G8 1-127 Low Ghost Note 6 A}8 1-127 Low Ghost Note 7 A8 1-127 Low Ghost Note 8 B}8 1-127 Low Ghost Note 9 B8 1-127 Low Ghost Note 10 C9 1-127 Fret Noise1 C{9 1-127 Fret Noise2 D9 1-127 Fret Noise3 E}9 1-127 Fret Noise4 E9 1-127 Fret Noise5 F9 1-127 Fret Noise6 F{9 1-127 Fret
Reference DSP List DSP No.
Reference DSP No.
Reference DSP No.
Reference DSP Effect List DSP Module List Module Number DSP Module Name Indicator Description Mono 1-Band EQ MONO 1EQ This is a single-band monaural equalizer. Mono 2-Band EQ MONO 2EQ This is a dual-band monaural equalizer. Mono 3-Band EQ MONO 3EQ This is a three-band monaural equalizer. Stereo 1-Band EQ STREO 1EQ This is a single-band stereo equalizer. Tremolo TREMOLO Uses an LFO to shift the volume of the input signal.
Reference Module Number DSP Module Name Indicator Description Modeling Wah MODEL WAH Simulates various types of wah pedals. An effect that can automatically shift the frequency according to the level of the input signal. Distortion DISTORT Distortion, wah, and amp simulator combined into a single effect. Drive DRIVE Simulates the drive of a musical instrument amplifier. Amp Cab AMP CAB Simulates an amp without distortion-generating drive and speaker cabinet.
Reference DSP Parameter List DSP Module Indicator Parameter Name Mono 1-Band EQ Description Settings This is a single-band monaural equalizer. EQ Freq EQ Frequency Adjusts the center frequency of Equalizer. *1 (page EN-337) EQ Gain EQ Gain Adjusts the gain of Equalizer. –12 to 00 to 12 In Level Input Level Adjusts the input level. 000 to 127 WetLevel Wet Level Adjusts the level of the effect sound. 000 to 127 DryLevel Dry Level Adjusts the level of the direct sound.
Reference DSP Module Indicator Parameter Name Stereo 2-Band EQ Description Settings This is a dual-band stereo equalizer. EQ1 Freq EQ1 Frequency EQ1 Gain EQ1 Gain Adjusts the gain of Equalizer 1. –12 to 00 to 12 EQ2 Freq EQ2 Frequency Adjusts the center frequency of Equalizer 2. *1 (page EN-337) EQ2 Gain EQ2 Gain Adjusts the gain of Equalizer 2. –12 to 00 to 12 In Level Input Level Adjusts the input level. 000 to 127 WetLevel Wet Level Adjusts the level of the effect sound.
Reference DSP Module Indicator Parameter Name Tremolo Description Settings Uses an LFO to shift the volume of the input signal. Rate LFO Rate Depth LFO Depth Adjusts the LFO depth. 000 to 127 Waveform LFO Waveform Selects the LFO waveform. Sine, Triangle, Trapzoid WetLevel Wet Level Adjusts the level of the effect sound. 000 to 127 DryLevel Dry Level Adjusts the level of the direct sound. 000 to 127 Auto Pan Adjusts the LFO rate.
Reference DSP Module Indicator Parameter Name Limiter Description Settings Limits the input signal level so it does not rise above a preset level. Limit Limit Adjusts the volume level of the limit at which limiting is applied. 000 to 127 Attack Attack Adjusts the time until the compression effect starts. A smaller value causes prompt limiter operation, which suppresses the attack of the input signal.
Reference DSP Module Indicator Parameter Name Chorus Description Settings Gives notes depth and breadth. Rate LFO Rate Adjusts the LFO rate. 000 to 127 Depth LFO Depth Adjusts the LFO depth. 000 to 127 Waveform LFO Waveform Selects the LFO waveform. Sine, Triangle Feedback Feedback Adjusts the strength of feedback –64 to 00 to 63 WetLevel Wet Level Adjusts the level of the effect sound. 000 to 127 Polarity Polarity Inverts the LFO of one channel.
Reference DSP Module Indicator Parameter Name Drive Rotary Description Settings A rotary speaker simulator that makes overdrive possible. Type Type Selects the rotary speaker type. 0 to 3 OD Gain Overdrive Gain Adjusts overdrive gain. 000 to 127 OD Level Overdrive Level Adjusts the overdrive output level. 000 to 127 Speed Speed Switches the speed mode between fast and slow. Slow, Fast Brake Brake Stops speaker rotation.
Reference DSP Module Indicator Parameter Name Reflection WetLevel Description Settings An effect that simulates the initial reflection of reverberation. Applies acoustic ambiance and presence to notes. Wet Level Adjusts the level of the effect sound. 000 to 127 Feedback Feedback Adjusts the repeat of the reflected sound. 000 to 127 Tone Tone Adjusts the tone of the reflected sound. 000 to 127 In Level Input Level Adjusts the input level.
Reference DSP Module Indicator Parameter Name LFO Wah In Level Description Settings “Wah” effect that can automatically affect the frequency using an LFO. Input Level Adjusts the input level. The input signal can become distorted when the level of the sound being input, the number of chords, or the Resonance value is large. Adjust this parameter to eliminate such distortion.
Reference DSP Module Indicator Description Parameter Name Modeling Wah Settings Simulates various types of wah pedals. An effect that can automatically shift the frequency according to the level of the input signal. OutLevel Level Adjusts the wah level. Type Type Selects the wah type. 1 2 CAE CRY 3 4 IBZ VO 000 to 127 1 to 8 5 6 FAT LIGHT 7 8 7STR RESO Manual Manual Adjusts the wah filter reference frequency.
Reference DSP Module Indicator Description Parameter Name Drive Settings Simulates the drive of a musical instrument amplifier. Type Drive Type Selects the drive type.*4 (page EN-337) 1 to 20 Gain Gain Adjusts the driver input signal gain. 000 to 127 OutLevel Level Adjusts the drive output level. 000 to 127 WetLevel Wet Level Adjusts the level of the effect sound. 000 to 127 DryLevel Dry Level Adjusts the level of the direct sound.
Reference Amp Cab Type List Type Number 1 2 3 4 5 6 7 8 9 10 11 12 13 14 15 16 17 18 19 20 21 22 23 24 25 26 27 28 29 30 31 32 33 34 35 36 37 38 39 40 41 42 43 44 45 46 47 48 Indicator FD-PRNST FD-TWRV1 RL-J12 FD-TWD FD-DXRV VX-AC3 ML-DC3 MB-MK1 MS-STK FD-TWRV2 SL-SLO MB-RCTF PV-51-SK BASS-CMB FD-BMAN BASS-STK 65-MQ AD-MP+CA BC-HC30 BN-SHV BN-ECS BN-UBR CV-LG3 DR-MZ38 DZ-V4 DZ-HA EG-TWK EG-VEN EN-G15 EN-INV EN-BM EN-53+DI EV-51III FD-CHMP FD-TWN FD-TWRV3 FU-OD GB-LANC HK-TM18 HK-SBL KH-STDT KR-RV LY-IRST
Reference Type Number 101 102 103 104 105 106 107 108 109 110 111 112 113 114 115 116 117 118 119 120 121 122 123 124 125 126 127 Indicator AP-SV4DI EB-C450 FD-BMNtw FD-BMNsv FD-BMNbk FD-STBAS GK-150 MK-T501 SW-PB20 SW-SM50 RL-CBKB LY-3C-AC AC-SIM AP-EXT-VIN STR-EXT MG-MIN-VCF-NEG MG-MIN-VCF-POS MG-MIN-VCF-TOP MG-MIN-VCF-OVL MG-MIN-VCF-OVL-T SSL-LCUT SSL-LMCUT HI-BST PARA-BST BASFIL-DEP BASFIL-SHL EH-SS-SPRK Number of variations 2 2 2 2 2 2 3 3 3 3 1 1 4 4 4 4 4 3 4 4 4 4 4 4 4 4 4 EN-339
Reference Home Customization 5 buttons Function List Category Screen BLANK BLANK MENU MENU Display Name Empty Screen Blank Menu Item My Setup My Setup on Menu Menu Item Active DSP Active DSP on Menu Menu Item Metronome Metronome on Menu Menu Item Balance Balance on Menu Menu Item Octave Shift Octave Shift on Menu Menu Item Sustain Sustain on Menu Menu Item Portamento Portamento on Menu Menu Item Pedal Pedal on Menu Menu Item Pedal1 Pedal 1 on Menu Menu Item Pedal2 Pedal 2 on Menu
Reference Category TONE Screen TONE Display Name Tone Screen Upper1 Tone Upper1 Upper2 Tone Upper2 Lower Tone Lower Split Split Layer Layer Touch Response Touch Response Lyric tone performance mode Lyrics Play Mode Lyric tone controller Lyrics Key Ctrl Random syllable advance Syllable Random Syllable chord control function Syllable Chord Ctrl Lyric tone retrigger Lyrics Retrigger Retrigger cycle unit note value + Lyrics Rtg Unit + Retrigger cycle unit note value – Lyrics Rtg
Reference Category Portamento Screen PORTAMENTO Display Name Screen Upper Portamento Upper Portamento Part Portamento Upper1 Part Portamento U1 Upper2 Part Portamento U2 Pedal1 Effect Part Lower PEDAL PEDAL Pedal2 Knob KNOB Effect Part Knob1 Effect Part Knob2 Effect Part Knob3 ARPEGGIATOR AUTO HARMONIZE ARPEGGIATOR AUTO HARMONIZE Effect Part Arpeggiator Part Portamento L Upper1 Pedal1 Upper1 Upper2 Pedal1 Upper2 Lower Pedal1 Lower Upper1 Pedal2 Upper1 Upper2 Pedal2 Up
Reference Category REGISTRATION Screen REGISTRATION Display Name Registration Area 1 2 Registration Area 2 3 Registration Area 3 4 Registration Area 4 Next bank Reg Bank Next Previous bank Reg Bank Prev Next area Reg Area Next Previous area Reg Area Prev Freeze Reg Freeze Freeze item RHYTHM SYSTEM EFFECT RHYTHM*1 Rhythm Reg Frz Item Rhythm Tempo Reg Frz Item Tempo Tone Reg Frz Item Tone Split point Reg Frz Item Split P Arpeggiator/Auto Harmonize Reg Frz Item ARP/AH Transpo
Reference Category SETTING Screen SETTING Display Name Transpose Screen + Transpose + – Transpose – Transpose Transpose Tuning Tuning Surround Surround Audio center cancel Audio In Center Cxl *1 Not shown on the tone screen. *2 Rhythm Variation 1 in the case of Operation Type 2. *3 Rhythm Variation 2 in the case of Operation Type 2.
Reference Fingering Guide ■ FINGERED 1, FINGERED 2 Chords *6 C *6 Cm CM7}5 Caug7 *6 CaugM7 Cdim C7sus4 Caug *3 C6 *1 *3 C}5 Cm6 *2 *3 Csus4 *3 Cadd9 Csus2 *3 Cmadd9 C7 *6 C69 *3 Cm69 *3 Cm7 *3 CM7 C7(}9) *6 C7(9) C7({9) C7({11) CmM7 Cdim7 *3 *6 C7(}13) CdimM7 C7(13) C7}5 *3 Cm7(9) Cm7}5 *3 Cm7(11) *3 EN-345
Reference ■ FINGERED ON BASS, FULL RANGE CHORD CmM7(9) In addition to the chords that can be fingered with FINGERED 1 and FINGERED 2, the chords below also are recognized. C5 *4 C8 *5 With FINGERED 2, interpreted as Am7. With FINGERED 2, interpreted as Am7}5. Inverted form not supported in some cases. Chord consisting of root and 5th only. Not a standard chord, but used when you want Auto Accompaniment with the root note only, or the root with an octave added.
Reference Chord Example List *1 *2 C C /(DD) D (D )/ED E F M m dim aug }5 sus4 sus2 7 m7 M7 mM7 dim7 dimM7 7D5 m7D5 M7}5 aug7 augM7 7sus4 *1 Root *2 Chord Type • Since the chord input range is limited, this model may not support some of the chords shown above. • You can use the split point to change the size of the accompaniment keyboard range (page EN-127).
Reference *1 *2 C C /(DD) D (D )/ED E F 6 m6 add9 madd9 69 m69 7(}9) 7(9) 7({9) 7({11) 7(}13) 7(13) m7(9) m7(11) M7(9) mM7(9) 5 8 *1 Root *2 Chord Type • Since the chord input range is limited, this model may not support some of the chords shown above. • You can use the split point to change the size of the accompaniment keyboard range (page EN-127).
Reference *1 *2 F /(GD) G (G )/AD A (A )/BD B M m dim aug }5 sus4 sus2 7 m7 M7 mM7 dim7 dimM7 7D5 m7D5 M7}5 aug7 augM7 7sus4 *1 Root *2 Chord Type • Since the chord input range is limited, this model may not support some of the chords shown above. • You can use the split point to change the size of the accompaniment keyboard range (page EN-127).
Reference *1 *2 F /(GD) G (G )/AD A (A )/BD B 6 m6 add9 madd9 69 m69 7(}9) 7(9) 7({9) 7({11) 7(}13) 7(13) m7(9) m7(11) M7(9) mM7(9) 5 8 *1 Root *2 Chord Type • Since the chord input range is limited, this model may not support some of the chords shown above. • You can use the split point to change the size of the accompaniment keyboard range (page EN-127).
Reference ####################################################################### hts_engine API ####################################################################### ----------------------------------------------------------------The HMM-Based Speech Synthesis Engine "hts_engine API" developed by HTS Working Group http://hts-engine.sourceforge.
Reference ####################################################################### CRF++ ####################################################################### Copyright (c) 2001-2012, Taku Kudo All rights reserved. Redistribution and use in source and binary forms, with or without modification, are permitted provided that the following conditions are met: * Redistributions of source code must retain the above copyright notice, this list of conditions and the following disclaimer.
Model: CT-S1000V Version : 1.
MA2201-B